Introducción
Usa esta guia para reemplazar el disco duro en tu Apple Time Capsule Modelo A1302.
Herramientas
Partes
-
-
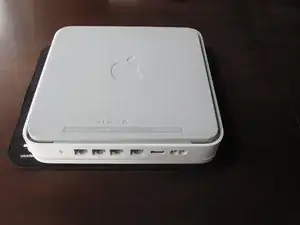
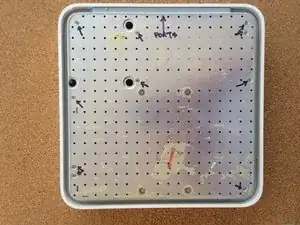
Abra el Time Capsule exponiendo los tornillos que mantienen el dispositivo unido. Los tornillos están ocultos por la base de goma, que es la superficie inferior del dispositivo.
-
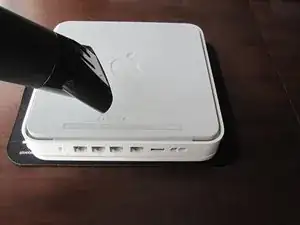
Usa una pistola de calor o secadora de cabello para calentar la base de goma, lo cual debilita el adhesivo sosteniéndolo.
-
Empezando en una esquina, levante cuidadosamente la base de goma para prevenir roturas. Puedes usar una pua de guitarra o una pequeña, regla de plástico para ayudar separar la goma del metal.
-
-
-
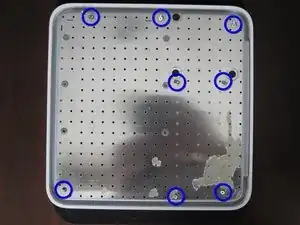
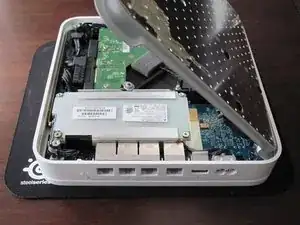
Una vez la base de goma esta separada del dispositivo, retire los 8 tornillos Phillips PH00 que unen la carcasa inferior metálica con la carcasa superior de plástico.
-
-
-
Levante el lado izquierdo de la placa de metal y lentamente girela al borde derecho del dispositivo.
-
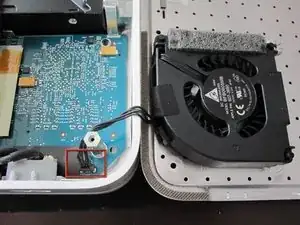
Debido a que mucha gente ha tenido serios problemas rompiendo el conector del ventilador. Es recomendable de NO tratar de desconectar el conector de alimentacion del ventilador. Sea MUY cuidadoso con este conector. Es muy frágil. Si necesita desconectar el ventilador de la placa lógica absolutamente, MUY cuidadosamente usa un spudger o pinzas.
-
-
-
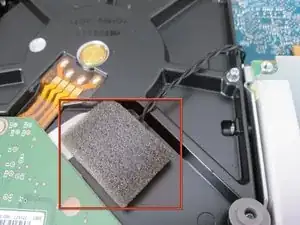
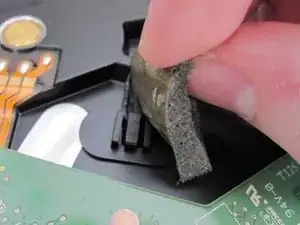
Despegue la espuma y deje el sensor a un lado. Sea cuidadoso con la espuma porque la reutilizará para conectar el sensor al nuevo HDD.
-
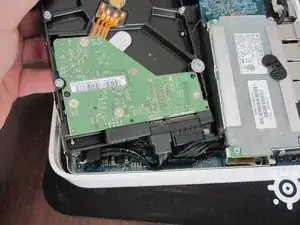
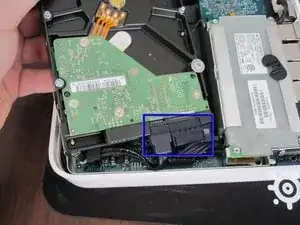
Levante el HDD fuera del dispositivo y desconecte los dos cables SATA del HDD.
-
-
-
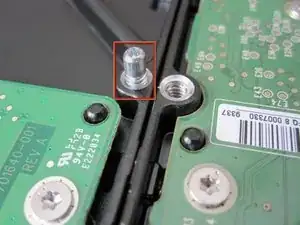
Usando un destornillador Phillips #00, retire los cuatro espaciadores de metal (clavijas) del viejo HDD e instálelos en el mismo lugar en el nuevo HDD.
-
Ponga el sensor de temperatura aproximadamente en la misma posición en el nuevo HDD que tenia en el viejo HDD. Cubra el sensor con la espuma, usando cinta adhesiva si es necesario.
-
Para montar de nuevo tu dispositivo, siga esta guía en orden inverso.

68 comentarios
Worked like a charm! Instructions were very thorough. Thank you
jlechuga -
I dislodged the fan connector from the logic board. How can I go about fixing this? Can I just solder the connector back onto the board? Thanks
Jon -
Yes. It says to follow the article bakcward so yes connecting correctly sshould work…
Success! I would get a flash of a green light after a factory reset then the flashing amber followed by a solid amber. No wifi signal or HD. Put my ear to the unit and heard the click of death. New hard drive per above and I was back up and running in 20 minutes.
Stuart -
Slowly start peeling at one corner... worked better than shown on the pictures.
Markus -
Slow down particularly near the bottom label where it is stiffer. Either that or I needed to give it more heat. Going too fast can risk tearing the rubber base if the adhesive is strong.
ElvinC -
If you are wondering if the Time Capsule will still work as a router if you remove the HDD and leave it out, the answer (according to another webpage I read) is YES, it will still work. Apparently, you get a warning with the AIrPort Utility about a missing HDD, but it still works. I wanted to keep and reuse the 1TB Hitachi HDD for offsite data backup.
CraigH -
Use an iron instead of a heating gun or hairdryer!
Gradually raise the temperature while checking for separation, while moving over the rubber. I first cleaned the rubber with some soap, to avoid scorching dust or grease. The setting for synthetic fabrics seemed to do the job with my Tefal iron; probably a little over 100 degrees centigrade. No steam off course!
Worked like a charm without leaving almost any residual glue.
Sticking the rubber sole back after the repair was also successful.
Frits de Bruijn -
Thanks for sharing this.
kenatkenichikato -
Adhesive tape used is Nitto No. 5015. I found a piece of a back-paper left underneath the rubber…
vesa -
Is there a possibility to change an already changed 2TB SATA to a bigger one? Mine is full. because I added another MacBook Pro, but I’d rather not buy a newer TimeCapsule
Bette Rose -