Introducción

Esta es una guía para un controlador Sony DualShock 4 PlayStation 4 y se puede usar en los controladores de otras compañías (Scuf o controladores personalizados).

Este procedimiento ayudará a reparar un botón R3 o L3 en un controlador que no funciona correctamente o tiene problemas al intentar moverse.

Ten cuidado durante toda esta operación ya que se trata de piezas muy pequeñas y sensibles, pero ten mucho cuidado en los pasos 1 y 2 para no dañar los cables que conectan el controlador y la batería, así como durante el montaje.

  1. KPRR5xPVQvwtwTZ4
    KPRR5xPVQvwtwTZ4
    JgiImQlD6YoAed3H
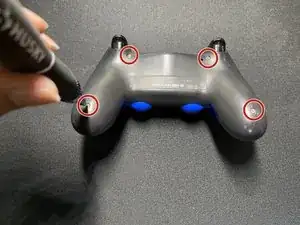
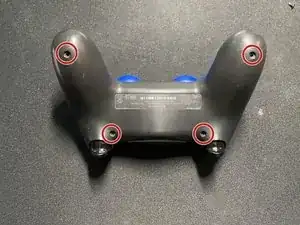
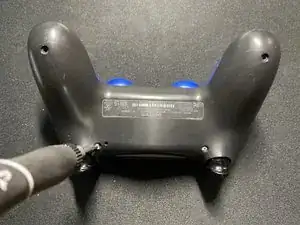
    • Retira los cuatro tornillos de la parte posterior de su controlador con un destornillador Phillips #0.

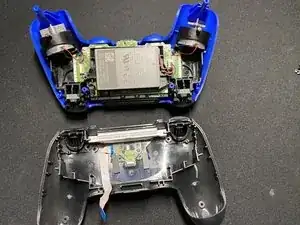
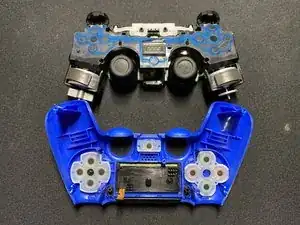
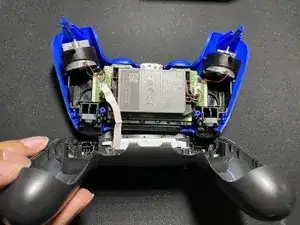
    • Separa la parte delantera y trasera del controlador.

    This actually breaks the clips on the upper left and right side of the top cover.

    You can see it happen on their screenshots as well. It doesn’t matter too much because it gets assembled without an issue.

    GlossGhost -

    I think this is for telling if someone has broken into their controller, as I couldn’t find a way to open the controller without breaking this clip. The controller works perfectly fine without it, but its annoying its there.

    Cameron -

    It’s perfectly doable once you know where they are, just slide a prong between the case pieces, and twist in a way that “unlocks” the clips. All of my clips are intact after studying the images for a bit

    Franz Rolfsvaag -

  2. MDpHvIo51mvYSs6U
    MDpHvIo51mvYSs6U
    JtGfjIpeDrhG3NYH
    CNWMZF2AUXoZCrMY
    • Desconecta el cable plano para desconectar el panel táctil del propio controlador.

    • Ten cuidado de no rasgar o dañar el cable.

  3. deBMkvdTYbIpIBFy
    • Desconecta la batería del controlador y sácala.

    • Ten cuidado de no rasgar o dañar el cable, ya que este es un componente importante para tu controlador.

    The battery may be glued to the base. Some strength may be needed - just be careful not to break the board under it.

    Yoav Moran -

  4. UYH6C1DGfLFTFNMT
    UYH6C1DGfLFTFNMT
    YYojdUWpRxu4TYPM
    BqG5XYhNPkFPGvmk
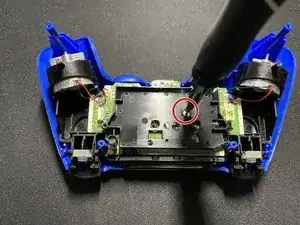
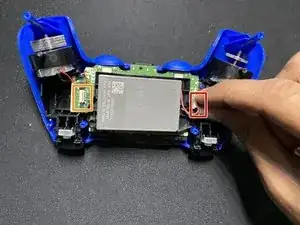
    • Retira el único tornillo de la placa negra que cubre la placa base con un destornillador Phillips #0.

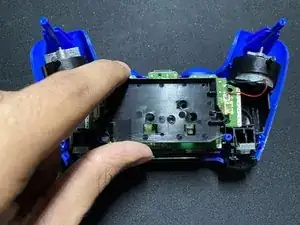
    • Retira la placa negra del controlador.

  5. 2YvSl2HqlNsLIcsk
    2YvSl2HqlNsLIcsk
    X6WB1mrjok1krvfC
    r6HNMUGYH4wBqbDU
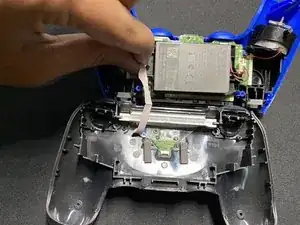
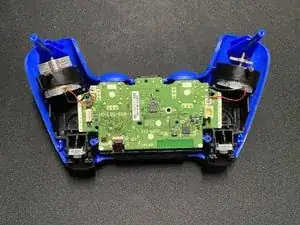
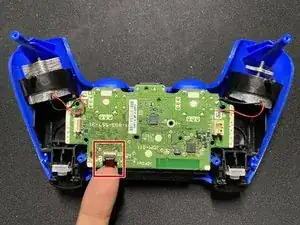
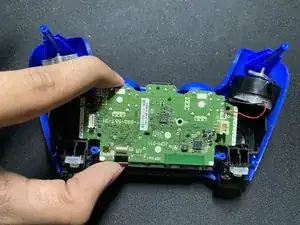
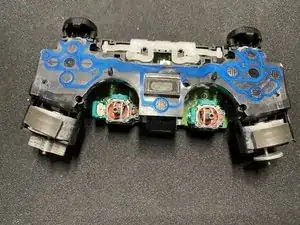
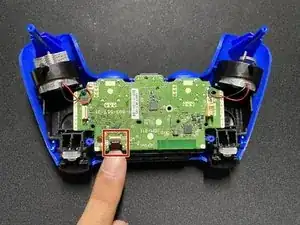
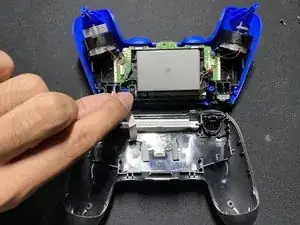
    • Desconecta el cable plano que conecta la parte posterior del controlador a la placa base.

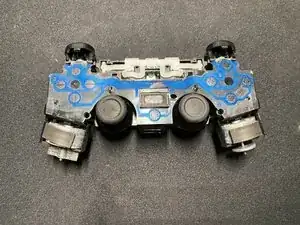
    • Retira la placa base de la parte posterior del controlador.

    • Ten cuidado de no rasgar o dañar este cable, ya que es importante para tu controlador.

  6. KIvoqOJhKZio2mOg
    KIvoqOJhKZio2mOg
    OwWB161IxIRcdcwK
    kwYcUr6NyjxNLZhx
    • Retira las palancas de palanca del controlador.

    • Ten cuidado con los sensores ya que son muy sensibles.

    The handles are shoved over the toggle handles. Some force may be needed to release them. Pull strongly - but not to strong!

    Yoav Moran -

  7. SRBLyup4ovAn5Q5B
    SRBLyup4ovAn5Q5B
    ZQg4b6FN1BkBnqIh
    UmycCqsYbnZMbJ5S
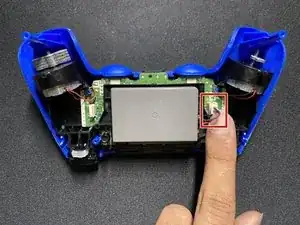
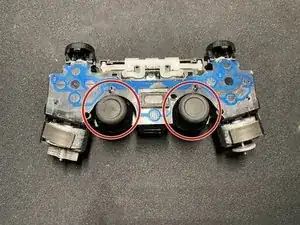
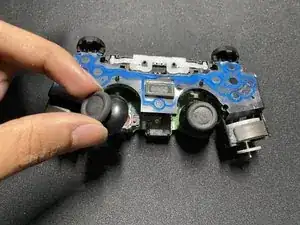
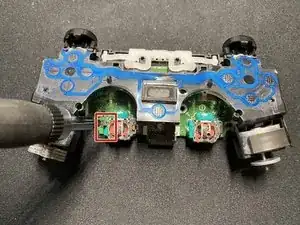
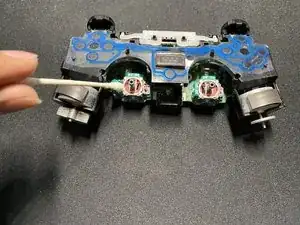
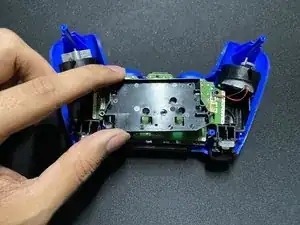
    • Usa un spudger para abrir el sensor de la palanca de palanca.

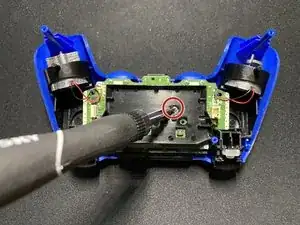
    • Usa un bastoncillo de algodón con un poco de alcohol para eliminar la grasa y la acumulación del sensor.

    Careful with this step as it has a short make/break cycle. Attempting to open the plastic latches on the toggle stick sensor repeatedly over time will break it and your analog stick will become useless.

    steven.tacle -

    This is true! I did it once (a few seconds ago) and will never try again. The %#*@ thing was very clean. (There was one or two cat hair stuck. I pull them without having to open the toggle stick sensor.

    Philippe Morin -

    Opened one sensor half-way, but felt I used too much force. Opened the comments and read this, thanks for the heads up

    Franz Rolfsvaag -

    Sorry but the only way to stop drift is to solder in new modules. Cleaning may work but not for long.

    Nigel -

  8. 15qSPBkYNYdxpMLK
    15qSPBkYNYdxpMLK
    xZPGVomfB4JJHyZO
    • Para volver a montar el controlador, coloca la tapa trasera en la placa base.

    • Desliza el cable rojo a través de la cubierta del controlador y conéctalo.

  9. OXX3vRyYmwa23nRB
    OXX3vRyYmwa23nRB
    PHPWaPsJWLFDVOaV
    • Vuelve a colocar la placa negra encima de la placa base y atorníllala.

    • Asegúrate de que la parte posterior del controlador y la placa base estén firmemente conectadas.

  10. v2X5Rd6INa1pLfyF
    v2X5Rd6INa1pLfyF
    WsshvjwH2X3gOFXY
    eSWYZan6QYScP3ih
    • Vuelve a enchufar la batería y colócala en su lugar.

    • Vuelve a enchufar el cable blanco en la placa base.

  11. NhPvStLmWwWEZM6G
    NhPvStLmWwWEZM6G
    IdmHRT3xqOy1ejZM
    • Conecta la cubierta frontal y la cubierta trasera del controlador y vuelve a atornillar los cuatro tornillos.

  12. ORUuIdSOca3FSPou
    • Lo has hecho todo.

Sabih Akram

Miembro Desde 20/09/20

1313 Reputación

4 comentarios

Thank you for this!! So many great pictures!! :D

The drift for me also prevented or interrupted movement with the left analog stick. Menus would continue to scroll after i scrolled them or wouldn’t move my character on screen.

briandewitt -

Nach Wechsel der Potis hatte mein Controller Drift an beiden Achsen. Das liegt daran, dass die Potis nicht 100% mit denen der Werkskalibrierten übereinstimmen. Eine nachträgliche Kalibrierung ist leider nicht so einfach möglich, da die Korrekturdaten im EEPROM des Controllers gespeichert sind. Deshalb habe ich parallel zu den Potis je einen 2MOhm Poti gelötet, mit denen der Spannungsoffset kompensiert werden kann. Ergebnis: Keine Drift mehr. Die Controller arbeiten wieder einwandfrei.

zapf2000 -

Well organised pictorial lecture.great work.

Egeonu -

Great walkthrough and high-res images makes the job a lot smoother. Only remark I have are three things: 1) There are four clips that are hard to see on the images, and aren’t detailed; they are on the top right and left, under the “SHARE” and “OPTIONS” buttons, as well as the two clips on either side of the docking port. These easily break, although I avoided that. 2) The sensor housing have very fragile clips which easily break after a repair or two. DO NOT USE FORCE ON THESE! If you’re in doubt, just try and blow some air into them. Some remaining dirt is better than a broken stick. I also avoided this thanks to a comment on the step, but I’ve heard many has broken their sensors doing this. 3) The USB connector isn’t labeled as a pull-out connector. This isn’t much of an issue, but in sub-par lit environments, it looks like a clip connector. Have some friends ruining their USB ports due to ripping the connector off the PCB, thinking it’s a clip connector.

Franz Rolfsvaag -