Introducción
Si tu Switch Pro Controller D-Pad es demasiado sensible y causa presiones direccionales accidentales, ¡esta es la guía que debes seguir!
-
-
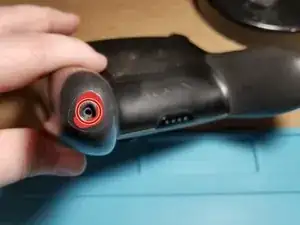
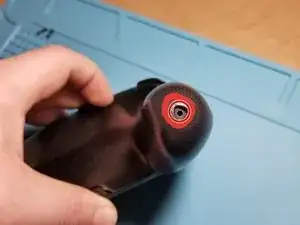
Los tornillos de agarre izquierdo y derecho se mantienen en su lugar con un tornillo J00 cada uno. Después de quitar el tornillo, la empuñadura se desliza hacia afuera.
-
-
-
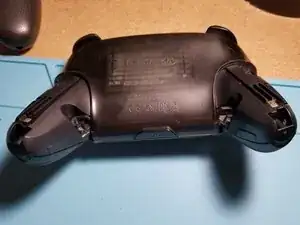
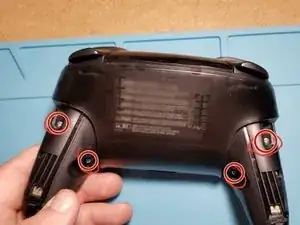
Retira los cuatro tornillos J00 que sujetan la placa trasera en su lugar.
-
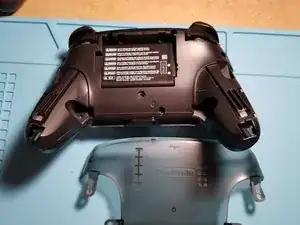
Una vez que se quitan, la placa posterior simplemente se levantará con poca o ninguna fuerza.
-
-
-
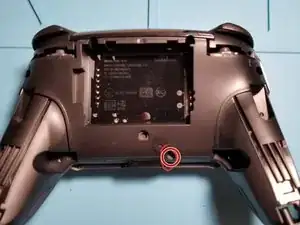
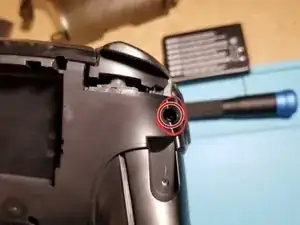
Retira un tornillo J00 adicional.
-
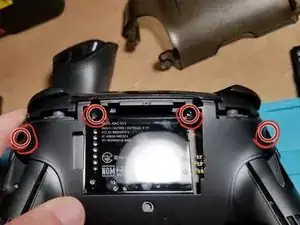
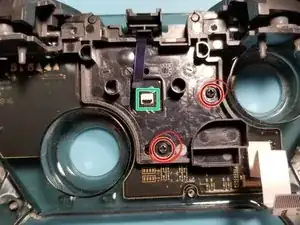
Retira cuatro tornillos J00 adicionales. ¡Los dos en el compartimento de la batería son muy fáciles de perder!
-
Un primer plano de los tornillos del borde (¡también muy fácil de pasar por alto!).
-
-
-
Usa una herramienta de palanca o la uña para separar suavemente las dos mitades del controlador. ¡Cuidado con el cable plano que conecta las dos placas!
-
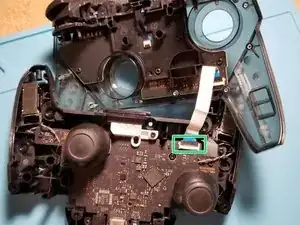
Este es un conector ZIF. La lengüeta negra del conector salta hacia arriba, lo que le permite tirar suavemente del cable para sacarlo del candado. Quité el cable de la placa con las palancas de control.
-
-
-
Desconecta el cable plano que conecta la placa a la placa del controlador.
-
Luego, quita los dos tornillos negros J00 que sujetan la placa a la PCB.
-
-
-
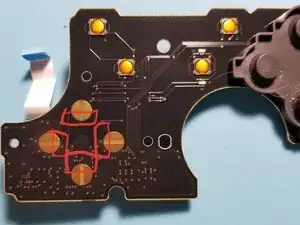
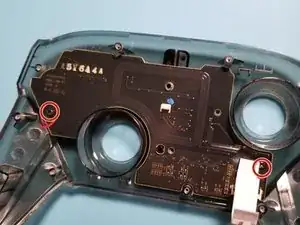
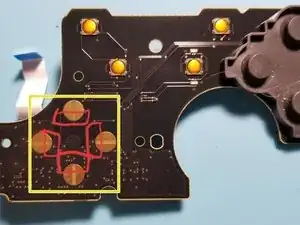
¡Voila! Aquí están los sensores táctiles D-Pad. He delineado el área que deseas cubrir en rojo.
-
Usando cinta (recomiendo cinta aislante negra, pero otros han dicho que funciona con cinta adhesiva transparente o cinta de embalaje, solo ten en cuenta que puede levantarse después de un tiempo y hacer que los botones se peguen), cubre las áreas resaltadas. Esto realmente reduce las pulsaciones accidentales de botones.
-
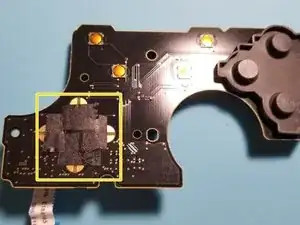
Después de algunas pruebas, apliqué la cinta a los conectores táctiles superior e inferior. Esto resultó en la operación más suave con menos pulsaciones accidentales de botones. Siempre asegúrate de probar (¡y de que te guste cómo se siente!) antes de completar el montaje.
-
Para volver a montar tu controlador (caro), simplemente sigue estas instrucciones en orden inverso.
Con suerte, esta guía fue simple y fácil de seguir, al igual que la solución real. ¡Para mi controlador, es día y noche en lo que respecta a la sensibilidad!
¡Que tengas un gran día y feliz arreglo!

13 comentarios
Thanks!! I got a bit confused on the 2nd ribbon cable because I wasn’t sure if it was a latch like the first but it worked out. Also reassembling the ribbon cables was a bit difficult and I wasn’t exactly sure how much I had to “plug” them in before closing the latch but I figured it out, thank you! Controller works wonderfully now.
Glad to hear it! Thank you for your comment!
Any issues using kapton tape instead of electrical tape?
Mirleis -
Not to my knowledge (I don’t have any on hand to test with though). May be worth a shot!
It should be noted that the official iFixit kit is recommended for the back screw removal (especially the ones at 11 and 1 o clock by the battery compartment) or you should have a screwdriver that is skinny enough to get it straight on. I barely got it with the iFixit kit and maybe left them a little bit loose because of that. Otherwise, this guide is very good for disassembling and cleaning.
Definitely! I swear by the official iFixit kit! I didn’t think I could get to those screws at first!