Introducción
¿El palanca analógico de tu controlador Xbox Elite Series 2 (modelo 1797) se desliza en la pantalla sin que tu la muevas? Si es así, probablemente tengas lo que se llama “deriva de palanca analógica”.
Hay múltiples causas de la deriva de la palanca. A veces puede ser causada por daños, como dejarlo caer, por ejemplo. Otras veces puede ser causada por el uso y desgaste normal. Afortunadamente, muchas veces, simplemente se debe a una acumulación de desechos en el sensor.
Esta guía fácil de seguir no requiere habilidades especiales y te guiará a través del proceso de reparación.
Partes
-
-
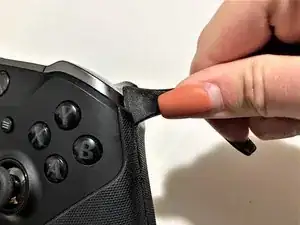
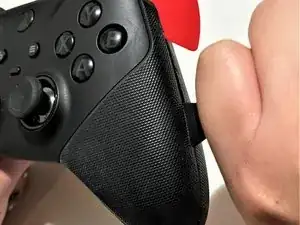
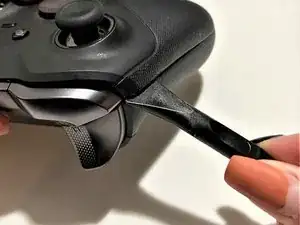
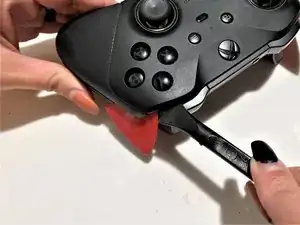
Coloca una herramienta de palanca en el pliegue del lado derecho del controlador.
-
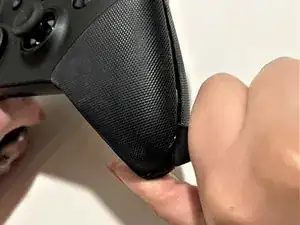
Desliza la herramienta de palanca hasta que el controlador comience a abrirse.
-
-
-
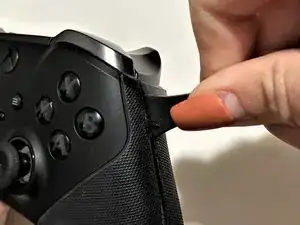
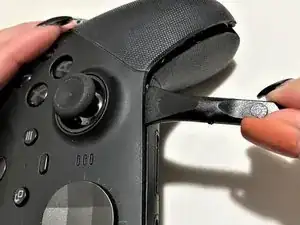
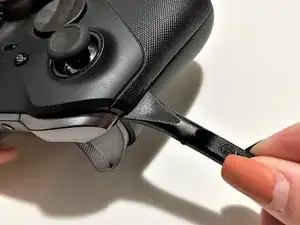
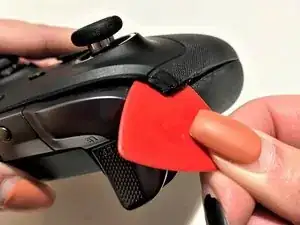
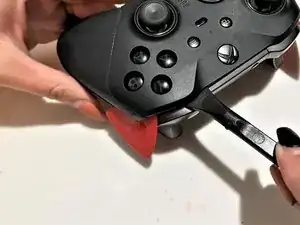
Desliza la herramienta de palanca a lo largo del pliegue de la parte inferior del controlador.
-
-
-
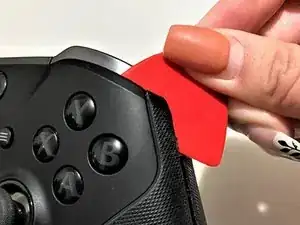
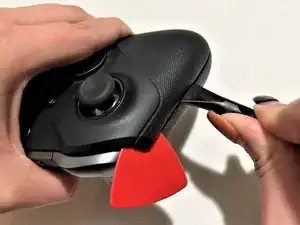
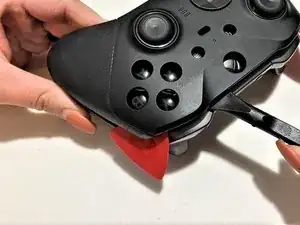
Coloca la herramienta de palanca en el pliegue del lado izquierdo del controlador.
-
Desliza la herramienta de palanca hasta que el controlador comience a abrirse.
-
-
-
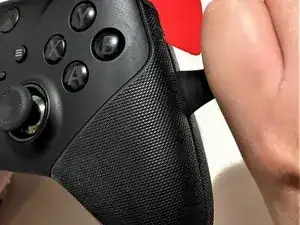
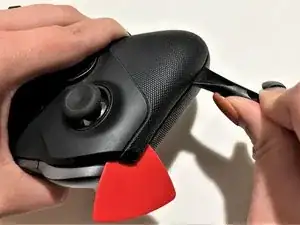
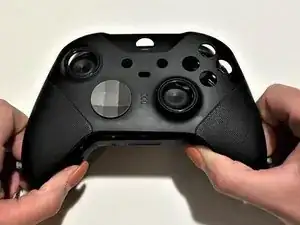
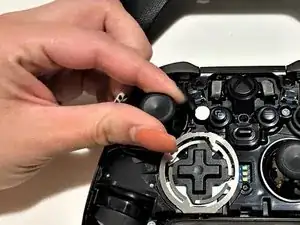
Coloca la herramienta de palanca en el espacio en la parte superior del controlador.
-
Desliza la herramienta de palanca hasta que se suelte toda la mitad superior del controlador.
-
-
-
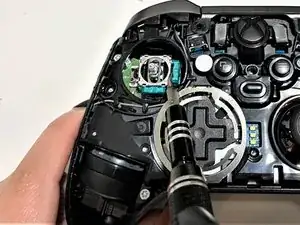
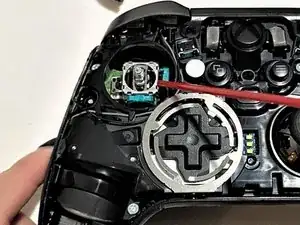
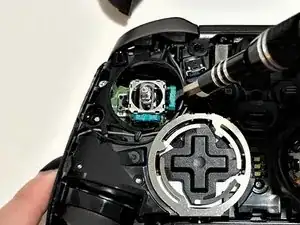
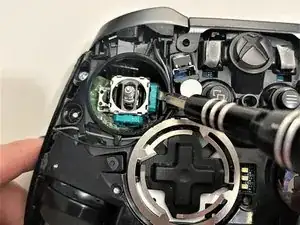
Coloca la punta del tubito de la lata de aire comprimido en el espacio cerca del sensor.
-
Rocía con la lata de aire comprimido hasta que el sensor esté libre de residuos.
-
-
-
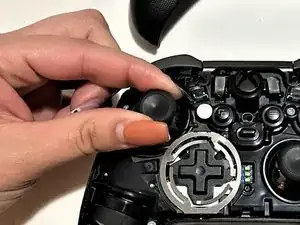
Vuelve a colocar la mitad superior del controlador en la mitad inferior.
-
Empuja la parte inferior, superior y los lados hasta que encajen.
-


10 comentarios
very good guide way easier to follow then others i’ve seen :) Thanks
munch483 -
Maybe im just too scared to totally ruin/ rip/ snap or otherwise DESTROY this thing or stab myself with a pry tool but it seems like this is WAY harder then the pictures/guide make it out to be. The top face plate is FAR FAR FAR harder to release then the guide says.. Its not like a regular controller AT ALL.. I have cut myself to the point of blood now with the sheer effort of trying to push a pry tool between the seam EXATLY where the picture shows.. It did NOT help at all.
Napster6 -
Hey Napster, You are very right. I bought this controller preowned and there are slice marks in the rubber where the person tried to open it and failed. I was able to open with out a terrible amount of difficulty by using the thin metal wedger tool thingy from the ifixit kit while simultaneously holding portions open with the blue triangle. Try pushing the tip of whatever your using to the bottom half of the controller then in a little more and then pry up. (near the b button). If it pops the top half out a little then wedge a placeholder in there then try the other side. Once you get both sides try a little lower near the vibrator then same for the other side and by then it should be easy enough to open with your hands. I struggled heavily the first time but found this was the easiest way. Good luck!
Jake H -
This is such an awesome guide! Fixed my controller drift and a saved me a ton of money in the long run. Thanks so much!
Seriously.. No.. this is CRAZY hard to get a pry tool into.. Explain more!
Napster6 -
You have to put a little force to get it into the crease and pry the bottom away from the body while gently pulling up on the face.
It's good to note that the tabs are on the front cover and pointing toward the outside of the cover for this part.
Jacob Buffington -
Die Nägel könnten mal wieder gemacht werden. ;-)
anonymous 7992 -
I came here to say that.
Megen Ashley -