Introducción

Esta guía de reparación fue creada por el personal de iFixit y no ha sido respaldada por Google. Obtén más información sobre nuestras guías de reparación aquí.

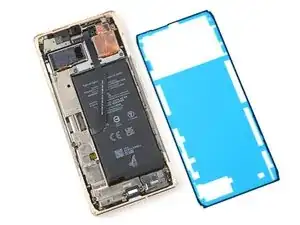
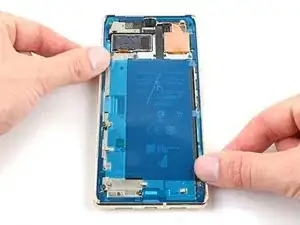
Usa esta guía para aplicar adhesivo nuevo en tu Google Pixel 6 Pro luego de una reparación. La pantalla de tu Pixel debe quitarse antes de seguir este procedimiento. Sigue esta guía para eliminar la pantalla si aún no lo has hecho.

  1. vOxGqvEMRQ4VxmVE
    vOxGqvEMRQ4VxmVE
    H3VXXfHJQ2j5VmXO
    Sh1fh1DuW3EPBsRV
    • Cualquier residuo de adhesivo o suciedad impedirá que la pantalla se selle correctamente.

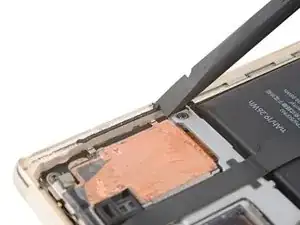
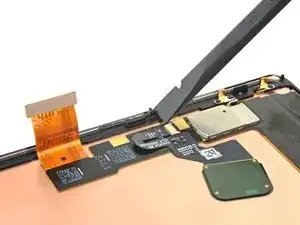
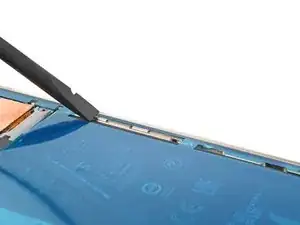
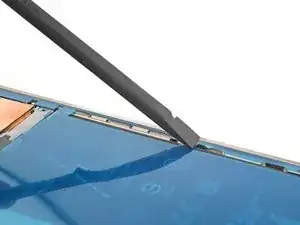
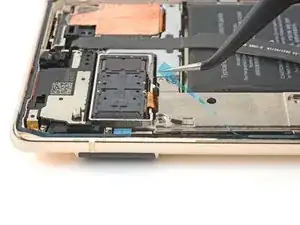
    • Usa el extremo plano de tu spudger para raspar la mayor cantidad de adhesivo que puedas.

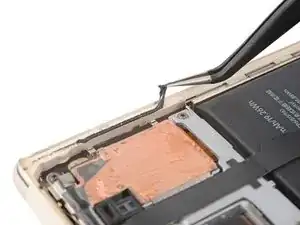
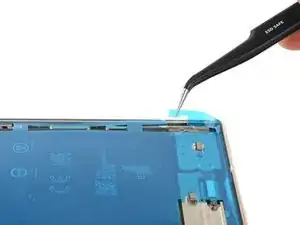
    • Usa pinzas o tus dedos para pelar y quitar cualquier resto de adhesivo.

    • Ten cuidado de no perforar la batería con las pinzas: una batería perforada puede derramar sustancias químicas peligrosas o provocar un incendio.

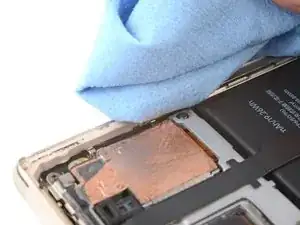
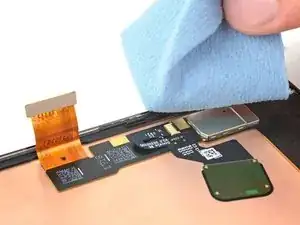
    • Limpia el perímetro del marco con una pequeña cantidad de alcohol isopropílico muy concentrado (superior al 90%) y un paño sin pelusa o de microfibra.

  2. 1KPZMaVpogCR1isd
    1KPZMaVpogCR1isd
    UBdKYT1BBpsgTPn6
    cSyW3ftigSvRr2KG
    • Si estás reutilizando tu pantalla, límpiala como lo hiciste con el marco.

  3. BfekWMJqs6b31KjV
    BfekWMJqs6b31KjV
    VPVwycMBJRvgIyGr
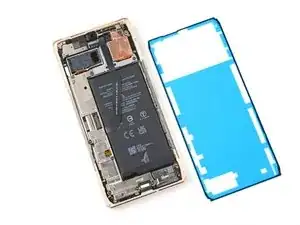
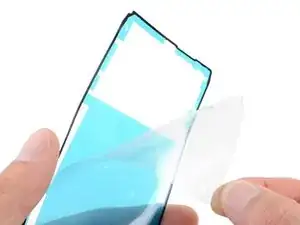
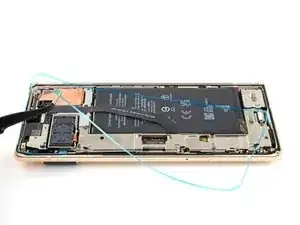
    • Antes de aplicar el nuevo adhesivo, extiéndelo sobre el marco para encontrar su orientación adecuada.

    • Utiliza funciones como la cámara frontal, el altavoz superior y las muescas en las esquinas para orientar el adhesivo.

  4. MiXBkRA63MxLtbrg
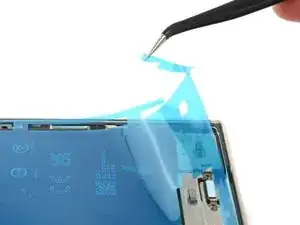
    • Usa la lengüeta en la parte superior del adhesivo para quitar el respaldo protector transparente.

  5. FZBNDkfJZnWWWuKg
    FZBNDkfJZnWWWuKg
    DTWrEko3ZqQPqukg
    asaRWLlQNnMWUjIB
    • ¡Ten mucho cuidado durante este paso! El adhesivo es muy pegajoso, y no se puede volver a colocar una vez que se pega. El adhesivo desalineado puede provocar un sellado inadecuado.

    • Coloca el adhesivo sobre el marco, comenzando con el borde inferior. Haz pequeñas correcciones sobre la marcha.

    • Usa la muesca inferior izquierda, la muesca superior derecha y el corte del altavoz superior para ayudar a alinear el adhesivo.

  6. VcKEaNSNUFlOLMaQ
    VcKEaNSNUFlOLMaQ
    MuY4AJ4mlpRdfWIK
    6TBaHUgYWZAmPavV
    • Usa un spudger o tus dedos para presionar firmemente a lo largo del perímetro del adhesivo y adherirlo al marco.

  7. KPSErArInFUVsU2O
    KPSErArInFUVsU2O
    HFBPlWwU2THM2ipC
    l6g2DxmfXIA2EBfD
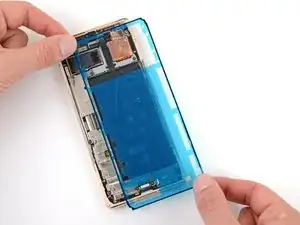
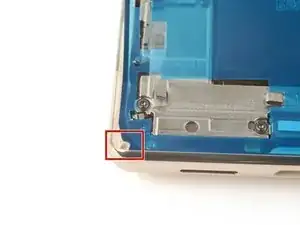
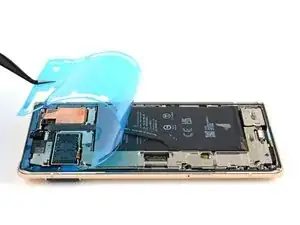
    • Toma la lengüeta de tiro en la parte inferior derecha del marco y retira el revestimiento principal.

  8. 4E66NsxrJkTHoLAX
    • Regresa a la guía de tu teléfono y continúa con el montaje.

    • Termina esta guía cuando tu pantalla esté instalada y estés listo para sellar el teléfono.

  9. q6VeQFQYXhMQ1NZu
    q6VeQFQYXhMQ1NZu
    NItaUExClEPpbfP6
    foKIGvLolJlxnvHQ
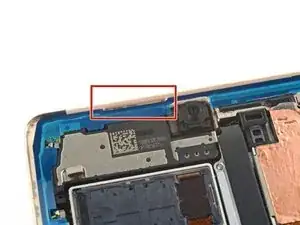
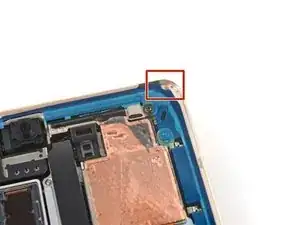
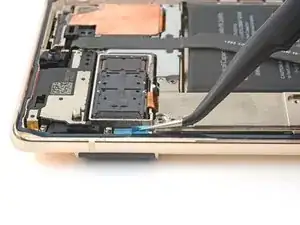
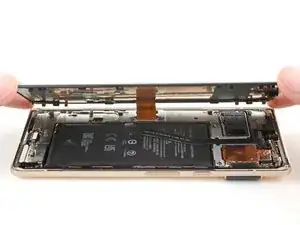
    • Toma la lengüeta de tiro en la parte superior izquierda del marco y retira el revestimiento que cubre el adhesivo perimetral.

    • Asegúrate de que el adhesivo no se despegue con el revestimiento.

    Where does it mention to remove the sticker from the front camera? Also, a photo of this with highlight around the area would be super helpful...

    alberte -

    Hi! In this process, there isn't a liner over the front-facing camera or its recess in the screen. This process only demonstrates how to apply the adhesive which secures the border of the screen to the frame. If you are following this guide, using this part, then bullet 6 of step 11 provides a reminder to check the recess in your replacement screen. It appears that our part doesn't come with the front camera liner, which may be why the original author didn't include a picture of the liner. Your part may differ slightly.

    Clay Eickemeyer -

  10. 14UobuNNkVdYqCZ6
    14UobuNNkVdYqCZ6
    4jHVlV1XCxsxUFba
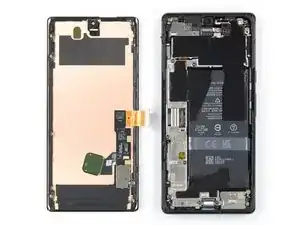
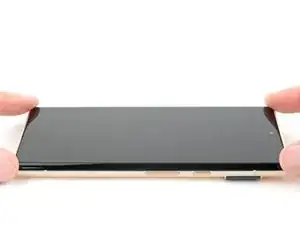
    • Voltea la pantalla y colócala sobre el marco.

    • Presiona a lo largo del perímetro de la pantalla para asegurarla.

    What do you think about using t8000 or b7000 glue? I am concerned that the water resistance will not be very good with this OEM glue. I have it and it doesn't look very thick. You know how the screen sort of snaps into place without adhesive? Well mine does not snap in one corner and lifts up about a 32nd of an inch. I worry the adhesive sticker will not work on this spot.

    Michael Carton -

    It sounds like either one of the clips isn't engaging near the corner you mentioned, or the frame is slightly bent. After you replace the adhesive and reinstall the screen, compress the phone with a lot of force for an extended period of time. As I mentioned in my other comment, official screen installations require something in the ballpark of 80 psi for 30 seconds to properly seat the adhesive. For best results, find a way to evenly compress your phone with a strong force. Be careful not to distribute an uneven amount of force to the raised rear camera mesa. Doing this will better allow the glue or adhesive to settle. In the end, don't trust the water resistance to be as good as original.

    Clay Eickemeyer -

Clay Eickemeyer

Miembro Desde 19/09/22

23784 Reputación

4 comentarios

will the phone have the same water resistance rating after this? Assume proper adhesive placement? ALso, what about b7000 glue? Any comment on using that?

Michael Carton -

Your phone will lose its official IP rating after reapplying any adhesive. The official double sided adhesive technically requires a large amount of force (somewhere in the ballpark of 80 psi) to bond as well as the phone was originally sold with. Without the equipment to do this, its difficult to predict how well your individual repair will hold up against water. A mobile-device-specific glue will work in the same fashion. I encourage you to seal the phone however you feel most comfortable. If you try glue instead of the official adhesive, make sure to be extremely precise about how much and where you apply the glue, since it's messy and your only barrier against the elements. Good luck!

Clay Eickemeyer -

Thanks!!! I can use a book with a weight on it, of an amount calculated to exert 80psi on the screen. By eyeballing it at a coffee shop, looks like 20lbs. Do you think that I should calculate this ONLY around the perimeter, or do you apply pressure evenly on the whole screen?

Michael Carton -

As a disclaimer: be extra sure the raised rear camera mesa doesn't create uneven force. If it does, the pressure may crack the rear case or lead to an improper seal of the screen. But, yes, calculate the area around the perimeter, since the screen isn't designed to support that weight in only the center.

Clay Eickemeyer -