Introducción
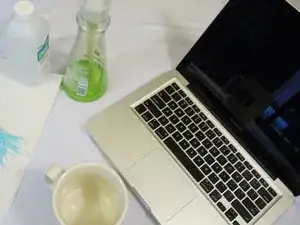
Los teclados pegajosos son un problema común en laptops/ordenadores portátiles MacBook, generalmente como resultado de derramar bebidas, restos de comida u otras sustancias sobre las teclas. Afortunadamente, con esta guía, el problema tiene fácil solución.
Si limpiando el teclado no se arregla el problema, en iFixit vendemos piezas y teclados de repuesto para MacBook Pro y también para MacBook Air.
-
-
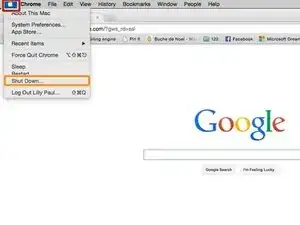
Antes de iniciar, asegúrate de tener tu equipo completamente apagado
-
Haz click en la manzana en la esquina superior izquierda de la pantalla del equipo. Un menú se desplegará hacia abajo
-
Haz click en "Apagar"
-
-
-
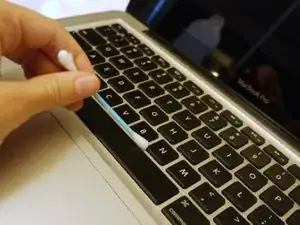
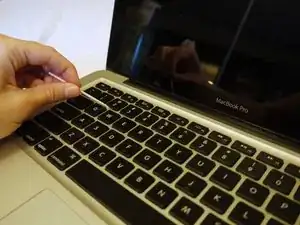
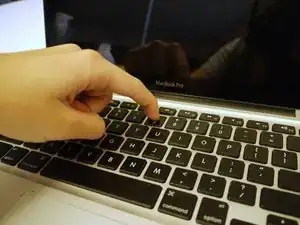
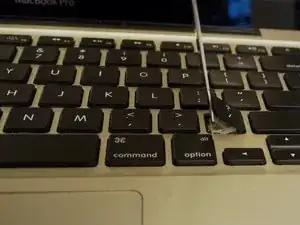
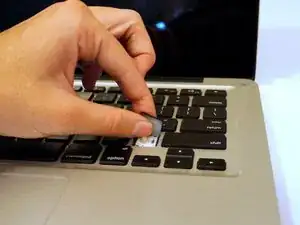
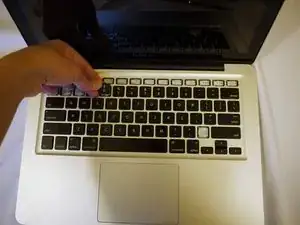
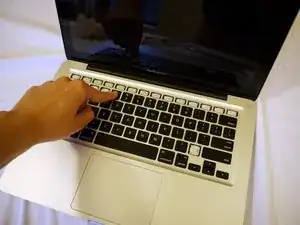
Utiliza un spudger o una herramienta plástica para levantar las teclas.
-
Inserta el spudger por debajo de un costado de la tecla.
-
Levántala.
-
Usa los dedos para quitar la tecla
-
-
-
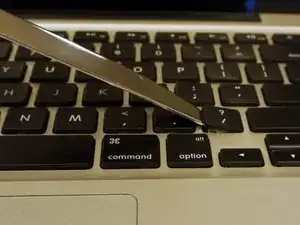
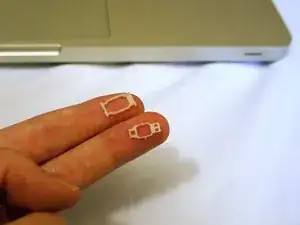
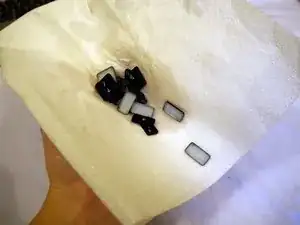
Cuando retire una tecla si una o ambas de estas piezas de plástico blanco se desprenden del teclado, no se preocupe. Se les llama "portadores de tecla" y son muy fáciles de volver a colocar.
-
Si una parte del portador todavía está en el teclado, quítela para tener ambas en sus manos.
-
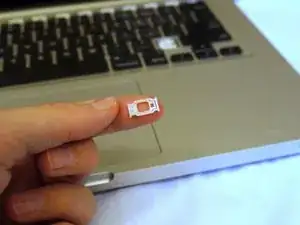
Mire la segunda imagen y alinee las dos piezas, luego empújelas juntas. Debería haber un suave clic.
-
En la misma alineación que la segunda imagen, coloque el portador en el lugar del teclado donde salió y presione firmemente en su lugar.
-
-
-
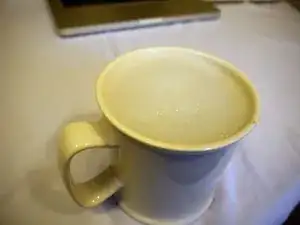
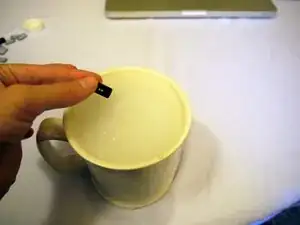
Ponga jabón y agua tibia en una taza.
-
Cuando retire las teclas, colóquelas en agua jabonosa.
-
Deje que las teclas se remojen durante 10 minutos.
-
-
-
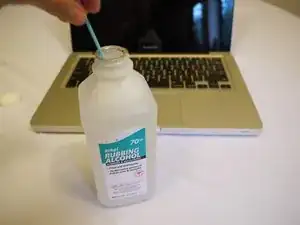
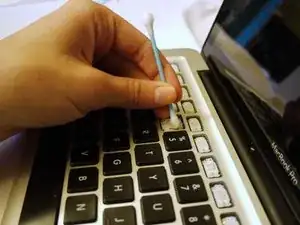
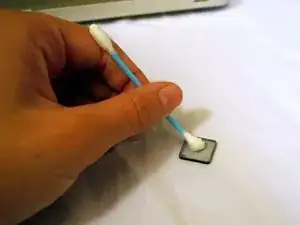
Opcional: Si sus teclas son demasiado pegajosas, use alcohol isopropílico y un bastoncillo para limpiar la parte posterior de las teclas.
-
Seque las teclas completamente con una toalla de papel.
-
-
-
Coloque las teclas de nuevo:
-
Primero alinee la tecla y presionala firmemente en su lugar.
-
Luego, mueva su dedo de un lado a otro hasta que escuche un doble clic.
-
Con un poco de suerte, habrás arreglado el problema con tu MacBook y su teclado pegajoso. Es una buena idea que limpies y compruebes el estado de tu teclado de vez en cuando. El iFixit's Electronics Cleaning Bundle y el Precision Cleaning Kit son buenas opciones para evitar las teclas pegajosas y para mantener tanto el interior como el exterior de las piezas electrónicas implicadas en perfecto estado.
53 comentarios
YOU ROCK THANK YOU
(I'm going to type "S" a few times to demonstrate how well this helped me!
SSSSSsssssssssssssSSSSSSSSSSSSSSSsssssSSS
Ugh it frustrates me that the author doesn't comprehensibly guide you through the complexities of taking keys off and on your keyboard. They are delicate and fit together elegantly. You should really elaborate before going and telling people to yank their keys off.
I disagree. He specified what to use, how to put them back on, etc. It's clear and precise!
Anyway I'm going to try this tonight so we'll see how it goes!
kaymay -
Actually it’s really not clear. If the key carriers come off and you don’t see how they were originally in the keyboard then there’s a huge amount of possible combinations as to which way around they could go. The author actually says “refer to the second picture to see how they go together” and then FORGOT TO UPLOAD THAT PICTURE ! You may have been lucky, but as many times as I’ve done this, it’s still a nightmare to figure out exactly which way around and which way up these little pieces go together. You may be lucky and get it right, or you may get it wrong but it’s still “good enough” or you may get it wrong and the key will never quite work the same again and you’ll end up taking it to a shop to replace the whole %#*@ keyboard for some ridiculous price because the author didn’t proof-read this article better and actually include the pictures that he said to refer to !
Great help - thx!
Kate -