Introducción
Solo guía de prerrequisito. Esta guía es parte de otro procedimiento y no debe utilizarse sola.
Herramientas
-
-
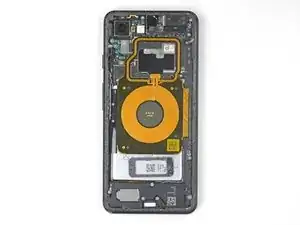
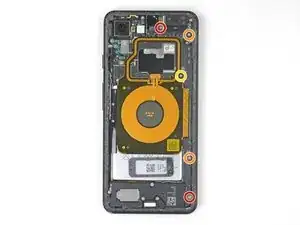
Remueve los cinco tornillos tipo Phillips que sujetan la bobina de carga inalámbrica:
-
Dos tornillos de 1.9 mm
-
Dos tornillos de 4.2 mm
-
Un tornillo de 4.3 mm
-
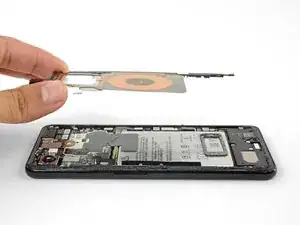
Remueve la bobina de carga inalámbrica.
-
-
-
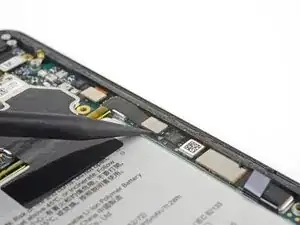
Usa la punta de un spudger para levantar y desconectar el conector de batería de su zócalo cerca del borde derecho del teléfono.
-


Conclusión
Para volver a ensamblar tu dispositivo, sigue estas instrucciones en orden inverso.

The top 1.9 mm screw can’t be totally removed — it comes out with the coil once loosened
Dmitriy -
Can I leave the wireless charging coil out?
This may also allow a bigger battery!
Jex Webster -
You may be able to! Note that this is not only the wireless charging coil, but also the NFC antenna (the upper loop).
Arthur Shi -
The 1.9 mm screws are actually screwed into the head of another screw beneath them. Sometimes the lower screw unscrews instead of the upper. That leaves both screws attached to the coil. If possible you should separate the two screws and screw the lower one back in first using a small flat blade screwdriver.
Richard Elder -
If you decide to clean the wireless coil assembly, be aware that IPA will completely remove the printed 2-D barcode on the lower right. (Hopefully that's not important.)
Bitt Faulk -
There were 7 screws!!! The last two were both near the power button.
Emily Viehland -