Introducción

Guía de sólo prerrequisitos para desconectar la placa lógica en una MacBook Air 2019.

  1. mCpNcwDmVvCIexvU
    mCpNcwDmVvCIexvU
    WCiJUh1bJboPNur2
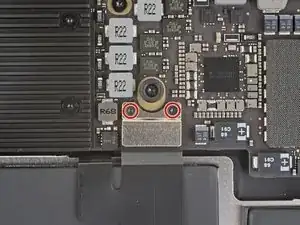
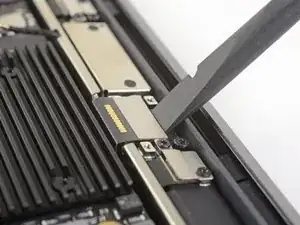
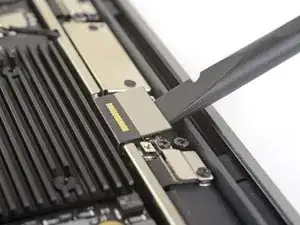
    • Usa un destornillador Torx T3 para quitar los dos tornillos de 1.4 mm que aseguran el soporte del conector del trackpad.

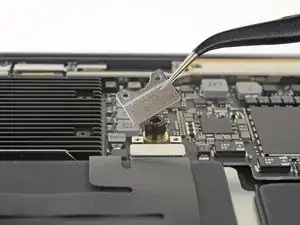
    • Remueve el soporte del conector del panel táctil.

    My machine used T4 screws

    johann beda -

    Me too! I tried with T3 and it wasn’t working.

    Rose Alshuaibi -

  2. Sw6VN6VuYRYAnW2T
    Sw6VN6VuYRYAnW2T
    iGLvdxo4pDlVZOh6
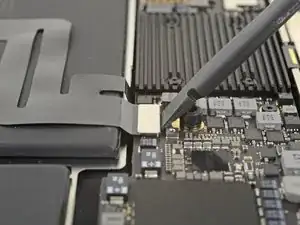
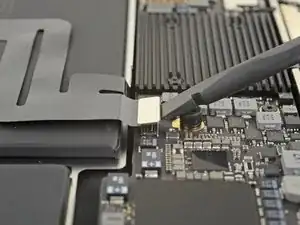
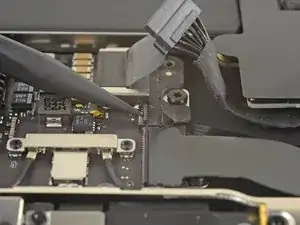
    • Utiliza el extremo plano de un spudger para sacar el conector del cable del trackpad de su zócalo.

  3. 2ANOeBCRlLS1Elpu
    2ANOeBCRlLS1Elpu
    gVBNK32AwYwuWQFx
    hRm4xZQXbIkkT4O5
    • Si el altavoz izquierdo ya está desconectado, omite este paso.

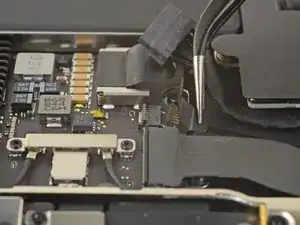
    • Desliza la punta de un spudger debajo del cable del altavoz y haz una palanca hacia arriba para desconectar el altavoz.

    • Con el conector desconectado, desliza la punta plana de un spudger bajo el cable para separar el adhesivo que asegura el cable a la placa lógica.

    I think step 15 was a mistake because it’s a repeat of step 10.

    Ryan R -

    Yeah, the speaker is already removed at this point.

    Jason _ -

  4. IHRbrlPXF2JApiqk
    IHRbrlPXF2JApiqk
    LyZ1foqy1wvBlOiv
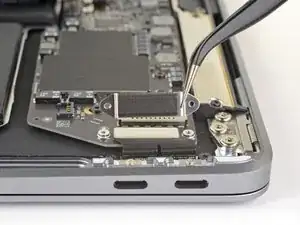
    • Usa un destornillador T3 Torx para quitar los dos tornillos de 1.3 mm que aseguran el soporte del conector del puerto USB-C.

    • Remueve el soporte del conector de USB-C.

  5. M3RvYGtmREQuaLZ2
    M3RvYGtmREQuaLZ2
    B6AMphVrIvwKpisH
    • Utiliza el extremo plano de un spudger para sacar el conector del cable USB-C de su zócalo en la placa lógica.

  6. BjgmhIFsgtdRtuUi
    BjgmhIFsgtdRtuUi
    hgUoCSOomRaZZNMa
    XNTm2JBIuDLHFUKi
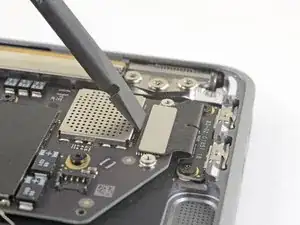
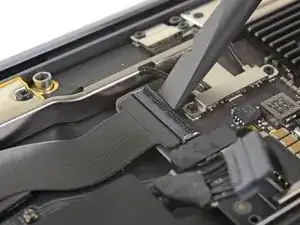
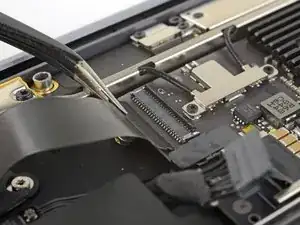
    • Utiliza un spudger para levantar la pequeña pestaña de cierre del conector ZIF del cable de la placa de sonido.

    • Desliza el cable de la placa de sonido del conector ZIF.

  7. RK65AOeFDCjfyyWv
    • Quita la cinta negra que cubre el conector del cable del ventilador.

  8. EvCAoAoChgdZSUpP
    EvCAoAoChgdZSUpP
    VORkbyxUw5mQoLXP
    EBqFtxhhx5MFDscb
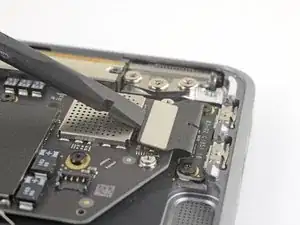
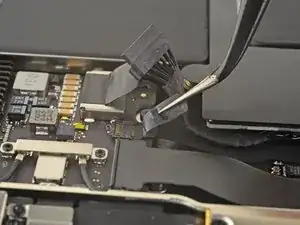
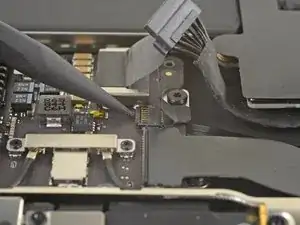
    • Utiliza la punta de un spudger para levantar la tapa de cierre del conector ZIF del cable del ventilador.

    • Desliza el cable del ventilador fuera del conector ZIF

  9. tXgZY3PV2kPaADlE
    tXgZY3PV2kPaADlE
    WAgCyw6YIrvC3RQH
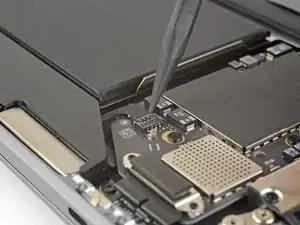
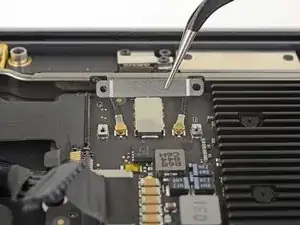
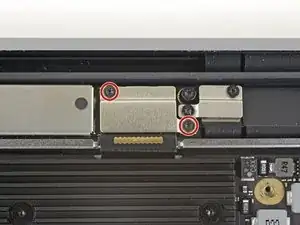
    • Usa un destornillador Torx T3 para quitar los dos tornillos de 1.4 mm que aseguran el soporte del cable de la antena.

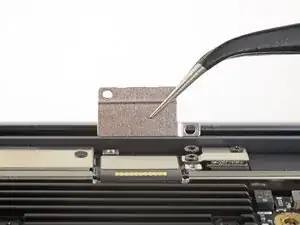
    • Remueve el soporte del cable de antena.

    These are T4 screws

    Richard Arnett -

    The MBA I just finished with were T3. I'm fairly confident with my tools as I recently updated/upgraded nearly my entire set with WiHa. I should also mention the many tools acquired from iFixit over the years have all been were exceptional lasting years. There's no doubt iFixit would have been my source but a close friend went to work for WiHa. His discount(s) & being motivated to help him was a major impact. For anyone not having such an advantage IMHO tools from iFixit are one of the best values anywhere. Let's not forget; buying from iFixit will also help to push "Right to Repair" forward. Here in Minnesota Right to repair ALMOST PASSED. Many believe it will become law during the next session! I can't tell you how proud this would make me. I would obtain as many service manuals as possible and post them all online!!! What a great dream...

    admin -

  10. SIwpML6D2V1THnvW
    SIwpML6D2V1THnvW
    HSbt4VrCJOZJWJeX
    vMkn5IqQ1LgQrMRK
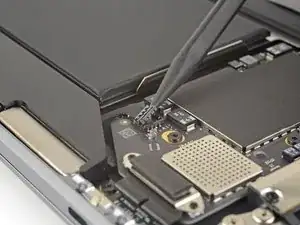
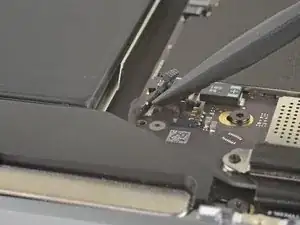
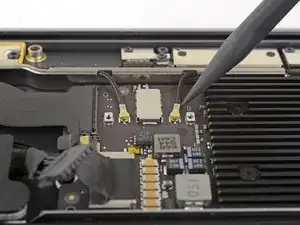
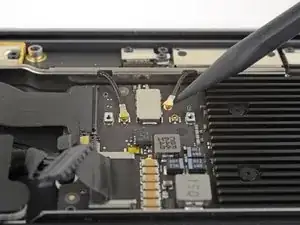
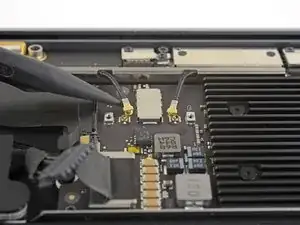
    • Inserta la punta de un spudger bajo uno de los cables de la antena cerca del conector. Haz una palanca hacia arriba para desconectar el cable.

    • Repite con el otro cable de la antena.

  11. JwduCSLFH2CcraAQ
    JwduCSLFH2CcraAQ
    kTylWJvDOGiAPbQS
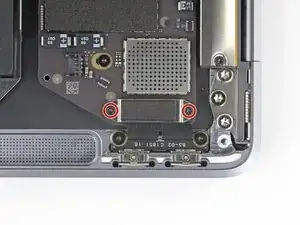
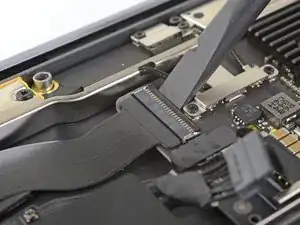
    • Usa un destornillador Torx T3 para quitar los dos tornillos de 1.5 mm que aseguran el soporte del conector del cable de la pantalla.

    • Remueve el soporte del conector del cable de pantalla.

  12. cELhRfbeZrcbMPps
    cELhRfbeZrcbMPps
    kHkPDOnxWduTqHLa
    • Usa el extremo plano de un spudger para levantar el conector del cable de la pantalla.

    How do I reconnect display connector??

    Kris Queck -

    Just align the plug section of the display flex with the socket on the logic board and gently press it in until it locks in place. Do not force it but just ensure it’s correctly aligned before pushing it into the socket.

    Peter Newman -

    Pro tip: You can remove the two T5 screws on the LCD connector side (located to the right of the display connector and to the left of the heat shield). From there, tilt the whole skinny LCD board towards the logic board connector and gently pinch the connector in to the socket. Before laying the skinny board back down, screw in the shield from Step 15 so it doesn’t pop out of the socket again.

    jason4 -

Conclusión

Para volver a ensamblar tu dispositivo, sigue estas instrucciones en orden inverso.

Adam O'Camb

Miembro Desde 11/04/15

179525 Reputación

0 comentarios