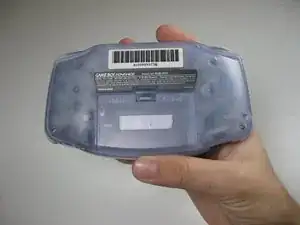
Introducción

Usa esta guía para desensamblar todas o cualquiera de las partes de la Game Boy Advance

  1. FQtv1v6UntVUhZbZ
    FQtv1v6UntVUhZbZ
    evt4WKJq2JU6NORS
    uV53WW1WLpuX3Xcv
    • Quita la tapa trasera de la batería pellizcando la pestaña y tirando hacia fuera.

  2. n2BM6E3TNmNQc1vv
    • Quita los seis tornillos de la carcasa trasera utilizando un destornillador Y1.

  3. YDNPJjBYq4IIvkO4
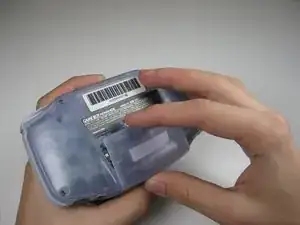
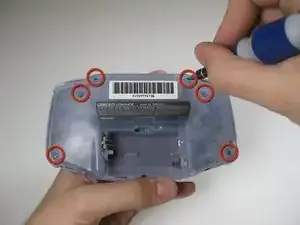
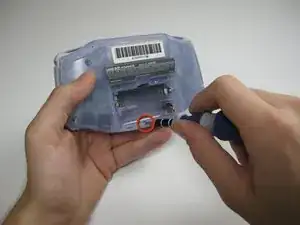
    • Quita el tornillo de la parte inferior de la carcasa trasera con un destornillador Phillips #1 (destornillador de estrella)

  4. YjidaLAxBustDHfg
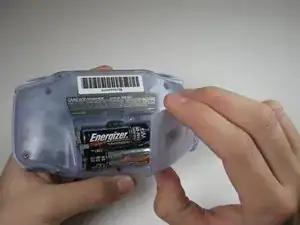
    • Quita la carcasa trasera tirando con una mano, sujetando la parte frontal de la consola con la otra mano.

    • ¡Ten cuidado! Los gatillos (botones L y R), los paneles laterales, y el interruptor de encendido se podrían caer al quitar la carcasa trasera.

  5. dEkU6llJcUF2igH3
    dEkU6llJcUF2igH3
    PfOcLcSAP6gX2pXX
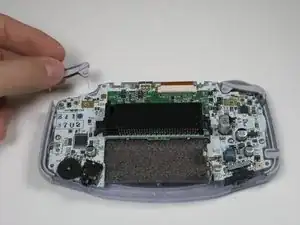
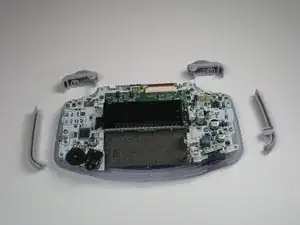
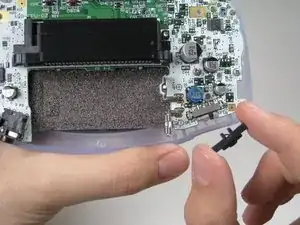
    • Quita los gatillos (botones L y R) tirando de ellos suavemente hacia arriba.

    • Repite lo mismo con los paneles laterales.

    • Solo aplicable a gatillos atascados o delicados. Ajusta y corrige los gatillos y vuelve a montarlos. La mayoría de atascos se producen porque los botones están mal colocados o atascados en su recinto.

  6. fCOBrNvTgtKZ3WC2
    fCOBrNvTgtKZ3WC2
    buPCeDKOkuwUWENq
    • Quita el interruptor On/Off tirando de él. Reemplaza con otro interruptor si es necesario.

  7. ODjLTdxT2hd2rIF4
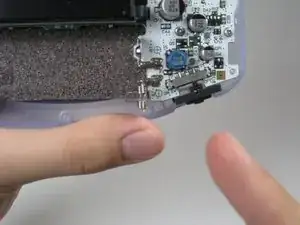
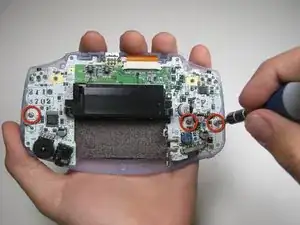
    • Quita los tres tornillos de la placa base con un destornillador Phillips #1 (destornillador de estrella)

    • El último tornillo en el lado derecho no está incluido en algunas consolas Game Boy Advance.

    some motherboards only have 2 screws holding it in place. keep this in mind if you cant find one

    Max R. -

  8. fACppBePP3QF5XAR
    fACppBePP3QF5XAR
    Po2GpWoUg3UvggRU
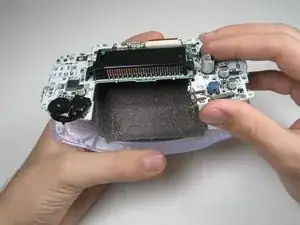
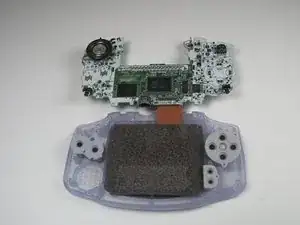
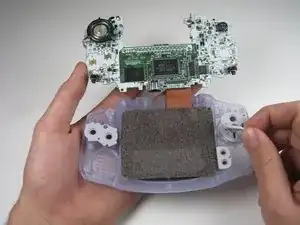
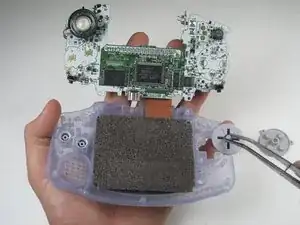
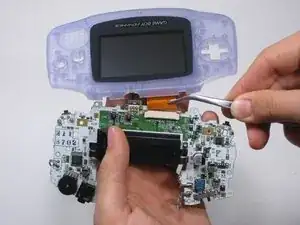
    • Quita la placa base y sepárala de la carcasa frontal tirando de la parte inferior de la misma, manteniendo el cable plano conectado.

    • Ten cuidado de no dañar el cable plano. Tira de la placa base con cuidado.

  9. ZhG4WYWRBXIQS1nl
    ZhG4WYWRBXIQS1nl
    TmsfPpSUY2P22rSV
    ZqTvGZGvqcNWTJxb
    • Quita las piezas de goma de los botones de su sitio.

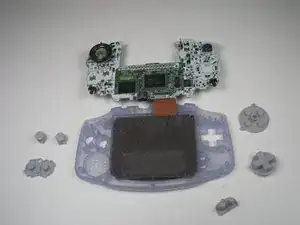
    • Quita los botones de plástico del pad direccional y los botones A/B de debajo de las piezas de goma con pinzas o con la mano.

  10. Y1XGVqih1NjNZbsV
    Y1XGVqih1NjNZbsV
    BqM6MXAjJ3V2XfDh
    ZYQ4E4KRqZy6ME1W
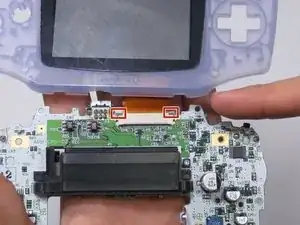
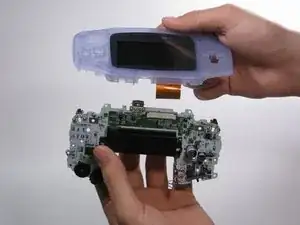
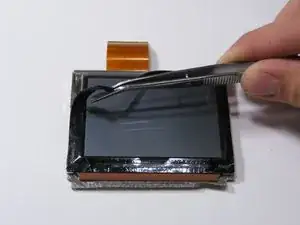
    • Utiliza un spudger de plástico/pinzas/uñas para desbloquear el cable plano de la pantalla tirando suavemente de las pestañas laterales hacia arriba (hacia el borde superior de la placa base)

    • Una vez el cable plano de la pantalla se ha desbloqueado, el cable debería deslizarse con facilidad y puede quitarse sin usar fuerza con unas pinzas o los dedos.

    Guide does not indicate that the ribbon cable port should be UNLATCHED before attempting to remove the ribbon cable, I strongly suggest revising this as someone unfamiliar with these style of ports may assume that the ribbon cable is a compression fit and just needs to be "pulled" free of the port.

    This is a terrible idea that will potentially result in tearing the ribbon! Please consider revising guide to add a step to indicate the proper method/detail for unlatching the LCD ribbon port! Thanks :)

    Ben Steel -

  11. StGr2Ks6JuTNdsoo
    StGr2Ks6JuTNdsoo
    fJZogxVx2dKyOrVY
    BGKsVlcA1ufbonoB
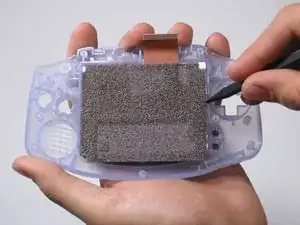
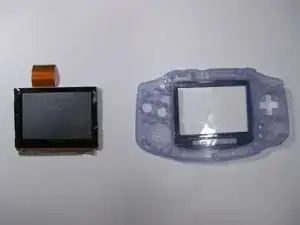
    • Usa el spudger para levantar la pantalla de la carcasa frontal. Coloca espátula en el espacio a la izquierda del pad direccional.

    • La pantalla y la carcasa frontal están conectadas por una cinta negra que podría romperse si no se quita con cuidado.

    • Puedes utilizar un iOpener o un secador de pelo en la parte exterior de la carcasa frontal para ablandar la cinta.

    This is a BAD place to pry on a functioning LCD. I used this exact method, slowly and carefully, and my LCD shattered.

    Instead, remove the lens (it’s worth it to sacrifice the lens adhesive to save your LCD), and gently and slowly press with a gloved thumb on a corner to push it through from the front of the Game Boy. Let the adhesive release itself, don’t force it. If the room is super quiet, you should be able to hear a faint peeling sound, even if you can’t see anything moving. That means you’re doing it right; just wait and it will release.

    trevorsklar -

    Actually you can just pry under the ribbon cable. The LCD has a metal frame there that allowed me to slowly and carefully pry from that point without (re)breaking my LCD.

    trevorsklar -

    Yep. Same thing just happened to me :(

    Robert Carlson -

  12. 6galgqIuLon5Ce6X
    • Usa pinzas para quitar la cinta negra si es necesario.

Adam

Miembro Desde 21/01/10

795 Reputación

7 comentarios

used this to replace the case and buttons on my GBA worked like a charm thanks!

Josh -

I dont understand. The items in “Tools featured in this teardown" is different from the tools written on the article e.g. Y0 in “featured" but Y1 in the “article”.

darelldechavez -

Bruh thx for

ColdPizza -

Great guide. My dumb ass didn’t see the screws holding the circuit board to the front shell lmao

RikaSprout -

What is the cpu

znlisowski@icloud.com -

I am having difficulty determining the size of the Tri-Point screws used on the Game Boy Advance. As a previous commenter noted the screw driver listed as “Tools Featured in this Teardown” shows a size of Y0, but in the text of the teardown it shows Y1. Can someone please clarify?

bhandl1 -

How do you remove the CPU and SRAM chips?

Steven Steele -