Introducción

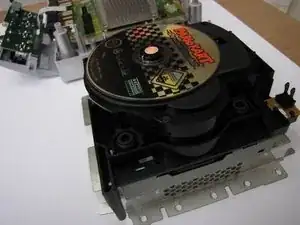
El lanzamiento de Nintendo GameCube en 2001 fue la segunda consola de juegos más poderosa de su tiempo, aunque no presentaba ninguna otra capacidad multimedia.

Fue mi primer dispositivo de juego estacionario y todavía lo aprecio, porque muchos buenos juegos como Zelda: The WindWaker y la mejor versión de Resident Evil 4 tienen su hogar en esta plataforma.

La unidad desmontada en este desmontaje es PAL.

Eso es todo. ¡Disfruta del desmontaje!

  1. UMk2UEgIolRGm4yf
    UMk2UEgIolRGm4yf
    As5vAaWZ6WCpgMWs
    6GMIFurYBmKSBZZ2
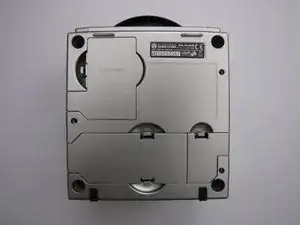
    • Voltea la unidad boca abajo y retira los tornillos que se encuentran en los cuatro orificios profundos en las esquinas con un destornillador gamebit de 4,5 mm. ¡No quites la carcasa todavía!

    • Voltea el dispositivo con el lado derecho hacia arriba nuevamente y ahora levanta la cubierta superior. Saldrá fácilmente.

  2. 4rF2OI3iH4rUjLMN
    4rF2OI3iH4rUjLMN
    3BnurvnIPmhuHD5y
    fndqS3BMkDgnHMMr
    • Desengancha la cubierta del puerto del controlador y la cubierta de E/S más trasera quitando los dos broches a los lados de cada cubierta. No quites el panel del controlador todavía.

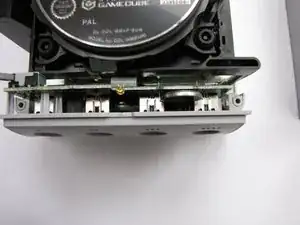
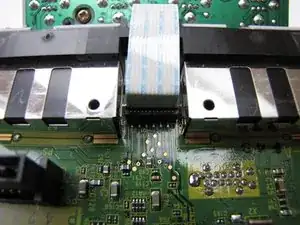
    • Luego retira los disipadores de calor de las ranuras para tarjetas de memoria (paso necesario).

  3. CPXt2ATxvtTUwUTn
    CPXt2ATxvtTUwUTn
    qcZkgKmpauimLGfI
    scy11IGJ3MtyQ5QU
    • Ahora comienza a quitar los tornillos Phillips #2 'normales'.

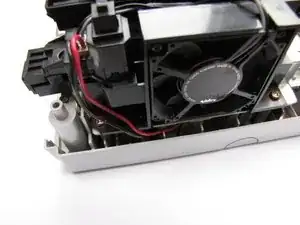
    • Comienza por quitar el ensamblaje del ventilador.

    • luego desatornilla los 12 tornillos visibles en el borde del GameCube ahora no tan en forma de cubo.

  4. ibg6tSSve4W3MHhR
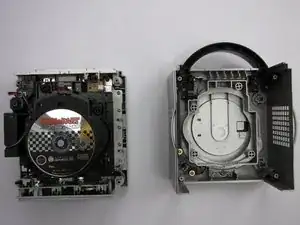
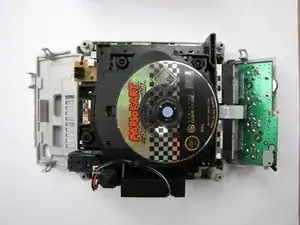
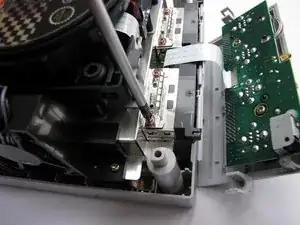
    • Ahora puedes levantar el conjunto de transmisión. Tal vez tengas que aflojarlo un poco con un destornillador o un spudger de alta resistencia.

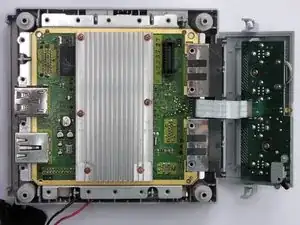
    • La placa base ahora es visible.

  5. bD3GMHpXS5mrp3BL
    bD3GMHpXS5mrp3BL
    D3sQRaUNcIRJGaAl
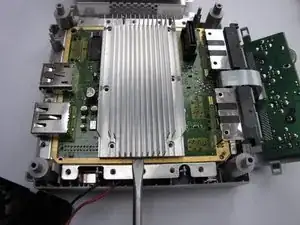
    • Ahora retira el disipador de calor. Desatornilla los seis tornillos que lo sujetan.

    • Ahora usa algo plano y duradero para levantar con cuidado el disipador de calor colocándolo debajo del aluminio y usándolo suavemente como palanca.

  6. F4vSrWJMt2jHvxBQ
    F4vSrWJMt2jHvxBQ
    5xBMwKtrYqyC1xhy
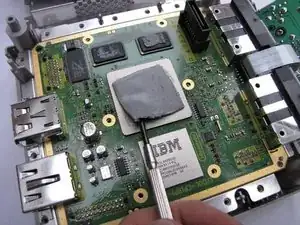
    • Si quedan almohadillas térmicas en los procesadores y/o chips RAM, retíralas con una espátula de plástico.

    • Ahora desconecta el conector del panel del puerto del controlador levantándolo y moviéndolo con cuidado. Debería salir fácilmente.
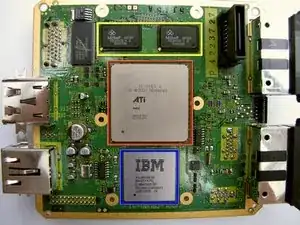
  7. bijMWRIpF6YusDgQ
    bijMWRIpF6YusDgQ
    GbIrCBDhOtDmrhED
    • 24 MB MoSys 1T-SRAM

    • GPU ATI 'Flipper', 162 MHz con 3 MB 1T-SRAM integrado en la matriz

    • CPU IBM 'Gekko', 486 MHz (núcleo basado en PowerPC 750CXe)

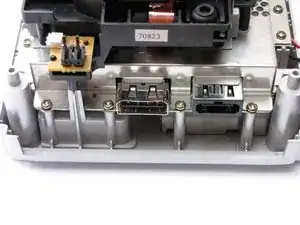
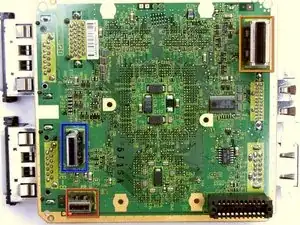
    • Conectores (2da foto):

    • 'Puerto de alta velocidad'

    • 'Puerto serie 1'

    • 'Puerto serie 2'

  8. bSohYX3VqELIAOZA
    bSohYX3VqELIAOZA
    xYpQFFamXqsLZ1HI
    kAVGji2AN6OlOUBw
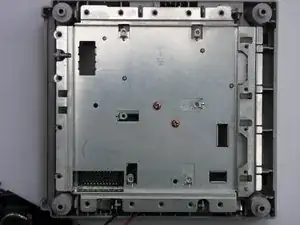
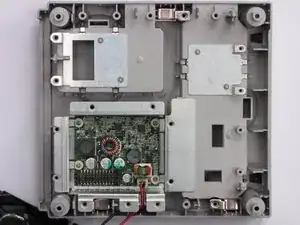
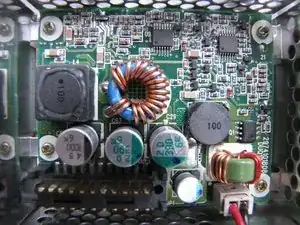
    • Si levantas la placa base, verás una placa de metal, probablemente para protección EMI. Retira los dos tornillos que lo sujetan y tendrás acceso a la fuente de alimentación interna.

    Interestingly enough, the newer version (DOL-101) doesn't have an internal power supply! Just an empty slot.

    Tom D -

Thomas J

Miembro Desde 24/01/10

403 Reputación

13 comentarios

Great teardown Thomas!

Miroslav Djuric -

Cita de Miroslav Djuric:

Great teardown Thomas!

Thanks!

Thomas J -

WOW! Great work, Nintendo stuff is hard to open!

Mc128k -

Cita de Mc128k:

WOW! Great work, Nintendo stuff is hard to open!

Thank you! Everything beyond Triwing requires creativity.

Thomas J -

Will I need to reapply the thermal paste?

http://i.imgur.com/Q6antAn.jpg

Calvin Hall -

I know I'm 5 years late to answer this, but for people that come through here: This is not thermal paste, those are Thermal Pads, it's very different because they have specific thickness, do not short circuit a board, hold their shape and so on. If you manage to remove the heat sink without damaging them, it's fine to just place it back and it will work. If you tore them apart, you will need new ones. You will need to get them in 3 different thicknesses: 1mm, 1.5mm and 2mm.


Looking at step 10 and using its colors as reference: 1mm for the yellow chips, 1.5mm for the one marked in red and 2mm for the blue one.

lipe.icp -

Did you disassemble a DOL-001? I have a DOL-101 and the power supply is external.

Edsknife -

Oh god, it’s been 9 years and people still look at my Teardown :D

To answer your question: My unit also had an external power brick. I don’t really know what the internal circuitry is for, but it looks like a power source of some sort. No idea about the model #, the unit is somewhere deep inside the attic.

Thomas J -

He has a DOL-001.. i know that because the unit has the Serial Port 2 and Digital AV

Rodrigo Valério -

How do you remove the plastic shroud around the front controller ports? I want to print a new one that is transparent to light it up

Jeff Harris -

you always re apply the past or it will not work right

tostypinapple -

also my game cube is dead it will not turn on can you help me

tostypinapple -

Hi all,

I need to get hold of some screws from the gamecube but I can’t find them.

They are the ones that are identified above in Step 5, the ones on the memory card springs/heatsinks.

Does anyone know a link to these so I can grab a set :)

Thank you

Tom Rowe -