Introducción
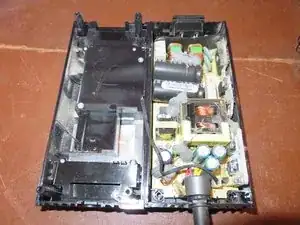
Desmonté mi Power Brick para poder para limpiarla. La configuración de energía para mi Xbox se había dejado en "Instant On" desde el día del lanzamiento hasta principios de este año. Con tu sistema en Instant On, el ventilador funciona continuamente usando .16Amps / 19Watts. Al poner tu consola en su modo de ahorro de energía solo consume 0.03Amps / 4Watts. La cantidad de suciedad dentro de tu consola dependerá de varios factores, como el modo de energía en el que mantienes tu sistema configurado. Si el ventilador no está funcionando, obviamente no está atrayendo más polvo/suciedad de lo que lo haría si estuviera encendido. El último paso tiene imágenes que muestran cuán sucios pueden estar sus dispositivos electrónicos con el tiempo y la importancia de limpiarlos para mantenerlos funcionales.
-
-
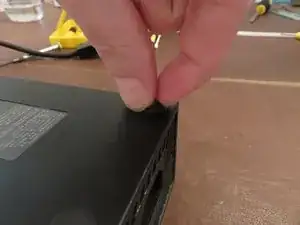
A diferencia del X360 Power Brick, estas botas de goma no requieren herramientas para levantarlas. Simplemente coloca las uñas debajo y tira suavemente hacia arriba.
-
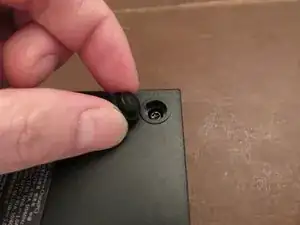
Quita los 4 tornillos con tu destornillador de bits de seguridad T10.
-
-
-
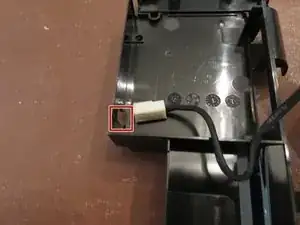
Usando el extremo de la punta de su spudger de plástico, o sus dedos, tira suavemente de la lengüeta que sostiene el cable de alimentación del ventilador en su lugar.
-
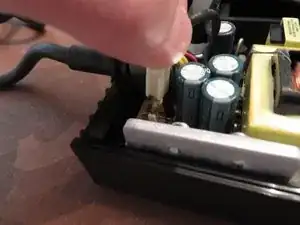
Tira suavemente del cable hacia arriba y lejos de la placa de circuito.
-
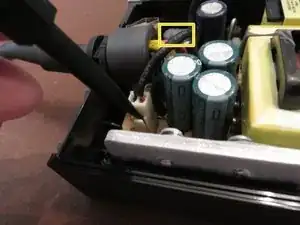
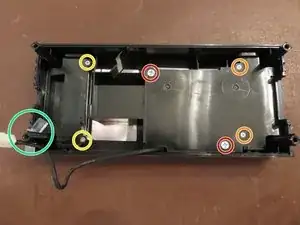
Si miras dentro del cuadro amarillo, en la esquina superior izquierda, notarás un color gris en la parte superior de un condensador. Es una sustancia pegajosa. Cuando abrí la fuente de alimentación por primera vez, el cable de alimentación del ventilador se presionó contra ella y se atascó. Tira suavemente del cable hacia arriba
-
-
-
Usa un destornillador Phillips para quitar los dos tornillos más grandes.
-
Los dos tornillos más pequeños (naranja) fueron un poco complicados. Están atornillados muy fuerte. Comencé con una cabeza Phillips # 0 y se dañó un poco el tornillo. Pero no se destruyó. Recomiendo usar una cabeza Phillips # 1 en estos. También utilicé una pequeña empuñadura de goma para agarrar mejor mi destornillador. Lo hizo mucho más fácil.
-
Una vez que se quitan los tornillos, levanta el marco de plástico del lado izquierdo y retíralo de la parte superior del bloque de alimentación y voltéalo.
-
A diferencia de la X360 Power Brick, el difusor de luz no necesita ser retirado de la fuente de alimentación. Si deseas quitarlo de todos modos, simplemente agárralo con los dedos y sácalo.
-
Estos tornillos no sirven para nada. No había nada debajo. A menos que tengas una versión diferente a la mía, no es necesario quitar estos tornillos.
-
-
-
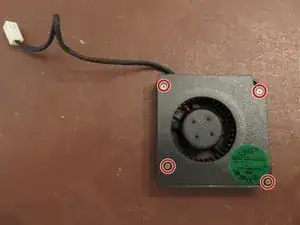
Levanta el ventilador desde el lado más alejado del cable.
-
Tira del cable a través del agujero en el marco y coloca el ventilador a un lado.
-
-
-
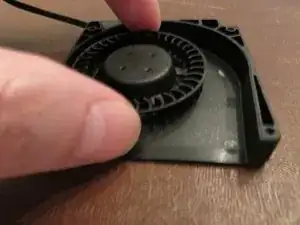
Quita los 4 tornillos usando un destornillador Philips #0 y quita la parte superior de carcasa del ventilador
-
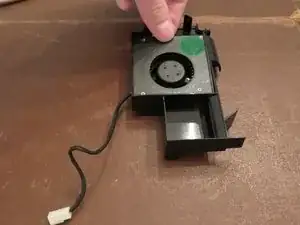
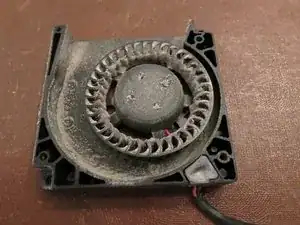
Agarra suavemente el ventilador y levántalo.
-
-
-
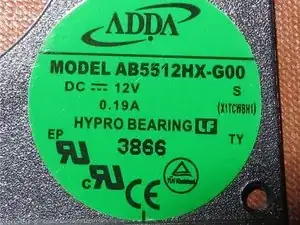
Aquí está la pegatina de información del ventilador en caso de que alguien la necesite como referencia.
-
-
-
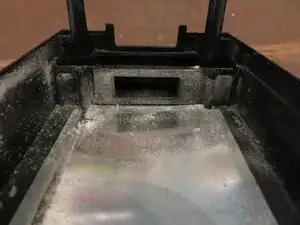
Poco menos de 3 años desde el día en que se compró (22 de noviembre de 2013) y ahora (12 de agosto de 2016) esta es la cantidad de suciedad que acumuló mi Power Brick. Recientemente me estoy metiendo en reparaciones electrónicas, por eso esto no sucedió antes.
-
Después de 1 año, la garantía de tu Xbox / PS quedará anulada a menos que compres una garantía extendida. ¡Limpia tus consolas antes de que la suciedad y el polvo las destruyan!
-


41 comentarios
Would this help with the orange light I am getting from the Xbox one power Brick?
Me too having the same question please help!!
kingasd -
Hi! I’ve had many people come to me and ask the same question, if your Xbox One makes a sound when you try to activate it, but there is no light on the Xbox and the power brick is holding a solid orange light, it is most likely the end of your power bricks life. Unfortunately, Microsoft and any other gaming store/supplier stock these anymore, so your last resort would be eBay. 2nd option is if your Xbox doesn’t turn on or make a sound, and your power brick turns white, it’s the console. Long story short, in your situation I would say you might need to invest in a new power brick.
It is your power brick have too get a new one or change the compasitors there's 3 of them I just had too do it
What specifically is the problem angelorestrepo and kingasd? The orange light is an indicator that your system is in energy saving mode. What happens when you power up the unit?
http://support.xbox.com/en-US/xbox-one/c...
Mind you at this point I have no idea what's really going on with either of your systems but it's possible this may be a really simple fix. Check this link and try these simple solutions if you haven't already.
Falls das nicht gelingt mit den Finger-Nägel: Einfach Holzschraube oben vorsichtig eindrehen, Gummifuss löst sich ab bzw. kann an der Schraube herausgezogen werden. Das “Loch” der Schraube sieht man nachher so gut wie nicht mehr.
Flagsoft -
TIP : If you have problems remove the rubbers: Just use a wood screw and gently screw it in the center until the rubber lifts up !
Flagsoft -
My t10 isn't working nothing is its just scrapping away at the screws
Angel Freeny -
Is it a T10 or T10 security bit? Security bit has a hole in the middle
Navy Vet 2015 -
Thank you so much for posting the tool needed for the screws on the bottom !!
kklovesmusic -
I'm here to serve :) glad you got it
Navy Vet 2015 -
I don’t have any screws, it’s just a piece of plastic that I can turn with tweezers
canadian_birdman -
Thanks for the suggestion about using a wood screw —worked like a charm. Just wish I had seen this before I tore one of the feet up trying to get it out.
errolsayre -
Well, All my boots tore apart with a gentle pull. So whgat do you do when you have a rubber circle with a square bit of plastic stuck there now?
Adam Slater -
Hi I’ve been researching this a bit online and many people are saying it’s extremely dangerous, however I need to at least try to fix my power supply as I have no other way to watch tv or play games. If I have a limited knowledge of electrical components would you still suggest undertaking this repair?
Jake -
The wood screw suggestion needs adding to the instructions - awesome suggestion!
Josh Beckett -
Amendment: The wood screw suggestion does not work for all models (I have just broken a couple of rubber boots removing them) - this was because they had a hard plastic center that prevented me screwing in a wood screw to aid removal and forcing me to try and pull them out by hand.
Josh Beckett -
When you peel off the rubber underneath theres like plastic holders above the screws. You have to take the holders off with a pair of needle-nose pliers, then you have the Torx TR10 screws underneath. And yeah it was hard to get the rubber off, I used the spudgers fine tip to remove the rubber.
Americo DeLuca -
CONSEIL: Si vous avez des problèmes, retirez les caoutchoucs: utilisez simplement une vis à bois et vissez-la doucement au centre jusqu'à ce que le caoutchouc se soulève!
moi_alexis01 -