Introducción

En este desmontaje te enseñaremos como desmontar tu PlayStation 2 de Sony.

  1. WAkCKt2inWE4qpRW
    WAkCKt2inWE4qpRW
    3ZApgKI2fYCQE3SE
    BrGt63pELdgmHhMd
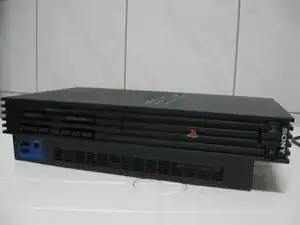
    • Aquí podemos observar la consola totalmente montada.
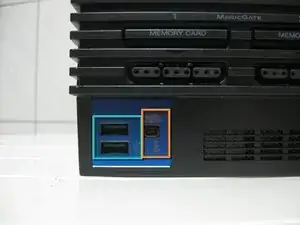
    • Los puertos USB.

    • Los puertos firewire S400.
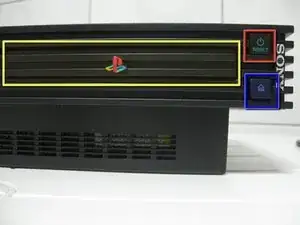
    • La unidad óptica.

    • El botón de reset o reinicio.

    • El botón para abrir la tapa.

  2. DIDor1ibadB4TNMx
    DIDor1ibadB4TNMx
    F2o2mBLYQBsBDB2b
    • Estas herramientas son las únicas que vamos a necesitar: cuatro destornilladores y unas pinzas.

    • En la siguiente foto podemos observar la PlayStation 2, un mando y una tarjeta de memoria (memory card).

    I don't have. A flat head sturdriver

    myjiki -

  3. KjqKGpO1AVBS6fDL
    KjqKGpO1AVBS6fDL
    BOiIvgPfY3uwqqvs
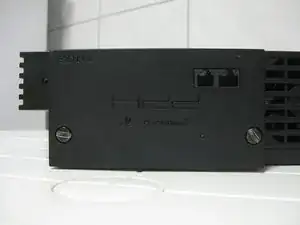
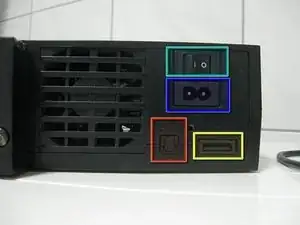
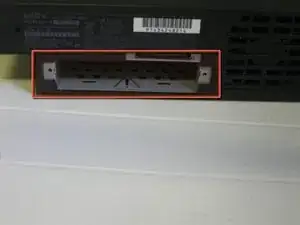
    • En este caso en la parte trasera tenemos un adaptador ethernet que al mismo tiempo es la bahía para el disco duro. Además también podemos observar el ventilador para la refrigeración de nuestra PlayStation 2.

    • El botón de la alimentación.

    • El conector para la alimentación.

    • La salida AV (audio y video).

    • La salida digital óptica.

  4. hP3ZTENVGlLSVqRP
    hP3ZTENVGlLSVqRP
    iFBVFtyElSpFgrKe
    MeEa2Kc25y5U1WJP
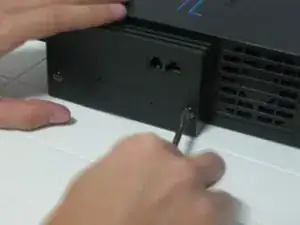
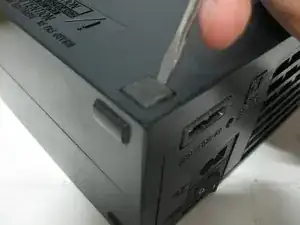
    • Comencemos con el desmontaje. Para empezar utilizaremos un destornillador plano para quitar el adaptador de ethernet.

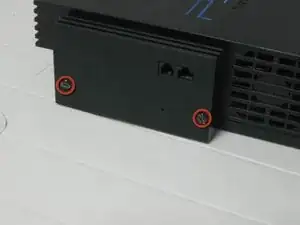
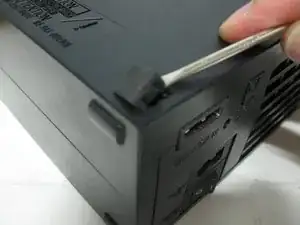
    • Quita estos dos tornillos.

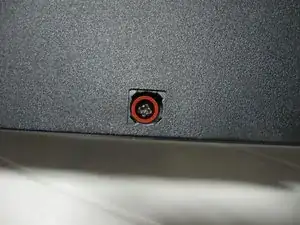
    • Y quítala simplemente tirando.

    I have the ethernet adaptor with mine but no hard drive, how do you get the hard drive to work in it?

    Chris Green -

    Cita de Chris Green:

    I have the ethernet adaptor with mine but no hard drive, how do you get the hard drive to work in it?

    it is a mod. you can look it up

    DustySeven -

  5. U1ucDtcVDwBNHhLv
    • Esta es la bahía de expansión donde el va colocado el disco duro.

    I got my ps2 from flea market and it didn't have a lid to cover up the expansion bay is that ok to leave it like that

    Plushbeatzz gaming -

  6. CruQnThZ4REjqTdX
    CruQnThZ4REjqTdX
    WelPDLgSZdBxV2AQ
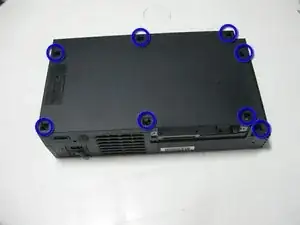
    • Pon la consola boca arriba.

    • Utiliza un destornillador plano pequeño, para quitar las patas de goma que esconden los tornillos. En este modelo tenemos 8.

  7. 5nWu3XbkyWD5Hih1
    5nWu3XbkyWD5Hih1
    GRZUJOONxesSaAdh
    3SG4wNKciSrmISJM
    • ¡Sorpresa! Debajo de las patas de goma se esconden tornillos.

    • Tendremos que quitar los 8 tornillos.

    • ¡Vamos, manos a la obra!

    Hello, nice review! Can you help me out with a question i have? I have this PS2 Fat, i miss those big long screws that hold the outside shell, i need to buy them (if i can) so i can only find long screws from the PS3 4000, does those screws fit into PS2 Fat aswell? Do you know?thanks!

    Cheerious -

  8. D6GRAPaywEBK1tUi
    D6GRAPaywEBK1tUi
    xLLjXv4QY3PmXdfn
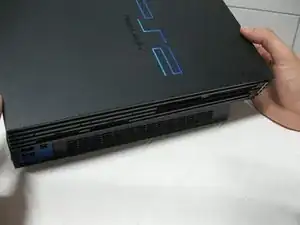
    • Vuelve a colocar la consola en su posición original, y tira de la carcasa superior desde la parte trasera hacia la parte frontal.

    • ¡Échale un vistazo a las imágenes!

    You will need to pull back the anti-tamper seal along the rear left corner.

    Wade -

  9. oo3aUlTrNJGYqBih
    oo3aUlTrNJGYqBih
    UVuLTHVF33i4TdQR
    PBxFhFHvdZWYI5A6
    • Este modelo tiene un cable plano que va conectado al botón de reset y de levantar la tapa. Ten mucho cuidado de no romperlo o dañarlo.

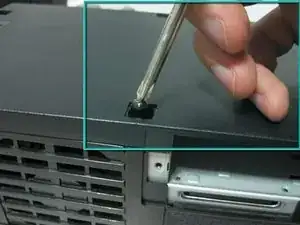
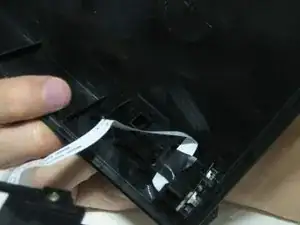
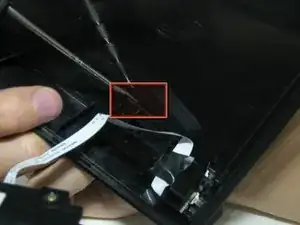
    • Quita el plastico que sujeta el botón simplemente tirando con un destornillador plano pequeño.

  10. TP6CIhkIrhnxjxJl
    • El plástico que sujeta el botón sale de la carcasa. Tiene algo de cinta para prevenir que se vuelva a romper. (Sí, ya he roto este cable).

  11. SbgEliZbCsWCVRuX
    SbgEliZbCsWCVRuX
    tuyMHLe6SQFPVXCa
    2FGM2OwwFEWE62sd
    • Quita estos dos tornillos para desconectar las ranuras de los mandos.

    I've tried cleaning my memory slot ports. They look fine. I'm wondering if I just have crap luck and got 2 bad cards or do I need to replace the part.

    My controller ports work fine though. Same cable I'd imagine

    AbsoluteQuinoa -

  12. iLZ6X2gUtDiQKBeQ
    iLZ6X2gUtDiQKBeQ
    ghbCYUjHsvFiN2MN
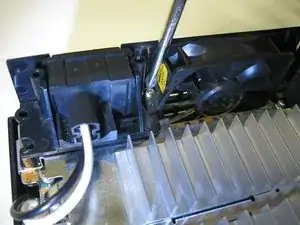
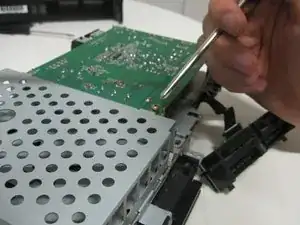
    • En este paso quitaremos los tornillos de la refrigeración y del botón principal de alimentación.

    After reassembly, I have a fifth screw identical to the ones shown in Step 11 and Step 12 left over, any idea where it goes?

    Thaddeus Warner -

    When you remove the power/ac plug there is a spot for the screw underneath.

    Jeff Friesen -

  13. m4FmMyGOLSbpjNfG
    m4FmMyGOLSbpjNfG
    MiLgARFuXonFJMHT
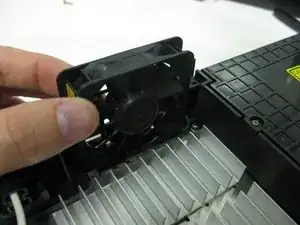
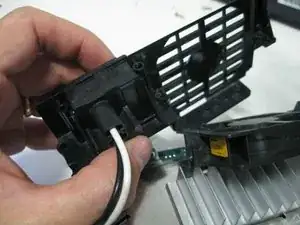
    • Tira del ventilador hacia arriba, pero ten cuidado de no romper o dañar el cable.

    • Tira hacia arriba y quita la rejilla del ventilador.

  14. XgRcGRSGaxjU2pUA
    XgRcGRSGaxjU2pUA
    2MKTQBXFGhGPJxfc
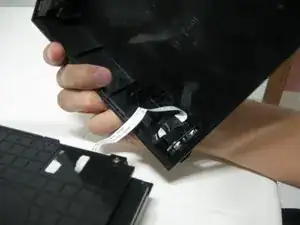
    • El cable de alimentación va hacia adentro de la carcasa, con lo cual será mejor quitarlo como explicaremos en un paso más adelante.

    • El cable del ventilador también va hacia adentro de la carcasa, ten mucho cuidado de no romperlo.

  15. 3TQTa1eIbQ5USalB
    3TQTa1eIbQ5USalB
    cqWDFGqyHACUPwJA
    IBYZPJkJfQBN3awD
    • Volvamos a darle la vuelta a la consola, con cuidado ya que algunas piezas aún siguen conectadas y las quitaremos en el paso siguiente.

  16. ZdEPBM3qlkQqVfV4
    ZdEPBM3qlkQqVfV4
    opvTLkfrWshYZ3hI
    • Vamos a quitar la carcasa inferior.

  17. pkBf6VCuCbsEs2jc
    pkBf6VCuCbsEs2jc
    BKNhp3ri6CEAlTTP
    ZPOCmcDUPUaG35wL
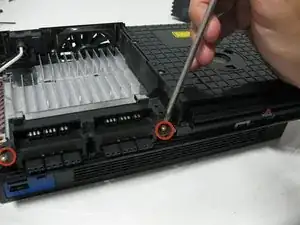
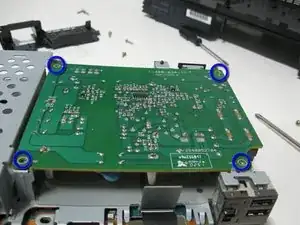
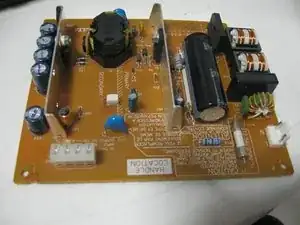
    • Esta es la placa de alimentación. Quita los cuatro tornillos que están marcados en azul en la fotografía.

  18. DSslSNDQkRfqsiG1
    DSslSNDQkRfqsiG1
    ye2CFbULXGi3UVXE
    AmIHcHtlu2aToXPO
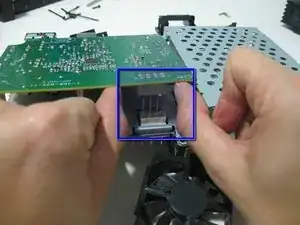
    • Mirando desde atrás, levanta la placa desconectando los pines que van a la placa base.

    • Finalmente ahora SÍ puedes quitar el botón de alimentación.

    • Y esta es la placa de alimentación

    • Cuando estés trabajando con la fuente de alimentación ten mucho cuidado de no tocar los cables del condensador ni ninguna soldadura que este expuesta en la parte trasera de la fuente de alimentación. Trabaja solamente sosteniéndola de los bordes.

  19. pGLI4BHyAAoiyv4S
    pGLI4BHyAAoiyv4S
    cFhC1kKNoxHSsAdB
    CJ16wdwdKXhUJOJK
    • Ahora quitaremos la rejilla de la bahía de expansión.

    • Y ahora es el momento de quitar el cable del ventilador de la placa base, utilizando unas pinzas de precisión. (Yo ahora no he podido, simplemente se ha quedado atascado, ya lo he quitado antes, pero ahora simplemente está más duro, así que intentaré quitarlo más tarde en el desmontaje).

    I just broke the fan pins because you have to push the connector to the side and then up. There are 2 hooks that hold the connector in place.

    Sean Brownell -

  20. Lwt2xO6PW2WVRgCa
    Lwt2xO6PW2WVRgCa
    3PP62GfNZm32ZpJl
    NoOt4KRZf2YCyFSf
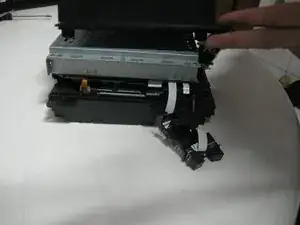
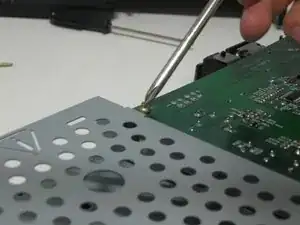
    • Quita el plástico de protección térmica de la carcasa.

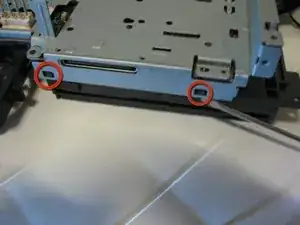
    • Quita los tornillos pequeños utilizando un destornillador Phillips pequeño.

    • Y quita la carcasa metálica del lector de DVD, como se indica, utilizando un destornillador plano pequeño.

    There are 4 more screws that you do not have marked that I needed to remove before this metal case could be removed in the next step. Three of them on this side same as the ones circled in orange. One of the is on the other side near the audio out connector.

    Jssamp -

  21. 1So2yYIgToJ3opBO
    1So2yYIgToJ3opBO
    5Ck5g5KaPNErfHUT
    rNU6OoZa21B1fOll
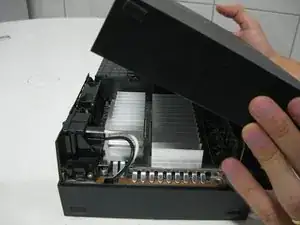
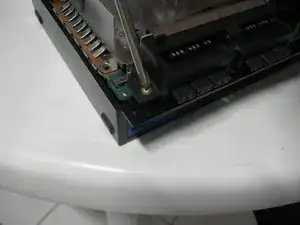
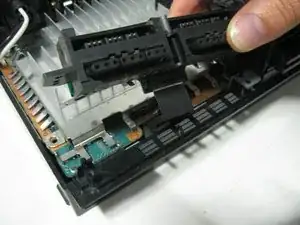
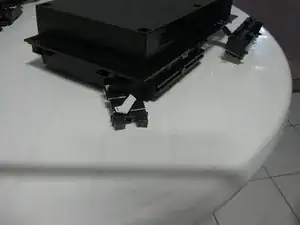
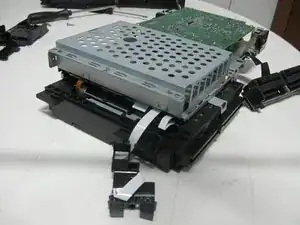
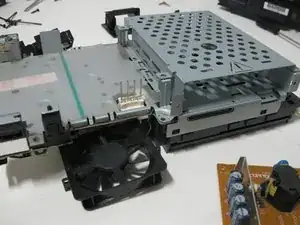
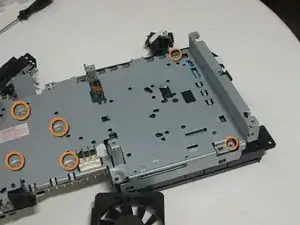
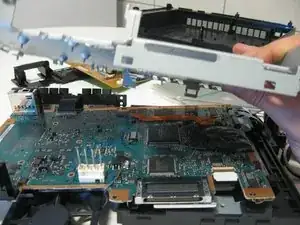
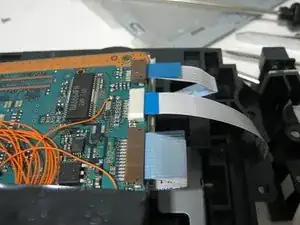
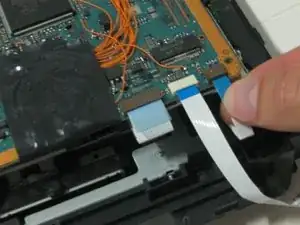
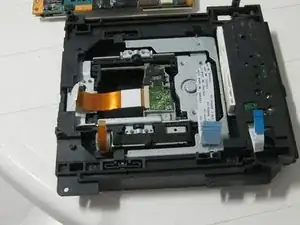
    • Ahora puedes quitar la carcasa metálica y encontrarnos la placa base.

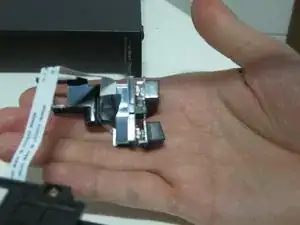
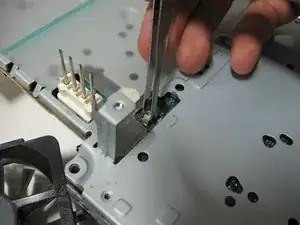
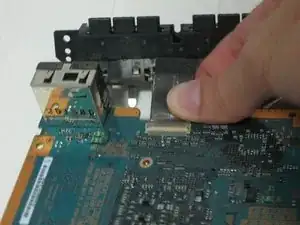
    • ¡Mira! los cables planos. Ahora es el momento de quitarlos, se cuidadoso por favor.

  22. bLyWqe5V1gI5m5Jc
    bLyWqe5V1gI5m5Jc
    pUqE5FeSPHQRKGSU
    TSL1426hpQUDndhq
    • Quedan dos más y el lector de DVD estará fuera.

  23. qvaWxwl6fmhvBQ4l
    qvaWxwl6fmhvBQ4l
    uDetIpUc5TapbEg2
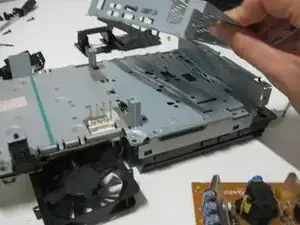
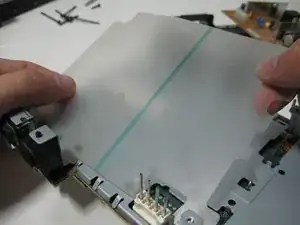
    • Ahora puedes darle la vuelta a la consola de nuevo y quitar la protección metálica.

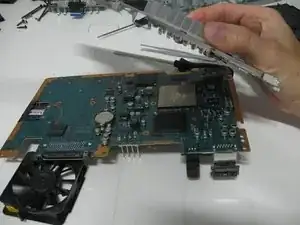
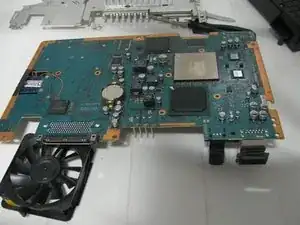
    • Este es el otro lado de la placa base.

  24. GkhHjQPwZrWRJPFV
    GkhHjQPwZrWRJPFV
    pbrtpxQFUROMev1H
    LRmhAxH5BVNKxg3u
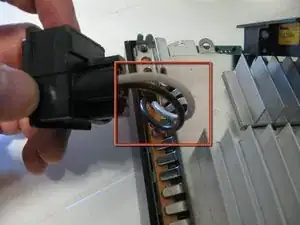
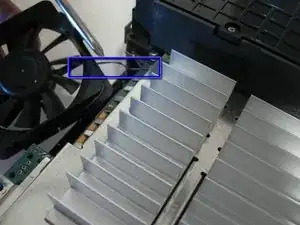
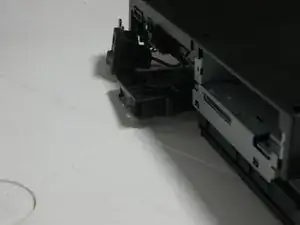
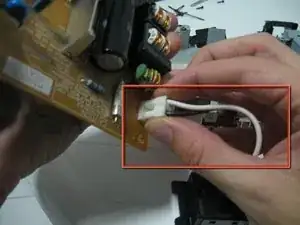
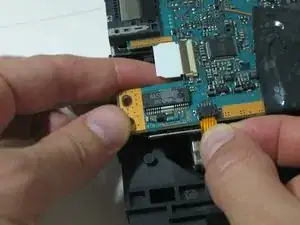
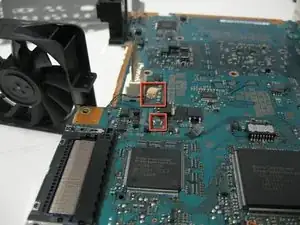
    • Bien, ahora intentaremos quitar el cable del ventilador que no pudimos quitar anteriormente.

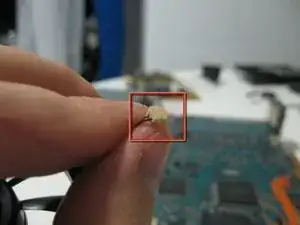
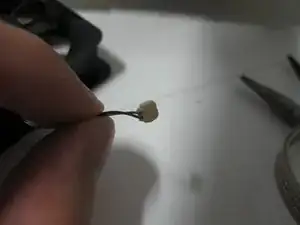
    • El conector está hecho para desconectarlo, pero está viejo y parece que se han convertido en uno solo y he roto la soldadura.

    • Encontraré una forma de arreglarlo, ¡siempre lo hago! =)

    I did the same thing on my slim but to my systems battery. Will this prevent the system from working?

    NJBmusic -

    How did you fix same happened to me

    Francisco Torres -

  25. 2bTZlXUoYSV1cOHU
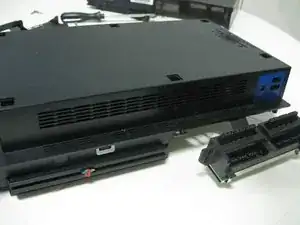
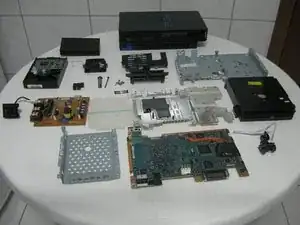
    • Este es el final del desmontaje.

    • Desde la parte superior izquierda: Adaptador de ethernet, disco duro, rejilla de ventilación, protección inferior metálica, placa de los puertos de los mandos, plancha plástica para aislar la placa de alimentación, protector metálico superior, lector de DVD, tapa de la bahía de expansión, placa base y estructura plástica del botones reset/eject.

    You probably shouldn’t put electronics on cloth, but I guess its about 9 years too late for that.

    Johnny Danger -

Pollux

Miembro Desde 23/10/09

650 Reputación

8 comentarios

reverse procedures..step by step..

a to z cellutions belize -

Yep in reverse, take your time or you'll be like me breaking things and having to rig it haha. Put the shielding back together, drive, power board, the other shield for hard drive. Everything, plug all connections. Even power-reset buttons. Then put it on the bottom casing, connect controller ports and close it up with top casing.

juan hernandez -

How did you fix the flat cable?

Bigs -

If a cable is ripped or broken, unfortunately there is no way to fix it. You will have to replace the cable.

Molten Toast -

I put a lot of layers of tape on mine, the last owner of my system was very naughty and disassembled the system when it was still under warranty, so the cable was brokem

John Doe -

do you have the list of screws required for this? i am missing a few trying to locate the size specs

Corey Smith -

All i see is the 20 legged modchip-kraken lurking in one of those pics ;)

mgwara -

Hi, I have a problem with a hardly used PS2. When I turn it on it only displays some coloured squares. I don’t know if the video chip has gone. Do you have any ideas??

agfa gaevart -