Introducción

Estaba teniendo problemas con la temperatura y decidí limpiarla. Aquí están los pasos que seguí.

  1. OPmA41Gn6YSkTxDy
    OPmA41Gn6YSkTxDy
    ggVeoWjBHIyKNPtX
    QqhGVAU2Sm2qw1NM
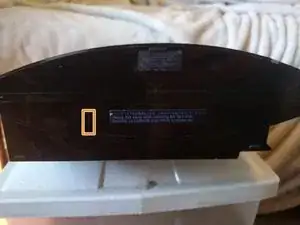
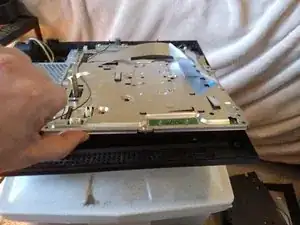
    • Utilizando tus uñas o una espátula, quita la tapa.

    • Quita el tornillo PH1.

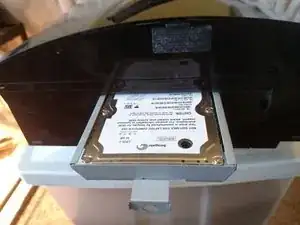
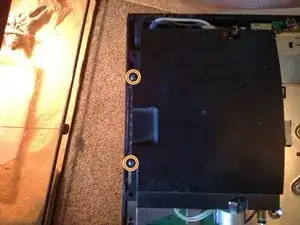
    • Tira y saca el disco duro.

  2. Gq3mQjwM3ZOC2XmY
    Gq3mQjwM3ZOC2XmY
    iRsEwQg4CH4FviRQ
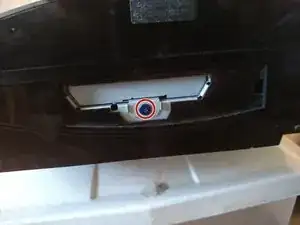
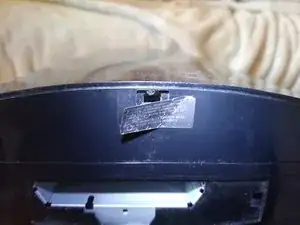
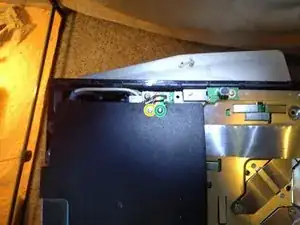
    • Quita la pegatina que esconde una pata de goma debajo.

    • Quita el tornillo T8 de seguridad.

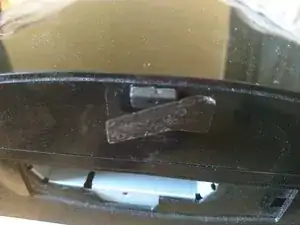
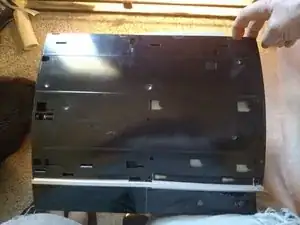
    • Tira de la protección hacia a ti para quitarla.

    Slide the cover towards the screw opening would have been a better instruction as people may do this repair with the system on its side. Also, a picture showing that sliding it is how you take it off not “pulling it” would have been perfect.

    Dylan Y -

    It's T8 or T9 ?

    Sebastien Plante -

    I confirm it's a T8 security torx.

    Sebastien Plante -

  3. AWUDDWhAr2VRhV2p
    AWUDDWhAr2VRhV2p
    Jk6f3KFAUIbgDykb
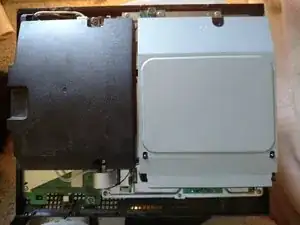
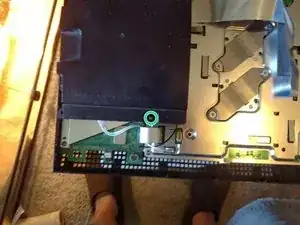
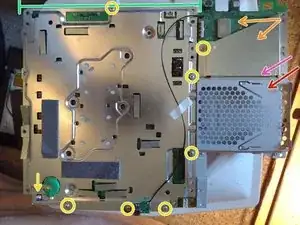
    • Quita los seis tornillos medianos.

    • Quita el tornillo mediano. Este tornillo está marcado convenientemente con una S por si olvidas donde estaba.

    • El lector de Blu-ray NO está atornillado. NO inclines la consola.

    • Utiliza tus uñas para presionar la pestaña que está al lado del tornillo mediano y levántala. La carcasa gira en la parte delantera.

    • Cuando estés volviendo a montar todo, coloca el borde frontal y luego rótalo hacia atrás. Los tornillos pondrán todo en su sitio.

  4. bdi1puFBqUQPLLHc
    bdi1puFBqUQPLLHc
    OIqNuXXvZNkneIEC
    DVD11AYvh5JQkTD4
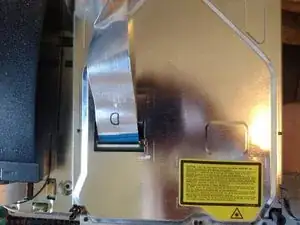
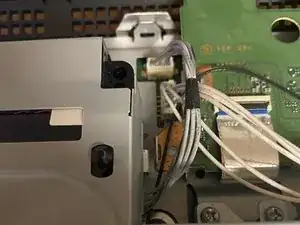
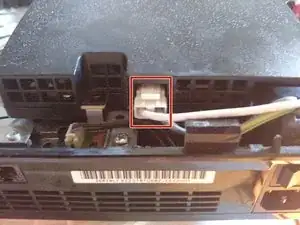
    • Voltea la unidad de Blu-Ray y levanta la pestaña negra para quitar el cable plano.

    • Desconecta el cable de 4 pines conectado a la unidad de Blu-Ray.

    Mine had a label covering the entry to the Blu-ray casing, so I needed to remove the power supply and disconnect the Blu-ray ribbon cable from the motherboard instead.

    Bil -

    Mine also has a 4-pin cable on the side that also has to be detached

    gordonhamachi -

  5. cfuJE5GSsNkWplOy
    cfuJE5GSsNkWplOy
    sRrhYVLaMBLaAWRB
    M46VSK3m1sRrrNHk
    • Quita el tornillo M.

    • Quita los tornillos medianos medianos.

    • Quita los tornillos M largos.

    • Cuando vuelvas a montar todo, los tornillos finos van marcados con una M.

  6. QmbAPgZqEVXLGJWG
    QmbAPgZqEVXLGJWG
    FmbZ2IIiVTMwKMLk
    • Aprieta hacia abajo la pestaña y tira hacia a fuera.

    • Tira hacia a fuera.

    Where does that ribbon cable on the second pic on step 6 go?! kinda confused on how to take it out..(that Rainbow shaped wire thing)

    kevinpaulenriquez -

    That connects the front peripherals to the main board. There should be a brown tab on each side that you just flip down. Then just lift the ribbon cable up.

    knyrii -

    how many pin that ribbon cable which connect to front usb ?

    Adirose Axl -

  7. o3ogehBAbHlxNUDB
    • ¡No utilices una espátula metálica! Hay pines expuestos que podrían hacer cortocircuito y electrocutarte. (Yo no sabía esto cuando lo hice).

    • Utilizando algo no conductivo, levanta esta esquina para quitarlo de una manera más sencilla.

    • Tira hacia arriba para quitar la fuente de alimentación.

  8. GOBHU43KlBJoDiau
    GOBHU43KlBJoDiau
    hTqNMNht6vNTleHU
    LoDWkHf553SXUIu3
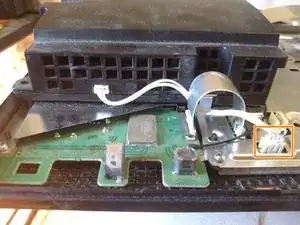
    • Quita los tornillos medianos.

    • Quita el tornillo de la toma a tierra.

    • Quita los tornillos del disipador y las abrazaderas.

    • Levanta hacia la parte frontal para quitarlo.

    • Haz esto lentamente. Los disipadores no están atornillados y podrías dañar las aletas y haces demasiada fuerza.

    • Esta es la segunda vez que he desmontado esto. Por este mismo motivo no hay pasta térmica en los chips. Viene con pasta puesta, aunque demasiada en mi opinión.

    • Cuando vuelvas a colocar todo de nuevo, todos los huecos de los tornillos están marcados. Si el agujero no tiene una marca, no le coloques un tornillo.

    Base not brace right?

    Kajus Slekys -

    Ground screw wouldn't go in through the ground wire no matter what I tried. It would if I screwed it straight into the brace, but not if I put it through the ground wire first. Ended up stripping it.

    Joe Mama -

    You wrote that if the hole doesn’t have a marker, then don’t put a screw in there, but shouldn’t there be two screws in the bottom-right? I also noticed that you marked the screw on the bottom, second from the right, twice. It’s marked in this image and the next one. Also, the number of screws I have left over seems to suggest I’m right and a second screw should go near that bottom-right screw where there is no circle. Did I screw up?

    Cole Fudge -

    I did screw up. I missed one screw for the USB and WiFi controller. The screw hole I was talking about is filled by one of the long screws that goes through the cover and past the disk drive. My bad!

    Cole Fudge -

    Please how do i know of the heatsink fin is spoilt?

    Abiodun -

  9. 52lgJAJhJtvHADKZ
    52lgJAJhJtvHADKZ
    Y4mgCMWMICXahAfO
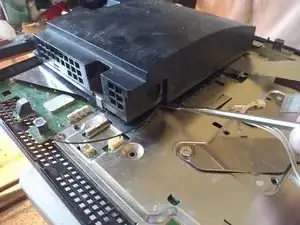
    • Desatornilla los tornillos M y desconecta la batería de la placa. Tu PS3 ahora no sabrá la hora ni la fecha.

    • Me confundí cuando volví a montarlo. El protector va debajo de la mitad superior de la caja del disco duro.

    • Levanta este lado de la caja del disco duro y muévelo para desconectarlo. Puede costarte un poco quitar los pines.

    • Quita el protector del controlador USB y WiFi.

    • Quita el controlador USB y WiFi. Sale simplemente hacia arriba. Quita la cinta blanca.

    • Levanta desde este lado para quitar el protector de la placa base.

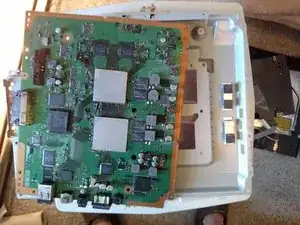
    • La placa base sale simplemente hacia arriba.

    I need help i cant get that battery with the yellow arrow, do i just pull it out?

    The_Sinkre -

    The battery is spring loaded: just pull it out.

    Daniele Carminati -

  10. IK1dv52yO1MIKBoS
    IK1dv52yO1MIKBoS
    VbIyEYDj2EQQCfvP
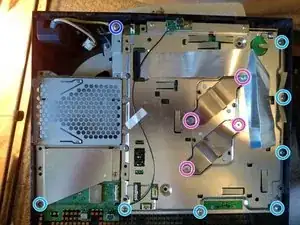
    • Ok, me he olvidado de hacer una foto antes de desatornillar la parte inferior.

    • La placa posterior se levanta.

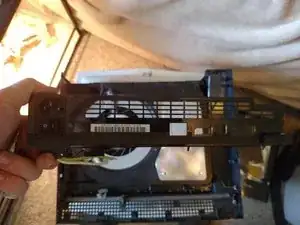
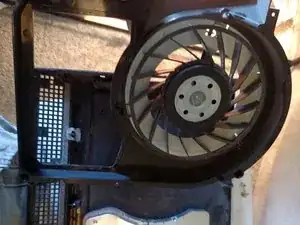
    • El ventilador y la carcasa salen hacia arriba.

    • Los disipadores no están atornillados y salen hacia arriba.

  11. 2lDqLfFsSkJYSEu6
    2lDqLfFsSkJYSEu6
    IIKEUc33LVDGkiPU
    • Inserte frase sabia aquí.

    Very nice and extremely time saving, without you guidance I would be at the pawn shop replacing the one that is in 1,000,000 pieces because "it accidentally fell."

    Jeffrey Geisenberger -

    I need the bottom @knyrii

    Kajus Slekys -

    Lo felicito por su ordenado, detallado, sintético, claro e ilustrado tutorial. Gracias por las imágenes, que ayudan enormemente, y por las explicaciones resumidas (sin palabras de más).  Mil gracias por el tiempo que se ha tomado para poder compartir su conocimiento con nosotros tal que realmente podamos entenderlo.

    mimimoni -

Conclusión

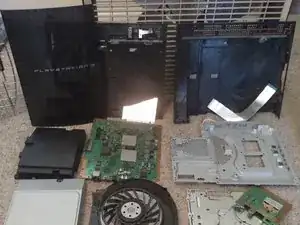
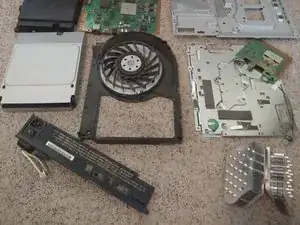
Para volver a armar tu dispositivo, sigue estas instrucciones en orden inverso.

knyrii

Miembro Desde 25/07/15

2205 Reputación

25 comentarios

I have this exact same ps3 model and I took it apart to clean it and now the controller won't sync. I press the PS button and all 4 lights blink rapidly (faster than when 1 blinks when it's charging) for about 30 secs and then turn off. I have tried to sync it a couple diff ways with the same result.

Jeff -

The ribbon cable in image 2 of step 6 may be loose.

knyrii -

My ps3 Fat bluetooth not working i am changing thE bluetooth plate but not working pls help

harpreet singh -

Only a few things I can think of:

Replacement module is bad

Replacement module is the wrong version

Something is interfering with the bluetooth signal

knyrii -

My PS3 keeps shutting down when trying to load a game...sometimes it goes but some other times not...

Any help?

Thanks in advance

Ana Teixeira -

Hi, you may need a new psu, but do some more research before purchasing.

Eli Coates -

BTW my PS3 is model: CECHH01

Ana Teixeira -

I believe I have the original PS3 module, I took it apart the first time to clean it out. When put back together, the device still automatically shuts itself off in mid gameplay. I've made sure the PS3 has more than enough room for it to not overheat again.

I'd place my hand on its back to see how hot it is, it wouldn't have to be TOO hot, but it unfortunately still continues to turn off on its own... please help.

Aileen Barrera -

could it be the thermal paste?

Aileen Barrera -

Good! Now maby i can fix one of my ps3's i bought broken.

labiosus -

Everything is cleaned out and I reapplied thermal paste and put everything back together but, I wanted to know if it is possible that the ribbon cable for the blu ray player is essential in running any apps or games (that don’t require a disc) on the ps3 because that is the only thing that might not be in securely because mine differed slightly from the photos you provided. Thank you for the guide.

Jesse crum -

No problem! I’m glad it helped. I’m sure that the drive not being recognized or missing will not prevent you from running downloaded games. A bad connection may cause it to not boot or throw an error if something got shorted out.

knyrii -

My poor ps3fatboy crapped out 4 years ago this winter and I finally got around to tearing it down to see why when I power it on the system beeps, red light f;ashes, turns green then turns off before anything appears on screen. So, I'm hoping I'll find some clue by taking it apart or discover a passion of taking apart people's ps3's across the land just because I can….

Anyways, thanks for this great guide! I'm hoping it's a simple short or broken solder connection since I read the root cause for many people is Big Fat Brittle solder joints cracking.

John G. W. VI -

One of the more difficult and badly designed systems to fix. Multiple problems on my end! The case of the “Temperature sensors” Followed schematics to see where they are located. My motherboard is working correctly, GPU CPU fine, thermal paste in check and the system is not hot. Soo many people are being fooled by the warning pop up (upper right screen) System is too hot and shutting down” This has nothing to do with your motherboard being faulty, GPU/CPU or thermal paste. It has to do with this models’ power supply and temperature sensors. Swap out power supply for a compatible one and or get the schematics to where the temperature sensors are located and fix them. Ugh! Love the PS3…hate the MODEL!!

Dee -

My phat PS3 won’t take disks. There is no disk in it, but It won’t even go in, then immediately eject. It just won’t take it. Thanks to anyone who replies.

Legendary Ocelot -

Thank you !

Wanted to sell my PS3, but it wasn’t a possibility to sell to someone a console that made the noise of a Jumbo Jet starting up.

Everything went well, cleaned every bit of and and changed the thermal paste, now it’s good as new !

Really easy to follow, good job making this tutorial ! :)

Lucas Gustin -

Hello, I am having trouble removing the round green CR battery from the motherboard, i tried wiggling it out and pulling but it won’t budge, any help? and thank you very much for the tutorial.

Neon Nostrade -

I opened mine today to try to do a long overdue, deep cleaning. After lifting the cover for the hard drive, I saw that the blue security screw was completely stripped but the previous owner of the system. Is there any way for me to remove this screw?

Geo Castellano -

Try with some pliers to grab the screw and turn it.

Daniele Carminati -

Thanks! Hopefully that helps. I was already going going down the rabbit hole of trying to find tools to help remove the screw.

Geo Castellano -

I took my fat PS3 4 port USB apartment cleaned out the thermal paste and reflow the chips then reassembled it. Now I have no indication of power at all. Any ideas what happened?

Sam -

The power supply (the black box) should have two cables plugged into it, check they’re properly seated on both the power supply and the motherboard.

defski -

what is that cable name at pic 5

isimsiz oyuncular30 -

I have no HDMI connection. AVI works. Unit was connected to TV that was hit from a lightning strike. Any guidance on which components to look at for failure?

Matt T -

With these directions, I let my dog do it! Well done my man!

Ckyu29@gmail.com -