Introducción
Este era un teclado que no funcionaba y que se abrió para exponer la placa de circuito impreso (PCB Printed circuit board).
Herramientas
Partes
-
-
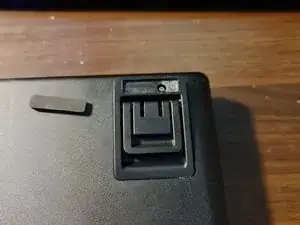
Quita la pata de goma del soporte del teclado superior derecho, para exponer el tornillo. Luego extrae el tornillo.
-
-
-
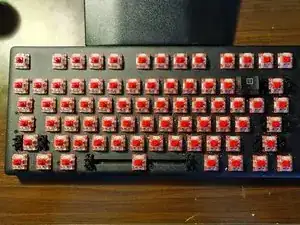
Quita todos los botones del teclado, para exponer los 16 tornillos autorroscantes negros y luego extrae los tornillos.
-
-
-
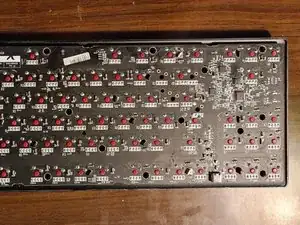
Levanta con cuidado la carcasa de la parte superior, para exponer la placa de circuito impreso.
-
Para volver a montar el dispositivo, sigue estas instrucciones en orden inverso.

2 comentarios
Do you happen to know the pinout for the RGB light? Also, the copper trace for the space bard RGB? My RGB pad on the space bar was lifted during de-soldering to fix the stabilizer. The copper trace seems to be the most different in the space bar LED. I need to find the trace to create a new connection to the RGB for the space bar
I could probably work it out for you. It would help if you shared pictures of the lifted trace. In order to effect a repair you will need a soldering iron, solder and flux. You will also need some aircraft or kynar wire (really thin wire). Do you have a multimeter with continuity tester?