Introducción

Un desmontaje del ratón (mouse) inalámbrico Logitech M235

  1. KENAOmPI6VKSVinq
    • Retira la batería y la tapa de la batería

  2. LaDyiTyMATPdmSj6
    LaDyiTyMATPdmSj6
    1eJjakZDsq2NxaBf
    • Retira los dos tornillos que sujetan la cubierta.

    • Tenía dos de estos ratones y uno de ellos tenía un tornillo oculto debajo de la etiqueta CE, así que asegúrate de comprobarlo antes de abrir el ratón.

  3. mKRKrKNCo3oNlygP
    • Usa una herramienta de palanca para abrir la carcasa del mouse.

  4. WWTgyWdidETZ11wp
    • El carcasa debe ser fácil de abrir y no requerir mucha fuerza.

  5. 6GeBpxkdEGYLLCtK
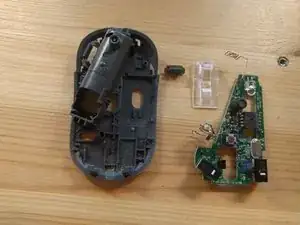
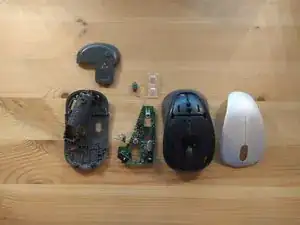
    • La placa del circuito impreso (PCB) solo se sujeta con unos pocos clips y se puede quitar fácilmente.

  6. bqUEsm3bgBKsVkJW
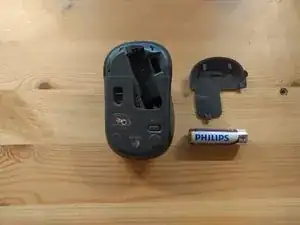
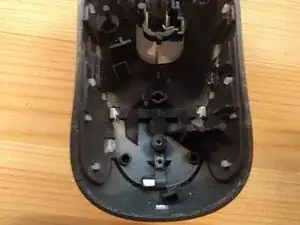
    • La cubierta superior del mouse se puede quitar deshaciendo los tres clips blancos que la sujetan en la parte de plástico gris.

  7. KJpHUXiD13ONYosA
    • ¡Hecho!

Daniel

Miembro Desde 27/11/16

183 Reputación

8 comentarios

Great work. Hope to see some more of your work

Mustafa karu -

thank you..this helped me a looot

Sharnav Kundu -

My M325 has NO SCREWS!!! Now what???

christcansaveyou -

There are several variants. Mine has only one screw, hidden by the battery compartment label, near the + terminal

Robert Reite -

The most common problem with this mouse is dust and dirt getting in the optical encoder for the wheel.

Robert Reite -

That’s an easy one to deal with:

* Switch off.

* Remove the battery cover.

* Remove the battery.

* At the end of the battery tray near the positive terminal there is a hole. Inside is a tab which, with a suitable tool, can easily be un-clipped by pushing gently in the direction of the positive contact will just pop the top cover. Then gently prise up the cover and you have full access to the wheel. No busting holes in any stickers and no screws.

Jeremy Cavanagh -

I’ve torn mine down bc the lhb click doesn’t work. one small posi-screw behind the battery compartment, underneath the +ve on the sticker, at the top of the battery.

Adam Sherwood -

Thanks for info. I opened up my previous Logitech mouse (M235) so was familiar with the hidden screws.

That one had 2 screws from memory. I think the problem with that one was: I used to turn the mouse off at the switch each time, and eventually the switch dropped down. So, with the replacement, I just leave it alone!

I now have a M238. Same problem: scrolling sensor disrupted by dust.

The M238 only has one screw (under battery sticker). There’s round indent under the M238 sticker, but it’s not a screw hole.

I just opened mine up and wiped the sensor with my finger, and cleaned the mouse wheel grooves of grime.

Mouse is working like new again. Whew! Was driving me crazy! heh.

Tip: prying tool can be old credit card cut down to shape. I just used my fingernails for the mouse opening above.

With the opening of the M238: once the screw is removed and you pry it apart, it is still ‘attached’ at the ‘switch’ end, but just jiggle and pry and it pops off. It does feel like it’s going to break, but it’s not.

David Talbot -