Introducción

  1. 1K1Y5pSq3uLpHRWJ
    • Comienza por tener un controlador de Xbox One (:

  2. bxHcZiJRTTSEZCoY
    bxHcZiJRTTSEZCoY
    IWlDbBv3PXYZOWhO
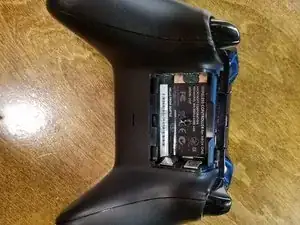
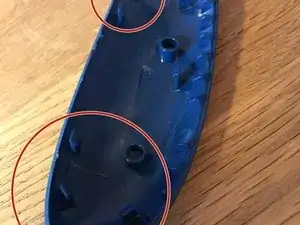
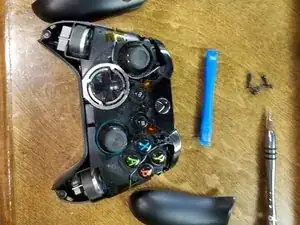
    • Comienza por quitar la batería y exponer el tornillo de seguridad T8. El tornillo debe estar oculto detrás de una etiqueta de garantía.

  3. tNpPPXCIQDW15KiA
    tNpPPXCIQDW15KiA
    1SaNXyieXu6ZJrIy
    1wfMqSUMKeFWrM5h
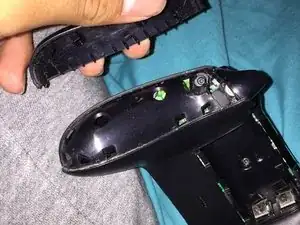
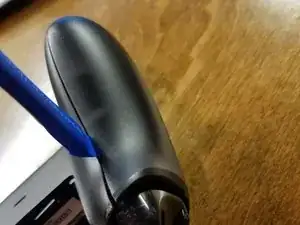
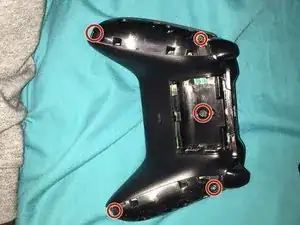
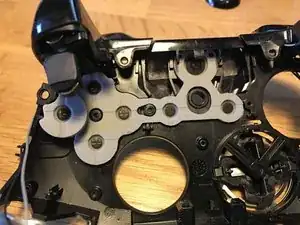
    • Retira los paneles laterales para exponer el segundo tornillo de seguridad T8 con un spudger, una herramienta de apertura IFixit o tus uñas, cada elección es divertida.

  4. iuDBaqgKyqF15TNC
    • Al quitar todos los paneles laterales, ¡han aparecido los 5 tornillos de seguridad T8!

  5. go531XS1HcAR4FP6
    go531XS1HcAR4FP6
    XluwbeF6h5v4QvZs
    BDhwWQx6VylFbPkc
    • Una vez que hayas retirado los tornillos de seguridad T8, retira la placa frontal.

  6. p2SKGCQafSi3hYaJ
    p2SKGCQafSi3hYaJ
    1qKLtpbNaqWEtAbA
    • Pega con cinta adhesiva los motores de vibracion para evitar que se caigan.

  7. bWoEITG4nEVln4Rn
    bWoEITG4nEVln4Rn
    QaEkTXBT3KwXduch
    YAU2pWmKHLLrFnNW
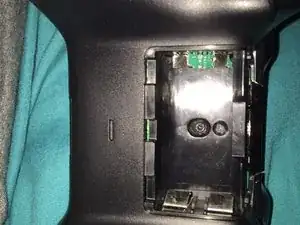
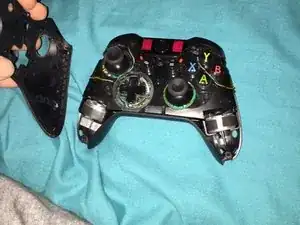
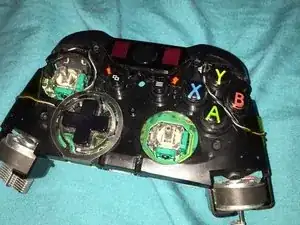
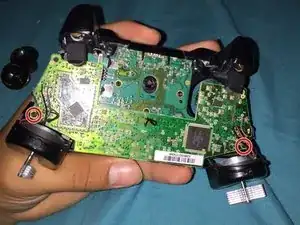
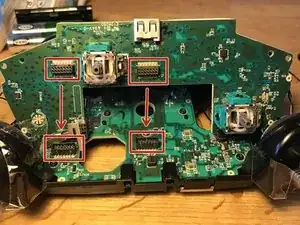
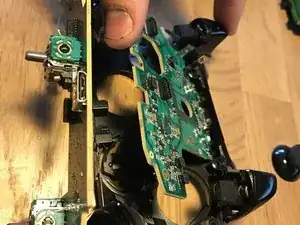
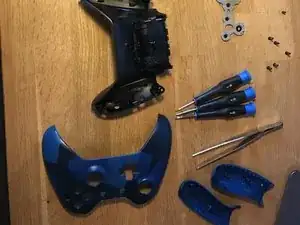
    • Retira los tornillos T6 para quitar los PCB.

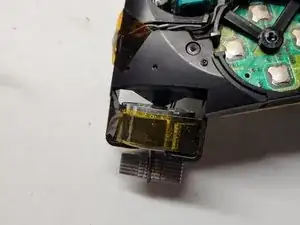
    • Se necesita un tirón para separar los conectores.

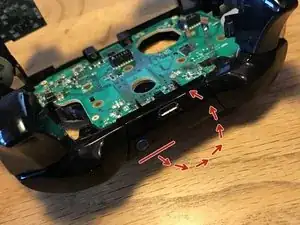
    • ¡Cuidado con los cables! No puedes quitar completamente la placa de circuito sin quitar los cables y requiere soldadura.

    You spelt without wrong.

    Darren Woloshyn -

  8. LeXwvysJUOSTOCIL
    LeXwvysJUOSTOCIL
    rM5GwQYCdOfmOGvo
    onNDlXrmJgFmVtjN
    • Retira la cubierta superior, se pliega.

    • Hay 6 tornillos T6 para quitar.

    I an attempting to reassemble the controller now but getting stuck at this step, i cant figure out how the sync button fits back in, everything i’ve tried seems to cause it to either turn once the cover is back on or lose it’s ‘spring’ so it stays pressed in.

    adamcomer01 -

    I was having trouble with this too, I think i figured it out. The sync button itself has two tabs, the really long tab should fit into a slot next to the Xbox button that keeps it in place.

    https://i.imgur.com/NGU6oUl.jpg

    there's also a cross shaped protrusion underneath that should make contact with a white button on the pcb, as well as an adhesive strip that goes over the sync button once it's in. (The shiny gray thing in the pic)

    legonro -

  9. S2MVf5eebvwLxAk2
    S2MVf5eebvwLxAk2
    6cv3XrqQOB3Bnrlq
    jHJRCCcoPQtiolSQ
    • Retira la placa de circuito

    • Debajo de la goma están los botones A B X Y.

  10. GEp3IyRX5oMQUTDq
    GEp3IyRX5oMQUTDq
    2nShfnODKQ4JDtZw
    UntIfOJZn6btD53Q
    • Sigue las instrucciones al revés para volver a juntar todo. :D

    Yeah, really great directions. I took it apart correctly but needed help putting it back, cause I kept hearing clicking noises…lol

    Thx!

    Pete -

ubaldo gutierrez

Miembro Desde 07/11/16

259 Reputación

10 comentarios

Very good instructions...

Chadwick Posey -

Nice instructions. I need to take apart mine and replace the d-pad. The previous owner was a bit... rough. Sometimes it doesn't work or it clicks twice. Cheers!

Johnathan -

Do you think that you can label the internals of the controller.

David Becerra -

I have a custom controller from the xbox design labs. I want to change the led on the front.

Can someone point out the model/ size led I would need?

Alajandro -

How do you put the sync buttom back in? Which way does it face?

Throaty Sea5 -

The little tab on the sync button faces inward (Facing the Xbox Home button)

Sean Morris -

thanks a lot for the kick guide, help me a lot.

Jorge Franco -

i did this and my batteries don’t fit anymore l

Aaron Voelke -

i did this and now the batteries don’t fit in the thing lol

Aaron Voelke -

Also, my controller buttons ‘click’, or are very loud when I press or navigate them (buttons, D pad and thumbsticks. Is there a way to lessen or soften that noise?

Pete -