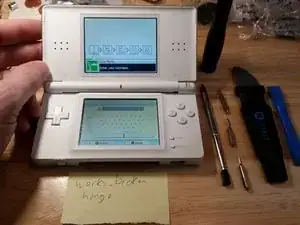
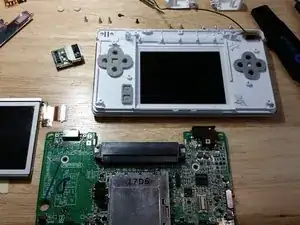
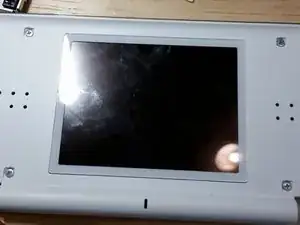
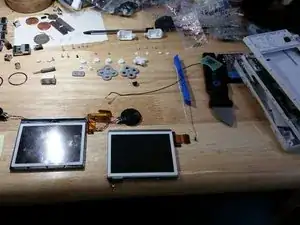
Introducción
Decidí aprender por mí mismo cómo reparar Nintendo DS Lites, porque las unidades rotas estaban disponibles a bajo precio en eBay en 2017. Después de trabajar en algunas docenas de unidades, he visto los errores que la gente ha cometido y les ofrezco esta guía para asegurarse de que no daña la unidad que está reparando (especialmente si la está arreglando usted mismo). Todos los problemas que he visto con el DS Lite se pueden solucionar desde $2 si solo necesita un nuevo digitalizador hasta alrededor de $10 si necesita obtener una placa base usada de una unidad desechada (precios de 2017). Los precios han aumentado desde 2017, pero la reparación de DS Lite sigue siendo razonablemente económica.
Una vez que haya aprendido a desmontar la DS Lite, podrá manejar cualquier dispositivo portátil de Nintendo, incluidos GameBoy, GameBoy Color, GameBoy Advance, DS, DSi, DSi XL, 3DS, 3DS XL, New 3DS XL, Switch, y Cambiar Lite. Personalmente, he usado estas técnicas para desarmar todas estas consolas con gran éxito y, ocasionalmente, tengo una tienda en eBay donde revendo mis consolas reparadas.
ADVERTENCIA: No intente desmontar ningún dispositivo electrónico mientras la batería esté conectada (debería ser imposible para DS Lite) o un cable de alimentación esté conectado.***
-
-
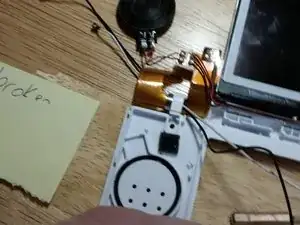
El problema mas común en la Nintendo DS Lite son bisagras rotas. Puedes comprar una carcasa nueva por menos de $10 directamente de China (precios 2017).
-
-
-
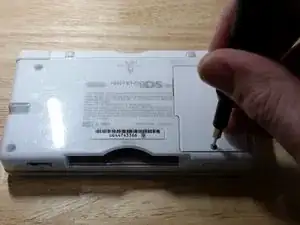
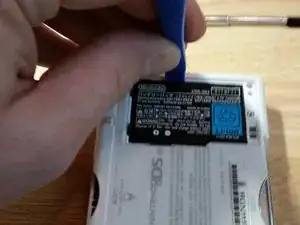
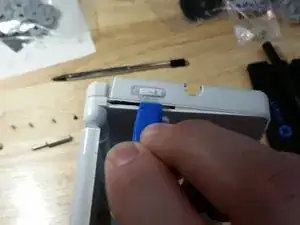
Desatornilla la carcasa de la batería con una punta PH000. Probablemente necesitaras abrir con fuerza la tapa de la batería debido a que se vuelve pegajosa con la edad. El compartimiento de la batería es apretado comúnmente a si que podrías hacer palanca suavemente para sacar la batería con un spudger de plástico.
-
-
-
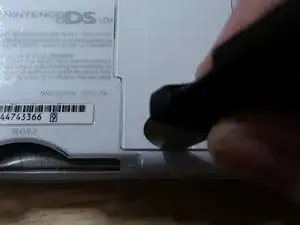
Normalmente veo esta parte del DS Lite dañado, sigue estos pasos para remover los pies sin dañar nada.
-
-
-
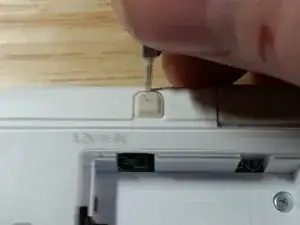
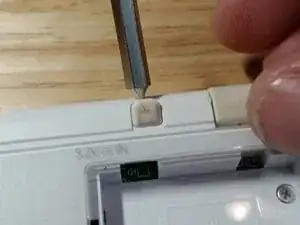
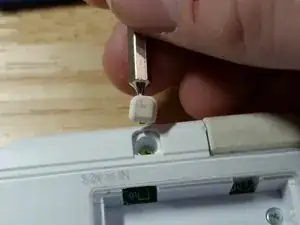
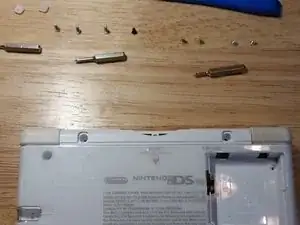
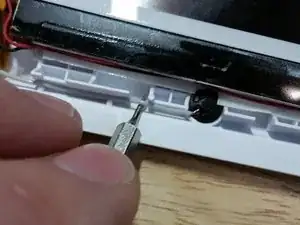
Ahora remueve los dos tornillos de color dorado debajo de los pies de goma y los dos tornillos de color plata en el compartimiento de la batería con una punta PH000. Luego remueve los tres tornillos plateados y el pequeño tornillo negro con una punta Y00. Deja la punta Y00 al lado cuando la dejes de usar.
-
-
-
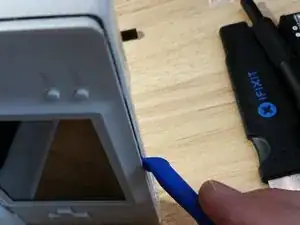
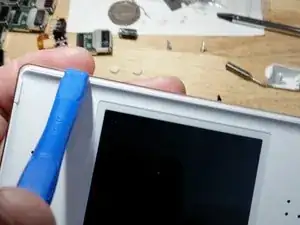
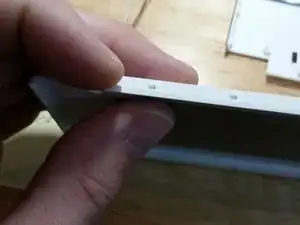
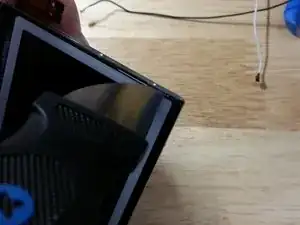
Veo muchos daños causados por remover la cubierta inferior sin cuidado, toma tu tiempo y cuidadosamente mueve la spudger de plástico alrededor del perímetro. Su la cubierta inferior parece pegada, remueva la cubierta con la unidad cerrada. Esto puede prevenir rayar el digitalizador.
-
-
-
Sujeta con cuidado y retira los botones laterales. Trata de mantener unido el ensamblaje del resorte para que no pierda ninguna pieza. El alambre de resorte puede perforar tu piel, así que ten cuidado. ¡Usa gafas de seguridad para evitar daños por los resortes rebeldes!
-
-
-
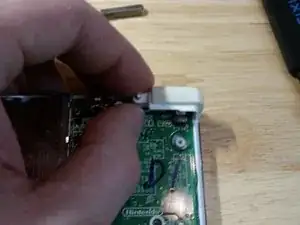
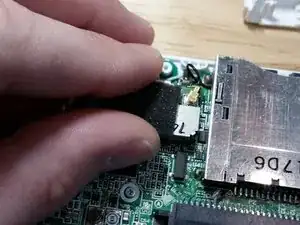
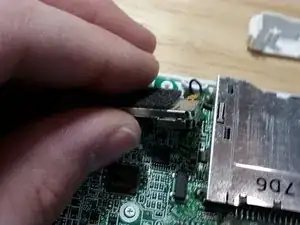
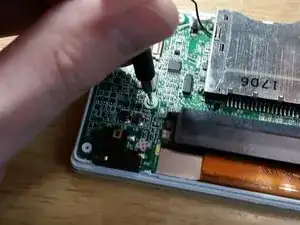
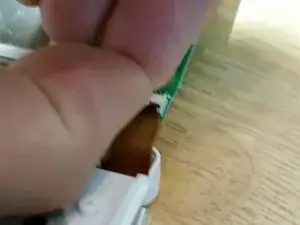
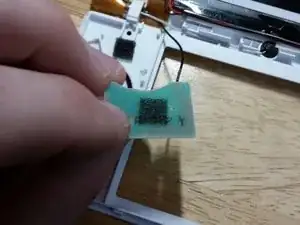
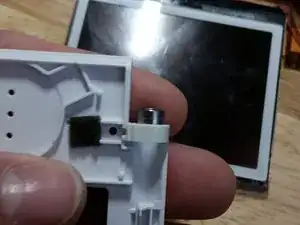
Debes quitar la placa secundaria Wi-Fi en esta etapa o corres el riesgo de dañar el digitalizador. Aprendí esto de la manera difícil. Deberás tirar con fuerza de la placa hija ya que el adhesivo es muy fuerte. Puedes intentar usar calor o alcohol para aflojar la placa secundaria, pero eso podría dañar los componentes y nunca tuve que hacerlo.
-
-
-
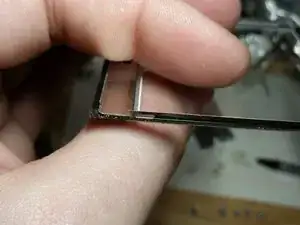
Levanta suavemente el conector flexible del digitalizador desde este lado con una punta pequeña de cabeza plana. Tómate su tiempo y se cuidadoso ya que este conector se rompe fácilmente. Reemplazar el digitalizador es una reparación extremadamente común para esta consola, por lo que recomiendo aprender a hacerlo.
-
-
-
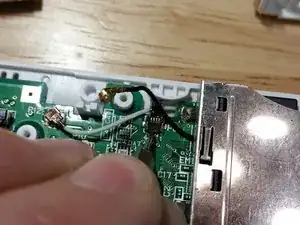
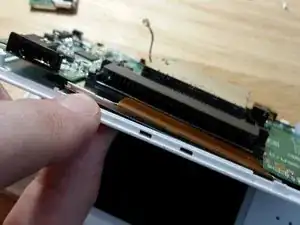
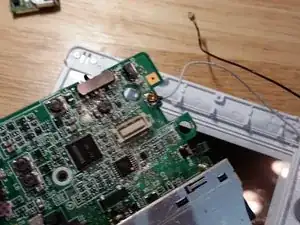
Dale la vuelta a la placa base como se muestra. Se cuidadoso ya que el cable flexible es frágil. Ten en cuenta la escritura china en la consola hecha en la fábrica de Nintendo.
-
-
-
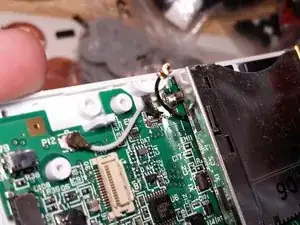
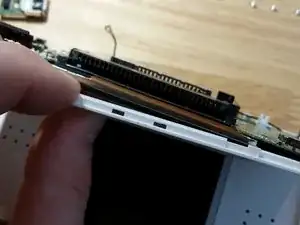
Retira el cable flexible con la uña. No utilices una punta de cabeza plana, ya que puedes dañar el conector. Perdón por la imagen borrosa, pero este paso será obvio si has estado siguiendo una unidad real. Ve el paso anterior para tener una imagen más clara.
-
-
-
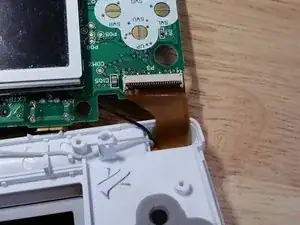
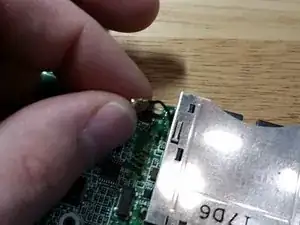
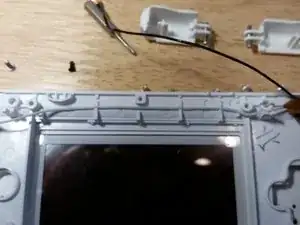
Remueve este cable negro. Tendrás que moverlo. Uno de las decisiones mas tontas en el diseño del DS Lite ademas de el problema de las bisagras, el cable negro es incluso mas difícil de volver a meter. No trates de meterte con el puerto de los cartuchos del DS en ninguna manera. Lo podrías dañar. El cable negro saldrá y entrara cuando sea necesario.
-
-
-
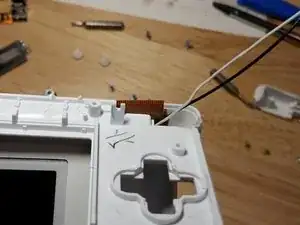
Toma nota de cómo se enruta el cable blanco. Deberás replicar esta ruta para volver a ensamblarlo. Ahora quita el cable blanco. Asegúrate de que el cable flexible del digitalizador se desconectó antes. De lo contrario, vuelve atrás y hazlo.
-
-
-
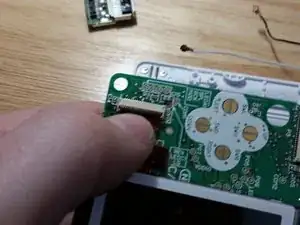
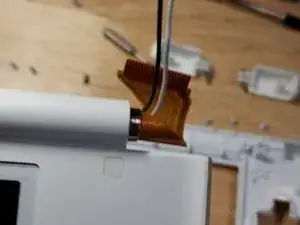
Remueve el conector flex de la pantalla inferior. Levanta el clip con tu uña, como lo hiciste con la pantalla superior.
-
-
-
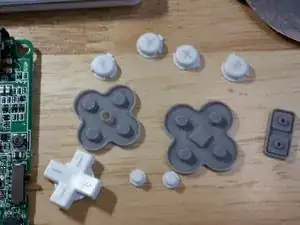
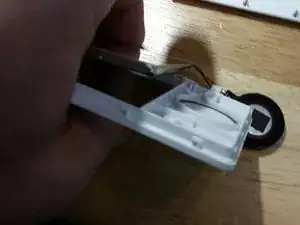
Retira el conjunto de botones de goma y plástico. Este paso es bastante fácil, pero no pierdas ninguna pieza. Puedes meter cada pieza de plástico y goma en agua jabonosa caliente para limpiarlas. Reemplaza cualquier pieza de goma que esté rota o dañada en exceso.
-
-
-
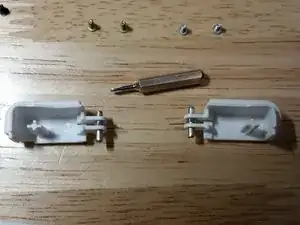
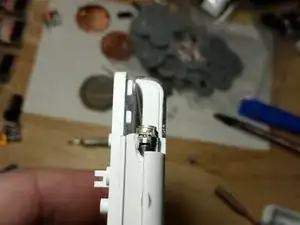
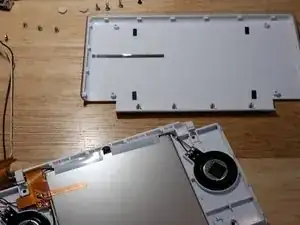
Este el mayor error de diseño en el Nintendo DS Lite. El ensamble de la bisagra es muy frágil. Guarda los tornillos y la parte de metal y plástico si estas remplazando la carcasa.
-
-
-
La razón mas común del porque DS Lites no se unen apropiadamente es porque este cable blanco no esta encaminado correctamente. Cuando re-ensambles, sigue este esquema de enrutamiento y el producto final se sentirá como que esta fresco del piso de la fabrica.
-
-
-
Asegura que los dos cables están encaminados por el centro del cable flex y cuidadosamente encamina el cable flex en la hendidura. El cable flex es increíblemente frágil, y fue reforzado en modelos posteriores. Toma tu tiempo en este paso. Si te toma diez minutos evitar que se dañe el cable flex, que así sea.
-
-
-
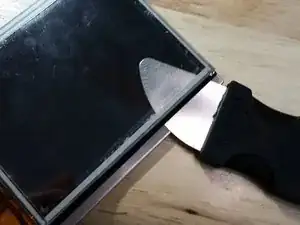
Con la broca de cabeza plana más pequeña que puedas encontrar, trabaja debajo de la etiqueta para evitar dañar la unidad tanto como sea posible. Estropear poco el plástico ABS es casi imposible. He tenido suerte más recientemente usando una hoja de afeitar de plástico.
-
-
-
Con el spudger de plástico, afloja la cubierta superior. No quites ni alteres las piezas de goma del lateral. No necesitas tocarlas, y las he visto innecesariamente dañados y desaparecidas innumerables veces. Como se señaló, la pantalla se deslizará hacia abajo uno o dos milímetros, lo que permitirá que las piezas se separen fácilmente.
-
-
-
Comience a presionar en la pantalla superior como se muestra aquí y trabaje a su manera. Sea bastante cuidadoso, pero tenga en cuenta que la pantalla LCD real está protegida por un protector de plástico en el frente y un protector de metal en la parte posterior.
-
-
-
Tomando nota del enrutamiento de los cables blanco y negro para su posterior montaje, retire el micrófono y la antena Wi-Fi, tirando con cuidado de los cables a través del centro del cable flex para no causar ningún daño.
-
-
-
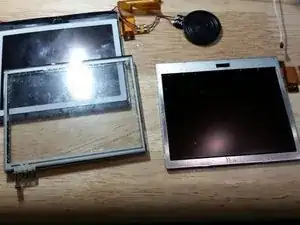
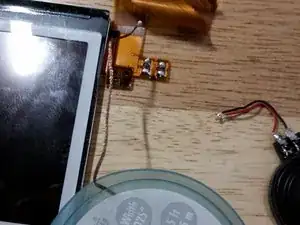
Estos deberían ser removidos y remplazados lado brillante arriba. Podrían ser sujetados aquí o en las bocinas.
-
-
-
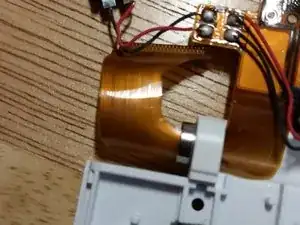
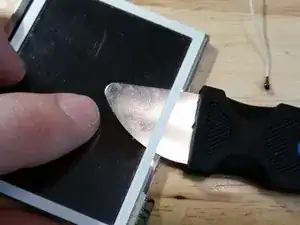
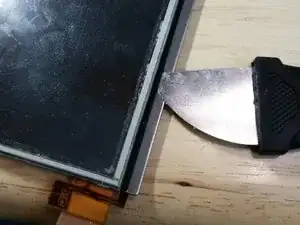
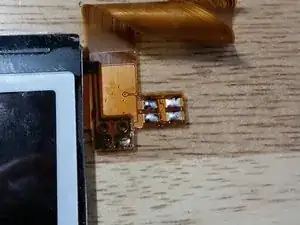
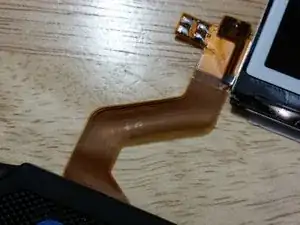
Si el cable flexible está dañado, al momento de escribir este artículo, te quedaste alrededor de $ 8. Tenga mucho cuidado con esta frágil pieza, enrolle con cuidado en un cilindro apretado. Si el cable flex está dañado, no hay forma de reparar la pantalla LCD y se debe desechar todo el módulo. Retira y deja a un lado la pieza de metal.
-
-
-
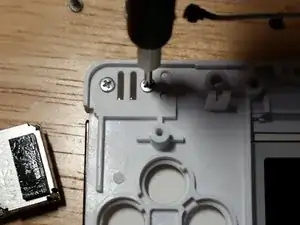
Remueve tres tornillos dorados del retenedor del stylus y dos tornillos dorados de la placa de metal. Desmontaje. Necesitaras levantar gentilmente el interruptor de poder y el control de volumen. Lava todas las piezas de plástico de la carcasa en agua caliente y jabonosa. Alcohol podría ser requerido para remover calcomanías y otra suciedad.
-
-
-
Si estas remplazando la carcasa con una de diferente color, necesitaras definitivamente remover la pegatina. Con un spudger de metal de iFixit, este es un paso fácil.
-
-
-
Desliza el spudger de metal debajo de la pegatina negra y desliza con cuidado alrededor del ensamble, evita los cables flex. Este paso es fácil, pero tienes que hacerlo si es necesario reemplazar la pantalla o el digitalizador. Si ambos son funcionales, este paso es innecesario. Limpia a fondo ambas piezas con alcohol a después.
-
-
-
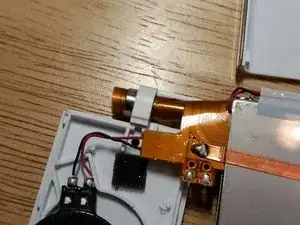
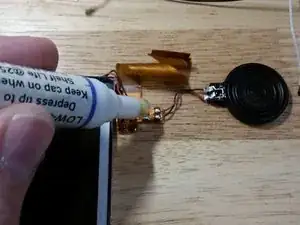
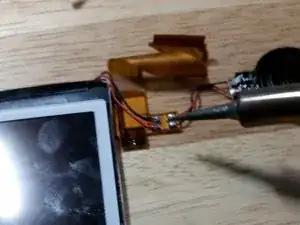
Este paso solo es necesario si la pantalla LCD superior está defectuosa. Este es un problema común. Primero, humedece los contactos con fundente. Luego derrite la soldadura y retira los cuatro cables, anotando sus posiciones para volver a ensamblar. Puede ser útil usar soldadura con plomo, pero asegúrate de obedecer todas las leyes locales.
-
-
-
Limpia los contactos como prefieras. Utilizo una pequeña mecha de soldadura de fabricación estadounidense y he aplicado un poco de soldadura nueva a base de plomo.
-
-
-
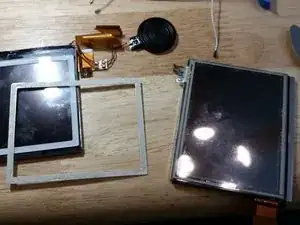
La cubierta de plástico está encajada debajo de la cubierta de metal y se sujeta con algunos esquemas diferentes, dependiendo de la antigüedad del DS Lite. Un método son dos pestañas a cada lado. Gentilmente suelte las pestañas sin quitar la cubierta metálica trasera. Este paso es innecesario a menos que esté cambiando el color de la carcasa
-
-
-
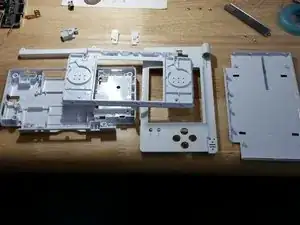
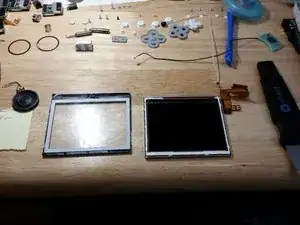
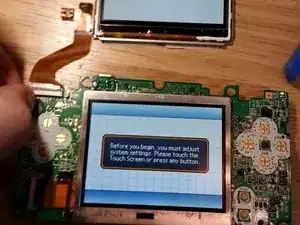
Ahora prueba la unidad desmontada. Primero, conecta la placa hija Wi-Fi. Luego conecta las dos pantallas a la placa madre. Luego, mientras sostienes la batería en su lugar, enciende la unidad. La unidad debe encenderse como se muestra (siempre que las pantallas estuvieran funcionando en primer lugar, reemplázalas primero si es necesario).
-
Para re-ensamblar tu dispositivo:
1)Asegura que el cable blanco esta encaminado correctamente antes de remontar la placa madre.
2)Cuidadosamente re-ensambla los botones de hombro. Esto toma practica.
3)Asegura que la orientación del interruptor de poder y el control de volumen es correcto antes de remplazar la carcasa inferior. Orientación incorrecto dañara la placa madre y no podrás encender la unidad de nuevo.

12 comentarios
Great work pal! Congratulations.
The best guide online for fixing the DS lite. Thanks a lot!
JohnJD -
I find this very specific and helpful! I will favorite this guide, once i have every materials required… especially the soldering part in this guide. Far from what i know… The guide deserved the best credits as the author included the soldering heat meter! However, i do not understand why the 2nd/middle picture (from right to left) at Step 28…
Step 28; Removing the Speaker things.
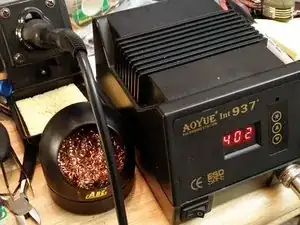
Pictures: links, the picture on the machine says… 402, not 400. - Picture is from step 28.
This step is only necessary if your upper LCD is bad. Unfortunately, this is a common problem. First, wet the contacts with flux. Then, with your iron at 400 degrees C, melt the solder and remove all four wires. It might help to add fresh solder with lead. The lead-free solder used by Nintendo sucks.
I usually do my soldering between 300 and 350C. If you do a fair amount of soldering, pick up a knockoff Hakko FG-100 tip thermometer and then get the official sensors. This will set you back around $50 total on Amazon, but considering that the official FG-100 is over $200, it’s a steal. Anyway…check your iron for accuracy. The key here is heat transfer. Use the largest tip that fits in/on the pad. A larger tip will retain heat better and will heat a larger area at once. Now as posted above, add some fresh leaded solder to the joint. This will help to lower the melting temperature of the rest of the solder. Final tip is: Don’t forget the flux. Flux is your friend. You can never have too much flux. Flux will save you from bad joints, burned parts, and a lot of swearing. Get yourself some flux in liquid and paste form. Clean up the excess when you’re done with the highest concentration isopropyl alcohol you can find.
I am new to soldering, so i can’t say i am fair to soldering, but i am going to give it a try especially since my Nintendo DS Lite is way old and in need of fixs and therefore cant spend alot for the time being… but ill still buy it either way! Thanks for the help! reasons i am in need of it is good materials and parts is because i want it to be completely like new for myself.
I removed the solder temperature. What settings you should use will vary depending upon your situation. Desoldering the speakers is not very difficult at all, provided that you use flux, and many different techniques should work.