Introducción
Herramientas
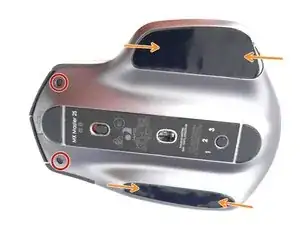
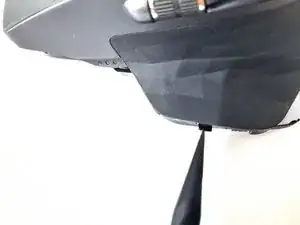
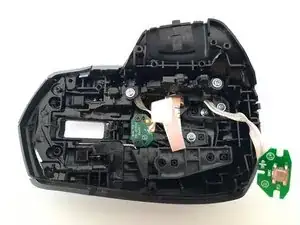
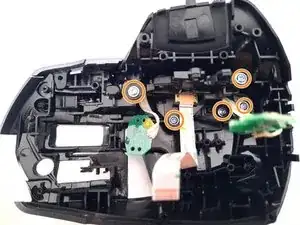
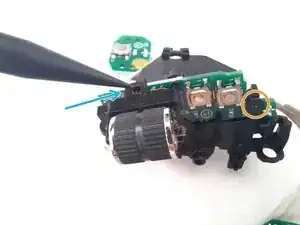
Partes
-
-
Verificamos que el mouse esté apagado, le damos la vuelta para acceder a 6 tornillos en la parte inferior.
-
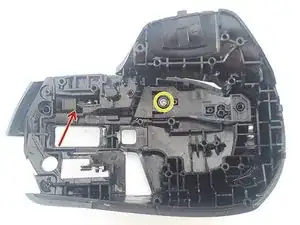
Retira los dos tornillos frontales T5.
-
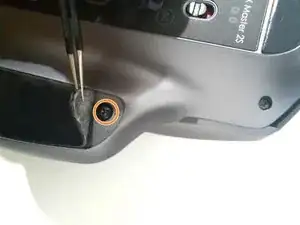
y 4 tipo Phillip debajo de las pegatinas, 2 a cada lado.
-
-
-
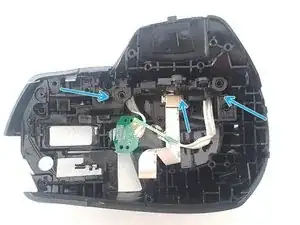
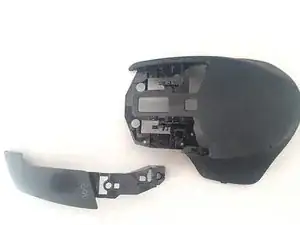
Separa cuidadosamente las dos partes.
-
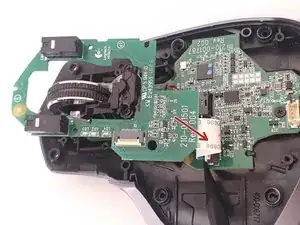
Levanta el pestillo de plástico para liberar el cable plano.
-
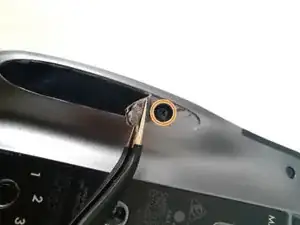
Desconecta el cable plano de su enchufe.
-
-
-
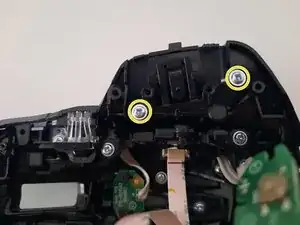
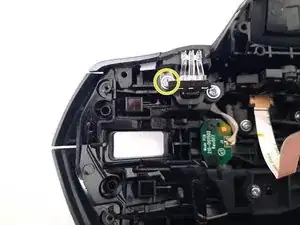
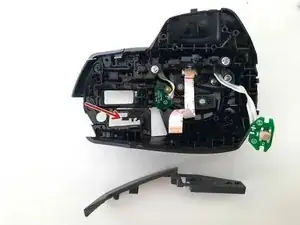
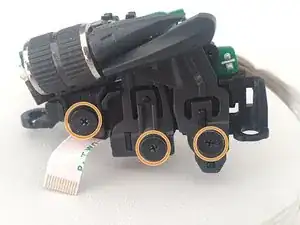
Retira los tornillos negros de la placa del botón.
-
Desenrosca también el tornillo que sujeta la carcasa superior y la tapa lateral.
-
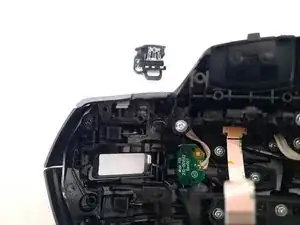
Retira el mecanismo del botón.
-
-
-
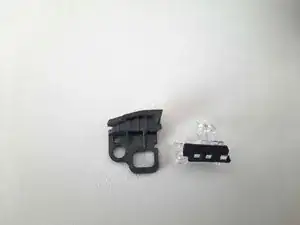
Retira el tornillo que sujeta la pieza con cuidado. Además si lo deseas puedes separarlo en dos partes muy fácilmente, para su limpieza.
-
-
-
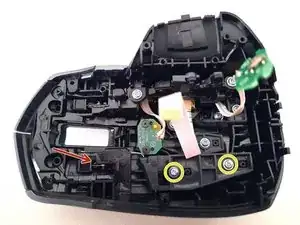
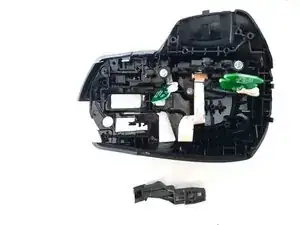
Desatornilla los dos tornillos que sujetan el botón.
-
Al quitar los tornillos, tira suavemente del botón hacia adelante.
-
-
-
Retira los tornillos negros de la placa del botón.
-
Desatornilla el tornillo que sujeta el botón.
-
Retira el botón de plástico con cuidado.
-
-
-
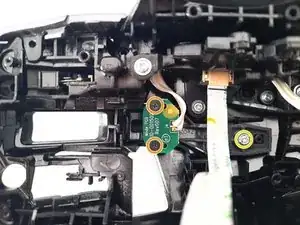
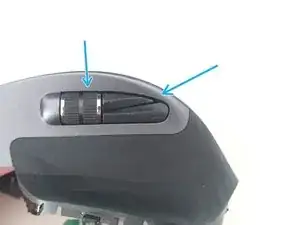
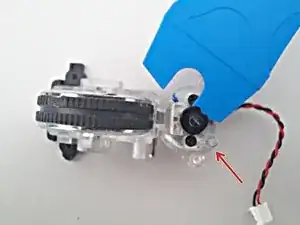
Retira los tornillos que sujetan todo el mecanismo de desplazamiento y dos botones laterales. También quitamos la mayoría de los tornillos que sujetan el botón de clic derecho.
-
Presiona suavemente el scroll desde el exterior del mouse, tira hacia arriba del interior de la pieza, te puedes ayudar con una palanca de plástico, pero no es necesario, toda la acción que sea muy suave, para no dañar los cables y el mecanismo
-
-
-
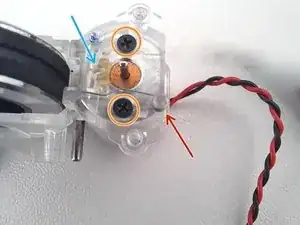
Retira los tornillos que sujetan los botones y el scroll.
-
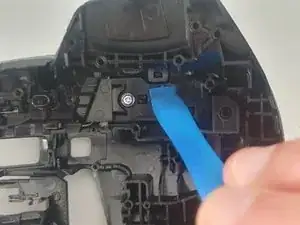
Usando una palanca o una cuña de plástico, termina de desarmar el scroll.
-
Luego retira el tornillo que sujeta la placa con los circuitos.
-
-
-
Desatornilla el tornillo que sujeta el botón.
-
Al retirar el tornillo, tira suavemente del botón hacia adelante.
-
-
-
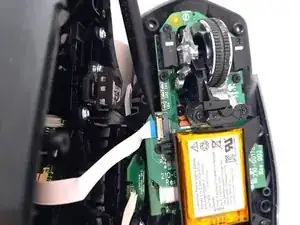
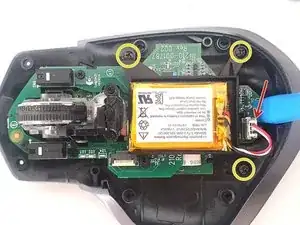
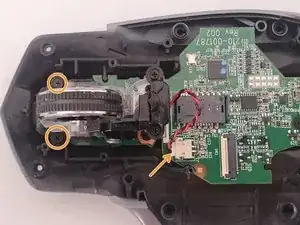
Desatornilla los tres tornillos del soporte de la batería y retira la conexión a la placa base.
-
Retira los tornillos de una de las dos placas electrónicas.
-
-
-
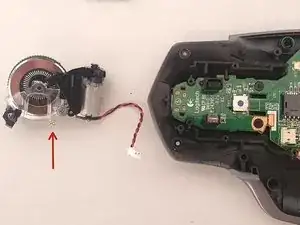
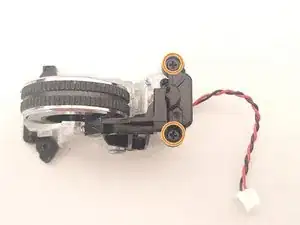
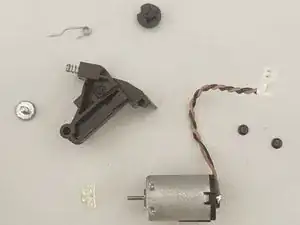
Retira los dos tornillos que aseguran la cubierta del rotor del motor y luego retira la cubierta con cuidado.
-
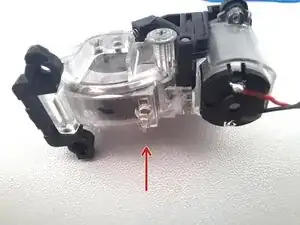
Quita el tornillo que sujeta la pieza de plástico. Ten en cuenta que para quitarla debes quitar con cuidado el pequeño resorte que la conecta al soporte transparente donde descansa la rueda de desplazamiento.
-
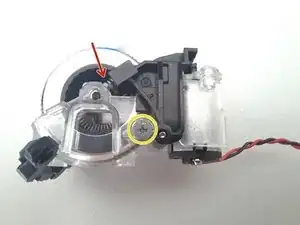
Desmonta el rotor o la cabeza del motor haciendo palanca muy suavemente con una herramienta de apertura iFixit u otro instrumento. Ten en cuenta la posición en la que estaba antes de desmontar, ya que solo tiene una posición para montar.
-
-
-
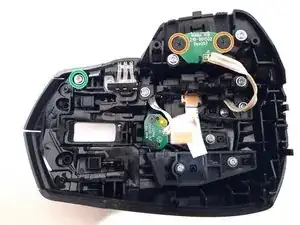
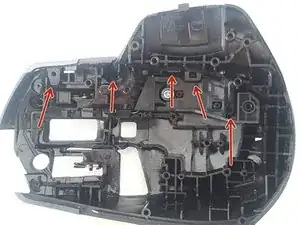
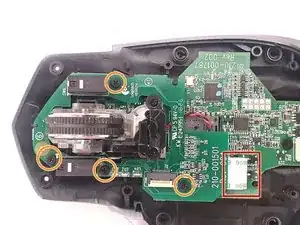
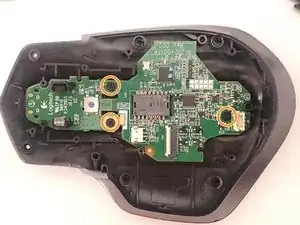
Retira los tres tornillos que sujetan la placa base.
-
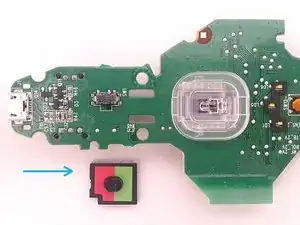
Retira el botón de encendido y mira la posición como estaba
-


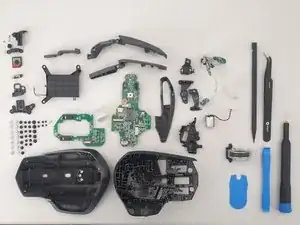
Para volver a armar tu dispositivo, sigue estas instrucciones en orden inverso.
22 comentarios
I’m not sure I see any reason why anyone would to this and risk it being ruined. In other words, what are the potential benefits? Cleaning?
Yup cleaning that scroll wheel, and maybe even the switches if your really dirty. 15 min made my mouse new again
Hello!! It is a spectacular product, with its mistakes (nothing is perfect ;)). The fundamental objective of this guide is simply to answer the question How does it work, what is inside? It can serve as a guide to clean it (either both scrolls or the button contacts), change the battery, etc. Everything that can contribute to extend its useful life much more.
Read the name of the site
Used this guide to clean my scroll wheel, took me 15 min, super easy. Didn’t need to remove anything, just opened it up and disconnected the 1 ribbon cable from the top half.
I used some clear tap folded on itself and ran it through the scroll wheel a few times. Only a bit of dust came out but the difference is crazy, its totally free spinning now.
Stop convincing yourself your scroll wheel is fine, open it up, clean it out and its even better.
Thanks iFixit
It’s actually a REALLY good mouse
if the problem is that the scroll wheel spins freely, the button next to it controls that.
Rob Miller -
The stickers have two layers. To avoid de-laminating them, stick a sharp, flat object underneath the edge of the sticker and try to carefully pry up all of the material at once.
Maddison Hellstrom -