Introducción

Esta es una guía de prerrequisito. Esta guía es parte de otro procedimiento y no necesita utilizarse sola.

  1. 21LJYnUT534diPkY
    • Voltea la PS4 al revés con la parte trasera hacia ti.

  2. kywHHmkOcswPFDjm
    kywHHmkOcswPFDjm
    g3p1nmGqDLvNYlwD
    HVJTWJOoL6cUcoBS
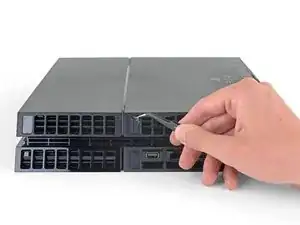
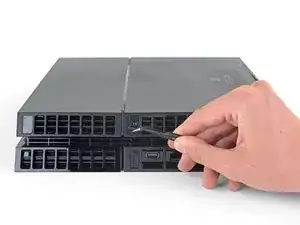
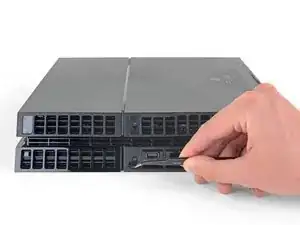
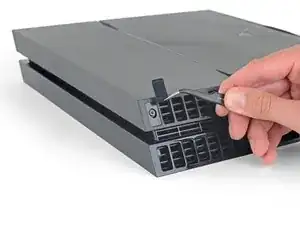
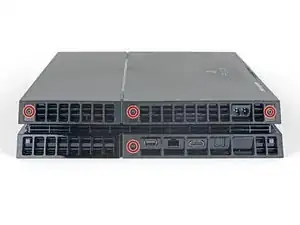
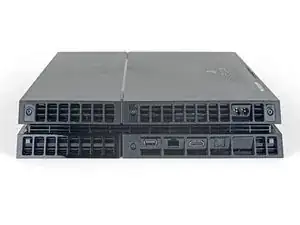
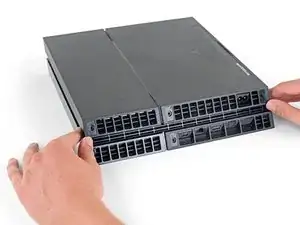
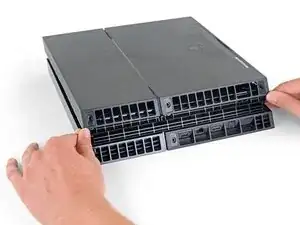
    • Usa pinzas para quitar las dos pegatinas en el centro de la parte trasera de la PS4 exponiendo dos tornillos de la caja.

  3. QGDNpTn4LrZHSr2F
    QGDNpTn4LrZHSr2F
    MLVk3bQRWjJpjhKh
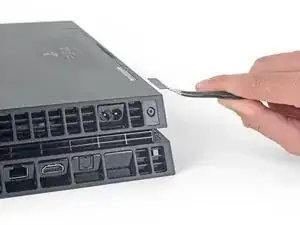
    • Usa pinzas para quitar con cuidado las cubiertas de plástico de los tornillos en cada esquina, exponiendo dos tornillos más de la caja.

    What If my PS4 doesn't have the two screws on the side

    Michael Jimenez -

    I should imagine that plastic cover will come off?

    How did you go?

    Cary B -

  4. EoWfJjtMRGNijIDA
    EoWfJjtMRGNijIDA
    kPwQlcOBVwv2PxuA
    • Quita los cuatro tornillos de seguridad Torx de 7.2 mm de la parte trasera de la PS4.

    I only have two screws, those in the middle of the console.

    Oscar Martinez -

    Have you removed the plastic covers mentioned in the previous step? That will expose the other two screws.

    Sam Omiotek -

    same, here. there are only the middle screws, no covers or screws on the sides. and it sits pretty tight

    Johannes Müller -

    turns out 12XX models are different. Look at this for reference: https://www.youtube.com/watch?v=Hpr0z0ve...

    Johannes Müller -

    Yes there is slight variations between the first models, and the second gen and on models. I have an original and only has the two screws in the middle, removal of the cover remains the same.

    Mary Westphal -

  5. kbpHqgpXdtdVifwo
    kbpHqgpXdtdVifwo
    gtKNupdgQ44yDPVf
    • Usa tus pulgares para levantar la carcasa inferior y sacarla de la PS4.

    • La carcasa inferior se mantiene en su lugar mediante clips de plástico. Es posible que debas usar mucha fuerza para liberar la caja inferior.

    sur la version 2 de l ps4 fat il n'y a que les 2 vis du milieu. Comment défaire le boîtier ?

    nlvolle -

  6. coGRVtdMr6vYQIWw
    coGRVtdMr6vYQIWw
    BGP5HaSrJNavVLaN
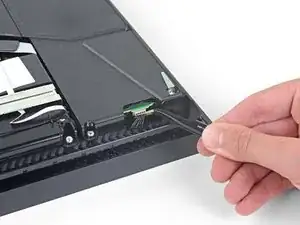
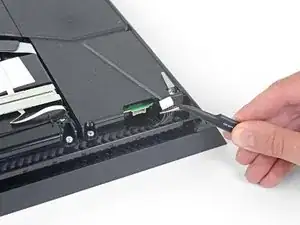
    • Usa un par de pinzas para sacar el cable de la fuente de alimentación y desconecta la fuente de alimentación de la placa madre.

    • Si notas el conector atascado, utiliza un spudger para hacer palanca suavemente para sacarlo.

    This part looks dangerous. There should be a flag/warning not to destroy that cable yes?

    Shawn -

    I second Shawn's comment. That cable seems to be very fragile, and one of the wires snapped on mine while removing the cable. It wouldn't have bothered me so much, if it wasn't a pain to find a replacement for it.

    Matt Gaia -

    The tweezers used here, do not cut it. Not enough grip.

    I had to use a set of needle nose pliers to remove this.

    Cary B -

    Power supply connection stuck. I don't want to damage it

    Nick Alex -

    What you need to do here is be patient. Do not pull the wires. Get some fine nosed pliers, wiggle the white connector from left to right in small movements and edge it out slowly. You can also use your nails one finger at each edge of the white connector to do this.

    David Harkness -

    Its really hard but i managed it with both of the tweezers/pincers at the same time


    1. Keep in mind to pull not too hard on the wires and make step 2 and 3 simultaneously!

    2. the straigt and wider tweezer to pull the white connector itself
    (top and bottom grip)
    3. the small and angled tweezer to pull the wires carefully
    (as shown on the picture above)

    dinkelberg01 -

    Another option, is to remove the screws holding it down, leave the cable in place and lift it out carefully, revealing the other end of the connection. The hidden side of the connection wire is easier to get a handle on.

    Mary Westphal -

    I concur with David, some patience and a lot of wiggling did it for me despite the stubbornness of the connection. Does seem like this one varies a lot in how difficult it is to remove.

    hazelrat -

  7. EcgmyieGDdcMElOU
    EcgmyieGDdcMElOU
    oES1wXquYuIymPTQ
    • Usa la punta de un spudger para desconectar el cable de antena de la placa madre.

    dumb question but I’m very new to this. when reconnecting the wifi antenna, does it just click back on? I'm hesitant to try this procedure if I need to solder anything since I have zero experience.

    cliodhna -

    Yup! Hold it in place and press straight down on top of it with your finger or a spudger. If you have any other cable/connector questions see this guide.

    Sam Omiotek -

    Heads up, you might have a black philips screw above the power connector. It fixes the motherboard and EMI shield on if you're dealing with an 1100 model.

    Dzmitry -

  8. MCxbfUY6UaKrmKCQ
    MCxbfUY6UaKrmKCQ
    TVMGZOKQUI53asHY
    62BX2LGhKLgvIJmY
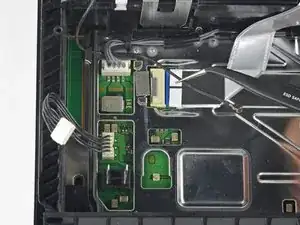
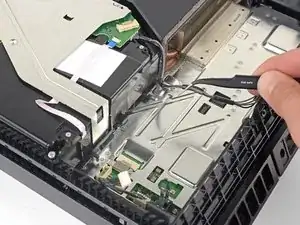
    • Usa un par de pinzas en tus dedos para tomar el cable de antena y alejarlo delas guías del cable.

  9. UPXA4VifbGFrvlIj
    UPXA4VifbGFrvlIj
    nXPq5UZ6AQwMh4aU
    M33e21yyIJ6ZAGlc
    • Usa un par de pinzas o tus dedos para pasar el cable de antena por debajo del cable del disco óptico.

  10. MIQAcQeKr1eTTVwf
    MIQAcQeKr1eTTVwf
    NxEPgJZruCIGLEhI
    • Remueve el tornillos Torx security de 9.7 mm que sujetan la antena.

    This does not work on the newer 12 series

    raseemhassan123 -

    Thank you! I thought I was insane. I've been trying to figure out where the hell this thing goes and the seat for it is like an inch from the corner. It's driving me mental trying to figure out how to put this back on

    Leo Halliwell -

  11. GUboTTDfFRGvEiF1
    GUboTTDfFRGvEiF1
    LiMR2mf1HehdEOsR
    • Remueve la antena Wi-Fi.

    When I’m connected to wifi it does good for awhile then it disconnects from the wifi and I can’t use the controller. I have to turn the game off and disconnect power source. Do you think the wifi antenna could be the problem or doin have another situation.

    Jay Pax -

    I would check the antenna connection to the motherboard, if it's properly seated I don't think it's the problem.

    hazelrat -

  12. UtJl22epDDxnDmXK
    UtJl22epDDxnDmXK
    EApjrGivEtJ2BSL2
    BdKvel4uAd3DTKJf
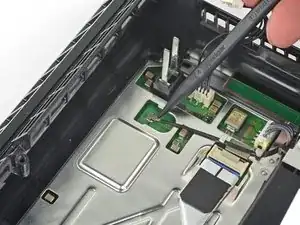
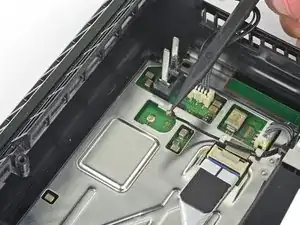
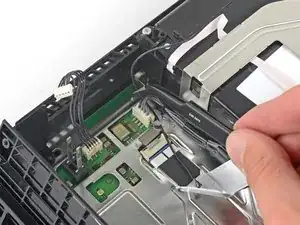
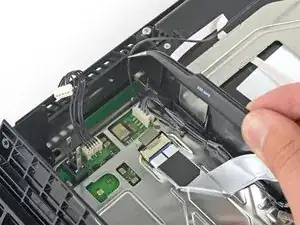
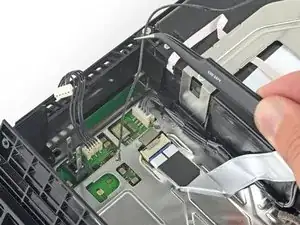
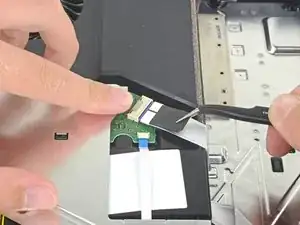
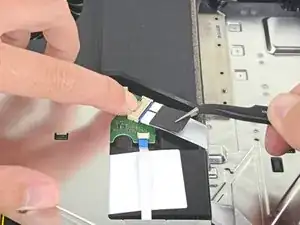
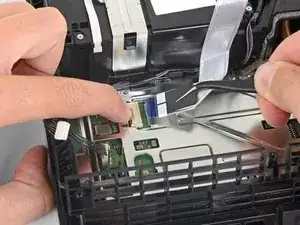
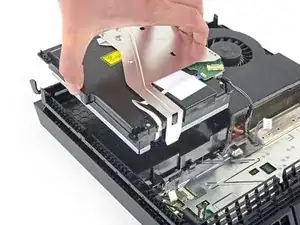
    • Usa tu uña para presionar la palanca metálica de liberación del cable plano en la parte superior de la unidad óptica.

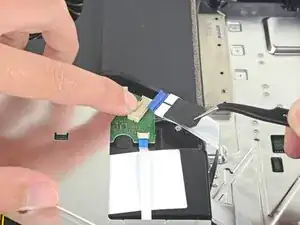
    • Usa tus dedos o un par de pinzas para desconectar el cable de cinta tirando de la lengüeta negra.

    • No es necesario que presiones la palanca metálica cuando vuelvas a insertar el cable de cinta. Oirás un clic una vez que esté completamente insertado.

    Please note that the younger generations of PS4 have a different setup of connectors to the driver, its sometimes 3 of these as presented but with different sizes and no pad to press down. However, dont be alarmed, just use the pair of tweezers and gently pull them off the connectors of the motherboard. Grab on tight on the blue area of the ribbon cable and pull gently! They tend to sit tight so take some time and patience on this.

    Mathias Kopp -

  13. 1LvBVqmqpBYstDEE
    1LvBVqmqpBYstDEE
    iTpPFQ2FtODogYS2
    GpRFwcaYGWPInGpL
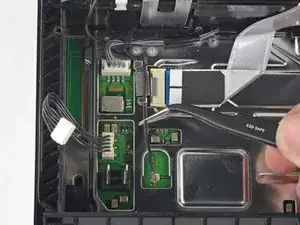
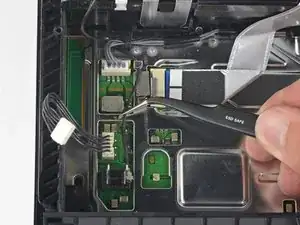
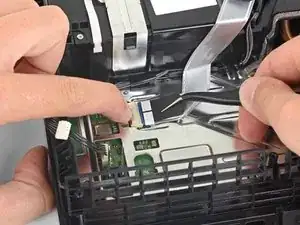
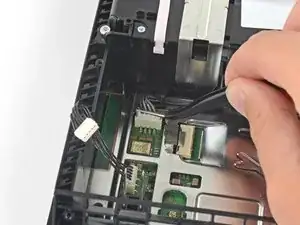
    • Usa tu uña para presionar la palanca metálica de liberación para el cable de cinta conectado a la placa madre.

    • Usa tus dedos o un par de pinzas para desconectar el cable plano tirando de la lengüeta negra.

    • Deja el cable plano a un lado para volver a montarlo.

    • No es necesario que presiones la palanca metálica cuando vuelvas a insertar el cable plano. Escucharás un clic una vez que esté completamente insertado.

    bei mir ist das leider defekt Plastikteil abgebrochen wie kann ich das ersetzen

    kevin pospiech -

    Is it possible to buy the white port for ps4? My one seems to be damaged so won't hold the ribbon cable.

    dorszes -

    This may be a difficult fix, as the white port seems to be integrated into the motherboard. You could try simply holding the ribbon cable down with electrical tape, if it's just a fitting issue?

    hazelrat -

  14. TeTMAoimw4tWu3an
    TeTMAoimw4tWu3an
    Z4EVnPGtququsxGP
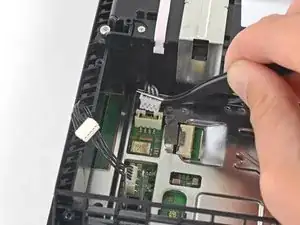
    • Usa tus dedos o un par de pinzas para desconectar el cable del disco óptico de la placa madre.

  15. VHP4L4gyrtPc5nC1
    VHP4L4gyrtPc5nC1
    1B43RCFxNHTSVdLf
    bLYmLS4WOufOyEwM
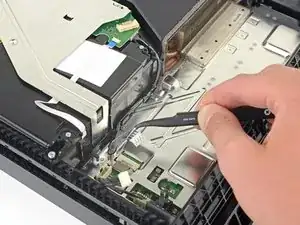
    • Usa tus dedos o un par de pinzas para remover el cable del disco óptico de las guías de cable que lo mantienen en su lugar.

  16. roUPxyMotoTmVYpU
    roUPxyMotoTmVYpU
    JbWvkobm2uRPxtZQ
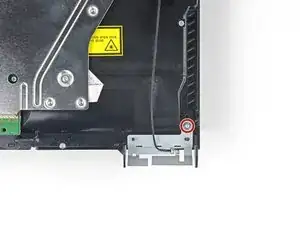
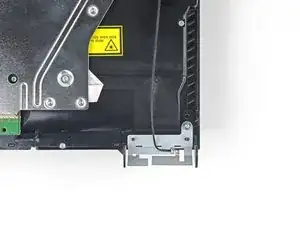
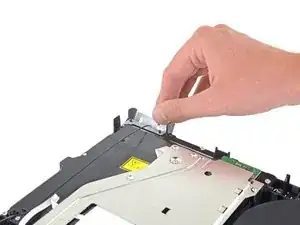
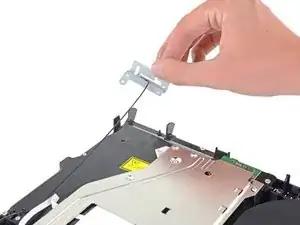
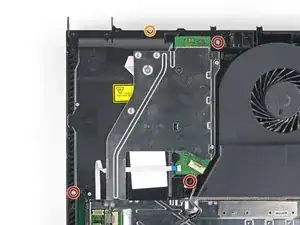
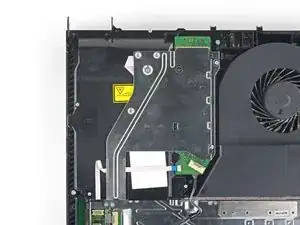
    • Remueve los cuatro tornillos que sujetan el disco óptico.

    • Tres tornillos Torx de 9.7 mm

    • Un tornillo Phillips de 6.2 mm

  17. 6O3MEDhAAGCqpqRa
    6O3MEDhAAGCqpqRa
    GxXAvyXwtYHZISCU
    • Levanta el disco óptico directamente de la PS4.

Conclusión

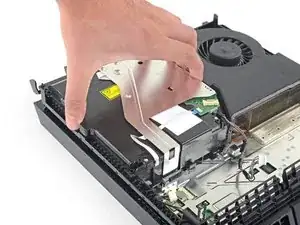
Para volver a montar el dispositivo, siga los pasos anteriores en orden inverso.

Lleva tus desechos electrónicos a centro de reciclaje certificado.

¿La reparación no salió como planificaste? Consulta nuestra comunidad de respuestas para ayuda en la resolución de problemas.

Compara tu parte de reemplazo nueva con la parte original. Puede que tengas que transferir los componentes restantes o remover los respaldos adhesivos de la parte nueva antes de instalar.

Sam Omiotek

Miembro Desde 25/02/19

59803 Reputación

0 comentarios