
Introducción
Hay muchos beneficios al agregar un segundo disco duro a tu computadora portátil, como velocidades mejoradas, mayor espacio de almacenamiento y menos dolores de cabeza al instalar un nuevo software. Utiliza esta guía para instalar uno utilizando nuestra carcasa de disco duro de puerto óptico.
Herramientas
Partes
-
-
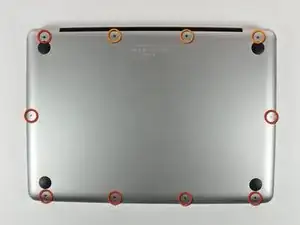
Retira los siguientes 10 tornillos que sujetan la tapa inferior del MacBook Pro 13 "Unibody:
-
Siete tornillos Phillips de 3 mm.
-
Tres tornillos Phillips de 13,5 mm.
-
-
-
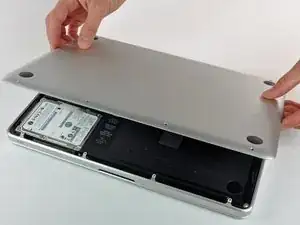
Levanta ligeramente la tapa inferior y empuja hacia la parte posterior para liberarlo de las pestañas que lo sujetan
-
-
-
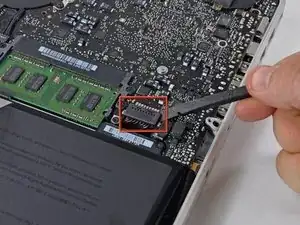
Utilice el extremo plano de un spudger para levantar el conector de la batería hacia arriba fuera de su toma en la placa lógica.
-
-
-
Retira el acolchado suave que puede estar en la parte superior y tira suavemente del conector para sacarlo de su zócalo en la placa lógica.
-
-
-
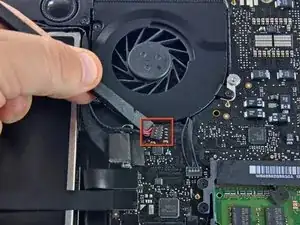
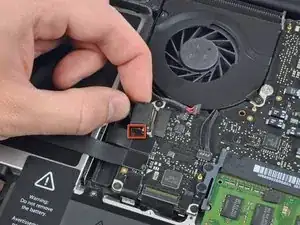
Tira del conector del cable de la cámara hacia la unidad óptica para desconectarlo de la placa lógica.
-
-
-
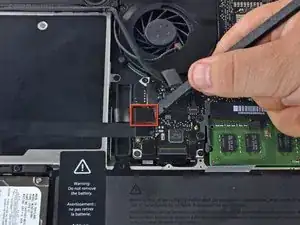
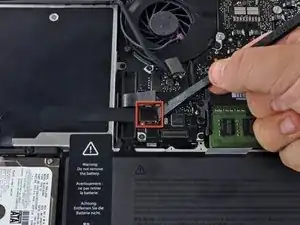
Usa el extremo plano de un spudger para sacar el conector de la unidad óptica de la placa lógica.
-
-
-
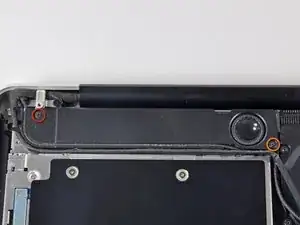
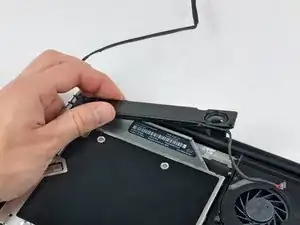
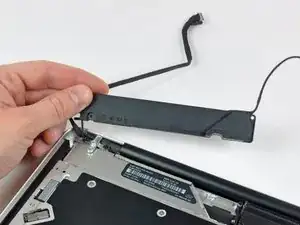
Remueve los siguientes tornillos que aseguran el altavoz a la tapa superior
-
Un tornillo 3.8 mm Philips
-
Un tornillo Philips 5 mm
-
-
-
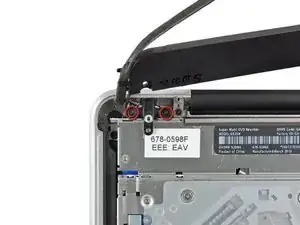
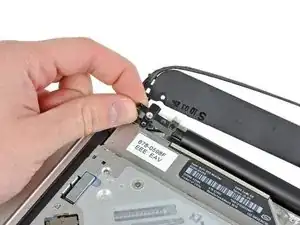
Remueve los dos tornillos Philips de 10 mm que aseguran el soporte del cable de la cámara a la tapa superior.
-
Levanta el soporte del cable de la cámara fuera de la tapa superior.
-
-
-
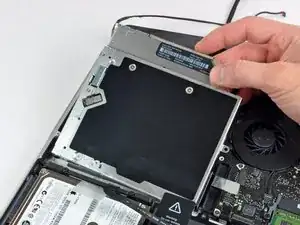
Remueve los tres tornillos Phillips de 2.5 mm que aseguran la unidad óptica a la tapa superior.
-
Levanta la unidad óptica desde la esquina derecha y retírala de la computadora.
-
-
-
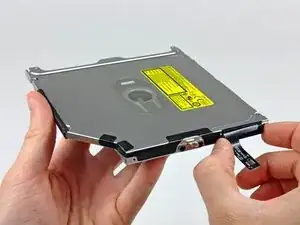
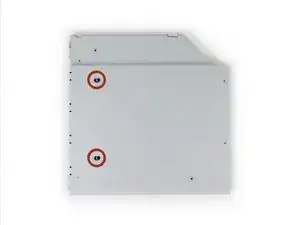
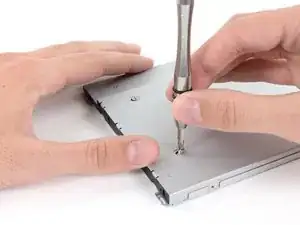
Retira los dos tornillos negros Phillips #0 que sujetan el soporte de montaje de metal pequeño. Transfiere este soporte a su nueva unidad óptica o caja de disco duro.
-
-
-
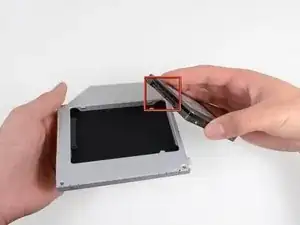
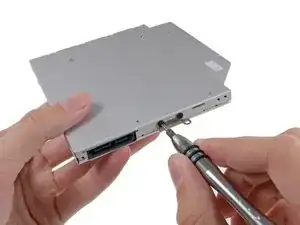
Retira el separador de plástico de la bahía del disco óptico presionando los cierres a cada lado, levántalo y sácalo de la bahía.
-
-
-
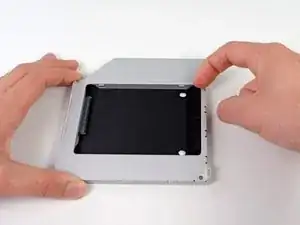
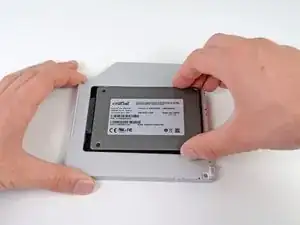
Asegúrate de que los conectores del disco duro miran hacia abajo antes de colocarlo en el hueco de la bahía.
-
Coloca con cuidado el disco duro en el hueco insertándolo en la ranura.
-
Mientras sujetas la bahía con una mano, presiona el disco duro con la otra mano para insertarlo en los conectores.
-
-
-
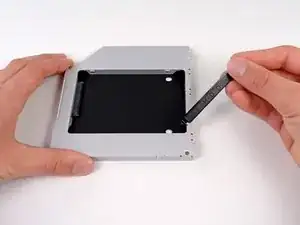
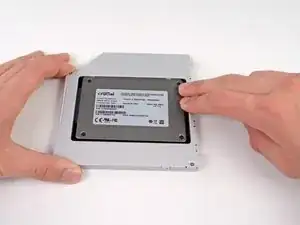
Una vez has ajustado el disco duro en su sitio, reinserta hasta el fondo el espaciador de plástico en el hueco.
-
-
-
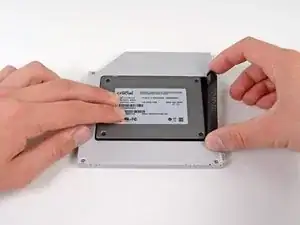
Fija el soporte del disco duro a la nueva bahía con dos tornillos Phillips #0.
-
Reconecta todos los cables que hayas desconectado del lector de discos ópticos original a la nueva bahía.
-
-
-
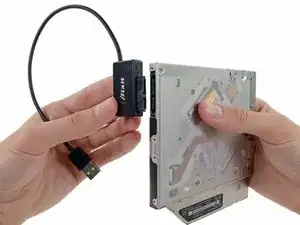
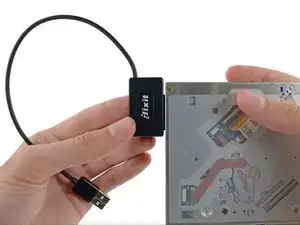
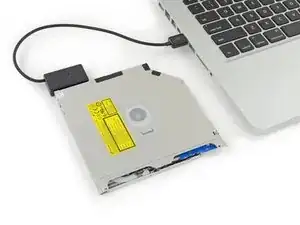
Alinea el conector SATA del cable con el puerto del lector y conéctalo cuidadosamente.
-
Conecta el conector USB a tu portátil. Tu lector óptico está listo.
-


Para volver a ensamblar tu dispositivo, sigue las instrucciones en orden inverso.

4 comentarios
I bought a 1TB SSD/hybrid drive from Ifixit.com to upgrade the 256GB HDD that came with MBP 2010. Disk Utility could not see the new drive on the original HDD cable but saw the old one just fine. New replacement cable was not the correct size for the MBP 2010 but worked just fine in my other MBP 2012. Put the stock HDD back in with the original HDD cable, removed the optical drive and replaced with the 1TB dual drive per instructions without problems. I have read online that the SATA HDD cable in MBP 2009 and early 2010 was too slow to read modern high-speed SATA drives.
Only glitch I found is DVD/CDs will not mount in the optical drive using the external USB cable that came with the dual disk kit purchased here. Will eventually have to find time to try swapping the optical drive with my other laptop to test internally as well as the external cable. At this point I don't care, didn't use the optical, love the two working internal disk drives. Thanks guys!
Bob -
I replaced Primary HDD with SSD and moved HDD to optical slot with caddy, and it seems works, but HDD in optical slot is incredibly slow now. Macbook 7.1. Sierra. SSD Savage 250Gb.
Smoooooth, like butta. Thanks for another great guide and parts. My 2010 macbook pro now has an ssd running fast w sierra, and my conventional drive for lots of storage. About $200 for ssd and the parts, and my computer will be in good shape for a few more years!
Compare the short screws carefully before reinstalling them. The shouldered screws go in the holes on the front edge.
David Kilbridge -
Before I started removing any screws I took a piece of paper and drew the bottom of the laptop and put a piece of double-sided tape in the spot where each screw goes. That way when I took out the screws, I could put them on the tape so I knew exactly which screw went in which spot. I did the same thing for dismantling the inside on another sheet of paper, then a third sheet for the screen after getting the front glass off.
mastover -
I use a similar technique: I print out the iFixit manual for the job, and Scotch-tape down the screws/brackets/cables I remove at each step next to the component descriptions. That way, when I'm reassembling, the bits are taped right next to the photo of where they came from.
adlerpe -
That's exactly what I do for all my repairs! It's the best way to keep track of all of the parts ' original location and to make sure that you don't miss any parts during reassembly.
joyitsjennie -
Great idea and one I use often
Thomas Overstreet -
Excellent idea! Thanks for sharing it here.
Laura Sharkey -
I used a 00 that fit but the screws were very tight so I used a tiny paintbrush with some wd40 on it and put it around the edges of the screws. Worked like a charm
valentinedhdh -
I use a magnetic mat and place the screws in order on that :)
Cary B -