Introducción
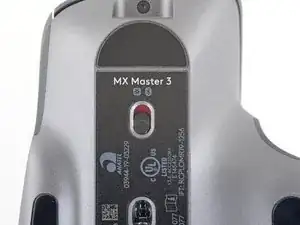
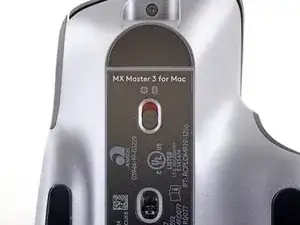
Use this guide to replace the battery in a Logitech MX Master 3.
This guide requires removing the mouse feet. If you’re planning to reuse your existing mouse feet, note that the adhesive needs to be thoroughly heated for them to be cleanly removed.
-
-
Flip the mouse's power switch into the OFF position, unplug any cables, and flip it over so the feet are facing up.
-
Heat an iOpener and apply it to the left foot for about two minutes.
-
-
-
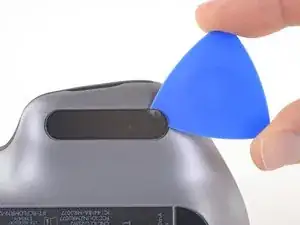
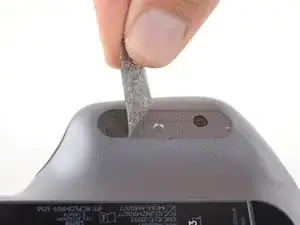
Slide an opening pick under an edge of the left mouse foot.
-
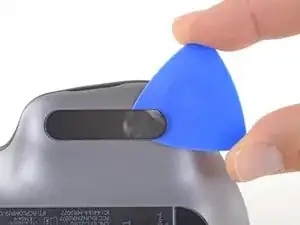
Slide your pick under the foot to separate its adhesive until you can grab it with your fingers.
-
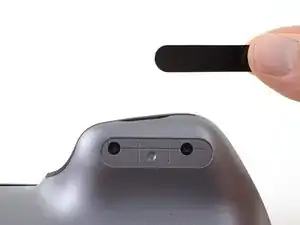
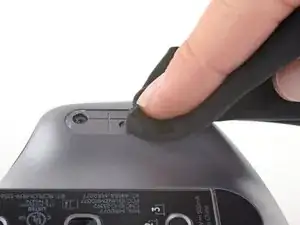
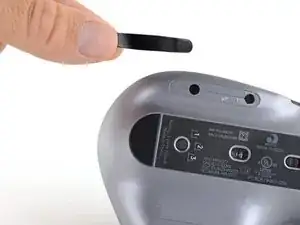
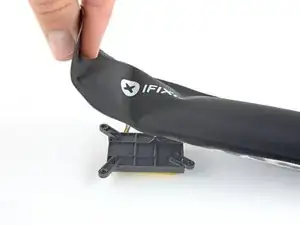
Peel up and remove the left mouse foot.
-
-
-
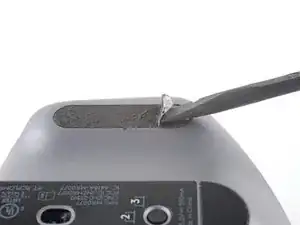
Slide the flat end of a spudger under an edge of the adhesive. If the adhesive seems stuck, you may need to heat the adhesive further.
-
Use a pair of tweezers or a spudger to remove any large chunks of leftover adhesive.
-
Thoroughly clean the bottom of the mouse with isopropyl alcohol and a lint-free of microfiber cloth. Allow the surface to dry completely.
-
Peel your new mouse feet away from their adhesive liners and press them firmly into place.
-
-
-
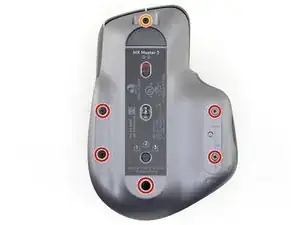
Remove the six screws securing the two halves of the mouse together:
-
Use a Phillips screwdriver to remove five 4.3 mm screws.
-
Use a T5 Torx driver to remove the 4.2 mm screw.
-
-
-
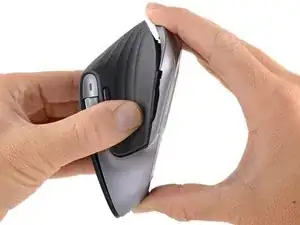
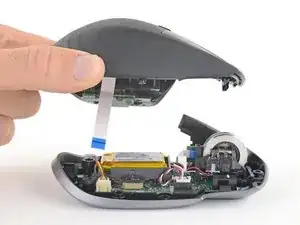
Grasp the mouse case at the back and pull the two halves apart slightly, so there's a gap at the back of the mouse.
-
Move one hand toward the front of the mouse and continue pulling the two halves straight apart.
-
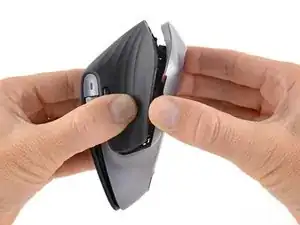
As you reach the front of the mouse you will need to slide the base toward the front of the mouse (down in the photos) so that the two halves clear each other.
-
Some of the clips are particularly stubborn and may require some force to pull apart. Apply steady, slowly increasing pressure to force the halves away from each other.
-
-
-
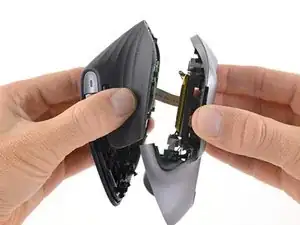
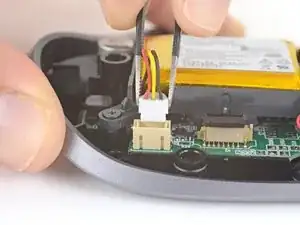
Use the flat end of a spudger to gently lift the black sliding lock on the interconnect cable socket until it stops and the cable is no longer locked in.
-
Slide the interconnect cable out of its socket on the motherboard.
-
-
-
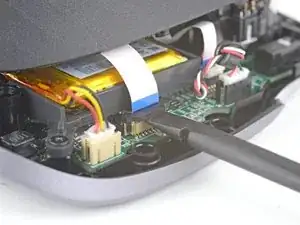
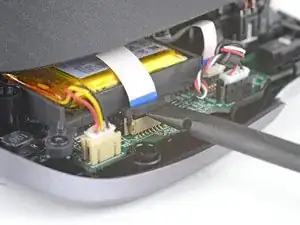
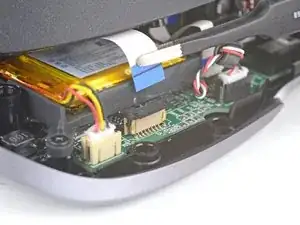
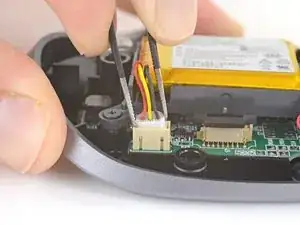
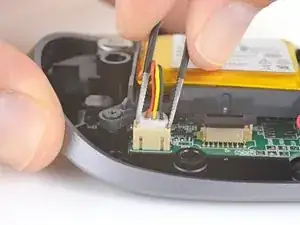
Use a pair of tweezers to grip the top of the battery connector.
-
Gently rock the connector side to side and pull it out of its socket.
-
-
-
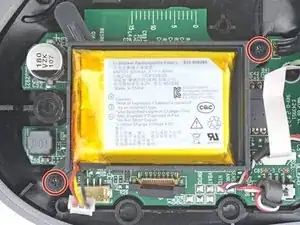
Use a Phillips screwdriver to remove the two 3.5 mm-long screws securing the battery housing.
-
-
-
Flip the battery housing over so the battery is facing down.
-
Apply a heated iOpener to the battery housing for about 2 minutes to soften the battery adhesive.
-
-
-
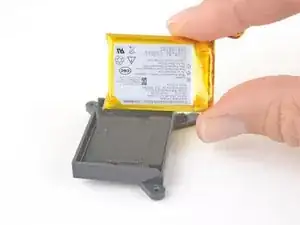
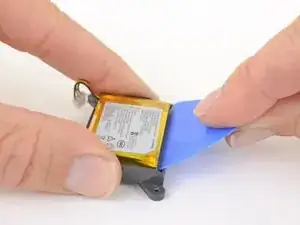
Insert the long edge of an opening pick between the battery and its housing at the side opposite the battery cable.
-
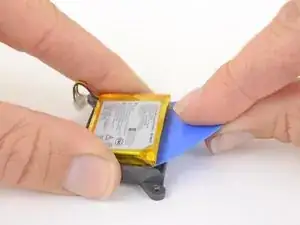
Push the opening pick under the battery and lift up to pry the battery out of its housing.
-
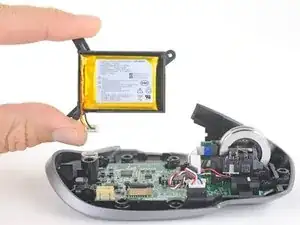
Remove the battery.
-
Use a spudger or your fingers to peel any old adhesive off of the battery housing. The old adhesive shouldn't leave any residue.
-
If your new battery doesn't come with preinstalled adhesive, place a couple strips of double-sided tape into the battery housing. Press the battery firmly into place to secure it.
-


Compare your new replacement part to the original part—you may need to transfer remaining components or remove adhesive backings from the new part before installing.
To reassemble your device, follow the above steps in reverse order.
Take your e-waste to an R2 or e-Stewards certified recycler.
Repair didn’t go as planned? Check out our Answers community for troubleshooting help.

3 comentarios
Pretty straight forward manual. Is there also a manual or spare parts available for the scroll wheel and/or its parts?
Hi! any clue of where to buy the replacement battery?
On Amazon or AliExpress. Google for 652535