Introducción

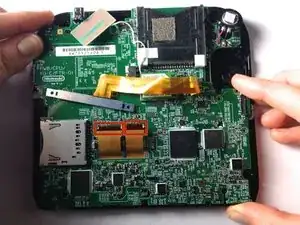
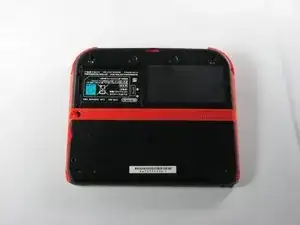
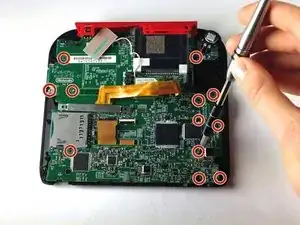
La placa principal recoge toda la circuitería interna del modelo 2DS, y se debe extraer con sumo cuidado. Asegúrate de no estropear ningún tornillo, porque impediría extraer la placa.

  1. wg4RTxdhgZNOVaab
    • Retire los dos tornillos cautivos Phillips que aseguran el panel superior trasero.

    • Los tornillos cautivos no se separan del panel trasero completamente.

  2. cdb3AdyJTrNhIjrr
    cdb3AdyJTrNhIjrr
    okYxlIGDUBKBdGNP
    • Gire el panel posterior superior hacia arriba y hacia afuera para quitarlo.

  3. YA2mNvc2fLpeZ4NZ
    YA2mNvc2fLpeZ4NZ
    yjKMPFAO1SC1LncE
    HRaiAoWcVXEMByll
    • Retire la batería de su espacio levantándola del lado más cercano al borde exterior.

  4. vkEjnCVvCfkcXpKn
    • Retira los diez tornillos Phillips que sostienen el panel posterior de la consola.

    Can't take off the screw top left next to the battery. What type of screwdriver do I use and where can I find some?

    Little Mac -

    I used a husky with changeable heads, you could probably find one on amazon

    Minecrafter Pig -

  5. ona5d6XElywnV2F6
    • El panel trasero está sujetado a la placa madre por un cable plano, así que ten cuidad de no levantar el panel trasero demasiado lejos del dispositivo.

    • Con cuidado, levanta el panel hacia arriba.

  6. nCtU5fTtc3gYBBVe
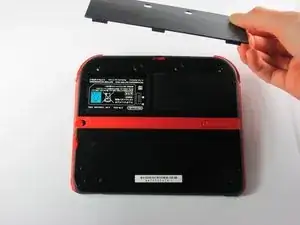
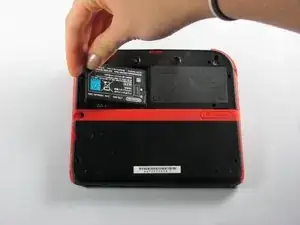
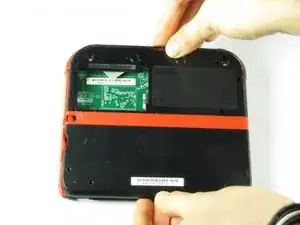
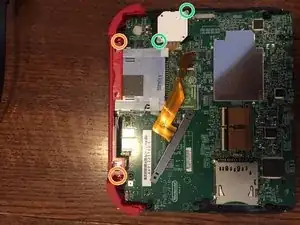
    • Con cuidado, da vuelta el panel trasero para localizar el cable plano.

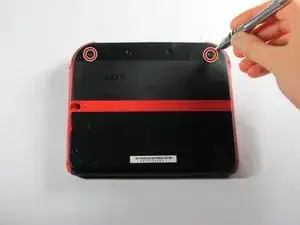
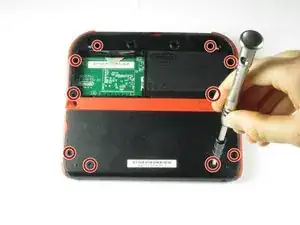
    • Remueve los dos tornillos Phillips que sujetan el cable plano al panel trasero.

    • Remueve los gatillos izquierdo y derecho. Tiene bisagras que podrían romperse y resortes que podrían salirse.

    You can also detach the cable from the motherboard safely by flipping up the connector on the motherboard. Just don't forget to reattach. Some will find this tedious but may save time if you know what you're doing with said connectors.

    Blackbeard -

    I agree, this is what the guide i followed said to do and since I was disconnecting all the other ribbon cables it made perfect sense to do it that way.

    Lin -

    pay attention: my 2ds dropped it's lens covers at this step

    Jos van Reenen -

    Likewise, I used a tiny drop of glue to put the lens back in place. Take care not to dirty the lens.

    Elliot West -

    The picture you have there has the camera lens ribbon installed upside down. The ribbon needs to be pointing down when you re-attach it not up.

    Rick Parrish -

    Agreed, ribbon cable looks upside down in picture

    Elliot West -

  7. Qojp1OOvIUVTUr1u
    Qojp1OOvIUVTUr1u
    OuYdgcEvDLpnQV5M
    • Sujeta los paneles laterales con los dedos y retíralos hacia los lados.

    • Los paneles se deben poder retirar con suavidad.

    When reattaching during reassembly, take great care to ensure volume slider piece is correctly aligned with potentiometer tab on motherboard, otherwise volume control cannot be changed.

    Elliot West -

    The are two small metal pins in the bottom corners of the case, take care not to misplace them.

    Elliot West -

    The (3?) small ribbon cables on the bottom of the motherboard appear to already have been unplugged in this step. unplug them while unplugging the two large screen ribbon cables in step 10

    Lin -

  8. 32gGatrJYXi2eqcW
    • Extrae los doce tornillos bronceados que sujetan la placa principal.

    • Sé muy cuidadoso de no estropear ningún tornillo. Esto podría dejar inaccesible la sustitución de la placa.

    ...also in this step, the pictures show the analog stick disappearing without a step to remove its two silver screws.

    Roger -

    I was using a brand new 000 driver, and found that I needed to dull the tip of it in order to get a better grip on these tiny screws.

    marjames -

    I dont know if its just me but my gold mother board screws i had a few that just didnt fit right with a ph000. Maybe my screw driver is just garbage?

    Mark Damien English -

  9. drj5COHLRB5bNu4x
    drj5COHLRB5bNu4x
    a5TIRFcWDcCjkH4k
    QFD1osmhxQpPJTkF
    • El panel superior sólo se puede extraer cuando la placa principal está liberada.

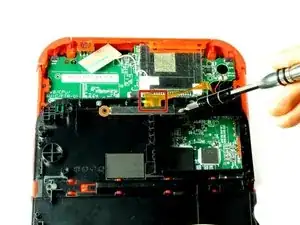
    • Hay dos tornillos adicionales situados en el carril superior. Extráelos para sacar por completo el carril superior y los botones.

    • Hay dos tornillos sujetando la base del joystick que deben ser extraídos (Ten cuidado con el cable flexible que aún permanece conectado)

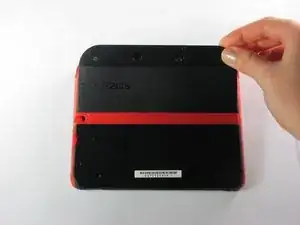
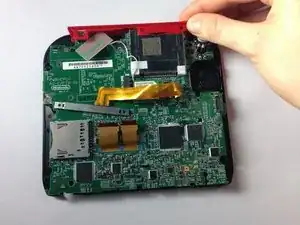
    • Sujeta el panel superior con los dedos y retíralo de la carcasa.

    • El panel superior debe ser fácil de retirar, aplicando poca fuerza.

    There are two additional brass screws holding the top panel plastic on to the frame. They are 00 Philips and shorter than the ones securing the motherboard.

    Roger -

    When reassembling, take care to ensure all buttons, and rubber button pads are located correctly BEFORE securing the motherboard.

    Elliot West -

  10. JKQgNplHbIPXEZdK
    JKQgNplHbIPXEZdK
    14GOAGZYrKXdPMfo
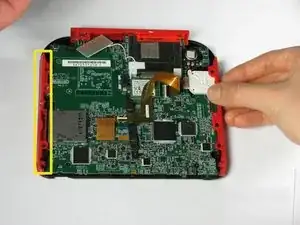
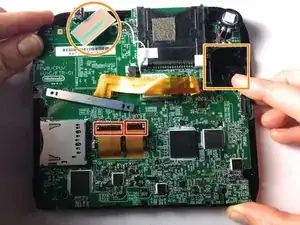
    • Separa los dos cables flexibles liberando las pestañas negras que los sujetan.

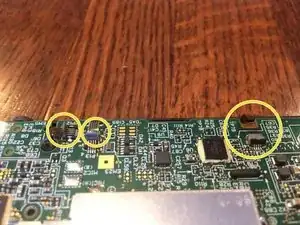
    • Extrae el plástico rectangular y el cuadrado blanco que son parte del joystick (requiere algo de presión). Ambos están sujetos a la placa principal.

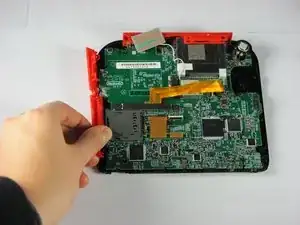
    • En algunos modelos, necesitarás extraer tres cables mas finos en la parte inferior de la pantalla. Están sujetos por pestañas. ¡SÉ CARIÑOSO!

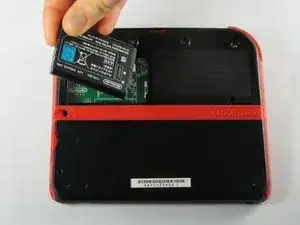
    • Sujeta la placa principal por un lado, y extráela.

    Don't forget to disconnect the two tiny ribbon cables on the bottom of the motherboard that attach to the microphone and home button.

    Roger -

    What happens if I can't get the ribbons to reattach? Is the board broke irreparably?

    Laurie Hutcherson -

    ...as well as the hidden 4-conductor ribbon cable on the upper right that connects to the analog stick.

    Roger -

    What about the top 2 wires

    briana1987be -

    Briana the 3 wires on bottom of board are covered under screen 2 step 10.

    goldenkenneth -

    y e e t y e e t m y d u d e s ! ! ! ! ! ! ! ! ! !!n ! ! ! ! ! ! ! ! ! !

    scoobert doobert -

    The replacement board that I’ve got has not got a grey plastic flip down ribbon cable retainer! How do I swap one from my old board?

    JoeStoner -

    The motherboard of my 2017(I think) 2DS is definitely laid out differently than in this guide, be careful.

    Matthew D. H. -

    Cosa succede se i connettori dei 3 piccoli cavi piatti si dovessero rompere??

    00 Jumpscare -

    How do I flip up the two ribbons ( need help desperately)

    Abbigail Brogden -

Conclusión

Para montar este dispositivo, sigue estas instrucciones en orden inverso.

Fina Beauchamp

Miembro Desde 12/01/15

2864 Reputación

11 comentarios

o meu 2ds esta com um defeito que, quando eu aperto o botão de power ele liga e apos alguns segundo desliga e faz um pequeno barulho.

thiagopereira10000 -

Would a jis #000 screw driver work better? As i tried a ph +000 and the gold motherboard screws just dont fit right

Mark Damien English -

I have a question. After I replaced the mother board I have been having issues with it freezing after a couple mins running. Do you know why

briana1987be -

I have a similar problem. After I replaced mine it will not open any app, and it does not show the status bar. Does anyone know why?

Steve David -

Now that I've removed the motherboard, how do I fix it? The instructible is great as far as it goes, but it doesn't go far enough

Danielle Chester -

Fix what? You need to be more specific. I have to purchase a screen from China in order to fix mine.

goldenkenneth -

The SD slot of my 2DS is not functioning. Should I replace the complete motherboard?

Ingeborg -

I have a quarter inch metal pin left over. Don’t see it in any tutorials. Anyone know where it’s from?

Mikael Daugherty -

I have the same thing, It came out when I was removing the back panel. I believe it was located towards the bottom of the panel. I’m scouring forums to see where it goes. Found this on Youtube! https://www.youtube.com/watch?v=qjoPIt5K... looks like it is just a reinforcement pin for a lanyard in the bottom corners.

Kwag -

stripped all of my screws. Your screwdrivers suck $@$*. never buying again. &&^& you

Tony Son -

The picture of the camera piece being unscrewed shows it in the backwards position, which caused me some grief during reassembly.

jcryay -