Introducción

Guía de pre-requisito solamente para remover la pantalla de tu Pixel 2 XL.

  1. VfgvjYSToxIVyAtc
    VfgvjYSToxIVyAtc
    AGl4aMY5sr2pTh5y
    • Si tu pantalla de cristal está rasgada, coloca cinta sobre el cristal para prevenir lastimarte y que se rompa más. Esto además hace que la superficie sea lisa lo que permite que la ventosa se adhiera.

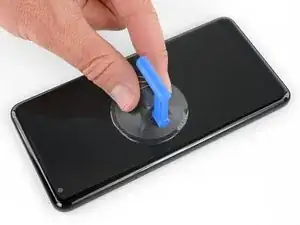
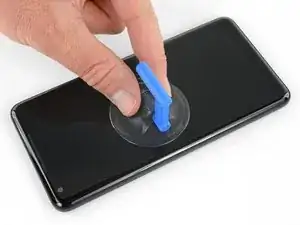
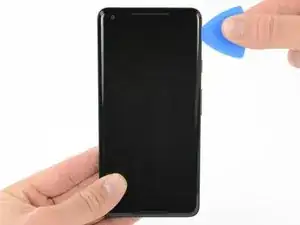
    • Aplica una ventosa lo más cerca posible del borde del teléfono donde se encuentra la ranura de la tarjeta SIM evitando el borde curvado.

    • La ventosa no se sellará bien en la parte curvada del cristal.

    Shouldn’t this be “As close as possible to the volume rocker”?

    Mihai Turdean -

    Forget about the tiny toy suction cup they provide to battery replacement kits. I used a dent puller from an automotive shop. The smallest they had was just small enough for the Pixel's screen. I still needed to heat the edges with a heat gun.

    Tamás Polgár -

    I wish someone tell me in advance that if I doing this replacement after using phone for a few years it better to have spare "display adhesive" and be ready to follow Google Pixel 2 XL Display Adhesive Replacement

    Original adhesive become dirty with time and fat chances it will be damaged during opening phase. In my case I replaced battery but can't use the phone, as still waiting for adhesive to be delivered

    Maxim Vorontsov -

  2. fXcRgORRaOocDBAL
    fXcRgORRaOocDBAL
    MWjcaBPFxGGrnjoj
    BSwgDksYvoQ2ESAp
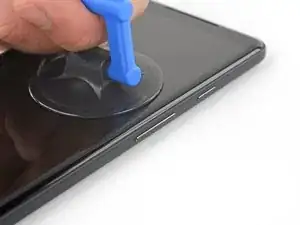
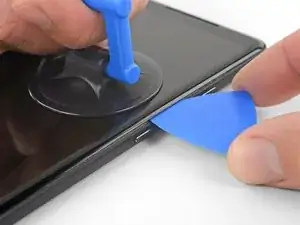
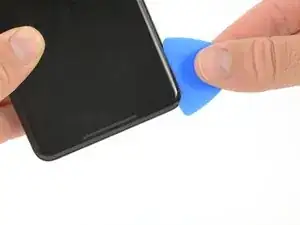
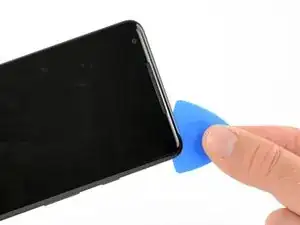
    • Tira de la ventosa con presión constante y firme e inserta una púa de apertura entre el panel frontal y caja trasera.

    • Esto requiere una gran cantidad de fuerza y paciencia. Si tienes problemas, mueve la ventosa y pantalla para ablandar el adhesivo o aplicar calor con una pistola de calor, iOpener o secador de pelo.

    Whatever happened to “Do not heat your phone. If needed, you can use a dropper or syringe to inject isopropyl alcohol (90+%) around the edges of the back cover to weaken the adhesive.”?

    Mike Trieu -

    It is in concern with swollen batteries.

    Fernando Granco -

    I spent an hour trying to get the glass screen apart from the body. I tried the hairdryer etc but made no progress. However, when I used a sucker to gently pull on the glass it was easy.

    Ronald Morrison -

    I used a heat gun, and the metal spatula in the iFixit kit. I broke the screen. Then, continuing with a blue plastic triangle, the screen continued to break. It seems to be quite brittle.

    Rolf Kirby -

    Never use metal tools on glass component

    p43j77 -

    Just broke the screen as well. I’d say heat gun is a must, otherwise it’s really hard to slide pick at the top and bottom without breaking the screen. It’s a very thin line of glass over there.

    Vitaliy Kurokhtin -

    I thought I did this perfectly. I used the iOpener to heat the glue, and the picks to slide around the screen to release the adhesive. I preformed the rest of the repair (charging assembly and the battery) with little issue. Just reassembled and the volume rocker side of the screen is white. I took less care on this side since the instructions said that you didn’t need to worry about how far the pick went in. NOT TRUE! There is a curvature to that edge that will push your pick up into the back of the unprotected display. It clearly doesn’t take much to damage it. I was so careful! F&CK!! I should have just created the e-waste and bought a new device. So mad!

    Eric Marcot -

  3. QTOPQyBykRiqjQAK
    QTOPQyBykRiqjQAK
    CDxGYMHrpLOOunaf
    • En los siguientes pasos, usa precaución adicional en ciertas áreas para evitar dañar el teléfono:

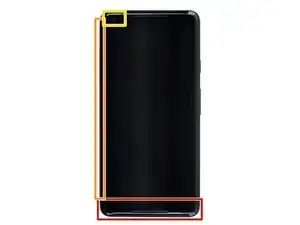
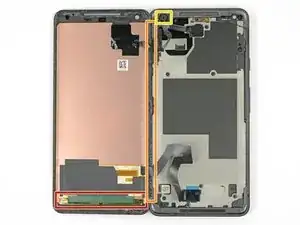
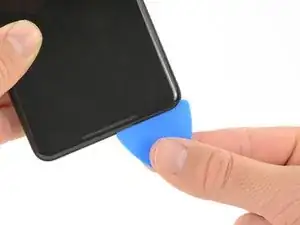
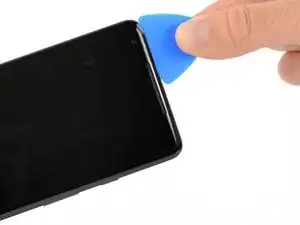
    • No insertes la púa más de 6 mm dentro del borde inferior del teléfono. Si la púa contacta la porción doblada del panel OLED, la pantalla puede resultar dañada.

    • No cortes a lo largo del borde izquierdo; hay cables de pantalla delicados que podrían dañarse.

    • Solo haz cortes muy poco profundos en la esquina izquierda superior. Hacer palanca muy profundamente puede dañar la cámara frontal.

  4. xLtUCqlMgMCHZFxe
    xLtUCqlMgMCHZFxe
    gCWc3YDluWvqMA3I
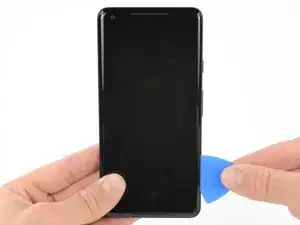
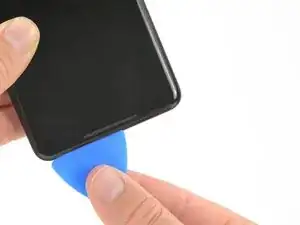
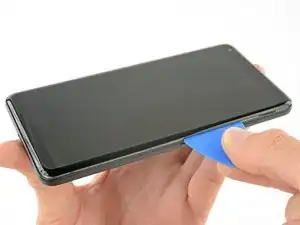
    • Desliza la púa de apertura a lo largo del lado derecho del teléfono para separar el adhesivo de pantalla.

  5. HJxBUHTGYCaUEMQS
    HJxBUHTGYCaUEMQS
    EpZELQbUOyLYSIpD
    hrtcDBTFMwJSwk22
    • En los siguientes pasos, usa el borde plano de una púa de apertura en lugar de la esquina para cortar. Esto ayudará a que no insertes la púa demasiado profundo.

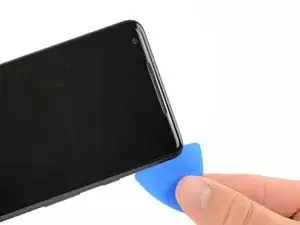
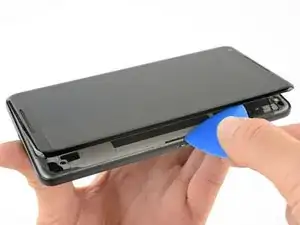
    • Desliza la púa de apertura alrededor de la esquina inferior derecha a lo largo del borde inferior del teléfono.

  6. FALPwgqqRNcJ2t6T
    FALPwgqqRNcJ2t6T
    FZpoOg1sPuaREOrf
    NEToBPfIR5hyYATX
    • Vuelve a insertar el borde plano de la púa en la esquina derecha superior del teléfono y deslízala alrededor de la esquina y el borde superior del teléfono.

  7. 4EUKqNVG5nvQcoIl
    4EUKqNVG5nvQcoIl
    RaxwCuAlKZjuOK5C
    • Levanta con cuidado desde el lado derecho del teléfono como si abrieras un libro.

    • Si la pantalla no se levanta fácilmente, haz un poco más de palanca para separar el resto del adhesivo.

    • No intentes separar completamente la pantalla aun, ya que los cables frágiles planos la conectan con la placa madre del teléfono.

    • Con cuidado coloca la pantalla de forma plana en la mesa al lado del resto del teléfono, manteniéndola cerca del teléfono para evitar tensar los cables de pantalla y del digitalizador.

  8. sdmUO2JTMAYLK3Oe
    sdmUO2JTMAYLK3Oe
    LPrN5vGxYbRvEwWO
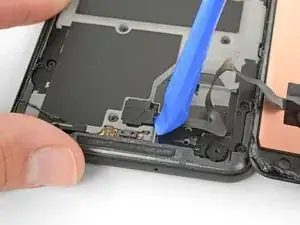
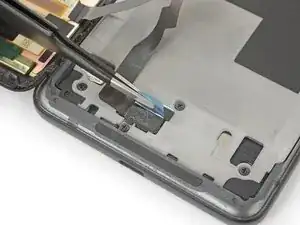
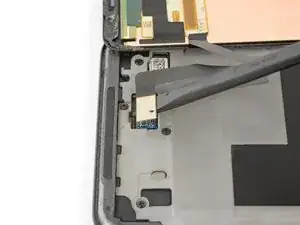
    • Usa la esquina de una herramienta de apertura para hacer palanca en la tapa del conector del cable del digitalizador.

    • Haz palanca con cuidado para evitar dañar el cable por debajo o perder la tapa misma.

    • Remueve la tapa del conector.

    • Asegúrate de conservar este componente para que puedas volver a instalarlo durante el montaje.

    when it comes out, it can pop with some force and go flying. Ensure you have a clear desk/floor so you can find it after it flies away

    hamiltont -

    Lol mine shot off and Ricocheted off the ceiling! Then landed on my shoulder haha

    john murfin -

    It literally popped me right in the middle of the forehead. My wife is still making fun of me.

    Jordan Toews -

    Mine flew off while I was laughing you guys, never too be seen again: (

    Shane Hadley -

    I decided to work outdoors, didn't read any comments first, so when mine flew off I found it five cursing minutes later in a crack on the driveway. Should have read the comments first! Thanks hamiltont. Will now read every comment BEFORE attempting step.

    Loose Drag -

    Confirmed, this $@$* can fly!

    Tamás Polgár -

  9. jOsasCmAgOEPh52W
    jOsasCmAgOEPh52W
    XIXoHbGDCVdLJvNO
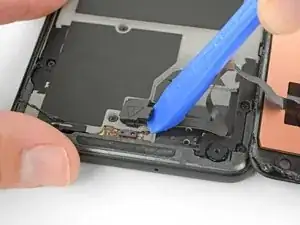
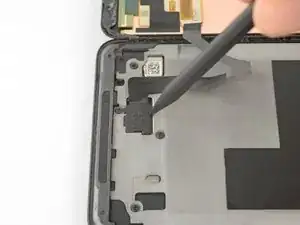
    • Usa la punta de un spudger para levantar el conector del cable digitalizador y sacarlo de su zócalo en la placa madre.

    • Para volver a conectar los conectores a presión como este, con cuidado alinea y presiona en un lado hasta que encaje en su lugar. No presiones en el medio. si es conector está mal alineado, las clavijas se pueden doblar y causar daño permanente.

    • Si alguna parte de tu pantalla no responde al tacto luego de la reparación, vuelve a asentar el conector, asegurándote de que se encaje completamente en su lugar y de que no haya polvo u otra obstrucción en el zócalo.

    This small connector gave me fits getting it located correctly, is there a trick to getting it aligned since it’s difficult to see around edge of the connector?

    Dennis Whitsitt -

  10. LnaLnoeCKPlhbwJM
    • Usa pinzas para remover cualquier cinta de la tapa del conector de la pantalla.

  11. ekxkMu5XCABS52ZB
    ekxkMu5XCABS52ZB
    sDtVCGVtvSly6Z3A
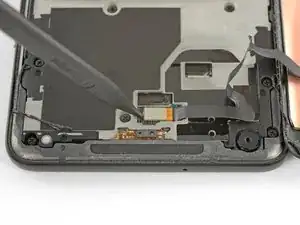
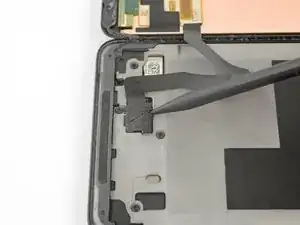
    • Inserta la punta de un spudger en el orificio pequeño en el borde de la tapa del conector de la pantalla.

    • Usa el spudger para levantar la tapa de su zócalo.

    • Retira la cubierta del conector.
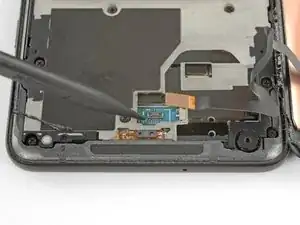
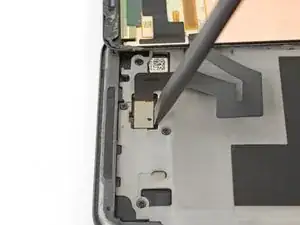
    • Asegúrate de conservar este componente para que puedas volver a instalarlo durante el montaje.

  12. f61ekFXtUKT2XXh3
    f61ekFXtUKT2XXh3
    4uEsyCZq2HNlFsWP

    BE EXTRA CAREFUL HERE, and during reassembly! There are 2 itty bitty parts directly under this ribbon cable connector that, if damaged, will render your loudspeaker unusable. The only sure way to fix it if you break it is to replace the motherboard. There are some reports of people being able to solder the spots and shorting it to make it work, and that worked for me for a time, but they’re really tiny (about 0.5 mm) and if you don’t get a secure solder, or if you bleed over, it will also mess up your top speaker.

    Joshua Parnell -

    Saw this comment after I’ve done replacing and sure enough, the loud speaker was broken. The resistor was knocked over but still hanging in place so I just stuck it back and it works for now.

    They are 2 black resistors at the end of the cable’s connector. So follow the above photo exactly and pry the connector from the side, not from the end of the connector like I did

    Tri Nguyễn -

    What wasn't clear to me here (because I didn't put Step 13 together with Step 12, I suppose?) is that if your replacement part came with speaker grills and camera gasket, Step 12 is your final step. You are done, except for replacing the cables and covers, then placing the adhesive strips onto the replacement part and sticking the phone back together.


    I ordered my screen from iFixit and it came with new grills and camera gasket already installed. I was able to use the thinnest strips on the supplied Tesa patch to line the entire screen perimeter piecemeal, then stick it back together like new.

    Loose Drag -

Conclusión

Para volver a ensamblar tu dispositivo, sigue estas instrucciones en orden inverso.

Adam O'Camb

Miembro Desde 11/04/15

179525 Reputación

0 comentarios