Introducción

Guía solo pre-requisito para abrir la Moto X Pure Edition para reemplazar la pantalla o batería.

  1. I1VFOoKklSWOU1TX
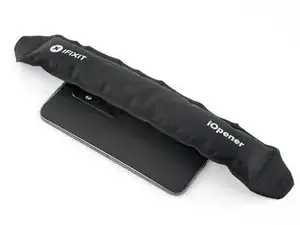
    • Prepara un iOpener y calienta la parte frontal del teléfono a lo largo del borde izquierdo durante dos minutos o hasta que esté un caliente al tacto. Esto ayudará a ablandar el adhesivo que sujeta la pantalla.

    • Quizás tengas que volver a calentar y aplicar el iOpener varias veces para que el teléfono esté lo suficiente caliente para cortar el adhesivo. Sigue las instrucciones del iOpener para evitar sobrecalentamiento.

    • Se podría utilizar un secador de pelo, pistola de calor u hornillo, pero ten cuidado de no sobrecalentar el teléfono; la pantalla y batería interna son ambas susceptibles a daños por calor.

  2. 4ITIIfrt26JXPIxU
    4ITIIfrt26JXPIxU
    OHtsmlqMpbdFj1iT
    HoXl4feVInrdRIed
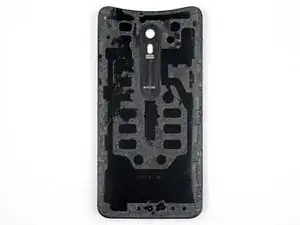
    • En los siguientes pasos vas a cortar el adhesivo que sujeta la tapa trasera.

    • El adhesivo se coloca como se muestra en la primera imagen que muestra la parte interior de la tapa.

    • Evita cortar en este área para prevenir dañar los delicados cables planos.

  3. BbSSSWONko31DNI2
    BbSSSWONko31DNI2
    45SkQkVXlySQoSYl
    aexbJkJH2nZvLCAu
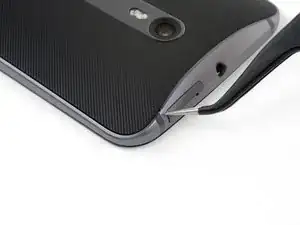
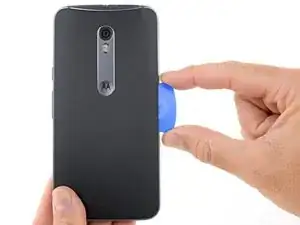
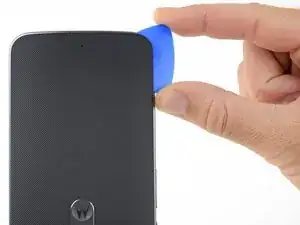
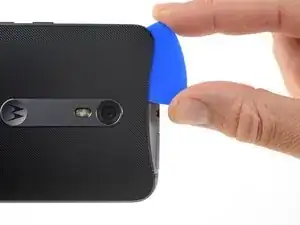
    • Sostén un par de pinzas puntiagudas cerradas e insértalas en el pequeño orificio en el borde de la tapa trasera cerca de la ranura para la tarjeta SIM.

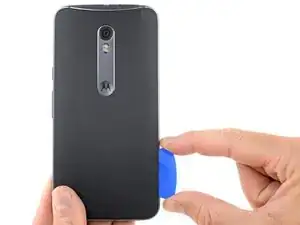
    • Usa las pinzas para levantar la tapa ligeramente y desliza la púa de apertura en el espacio entre la tapa y el marco.

    Insert only one of the tweezers’ point into the hole. Once the rubber backing is lifted high enough, slip a corner of the opening pick under the rubber backing. Leave the first pick near the corner while you use a second pick as directed in Step 6.

    Levi Asuncion -

  4. WfD6WDXBDtObiGgN
    WfD6WDXBDtObiGgN
    p5KZsRrrfyjQLHJA
    SoGbtZZolDdnMPjA
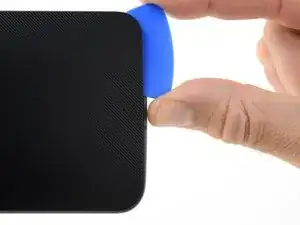
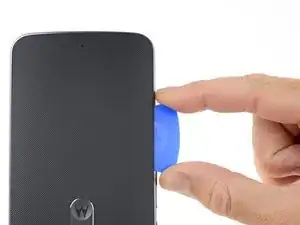
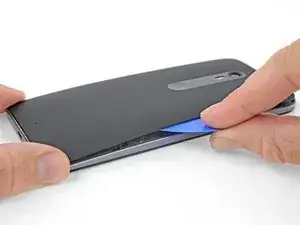
    • Desliza la púa de apertura a lo largo del borde del teléfono para cortar el adhesivo de la tapa trasera.

    • Intenta insertar la púa lo más que puedas por debajo de la tapa, Hay adhesivo grueso en el medio de la tapa que debe separarse.

    • Deja la púa en el lugar mientras procedes con el siguiente paso. La púa insertada puede ayudar a evitar que el pegamento que recién separaste se vuelva a adherir.

    I did not have a pick, used a few old credit cards, leaving them in place to keep the phone back separated.

    Used a hair dryer to heat up a little, one section at a time, was enough to remove. Pulled apart slowly.

    Left adhesive on the back and on the phone, where possible, using a tiny screw driver to separate. Reused whatever adhesive remained to reattach.

    Natalie Hursky -

  5. IxCNPhJWutPrxXdc
    • Prepara un iOpener y calienta la parte posterior del teléfono a lo largo del borde izquierdo durante cinco minutos. Esto ayudará a ablandar el adhesivo que sujeta el resto de la tapa trasera.

    • Puede que tengas que volver a calentar y aplicar el iOpener varias veces para que el teléfono se caliente suficientemente. Sigue las instrucciones del iOpener para evitar el sobrecalentamiento.

  6. YXJApJG1xQgPLQeZ
    YXJApJG1xQgPLQeZ
    1MoP2YItFZBf2CFY
    • Corta el adhesivo a lo largo del borde inferior del teléfono.

    • Vuelve a calentar la tapa trasera cuanto sea necesario para evitar que el pegamento se enfríe y endurezca.

  7. tZMViRwW2kFwmdoq
    tZMViRwW2kFwmdoq
    QmkNYhL1Kuscm5Kp
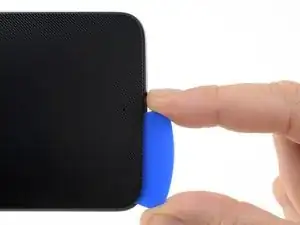
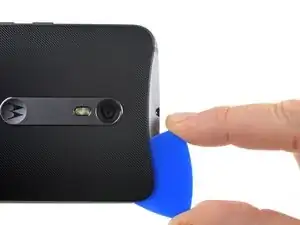
    • Corta el adhesivo a lo largo del lado izquierdo del teléfono.

    • Intenta insertar la púa lo más que puedas por debajo de la tapa hacia el centro de la tapa. Hay adhesivo grueso en el medio de la tapa que debe separarse.

    • Deja de cortar cuando llegues al borde de los botones de volumen. Si cortas más allá de este punto podrías dañar los cables planos por debajo de la tapa.

  8. cjcZoKkITldAUNXJ
    cjcZoKkITldAUNXJ
    mVOBOBxnhTNDTDQp
    lWHNArHdFiVwUwM4
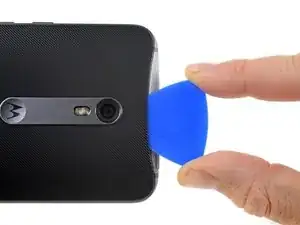
    • Corta el adhesivo a lo largo del borde superior del teléfono sacando la púa ligeramente para guiarla alrededor de la cámara trasera.

  9. QOZOuWRIwJsVmUWg
    QOZOuWRIwJsVmUWg
    hEVyVJoDTCWe1GRK
    TRBGiOQqSjZR15NL
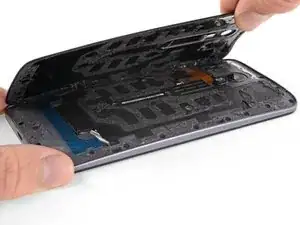
    • Con cuidado haz palanca en la tapa y apártala del teléfono.

    • Esto puede tomar mucha fuerza si el adhesivo en el medio todavía está adherido. A medida que levantas la tapa, es posible que tengas que usar una púa de apertura para cortar el adhesivo restante.

    • Para volver a instalar la tapa trasera:

    • Primero usa pinzas y un spudger para pelar y raspar el adhesivo restante tanto de la tapa posterior como del chasis del teléfono.

    • Luego limpia las áreas de adhesión con alcohol isopropílico de alta concentración (al menos 90%) y un paño que no suelte pelusa. Pasa solo en una dirección, no hacia adelante y hacia atrás. Esto ayudará a preparar la superficie para el nuevo adhesivo.

    • El adhesivo de reemplazo viene en una hoja precortada que coincide de forma exacta con los contornos de la tapa posterior. Si no está disponible, puedes utilizar una cinta de doble cara de alta adherencia, como Tesa 61395. Antes de instalar el adhesivo precortado en la tapa posterior, retira el inserto de metal. Instala el adhesivo, luego reemplaza el inserto.

    • Después de instalar la tapa posterior, aplica una presión fuerte y constante en el teléfono durante varios minutos para ayudar a que el adhesivo forme una buena unión.

    • Si lo deseas, puedes volver a instalar la tapa posterior sin reemplazar el adhesivo. Retira cualquier trozo grande de adhesivo que pueda evitar que la tapa posterior se asiente al ras. Después de la instalación, calienta la tapa posterior y aplica presión para asegurarla.

    Had the pre-cut adhesive sheet for reinstalling the Moto X Pure’s back cover. It seemed like the most “original” option at the time. I tried and tried to get it aligned inside the back cover, but found it virtually impossible to do. You pretty much have to get it perfectly aligned and then stick it down all at once. If it makes contact with the cover before it’s perfectly aligned, it’s all over. You’ll never get it back off without destroying it.

    After failing with the pre-cut sheet, I resorted to the die-cut strips and corner pieces. This worked just fine.

    Jeff Carleton -

  10. ah4W6JLwrZGvTHTw
    ah4W6JLwrZGvTHTw
    1t1x4EddN5225Miw
    Lv2tFWVD2TuCcHma
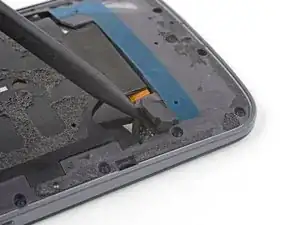
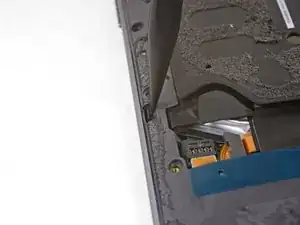
    • Usa la punta de un spudger para levanta la tapa de goma sobre el conector de la batería.

    • Remueve la tapa de goma.

  11. nDX2pqVCgHMiHA1C
    nDX2pqVCgHMiHA1C
    AxdJRLYT3cLwwmLU
    • Usa la punta plana de un spudger para levantar el conector de la batería del zócalo.

    • Solo levanta la pequeña lengüeta del conector en frente del cable plano. No presiones el conector demasiado fuerte o correa el riesgo de dañar el enchufe de la placa madre.

    Reconnecting the battery was difficult, did not align exactly. Note there are 2 slots that line up and 4 pins. Used a 10x magnifying lens with LED light, purchased to do this job. This step (reassembly) is where the magnifier came in handy. Had to move battery around a bit to get it to line up. Ended up removing adhesive tape from battery, so I could get in place to attach the connector. Battery held in place with screws and phone case, so far so good.

    Natalie Hursky -

    this is the difficult part. I find it is easier to remove this connector as the midframe and phone screen are separating (see step 19). Be also careful in prying this mine got broken luckily it is connected to the old battery which I replaced anyway

    Neil Catalan -

    Broke the battery plug right off the motherboard! Trying to do a 2nd battery replacement. Only push up gently on the edge of the tab and straight up. Shopping for a new phone.

    Natalie Hursky -

  12. 6csWJbhBacko22VM
    6csWJbhBacko22VM
    pUdEueRhCjxB3A3d
    • Usa pinzas para levantar la tapa de goma sobre el conector del flash.

  13. gX4tqtZjxamLkswY
    gX4tqtZjxamLkswY
    oMsPvZpCQUtOqbbB
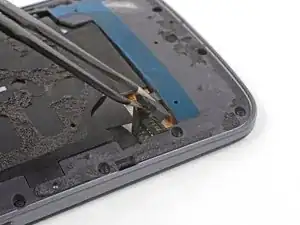
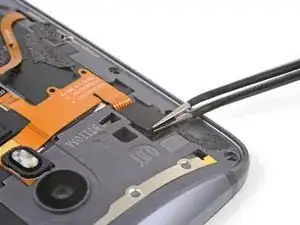
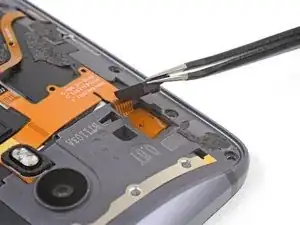
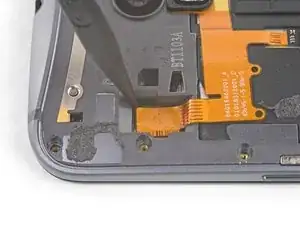
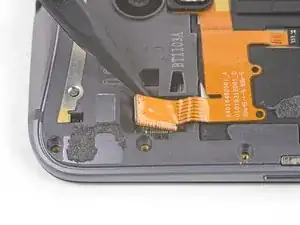
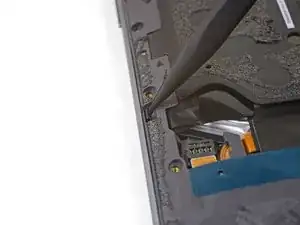
    • Usa la punta de un spudger contra la esquina del conector del flash para empujar el conector hacia arriba y sacarlo de su zócalo.

  14. cuuTufVE1SKP3nu3
    • Usa un destornillador T3 Torx para remover los 20 tornillos de 2.4 mm.

    Need to add a step for removing the bar holding the buttons in place. Step 5 from the tear down. Still can’t take the mid frame off though.

    Pieter Richards -

    I stripped the threads on one of the 20 screws, had to drill it out. (Managed to do this without cracking the screen, completed battery replacement, all ok.)

    Careful removing the screws, be sure of tight grip. I saw T4 torx suggested on another site for Moto X Pure, this might grip better? Try both.

    Natalie Hursky -

    I did not have to remove the screw holding the volume buttons bar in place. These stay attached, not needed for replacing the battery. Just the 20 screws shown.

    Natalie Hursky -

    DO NOT REMOVE THE SILVER SCREW HOLDING IN THE VOLUME AND ON-OFF BUTTON. If these buttons fall out there are 4 very small springs that will pop out and are very hard to reinsert. If they do pop out do not use tweezers to reinsert but use a magnetic screw driver bit to reinsert.

    Michael Bedwell -

    This is extremely easy to overlook. This screw is a different color (silver versus black) but when you’re in the swing of removing all the screws it’s tempting to just remove ALL the screws. I goofed, had the buttons fall out, could only find 3 of the springs. Put two back in the volume rocker and only one in the power button since it’s smaller, seems like it wouldn’t need two as much. Everything still works, maybe just slightly less tactile than before. Even without the the springs, there’s still some mechanical return to the buttons, so if you do lose them don’t despair.

    Michael Decker -

    This is not working, got two out. Most just strip.

    Christina Denboer -

    Update. The driver provided is not the right size. I had some tools laying around and found one that fit. This allowed me to get all the screws out except the six I stripped using the driver provided by ifiixit. Turns out they come out pretty easy if you have the right size bit. Would have been an easy fix had I not bought the tools…. go figure.

    Christina Denboer -

    What is the right size bit?

    Marlon Nelson -

    The T3 Torx Driver was bundled in the bag with the Alcohol Prep Pad, not with the rest of the drivers! So look before you there before you call support like I did.

    pixilated1 -

    T4 works better, T3 also works. Try both and proceed carefully, get a good grip before turning.

    Natalie Hursky -

  15. TDl2WjeUJqcmYVIZ
    TDl2WjeUJqcmYVIZ
    V4RwIievwOLpDWQJ
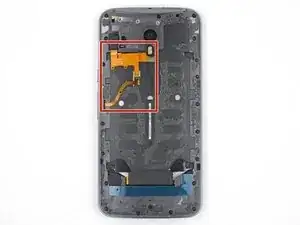
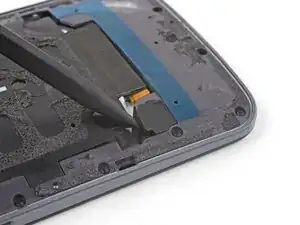
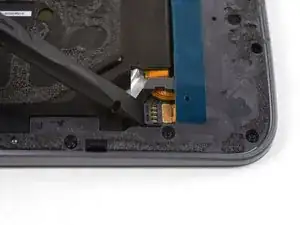
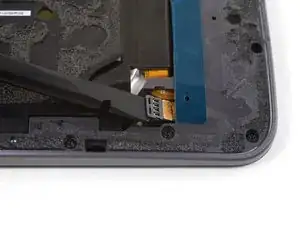
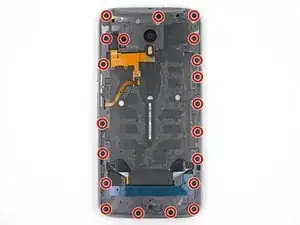
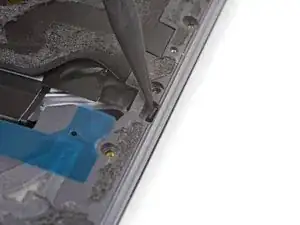
    • Usa la punta de un spudger para empujar el pequeño clip que asegura el lado izquierdo del marco central hacia el borde del teléfono, liberando el clip.

    On reassembly, these did not really click back in place. Held tight when reattaching the 20 (19 in my case) screws).

    Natalie Hursky -

    I had to push rather hard to release both clips. The tip of the spudger bent under the pressure I had to apply. But the the clips did finally release without damage.

    Thomas Bartol -

  16. e2MUxBsMTQjxcoVc
    • Repite el paso anterior para liberar el clip de marco medio del lado derecho.

  17. DbVyTklTFsoQH5y3
    DbVyTklTFsoQH5y3
    5gCGwlFmBVlDXTQD
    d3d3HCBhe3bklqDM
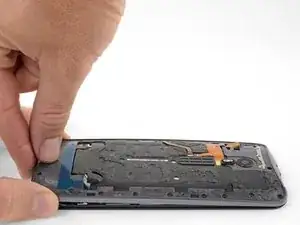
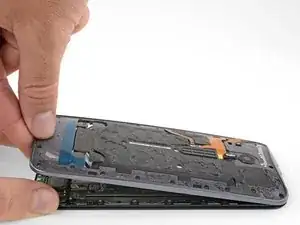
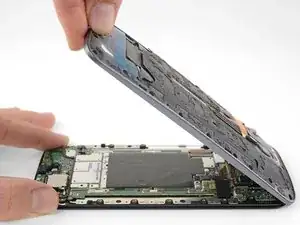
    • Sujetando la pantalla por los bordes, levanta suavemente el marco intermedio para separarlo de la pantalla.

    • Remueve el marco medio de la pantalla.

    My mid-frame and display were separated on the long sides but seemed a little bit stuck on the top and bottom. I used the flat end of the spudger to carefully pry the two assemblies apart at either end.

    Gary Herber -

    In my case, stuck in the middle. Pulled apart very slowly, giving the adhesive a chance to separate, and not tearing whatever it was in there. Kept an eye on the inside middle, and very SLOW let it separate. Or was that the battery? In either case, go slow on all steps.

    Natalie Hursky -

    Yeah, everything went according to the guide until this step. I lifted the midframe away from the screen assembly as shown and something in the center didn’t separate at all. I spent a good half hour terrified that I had missed a step or a screw or that there was something different about my phone. In the end I read the comments and very slowly and patiently lifted the midframe until something uncoupled and the two parts cleanly separated. I was certain that permanent damage must have been done, but upon reassembling everything seems to be working perfectly.

    Brian Horne -

    Note to self - check that ALL (20) screws have been removed… especially if midframe is stubborn lifting up - i (almost) forgot about the one near the display cable (and it’s threaded into the motherboard instead of the frame) :)

    John Riselay -

    In my unit, the midframe released from the display nicely just as described in the instructions.

    Thomas Bartol -

Conclusión

Para volver a ensamblar tu dispositivo, sigue estas instrucciones en orden inverso.

Adam O'Camb

Miembro Desde 11/04/15

179525 Reputación

0 comentarios