Introducción

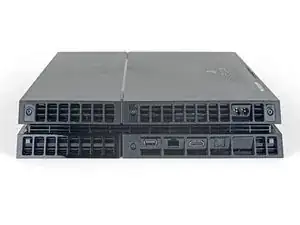
Esta es una guía de prerrequisito solamente. Esta guía es parte de otro procedimiento y no debe utilizarse sola.

  1. 21LJYnUT534diPkY
    • Voltea la PS4 al revés con la parte trasera hacia ti.

  2. kywHHmkOcswPFDjm
    kywHHmkOcswPFDjm
    g3p1nmGqDLvNYlwD
    HVJTWJOoL6cUcoBS
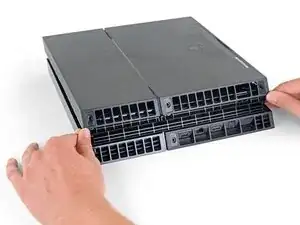
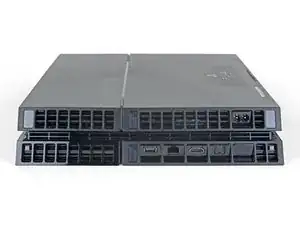
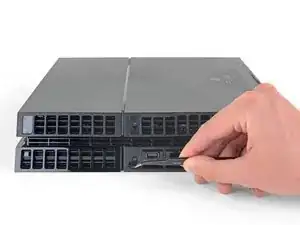
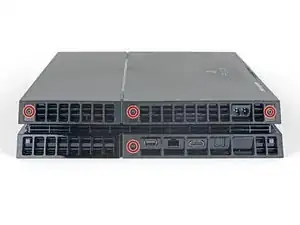
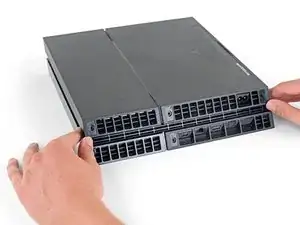
    • Usa pinzas para quitar las dos pegatinas en el centro de la parte trasera de la PS4 exponiendo dos tornillos de la caja.

  3. QGDNpTn4LrZHSr2F
    QGDNpTn4LrZHSr2F
    MLVk3bQRWjJpjhKh
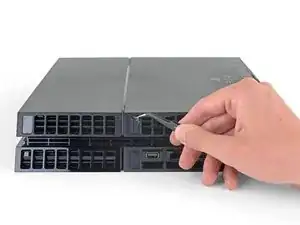
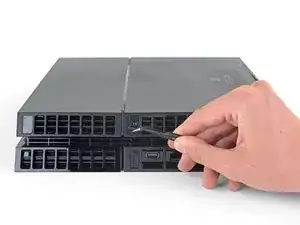
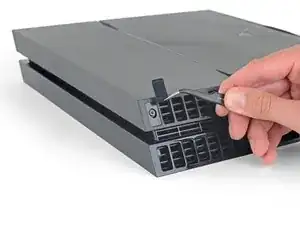
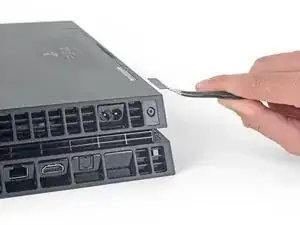
    • Usa pinzas para quitar con cuidado las cubiertas de plástico de los tornillos en cada esquina, exponiendo dos tornillos más de la caja.

    What If my PS4 doesn't have the two screws on the side

    Michael Jimenez -

    I should imagine that plastic cover will come off?

    How did you go?

    Cary B -

  4. EoWfJjtMRGNijIDA
    EoWfJjtMRGNijIDA
    kPwQlcOBVwv2PxuA
    • Quita los cuatro tornillos de seguridad Torx de 7.2 mm de la parte trasera de la PS4.

    I only have two screws, those in the middle of the console.

    Oscar Martinez -

    Have you removed the plastic covers mentioned in the previous step? That will expose the other two screws.

    Sam Omiotek -

    same, here. there are only the middle screws, no covers or screws on the sides. and it sits pretty tight

    Johannes Müller -

    turns out 12XX models are different. Look at this for reference: https://www.youtube.com/watch?v=Hpr0z0ve...

    Johannes Müller -

    Yes there is slight variations between the first models, and the second gen and on models. I have an original and only has the two screws in the middle, removal of the cover remains the same.

    Mary Westphal -

  5. kbpHqgpXdtdVifwo
    kbpHqgpXdtdVifwo
    gtKNupdgQ44yDPVf
    • Usa tus pulgares para levantar la carcasa inferior y sacarla de la PS4.

    • La carcasa inferior se mantiene en su lugar mediante clips de plástico. Es posible que debas usar mucha fuerza para liberar la caja inferior.

    sur la version 2 de l ps4 fat il n'y a que les 2 vis du milieu. Comment défaire le boîtier ?

    nlvolle -

  6. coGRVtdMr6vYQIWw
    coGRVtdMr6vYQIWw
    BGP5HaSrJNavVLaN
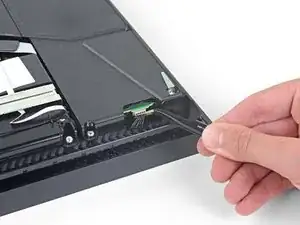
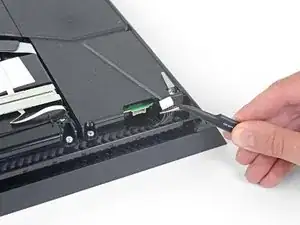
    • Usa un par de pinzas para sacar el cable de la fuente de alimentación y desconecta la fuente de alimentación de la placa madre.

    • Si notas el conector atascado, utiliza un spudger para hacer palanca suavemente para sacarlo.

    This part looks dangerous. There should be a flag/warning not to destroy that cable yes?

    Shawn -

    I second Shawn's comment. That cable seems to be very fragile, and one of the wires snapped on mine while removing the cable. It wouldn't have bothered me so much, if it wasn't a pain to find a replacement for it.

    Matt Gaia -

    The tweezers used here, do not cut it. Not enough grip.

    I had to use a set of needle nose pliers to remove this.

    Cary B -

    Power supply connection stuck. I don't want to damage it

    Nick Alex -

    What you need to do here is be patient. Do not pull the wires. Get some fine nosed pliers, wiggle the white connector from left to right in small movements and edge it out slowly. You can also use your nails one finger at each edge of the white connector to do this.

    David Harkness -

    Its really hard but i managed it with both of the tweezers/pincers at the same time


    1. Keep in mind to pull not too hard on the wires and make step 2 and 3 simultaneously!

    2. the straigt and wider tweezer to pull the white connector itself
    (top and bottom grip)
    3. the small and angled tweezer to pull the wires carefully
    (as shown on the picture above)

    dinkelberg01 -

    Another option, is to remove the screws holding it down, leave the cable in place and lift it out carefully, revealing the other end of the connection. The hidden side of the connection wire is easier to get a handle on.

    Mary Westphal -

    I concur with David, some patience and a lot of wiggling did it for me despite the stubbornness of the connection. Does seem like this one varies a lot in how difficult it is to remove.

    hazelrat -

Conclusión

Para volver a ensamblar tu dispositivo, sigue estas instrucciones en orden inverso.

Lleva tus desecho electrónicos a un n centro de reciclaje certificado.

¿La reparación no salió como planificaste? Consulta nuestra comunidad de respuestas

Compara tu parte nueva de reemplazo con la parte original. Puede que tengas que transferir los componentes restantes o remover soportes adhesivos de la parte nueva antes de instalarla.

Sam Omiotek

Miembro Desde 25/02/19

59803 Reputación

0 comentarios