Introducción

Los botones de la PSP pueden atascarse o no funcionar correctamente. Esta guía le mostrará cómo acceder a los botones para reparar, limpiar o reemplazar.

  1. QacnKmgPd5vO4EVM
    • Da la vuelta a la PSP de modo que la parte posterior quede frente a ti.

  2. KfhYCVXbuwocyXOJ
    KfhYCVXbuwocyXOJ
    ET6LQanHrAYARDNK
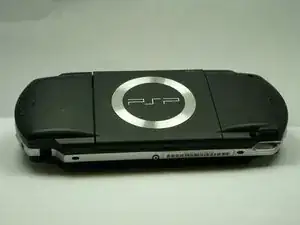
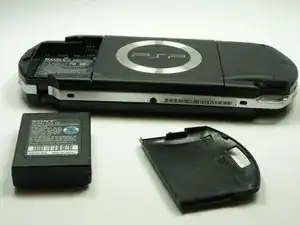
    • Ubique el botón de la carcasa de la batería en el lado posterior izquierdo de la PSP.

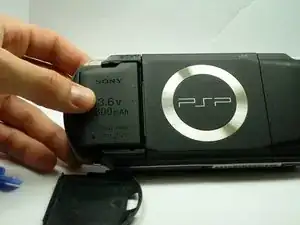
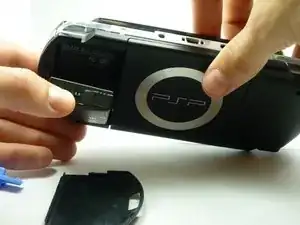
    • Presione el botón y retire la tapa de la batería.

  3. ISXv3lrW12xLWbnR
    ISXv3lrW12xLWbnR
    2m4TOHnIVUoYXWUA
    • Usando su dedo, retire la batería hacia arriba del sistema como se muestra.

    The use of the opening tool is completely unnecessary. There is a finger actuated opening latch button that says “PUSH” on it. Simply press down with your thumb then slide your thumb down and away, dragining the battery door with it. It will then come off. Assuming the system still has its original plastics, they may have become brittle enough that the opening tool could damage the release button or the plastic cover.

    Franklin Allen -

  4. ckGKHpFUTpAy5N3R
    ckGKHpFUTpAy5N3R
    vJp1HKCLNP1L5iB6
    • Retire los cuatro tornillos que se muestran con un destornillador Phillips #00.

    • Deberá retirar la etiqueta de garantía para acceder al tornillo en la parte inferior izquierda.

    Much luck to you if you have a tiny, metal screwdriver like I did, the screws might be stuck in there and may require some force.

    Squib -

    you need to peel back the warranty sticker in order to access both the lower left and lower left screws

    Frederick zzstu Geib -

    This is a bit misleading, you should only remove the two black screws in the battery compartment. The silver ones can stay.

    Damian Cartwright -

    The two left hand screws won’t come out of mine

    XULF -

    iFixit screwdriver bits aren't thin enough to reach the two screws on the right near the memory stick slot.

    Fliggle_Slaps -

    Can't edit previous comment so here's a new one:

    Standard or older iFixit screwdriver bits aren't thin enough to reach the two screws on the right near the memory stick slot. You'll need precision bits that have longer tips to reach these deep screws.

    Fliggle_Slaps -

  5. aGllC1mxt3FxwjJx
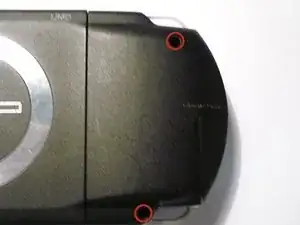
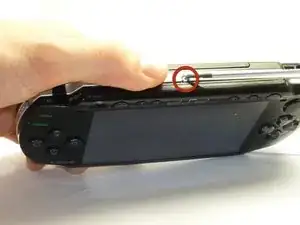
    • Retire el tornillo de la parte inferior de la PSP. Manténgalo separado del resto de los tornillos.

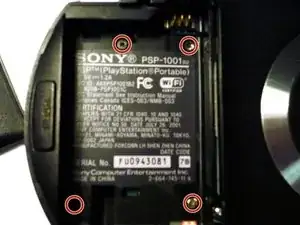
    • Retire los tornillos del lado derecho posterior dentro de los orificios.

  6. Ii3a5ygvVCa2DQTW
    Ii3a5ygvVCa2DQTW
    QOKFQYHjjpjkCpkW
    • Separe con cuidado la carcasa exterior de plástico del resto del sistema como se muestra.

  7. EEBVmKBDsbPhoIyr
    EEBVmKBDsbPhoIyr
    gXiKwVYA1ZRZXIIY
    ELMCxFQmtC6YCaIU
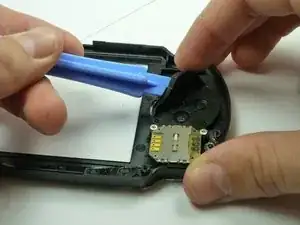
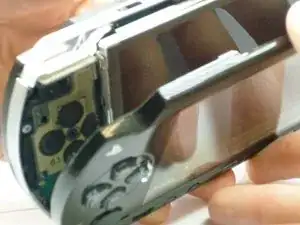
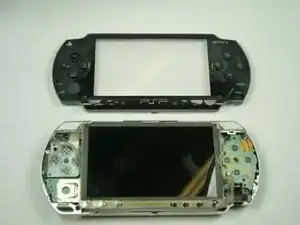
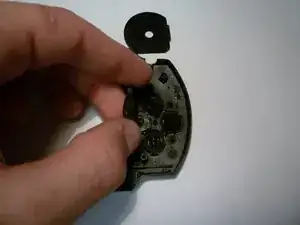
    • Si los botones de flecha no funcionan correctamente, voltee la cubierta exterior y ubique el interior de los botones, como se muestra

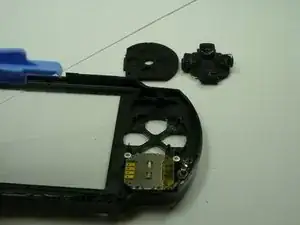
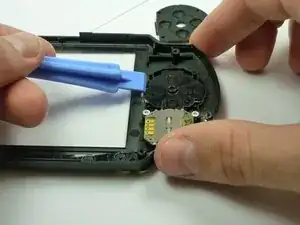
    • Retire con cuidado la protección de goma negra de los botones.

    • Limpiar el interior de la goma y el exterior de los botones con un paño

  8. NTks4IuVexNHrWfE
    NTks4IuVexNHrWfE
    kDKFC5OnmpfX2VTM
    • Si es necesario, reemplace los botones viejos con un juego nuevo (que se puede comprar en Sony u otras tiendas de electrónica).

    • Vuelva a insertar con cuidado los botones. Esto no debería requerir una fuerza excesiva, ya que los botones deberían encajar si están colocados correctamente.

    • Vuelva a aplicar suavemente la goma trasera en la parte posterior de los botones.

  9. CK2MfOQAmVt1qDRF
    CK2MfOQAmVt1qDRF
    ZkHAIAHQx6HrG6nV
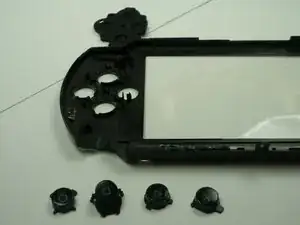
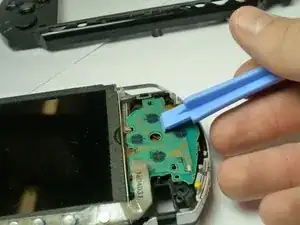
    • Si es necesario reemplazar los botones de función (x, cuadrado, círculo, triángulo), busque el respaldo de goma negra correspondiente en el interior de la carcasa.

    • Retire con cuidado la goma trasera para exponer la parte trasera de los botones como se muestra. (Esto se puede hacer con las manos).

  10. VbwvddYutoONHo5o
    VbwvddYutoONHo5o
    ZGYkWqRxRwli4JnX
    • A continuación, limpie con cuidado el extremo receptor de los botones de la placa base (que se muestra en la imagen) con un paño.

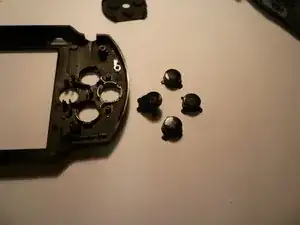
    • Si los botones están claramente dañados, entonces deben ser reemplazados.

    • Agregue los nuevos en el formulario, con el orden de botones correcto. (El orden correcto de los botones tiene el Triángulo en la parte superior, el Cuadrado a la derecha, el Círculo a la izquierda y la X en la parte inferior).

    • ¡Ten mucho cuidado! Los botones solo van de una manera. Si tiene problemas para encajarlos, gírelos en los lugares indicados hasta que encajen fácilmente. NO los fuerces. Forzar los botones puede causar daños.

  11. rxVdSgtYXWDQBR1D
    • Una vez que los botones se reemplazan correctamente, las gomas traseras se ajustan nuevamente a los botones, consulte Reemplazo de la carcasa para volver a colocar la carcasa.

Conclusión

Para volver a armar su dispositivo, siga estas instrucciones en orden inverso.

Henry Lee

Miembro Desde 14/01/10

752 Reputación

11 comentarios

It's a helpful guide,thx

Zero Knight -

Great guide. I highly Recomend this to anyone that needs to replace their PSP buttons

unashamed45 -

Otimo guia recomendo.

richardmosman -

use magnetised screwdriver i had a normal one and it was a pain in the ass to put those tiny little bastards back

Nagy Dániel -

Thank you this was a great guide

BLAISE of BASH -

I have a similar problem with my psp 3000. The X button does not work when it is pressed. I removed the casing, checked if there was dirt on the rubber padding and on the motherboard where the buttons sit and there is no dirt. What should I do now. I realy love my psp, but without the X button working I can not use it. Is this problem fixable?

Christopher -

Christopher, if that’s the case then you probably need to replace the conductive rubber padding, as that’s the part that really gets all the wear. I don’t know where you would find a replacement rubber padding, but you might try eBay or Amazon.

Daniel Whalen -

Hey Daniel, thanks for your responce. Im still not sure exactly what the probelm is myself so thanks for the insight. I have ordered a new flex cable to see if that’s the soultion. Could this be the problem, a broken flex cables?

Christopher -

I recently bought a psp 3000 and when I started to use it, in the software of the psp the “X” button is set as the back button and the “O” button is set to be the enter button. I reset the factory setting, it doesn’t go to “X” being enter and “O” being back. Anyone know how to fix this problem? Could the psp be fake?

Blank Blank -

It must be the Japanese Model. I own two Japanese psps and O is always the enter button. X is the back button and triangle is usually the menu screen. Hope that helps!

Pickle Satan -

My issues is the joy stick and it doesn't show how to fix joystick

Freezing God -