Introducción
Usa esta guía para reemplazar una batería gastada, Si tu batería está gastada, toma las precauciones apropiadas.
-
-
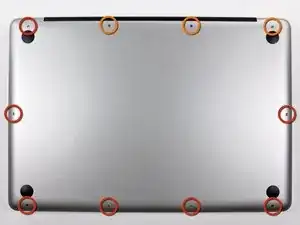
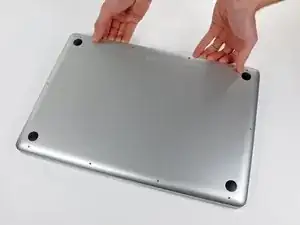
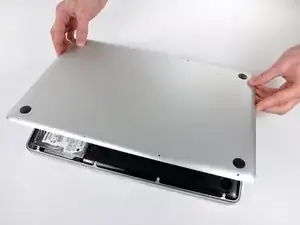
Remueve los siguientes diez tornillos que sujetan la caja inferior de la caja a la caja superior:
-
Siete tornillos Phillips de 3 mm.
-
Tres tornillos Phillips de 13.5 mm.
-
-
-
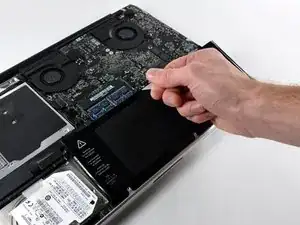
Con ambas manos, levanta la pequeña caja cerca de la rejilla de ventilación para sacarla de dos clips que la sujetan a la caja superior.
-
Retira la caja pequeña y déjala a un lado.
-
-
-
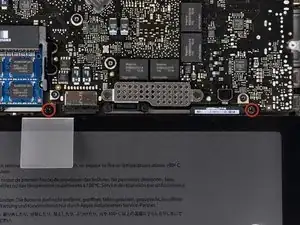
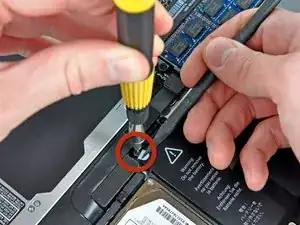
Retira los dos tornillos de Pentalobe de 5 puntos a lo largo del borde superior de la batería.
-
-
-
Usa la punta de un spudger para doblar hacia atrás el dedo de la etiqueta "Advertencia: No quitar la batería" mientras quitas el tercer tornillo Pentalobe de cinco puntos escondido debajo.
-
-
-
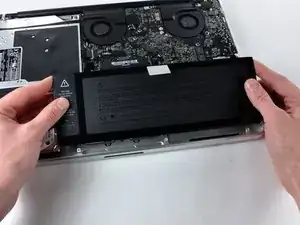
Levanta la batería con su lengüeta de plástico y deslízala hacia afuera desde el borde largo de la caja superior.
-
-
-
Inclina la batería hacia atrás lo suficiente para acceder al conector del cable de la batería.
-
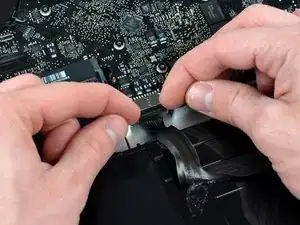
Extrae el conector del cable de la batería de su zócalo en la placa lógica y extrae la batería de la carcasa superior.
-
Para volver a armar tu dispositivo, sigue estas instrucciones en orden inverso.

18 comentarios
Just installed a new battery from Anker. This tutorial was very helpful to me. iFixit was out of stock on the battery I needed, or I would have ordered from you.
Anker did include the special 5 prong tiny screwdriver needed.
JohnB -
I bought and installed the ifixit.com battery for my Mid 2009 15 inch MacBook Pro and it was easy and is working great. Much better than the dying battery it had. It was very easy. I did purchase the required tools which made it simple. Thanks.
1tom2go -
Ordered the battery from iFixit, forgot to order the Pentalobe screwdriver. Nevermind, if you only do that stuff once (as I expect after 6 years with one battery) - don't spend the money on special equipment that cannot be used for anything else :)
Opening the macbook is easy (I have done that before to exchange the superdrive with a larger harddisk and the original HD with an SSD drive, and a couple of times to clean the fans), but the 3 screws on the battery are a pain.
What did the job for me: an old mini-flathead-screwdriver (approx. 2mm? - just slightly larger than the pentalobe) and a file. As none of my other screwdrivers would work with the ....pentalobes, i filed down the flathead (-)screwdriver so that it could get hold in 2 of the lobes - which did let me open and close these screws without a problem. My screws were not closed very tight though - if they are there is probably no way around the right tool.
May be helpful to have more distinct colors to identify the different screws.
Victor Caamano -