Introducción

Sigue esta guía para actualizar el disco duro de tu iMac con una SSD utilizando una carcasa metálica actualizada de 2.5" a 3,5". La guía incluye los pasos para instalar el sensor de temperatura para que los ventiladores del Mac funcionen a la velocidad correcta.

Esta es una guía de requisito previo y no debe usarse sola. Esta guía forma parte de las guías de sustitución del disco duro de la iMac.

  1. HKQbp12ZISQhNfAv
    HKQbp12ZISQhNfAv
    C535jLFwdCXbrulv
    wDWxsjpZCDD5vCjk
    • Sigue los siguientes pasos si vas a sustituir tu disco duro por un kit de SSD.

    • Si la caja de la SSD se parece a la primera imagen, sigue esta guía en su lugar.

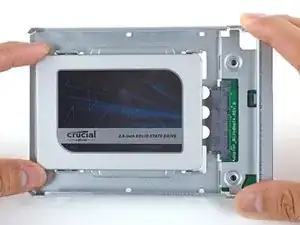
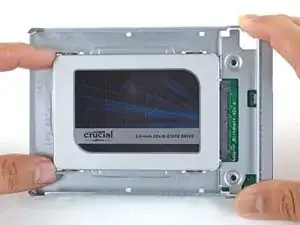
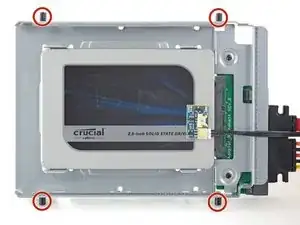
    • Alinea los conectores de la SSD con las tomas de la caja metálica.

    • Presiona la unidad contra las tomas de la carcasa hasta que la SSD quede firmemente asentada.

    • La SSD se conecta con la carcasa en una sola dirección. Si los conectores no se alinean, gira la SSD e inténtalo de nuevo.

    In my 21.5 “ imac, there simply isnt enough room to use the plastic ssd enclosure in photo 1 if you want to screw back into the bracket as instructions advise you to do. When trying to put the screen back onto the Imac, it just wouldnt fit. So basically i did not screw in the ssd enclosure fully with the bracket, there is still room for the ssd enclosure and for all of the connections and temperature sensor if you dont screw in the bracket.

    Computer is running fine after a month or so, but i image if we end up moving the imac we should be very careful not to shakeup the SSD too much.

    jacob d -

  2. FtBOnUuDYZJTjvey
    FtBOnUuDYZJTjvey
    RvVXsqFVNCWuybvj
    UmyFUVECjaDZNRjp
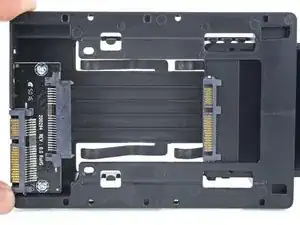
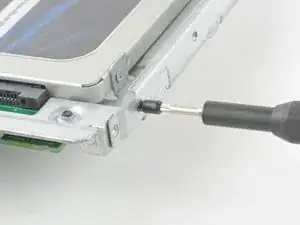
    • Usa un destornillador Phillips para instalar los cuatro tornillos plateados (dos de cada lado) a lo largo de los bordes del SSD para fijarlo a la caja.

  3. HU4PFgCWjYNkrIi4
    HU4PFgCWjYNkrIi4
    gWGSmdLLDiJOASYW
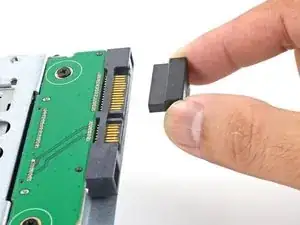
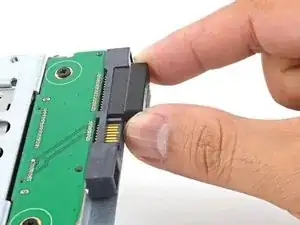
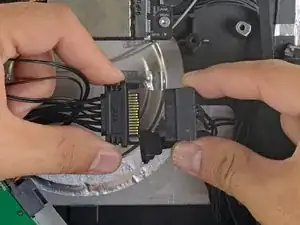
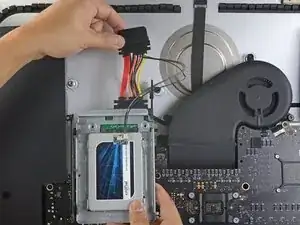
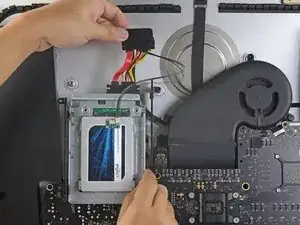
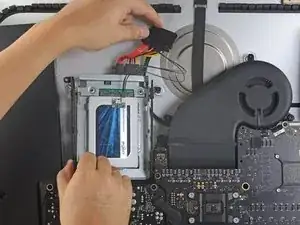
    • Conecta el cable de alimentación SATA habilitado para sensores incluido en el puerto del recinto.

    • El cable está enchavetado para conectarlo en una sola orientación. Si no puedes conectar el cable, gíralo 180° e inténtalo de nuevo.

  4. nFPHEiNHZQZIIWir
    nFPHEiNHZQZIIWir
    25p6UPH1X2Hpm1ut
    kZJrQ2FKFMAo4eGZ
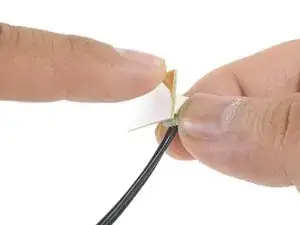
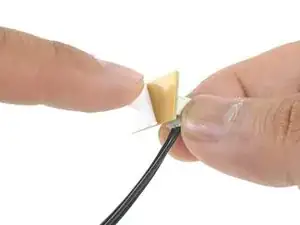
    • Despega el revestimiento blanco de la parte posterior de la pequeña placa del sensor de temperatura para exponer el adhesivo.

    • Pega la placa del sensor de temperatura a una superficie metálica expuesta del SSD, cerca del conector SATA.

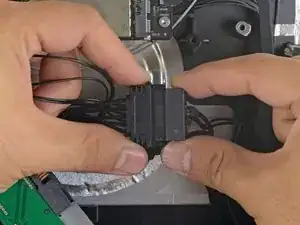
    • Dobla los cables del sensor de temperatura sobrantes para que estén fuera del camino mientras instalas la caja.

    I don’t remember these instructions including advice to first install MacOS onto the new SSD hard drive. If you don’t first install MacOS on the SSD before installing it, you will then need to use a different computer to create a bootable USB thumbdrive with MacOS installed on it, which is not as easy as it sounds as you have to format the USB correctly, and then download the OS which can take a while if your internet connection isnt great.

    jacob d -

  5. TB3g2BfZthZmgZof
    TB3g2BfZthZmgZof
    UZXpLNW61PfcoLXO
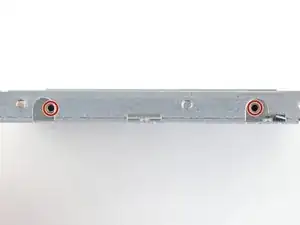
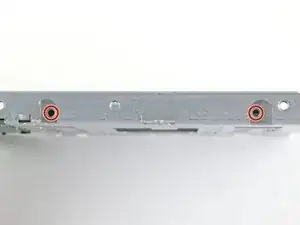
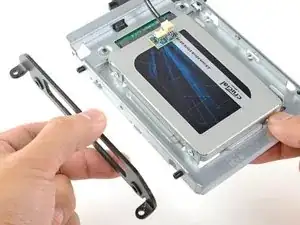
    • Utiliza un destornillador T8 para instalar las clavijas de montaje del viejo disco duro en los lados del recinto.

    Hallo. Will meine originale HDD wieder einbauen. Wo finde ich hier den Temperatursensor?

    MichaelRom -

  6. Aq2vsCxhf2S3qufG
    Aq2vsCxhf2S3qufG
    6HieMRWYI2Pgc2Yn
    • Coloca los soportes de montaje que se hayan retirado del disco duro antiguo en el recinto.

  7. ciVrfTP4LtNtlEV3
    ciVrfTP4LtNtlEV3
    QDKoTyhGQj1clwQP
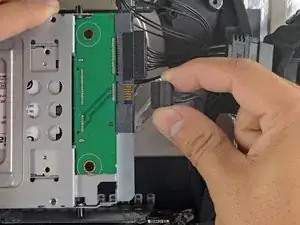
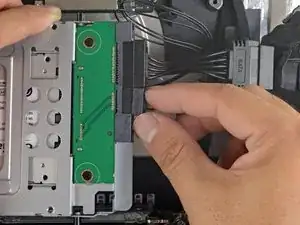
    • Conecta el cable de alimentación SATA del iMac al otro extremo del nuevo cable SATA habilitado para sensores.

  8. CWAiJZexabkmRKlw
    CWAiJZexabkmRKlw
    UXFeucvE5hqbSPEU
    • Conecta el cable de datos SATA del iMac al enchufe del recinto.

  9. YJqasivdZRKDWMjy
    YJqasivdZRKDWMjy
    FI6EqbMtmSvAcIM6
    DpsoNu5h3obcGm6g
    • Las imágenes utilizadas en este paso provienen de una iMac 2017. Sus cables pueden parecer ligeramente diferentes, pero el procedimiento sigue siendo el mismo.

    • Desliza el recinto del SSD en el espacio que ocupaba anteriormente el disco duro.

    • Encamina los cables SATA para que no interfieran con ningún otro componente.

    • Intenta mantener los cables libres de cualquier curva pronunciada, y dirígelos de manera que no queden apretados.

    I’m stuck on the last stage. In my 2011 21.5” EMC 2428, Model A1311, I simply can’t figure out how to get the new enclosure back in position to fasten it down. The new sensor cable interferes with the reinstallation. I don’t see adequate pictures above to see how to solve the problem, other than by just letting the new enclosure sit loose in the general area, which doesn’t seem ideal. Suggestions?

    David Hercher -

    Hi David,

    The sensor cable is pretty rigid, which makes it difficult to maneuver the enclosure into place. You may need to make some tight turns on the cable. You can also try running without the sensor cable and see if the fans will work adequately without it.

    Arthur Shi -

    If using a SSD adapter as replacement, does the EMI foam from step 15 go on the bottom of the SSD adapter?

    jim -

    It is a bit disorienting that the photos change from a 2011 to a 2017 model. Also the EMI foam seems to have gone missing in this instructions

    Gregory Robben -

Conclusión

Para volver a ensamblar tu dispositivo, sigue estas instrucciones en orden inverso.

Arthur Shi

Miembro Desde 03/01/18

219109 Reputación

0 comentarios