Introducción

Sigue esta guía para actualizar el disco duro de tu iMac con una SSD utilizando una carcasa metálica actualizada de 2.5" a 3,5". La guía incluye los pasos para instalar el sensor de temperatura para que los ventiladores del Mac funcionen a la velocidad correcta.

Esta es una guía de requisito previo y no debe usarse sola. Esta guía forma parte de las guías de sustitución del disco duro de la iMac.

  1. HKQbp12ZISQhNfAv
    HKQbp12ZISQhNfAv
    C535jLFwdCXbrulv
    wDWxsjpZCDD5vCjk
    • Sigue los siguientes pasos si vas a sustituir tu disco duro por un kit de SSD.

    • Si la caja de la SSD se parece a la primera imagen, sigue esta guía en su lugar.

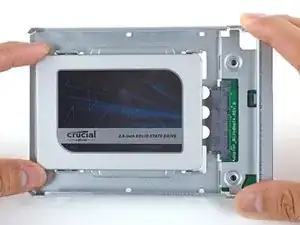
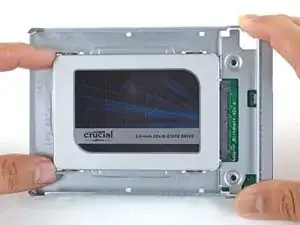
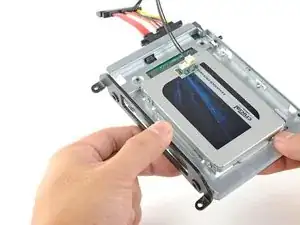
    • Alinea los conectores de la SSD con las tomas de la caja metálica.

    • Presiona la unidad contra las tomas de la carcasa hasta que la SSD quede firmemente asentada.

    • La SSD se conecta con la carcasa en una sola dirección. Si los conectores no se alinean, gira la SSD e inténtalo de nuevo.

    what if I’m installing a hard drive?

    Troy Garcia -

    Didn’t bother with the SSD caddy. Some 3M sticky pads did the trick!

    James Clive -

    Two thoughts on SSD replacement/upgrade:

    1) It would help if some references were made to help us determine what we need in terms form factors. I’ve never used an SSD and see a 2.5” one that would work, but I don’t know if 2.5” SSDs are different (in form factor) from 2.5” HDs. A lot of us are still learning about SSDs and isn’t that what this site is about? (Learning new things about hardware and using hardware?)

    2) I’m not clear if I definitely need a new temperature sensor if I put in an SSD or if

    Hal Vaughan -

    Can I buy the kit without the SSD. I'm thinking of replacing my 3TB hard drive with a 4TB SSD.

    Also, would you happen to know what the maximum hard drive dimension that can fit inside of this iMac? I may try a 14TB hard drive instead.

    Larry -

  2. FtBOnUuDYZJTjvey
    FtBOnUuDYZJTjvey
    RvVXsqFVNCWuybvj
    UmyFUVECjaDZNRjp
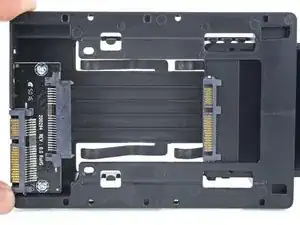
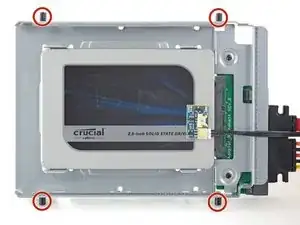
    • Usa un destornillador Phillips para instalar los cuatro tornillos plateados (dos de cada lado) a lo largo de los bordes del SSD para fijarlo a la caja.

  3. quopgXjU6RgRFYYW
    quopgXjU6RgRFYYW
    6FVtDs36uVFQAEUg
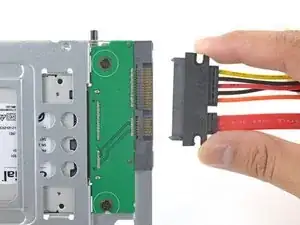
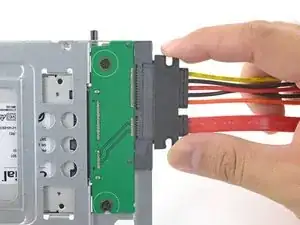
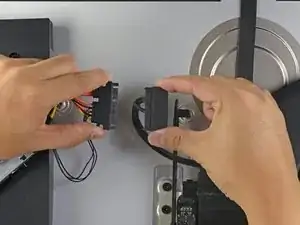
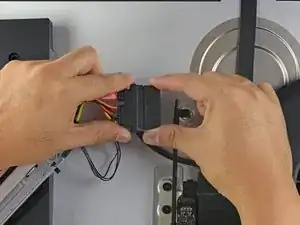
    • Conecta el cable de alimentación SATA habilitado para sensores incluido en el puerto del recinto.

    • El cable está enchavetado para conectarlo en una sola orientación. Si no puedes conectar el cable, gíralo 180° e inténtalo de nuevo.

    Is the thermal sensor needed? I fitted a replacement SSD and it’s all back together and the iMac’s fans are fine. They don’t go into full max speed mode.

    James Clive -

    If you have a problem with the fans, you can always use Macs Fan Control (free) to set the speed. The sensor is not needed.

    maccentric -

  4. nFPHEiNHZQZIIWir
    nFPHEiNHZQZIIWir
    25p6UPH1X2Hpm1ut
    kZJrQ2FKFMAo4eGZ
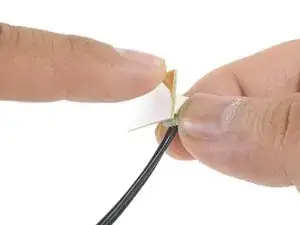
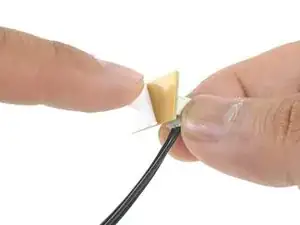
    • Despega el revestimiento blanco de la parte posterior de la pequeña placa del sensor de temperatura para exponer el adhesivo.

    • Pega la placa del sensor de temperatura a una superficie metálica expuesta del SSD, cerca del conector SATA.

    • Dobla los cables del sensor de temperatura sobrantes para que estén fuera del camino mientras instalas la caja.

    Great pics ! Is that “temp sensor board” is already on my HDD IMAC ?? Or must I buy one ?

    kenclark200 -

    Don’t bother with the thermal sensor. I didn’t fit one and the iMac is working fine and no fans are kicking in.

    James Clive -

    Instructions say to attach sensor to the SSD, but all pictures show it being attached to the SSD carrier. This may not represent accurate SSD temp as much of the carrier dissipates the heat absorbed from the SSD

    chris byrne -

    Confirmed, no need for the extra temp sensor on Mid-2015 iMac. (EMC 2806, Mid-2015 27" iMac). Just changed the old 1TB HDD to SSD, no extra fan RPM after power on.

    Laszlo Nyirfa -

    The adhesive on the sensor is very weak. My sensor fell off after a couple of days. Is there a safe glue to use to adhere it to the SSD? Super glue?

    estyle18 -

    FWIW I bought a 4TB Western Digital Blue SSD. The entire case of the SSD is plastic- there is no metal. Hoping the temp sensor adheres to it okay.

    Kupe -

  5. TB3g2BfZthZmgZof
    TB3g2BfZthZmgZof
    UZXpLNW61PfcoLXO
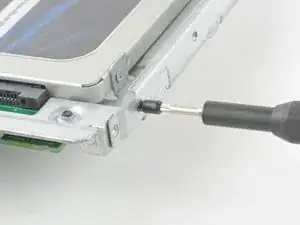
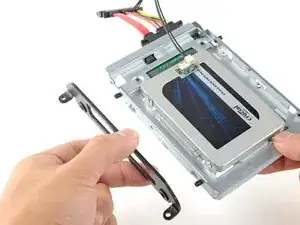
    • Utiliza un destornillador T8 para instalar las clavijas de montaje del viejo disco duro en los lados del recinto.

  6. KBSB2H5m4afo1XQb
    KBSB2H5m4afo1XQb
    yaSlbXuRWxuB6UEm
    • Coloca los soportes de montaje que se hayan retirado del disco duro antiguo en el recinto.

  7. SldWU16exyqkJemL
    SldWU16exyqkJemL
    UjNyOhADTniaGyRe
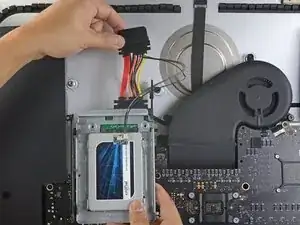
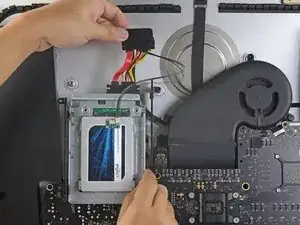
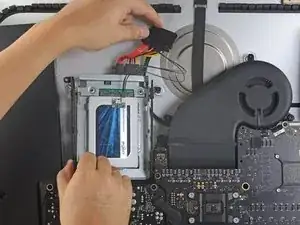
    • Conecta el cable de alimentación SATA del iMac al otro extremo del nuevo cable SATA habilitado para sensores.

  8. YJqasivdZRKDWMjy
    YJqasivdZRKDWMjy
    FI6EqbMtmSvAcIM6
    DpsoNu5h3obcGm6g
    • Las imágenes utilizadas en este paso provienen de una iMac 2017. Sus cables pueden parecer ligeramente diferentes, pero el procedimiento sigue siendo el mismo.

    • Desliza el recinto del SSD en el espacio que ocupaba anteriormente el disco duro.

    • Encamina los cables SATA para que no interfieran con ningún otro componente.

    • Intenta mantener los cables libres de cualquier curva pronunciada, y dirígelos de manera que no queden apretados.

    The SATA cable on my Late 2012 was not long enough to comfortably attach to the end of the temperature sensor array after it was plugged into the new SSD. I had to fold the array and slide it under the SSD and housing. There was much resistance to the folding so I took it slowly to let the wires adjust gradually to the fold so they would not break.

    Bob Enders -

    Unfortunately, the adapter that comes with it isn't long enough to avoid pushing against the screen in the front. One week after upgrading to SSD my screen fell off shattering and breaking the power connector on the systems board. A new screen is ordered but I'm hoping the power connector isn't damaged beyond repair. I'm going to try to adhere the HD adapter to the back inside of the case with 3m adhesive to avoid pressure against the screen.

    Erik Johnson -

    As a newbie, the only other upgrade I have done is to replace my iPhone 7 battery. I had trouble on reassembly.

    This is a great upgrade guide, but it would be important to me to see the reassembly instructions including the cautions.

    For example, I had issues with reattaching the plugs in the phone. I could see having an issue with them here, as well as repositioning the display back into the cabinet.

    I do PCB board repair work and repair pinball machines. But I won’t try this.

    Larry Hamm -

    how do i glue on the new screen? which glue is used?

    Marc Seeh -

    Try 3m double sided tape from Amazon, it available in 3mm width which is ideal for iMac screen. It has a very thin foam and is much better quality than the cheap Chinese kits available on Amazon. You will have to trim it to size with a sharp craft blade as you fit. Don’t risk your screen falling off from using cheap tape in the so called fitting kits!

    Tony Street -

Conclusión

Para volver a ensamblar tu dispositivo, sigue estas instrucciones en orden inverso.

Arthur Shi

Miembro Desde 03/01/18

219109 Reputación

0 comentarios