
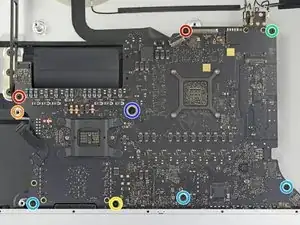
Introducción
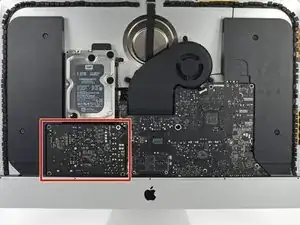
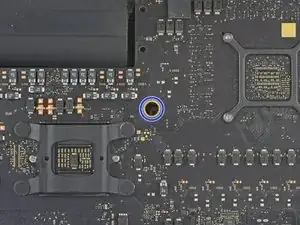
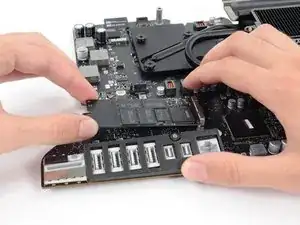
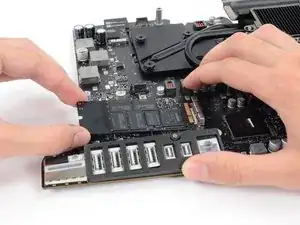
Si tu iMac fue configurada con una unidad de estado sólido o Fusion Drive, está incluye un SSD Blade en la parte trasera de la tarjeta lógica. Usa esta guía para acceder y remover el SSD Blade.
Antes de empezar cualquier trabajo en tu iMac: Desconecta la computadora y presiona y mantén el botón de encendido por diez segundos para descargar los capacitores de la fuente de poder.
Ten cuidado de no tocar los cables del capacitor o alguna unión soldada expuesta en la parte trasera de la fuente de poder.
-
-
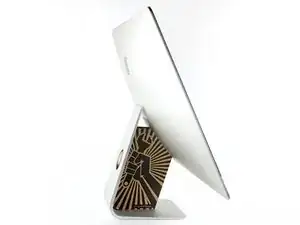
Con la bisagra libre para moverse, la iMac estará desequilibrada y será difícil trabajar en ella. Coloca una cuña de servicio en el soporte para estabilizar la iMac.
-
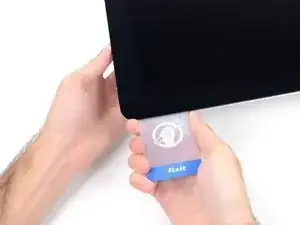
Si utilizas la cuña de servicio de cartón iFixit, sigue estas instrucciones de montaje para armarla.
-
-
-
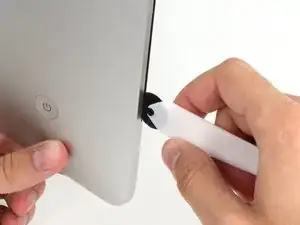
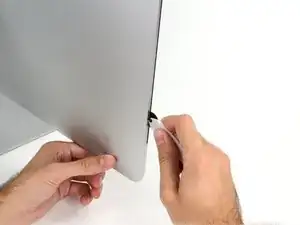
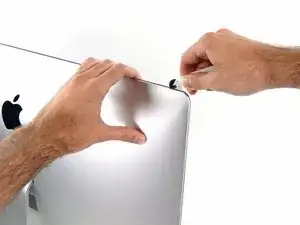
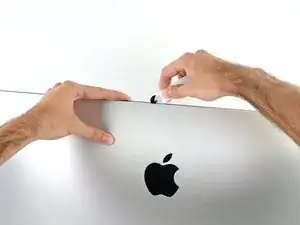
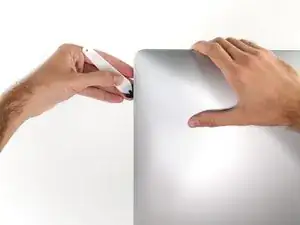
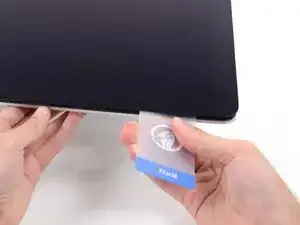
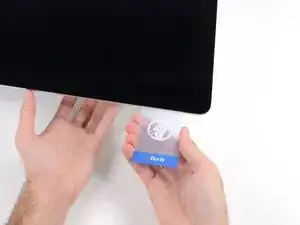
Desde la la izquierda de la pantalla, cerca del botón de encendido, inserta la herramienta de apertura de la iMac en el hueco entre el panel de cristal y la carcasa posterior.
-
-
-
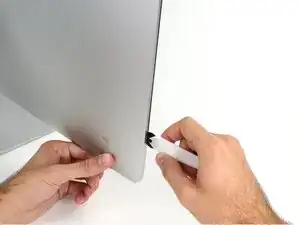
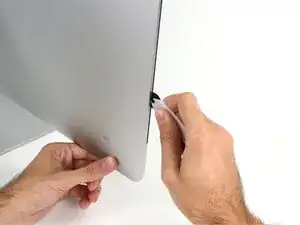
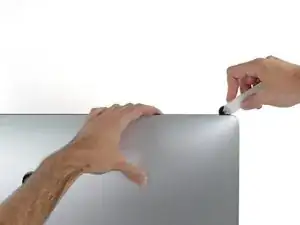
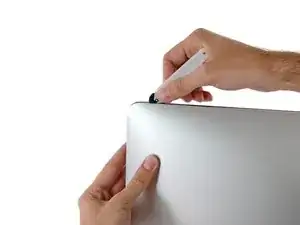
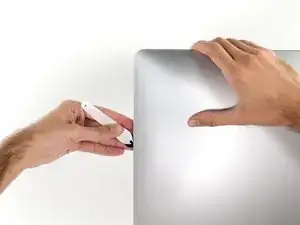
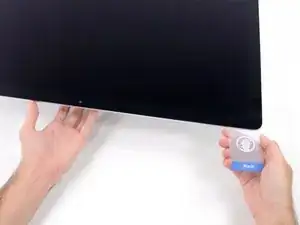
Usa la herramienta como un cortador de pizza, pásala por el hueco y cortará el adhesivo de espuma por el centro.
-
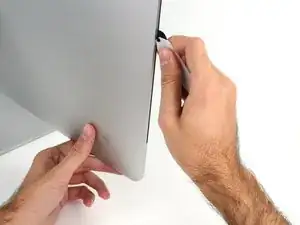
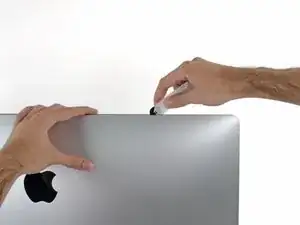
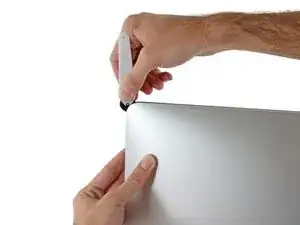
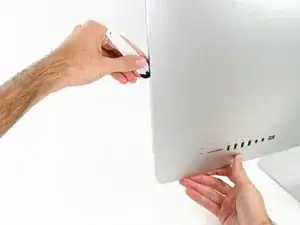
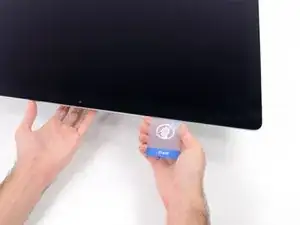
Pasa la herramienta por el lado izquierdo de la pantalla.
-
-
-
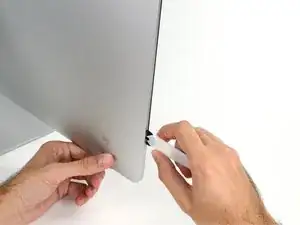
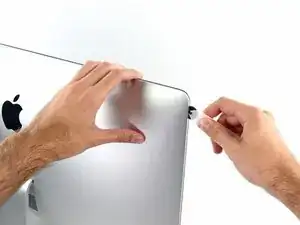
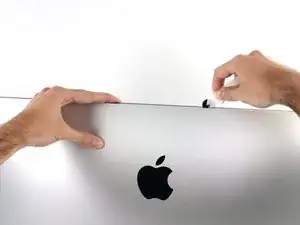
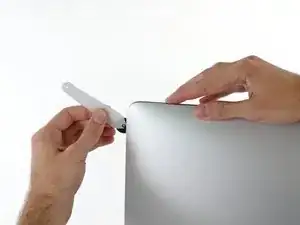
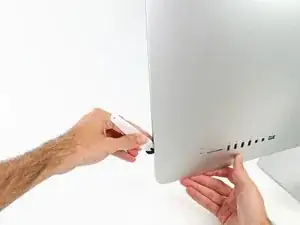
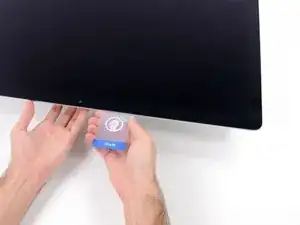
Termina de empujar la herramienta de apertura a la parte inferior del lado derecho de la pantalla.
-
-
-
Coloca el iMac boca arriba sobre una mesa.
-
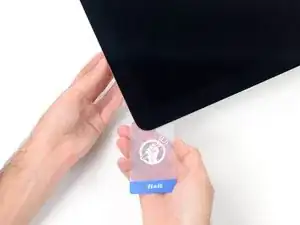
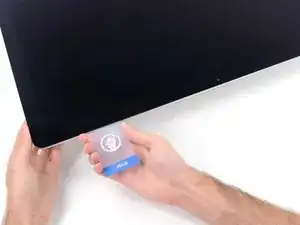
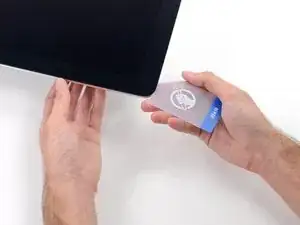
Empezando por la esquina superior derecha del iMac, introduce una tarjeta de plástico entre la pantalla y el marco.
-
-
-
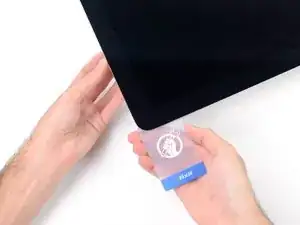
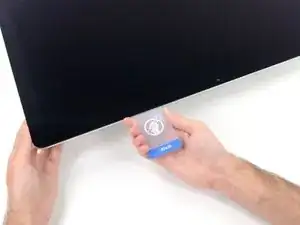
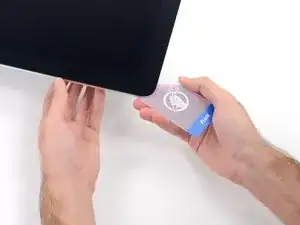
Gira suavemente la tarjeta de plástico para abrir el espacio entre la pantalla y el marco, y corta cualquier adhesivo restante cerca de la esquina.
-
-
-
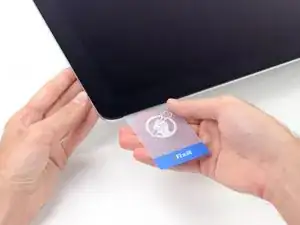
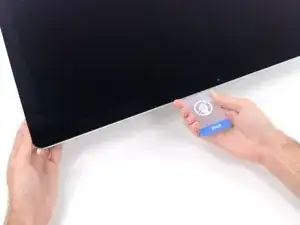
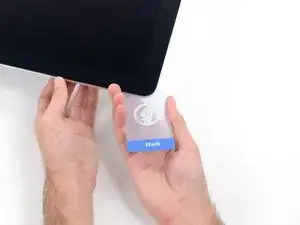
Pon la tarjeta en la esquina de nuevo y deja que se quede ahí para evitar que el adhesivo se reajuste.
-
-
-
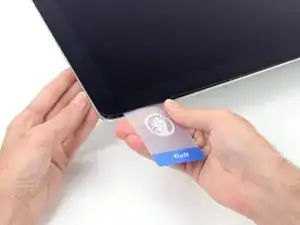
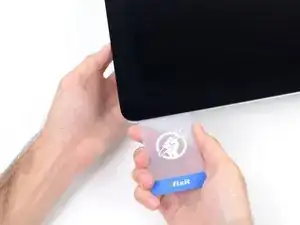
Inserta una segunda tarjeta en el espacio entre la pantalla y el marco en la esquina superior izquierda.
-
-
-
Desliza la tarjeta plástica hacia el centro, deteniéndote de nuevo justo antes de la cámara iSight.
-
-
-
Con las tarjetas insertadas como se muestra cerca de las esquinas, gira suavemente las tarjetas para aumentar el espacio entre la pantalla y la caja.
-
Si hay alguna sección que parece pegarse y no se separa, deje de retorcer y use una de las tarjetas para cortar el adhesivo en el área del problema.
-
Comienza a levantar la parte superior de la pantalla del marco.
-
-
-
Mientras sostienes la pantalla con una mano, usa la otra para desenchufar el cable de alimentación de la pantalla.
-
-
-
Levanta el soporte metálico de retención del cable de datos de la pantalla.
-
Desconecta el cable de datos de la pantalla.
-
-
-
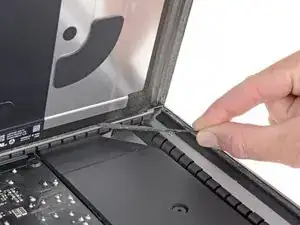
Agarra la pequeña pestaña al final de una de las tiras adhesivas de la pantalla del borde inferior y tira del adhesivo hacia la parte superior de la iMac para quitarlo
-
Repita este paso con la otra tira adhesiva y quítala.
-
-
-
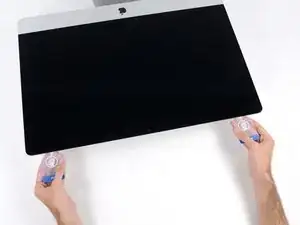
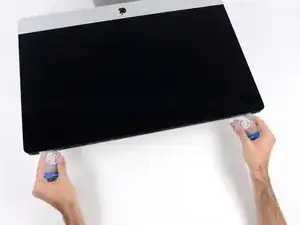
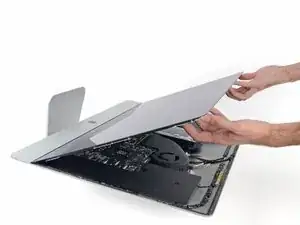
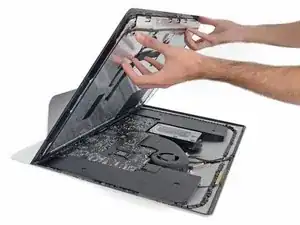
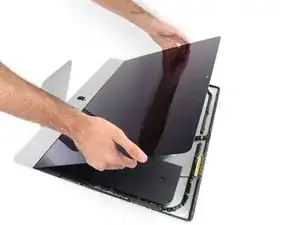
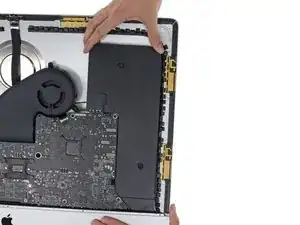
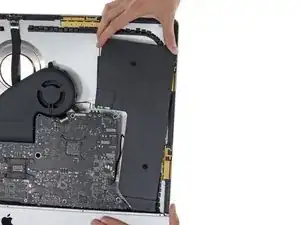
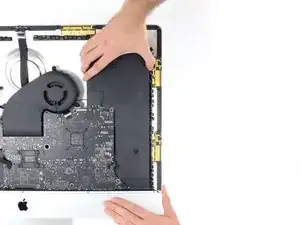
Levanta la pantalla del marco y sácala del iMac. Coloca la pantalla boca abajo sobre una superficie plana y suave.
-
Puede que sea necesario levantarla lentamente por un lado, para despegar el adhesivo restante.
-
-
-
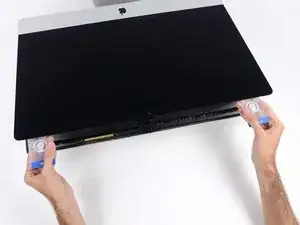
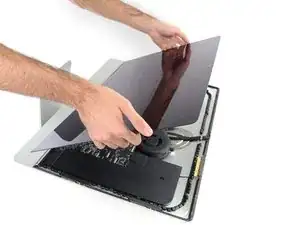
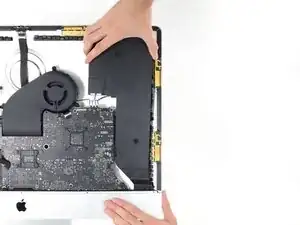
Utiliza un destornillador Phillips para quitar los nueve tornillos de 3,2 mm que sujetan el brazo de soporte.
-
Es posible que tengas que despegar el adhesivo de la pantalla que recubre el borde inferior de la carcasa del iMac para acceder a los tornillos.
-
-
-
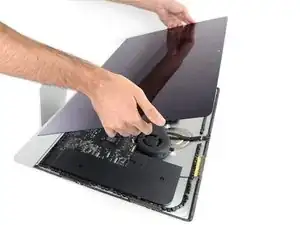
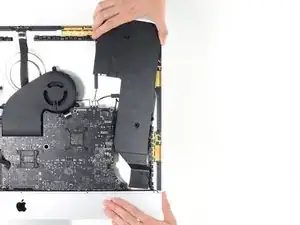
Retira el brazo de soporte inferior (también conocido como "correa para la barbilla") de la carcasa del iMac.
-
-
-
Desconecta el cable del altavoz izquierdo tirando de él hacia arriba y sacándolo de su zócalo en la placa base.
-
Retire el cable a través del espacio entre el disco duro y la placa base.
-
-
-
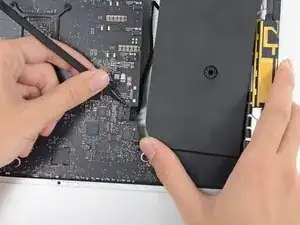
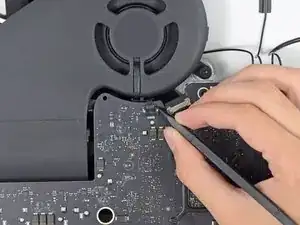
Usa un spudger para desconectar la conexión del botón de encendido de su ranura en la placa base.
-
-
-
Levanta el altavoz izquierdo, hasta que puedas ver el cable del botón de encendido (unos 1.2 cm).
-
-
-
Desconecta con cuidado el cable del botón de encendido de su muesca en el altavoz izquierdo.
-
-
-
Levanta el altavoz izquierdo y sepáralo del iMac.
-
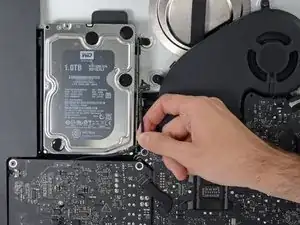
Empuja desde el terminal del conector, a la vez que tiras desde el terminal del altavoz, para ajustar el cable bajo la ranura de sujeción correcta del disco duro.
-
-
-
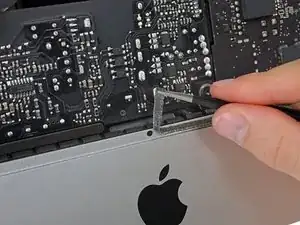
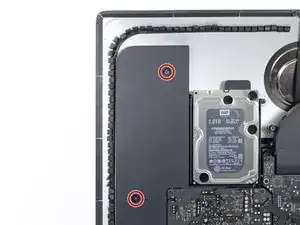
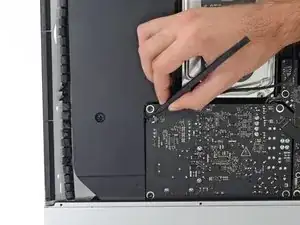
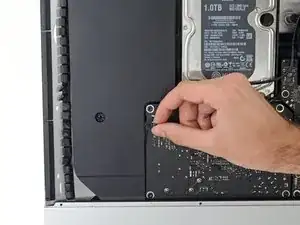
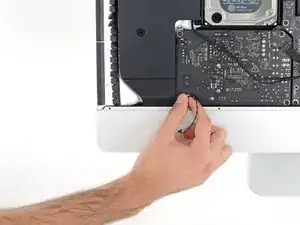
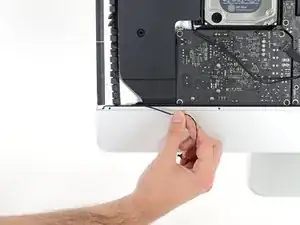
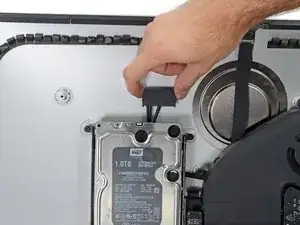
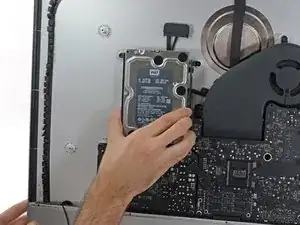
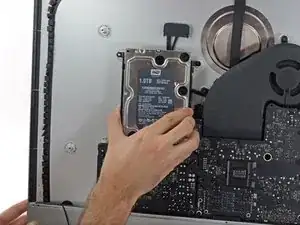
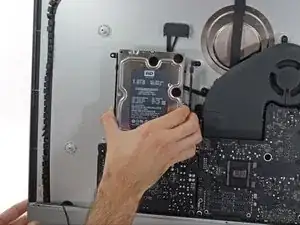
Remueve los dos tronillos de 7.3 mm que aseguran la abrazadera izquierda del disco duro a la carcasa trasera.
-
-
-
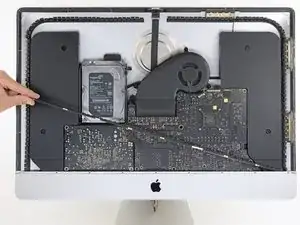
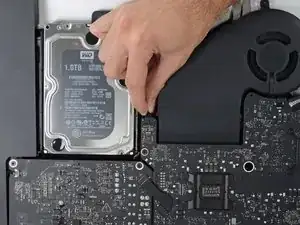
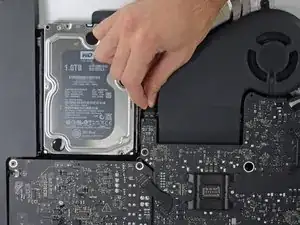
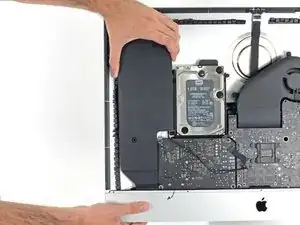
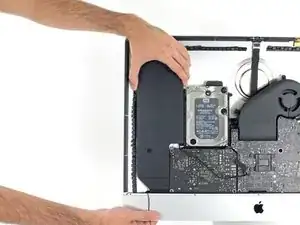
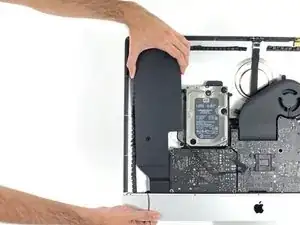
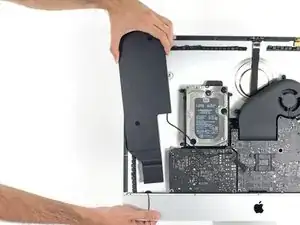
Agarra el disco duro y la abrazadera izquierda del disco duro juntos.
-
Inclina el lado izquierdo lejos de la carcasa trasera y desliza el conjunto hacia la izquierda.
-
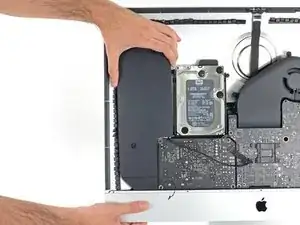
Remueve el disco duro y la abrazadera izquierda del disco duro de la iMac.
-
-
-
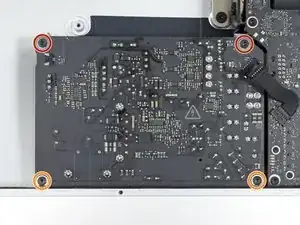
Retira los siguientes cuatro tornillos que sujetan la fuente de alimentación a la carcasa trasera (tamaño T8 o T10 según el modelo exacto):
-
Dos tornillos Torx de 23.7mm
-
Dos tornillos Torx de 7.3mm
-
-
-
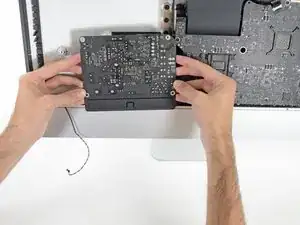
Mueve la placa de la fuente de alimentación hacia el borde izquierdo de la caja y hacia arriba para liberarla de la muesca en la placa lógica.
-
-
-
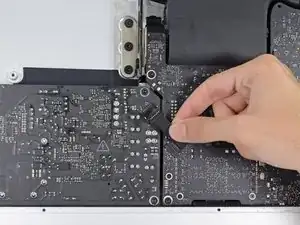
Presiona la pestaña del conector del cable de alimentación de CC, luego extráela de su zócalo en la parte posterior de la placa lógica.
-
-
-
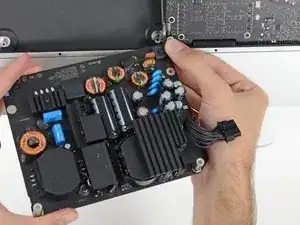
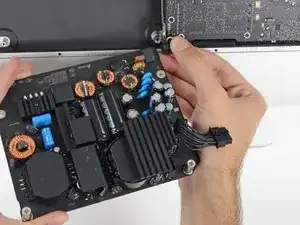
Voltea la parte superior de la fuente de alimentación hacia ti, como abrir un buzón, para revelar el conector del cable de entrada de CA.
-
Desconecta el conector del cable de entrada de CA.
-
-
-
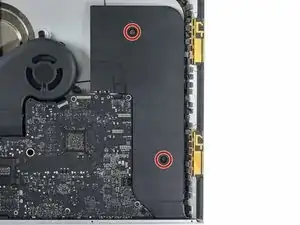
Utiliza un destornillador Torx T10 para quitar los dos tornillos de 10 mm que sujetan el altavoz derecho.
-
-
-
Mueve suavemente el altavoz derecho ligeramente hacia la derecha para permitir el acceso a la conexión de su cable en la placa lógica.
-
-
-
Usa un spudger para aflojar el conector del cable del altavoz derecho de su zócalo en la placa lógica.
-
Tira del conector hacia la derecha para sacarlo de su zócalo.
-
-
-
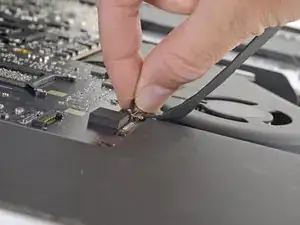
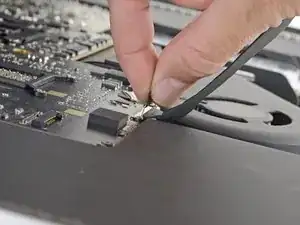
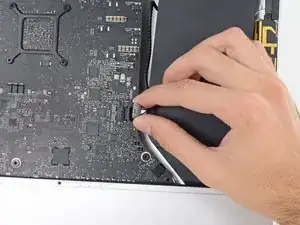
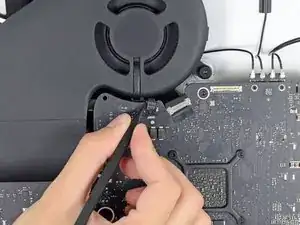
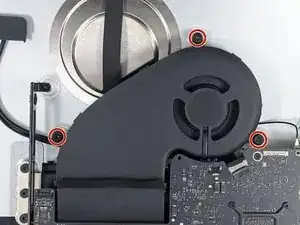
Usa la punta de un spudger para desconectar el conector del cable del ventilador de su zócalo en la placa lógica.
-
-
-
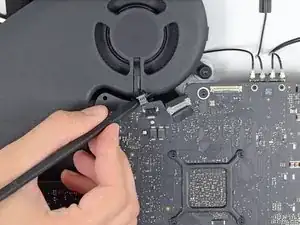
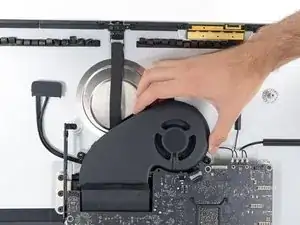
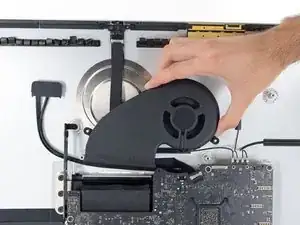
Despega la cinta negra que conecta el ventilador al conducto de escape ligeramente.
-
Deja la cinta en su lugar en el conducto de escape—solo necesitas exponer la unión para liberar el ventilador.
-
-
-
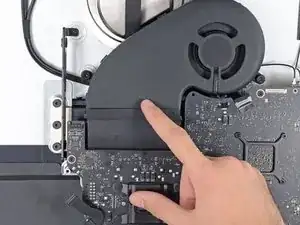
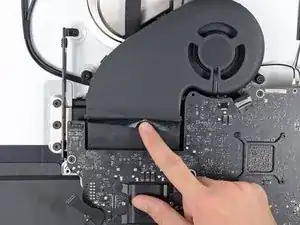
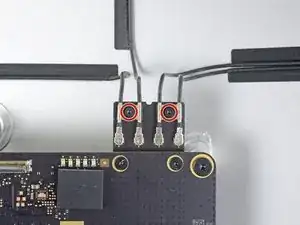
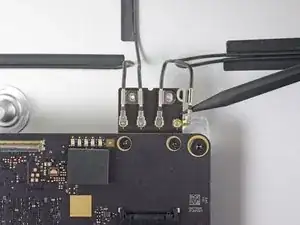
Utiliza un destornillador Torx T5 para quitar los dos tornillos de 4 mm que sujetan los cables de la antena AirPort/Bluetooth.
-
-
-
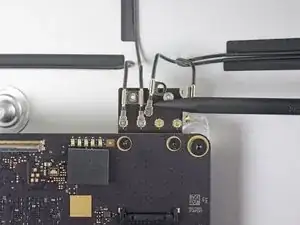
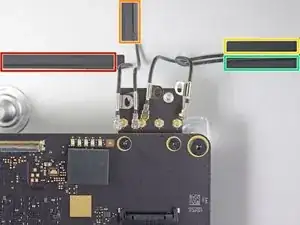
Usa la punta de un spudger para desconectar cada uno de los cuatro conectores de antena de la tarjeta AirPort/Bluetooth.
-
Extremo izquierdo
-
Parte superior
-
Superior derecha
-
Inferior derecha
-
-
-
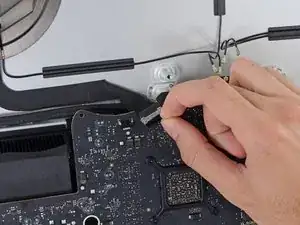
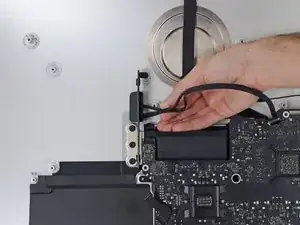
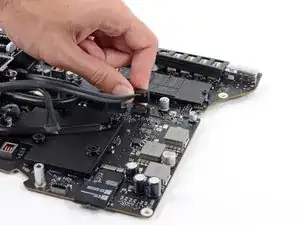
Levanta el soporte de retención de metal en el cable de la cámara iSight.
-
Saca el conector del cable de la cámara de su zócalo, hacia la parte superior del iMac.
-
-
-
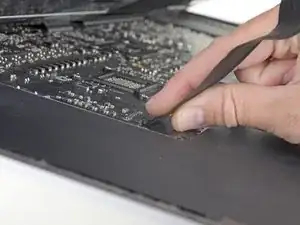
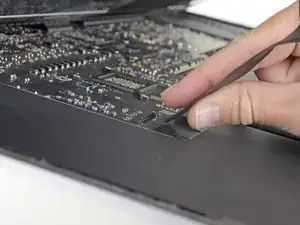
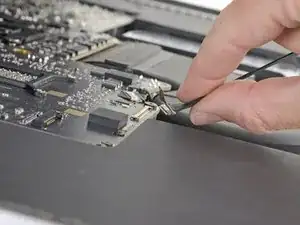
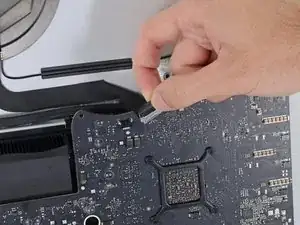
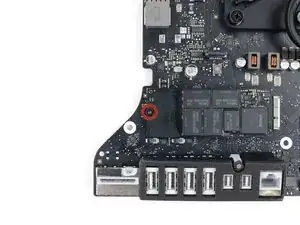
Usa el extremo plano de un spudger para desconectar el conector del cable del conector de auriculares de su zócalo en la placa lógica.
-
Empuja suavemente el cable fuera del camino.
-
-
-
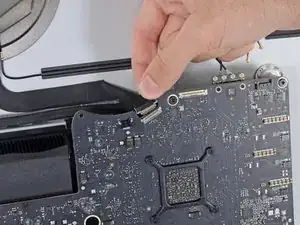
Usa la punta de un spudger para abrir la solapa de retención en el conector ZIF del cable plano del micrófono.
-
Usa pinzas para tirar suavemente del cable plano del micrófono para sacarlo de su zócalo.
-
-
-
Retira los siguientes tornillos que sujetan la placa lógica:
-
Dos tornillos T8 de 23,7 mm
-
Un tornillo espaciador T25 de 20,1 mm
-
Un tornillo T8 de 17,6 mm
-
Un tornillo T8 de 7,2 mm
-
Tres tornillos T8 de 7,1 mm
-
Un tornillo cautivo T8
-
-
-
Tira del cable SATA del disco duro y del conector a través del soporte derecho del disco duro. Mueve el cable hacia el lado derecho del iMac, fuera del camino del puerto de escape.
-
-
-
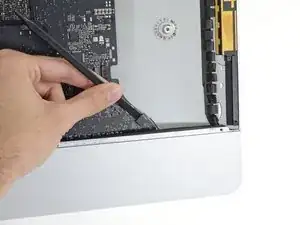
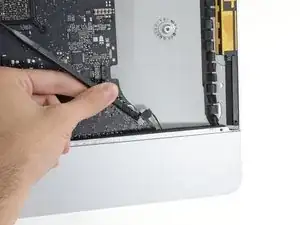
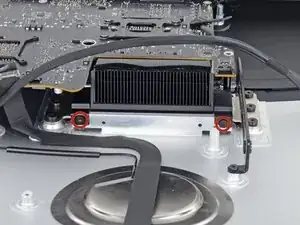
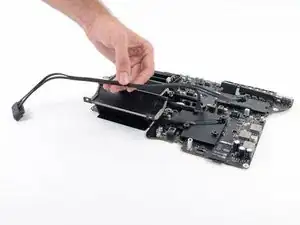
Utiliza un destornillador Torx T8 para quitar los dos tornillos de 5,6 mm de la parte superior del conducto de escape del disipador de calor.
-
-
-
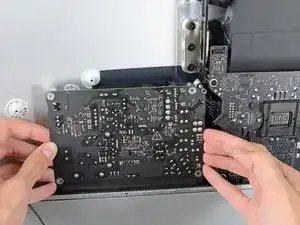
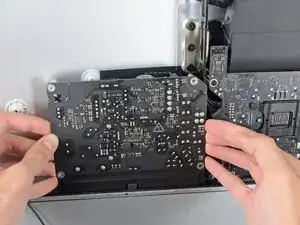
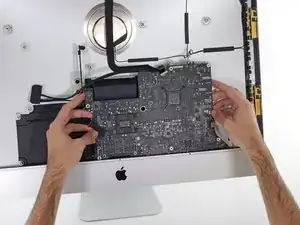
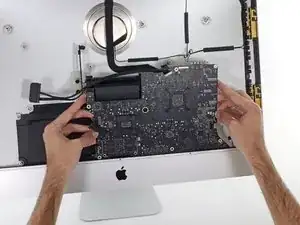
Inclina la placa lógica ligeramente hacia adelante.
-
Levanta la placa lógica hacia arriba y hacia afuera del iMac. Ten cuidado de no engancharla en ninguno de los postes de tornillo fijados en el interior de la carcasa trasera.
-
-
-
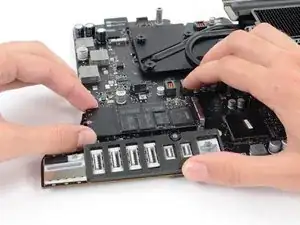
Cuando vuelvas a armar tu iMac, ten mucho cuidado de alinear correctamente los puertos de E/S exteriores. La placa lógica puede quedar torcida incluso cuando está asegurada con todos sus tornillos.
-
Puedes usar una unidad flash USB o un cable Ethernet para asegurarte de que la placa lógica esté colocada correctamente mientras la atornillas.
-
-
-
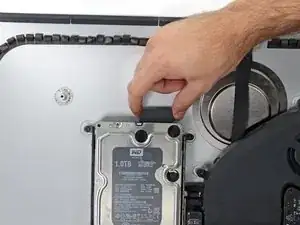
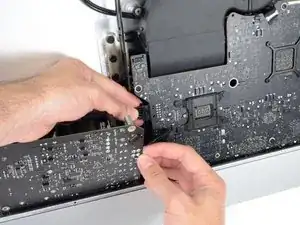
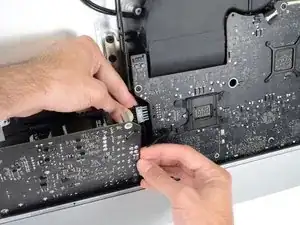
Tira hacia arriba del conector del cable de alimentación SATA para desconectarlo.
-
Desenchufa el conector del cable de datos SATA apretando la pestaña de bloqueo y tirando del conector hacia arriba.
-
Quita el cable SATA del conjunto de la placa lógica para quitarlo del medio y evitar que se dañe.
-


Compara tu nueva parte de reemplazo con la parte original --puede que necesites transferir componentes restantes o remover soportes adhesivos de la nueva parte antes de instalarla.
Para reensamblar tu dispositivo, sigue los pasos anteriores en orden inverso.
Lleva tu basura electrónica a un R2 or e-Stewards certified recycler.
La reparación no fue como lo planeado? Checa nuestro Answers community para ayuda.

10 comentarios
About as complex as a Mac gets in the modern era :-)
I struggled with re-engaging the ZIF socket for the microphone. Patience won out.
Re-seating the rear ports took a little effort; tolerances for USB-C is less than the motherboard screws. I wound up loosening all the MB screws, fully populated the rear USB/Ethernet/etc, then tightened them.
Having the correct tools definitely helped. The pizza cutter and Service Wedge makes quite the difference. Well stocked with iFixit tools here, but purchase of the adhesive package definitely helped the build.
Great teardown, thanks.
And, wow, Terminal command I haven’t used before - “diskutil resetFusion”.
Made setting up a Fusion drive a snack!
Hat problemlos funktioniert, neue WD 2 TB -SSD eingebaut.
Adapter von Amazon: NGFF M.2 NVMe SSD Convert Adapter Card für Upgrade MacBook Air 2013 2014 2015 2016 2017 und Mac Pro Retina 2013 2014 2015 (Schwarz) von Anyoyo
MMOBIEL Klebe Sticker Strip Set für LCD Display kompatibel mit iMac 27" A1419 iMac13,2 2012, iMac14,2 2013, iMac15,1 Retina 5K 2014 mid 2015, bei Amazon gefunden und damit das Ganze wieder verklebt.
jetzt läuft die Monterey-Installation durch…
Vorsicht mit den Kabeln, wie immer, ist Alles sehr fummelig.
Mit Vorsicht hat die Bastelei etwa 3 Stunden gedauert…
Reparatur-Set für iMac 5,6 cm (21,5 Zoll) / 68,6 cm (27 Zoll), rutschfester Griff + 4 Ersatzrollen aus Karbonfaser ebenfalls von Amazon zum Öffnen.
das Teil hier zum Öffnen.