Introducción
Sigue esta guía para reemplazar la batería en una iPad 6 Wi-Fi.
Si tu batería esta inflada, take appropriate precautions.
Ten cuidado cundo aísles la batería usando un bloqueador de baterías. Los contactos de la batería se dañan fácilmente resultando en daño irreversible a la tarjeta lógica. Si escoges completar esta guía sin aislar la batería, evita usar herramientas de metal excepto cuando sea completamente necesario (como al remover tornillos) para prevenir hacer corto circuito en la batería y dañar componentes del circuito sensibles.
-
-
Mientras estas esperando a que se afloje el dispositivo, nota que las siguientes áreas son sensibles al palanqueo:
-
Cámara frontal
-
Antenas
-
Cables del display
-
-
-
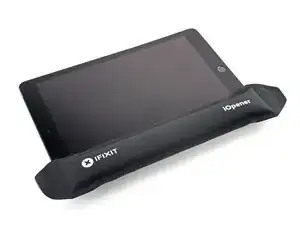
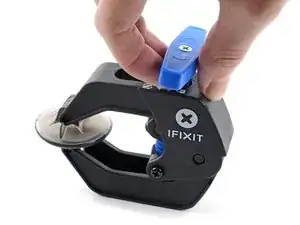
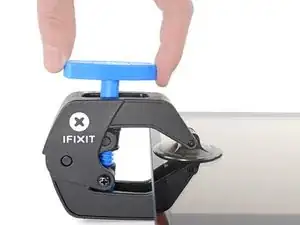
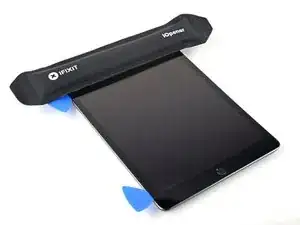
Jala el mango azul hacia la bisagra para activar el modo de apertura.
-
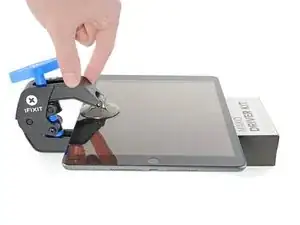
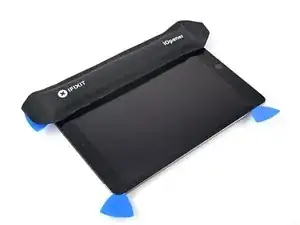
Levanta el iPad lo suficiente para que las bisagras del Anti-Clamp descansen por encima y debajo de la pantalla.
-
Posiciona las ventosas de succión cerca del borde izquierdo en la pantalla--una enfrente y otra detrás.
-
Presiona hacia abajo las ventosas para aplicar succión a la área deseada.
-
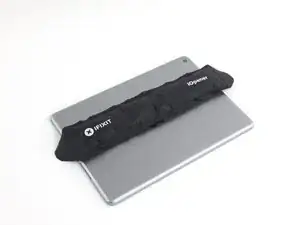
Si encuentras que la superficie de tu dispositivo está demasiado resbalosa para que el Anti-Clamp lo sostenga, puedes usar cinta de embalaje para crear una superficie más adherente.
-
-
-
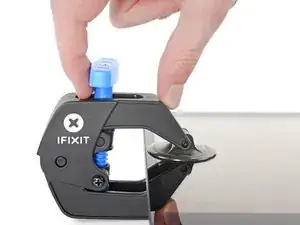
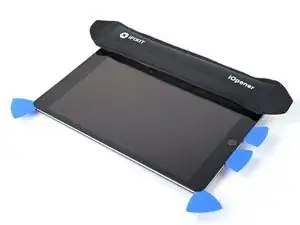
Empuja el mango azul lejos de la bisagra para activar el modo de apertura.
-
Gira el mango en sentido de las manecillas del reloj hasta que veas que las ventosas empiecen a estirarse.
-
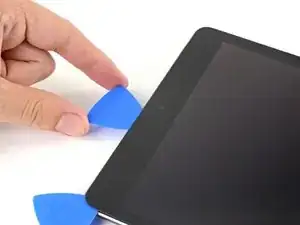
Espera un minuto para darle oportunidad al adhesivo soltar y exponer un hueco de apertura.
-
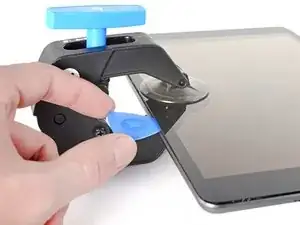
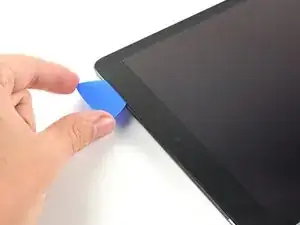
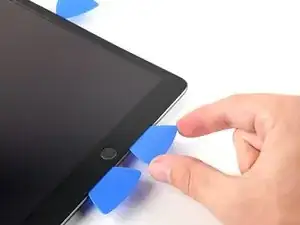
Inserta una púa de apertura debajo del digitalizador cuando el Anti-Clamp cree un huego lo suficientemente grande.
-
Salta el siguiente paso.
-
-
-
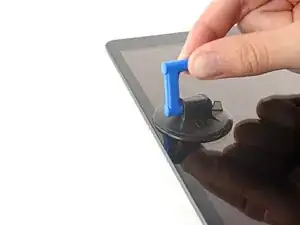
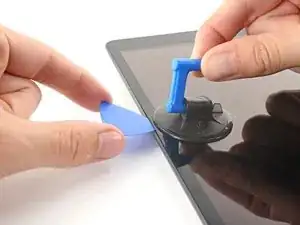
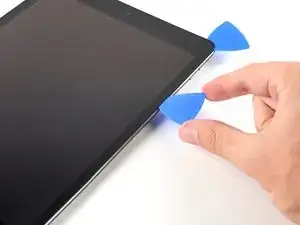
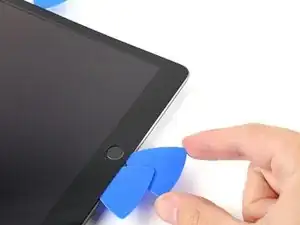
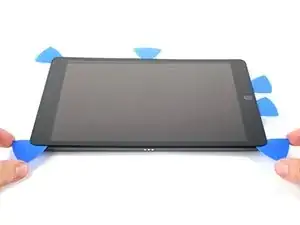
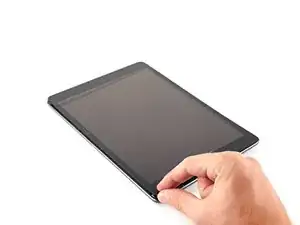
Una vez que la pantalla este caliente al tacto, aplica una manija de succión al borde izquierdo de la pantalla y lo más cercano al borde posible.
-
Levanta la pantalla con la manija de succión para crear un hueco pequeño entre el digitalizador y el marco.
-
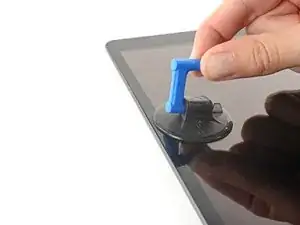
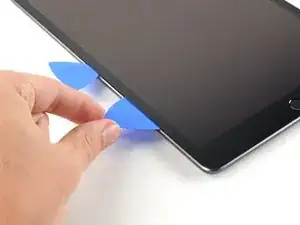
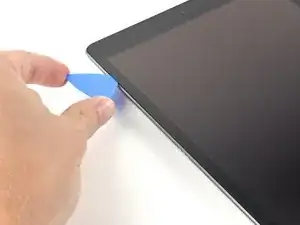
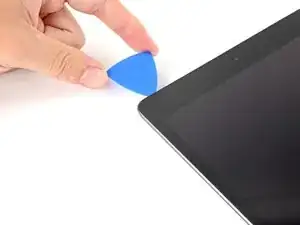
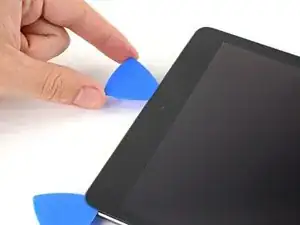
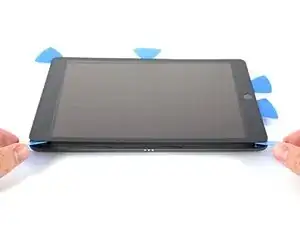
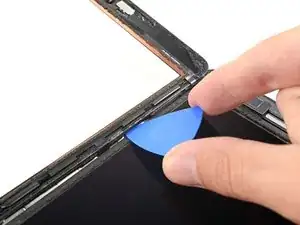
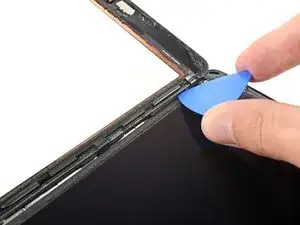
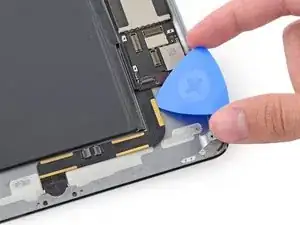
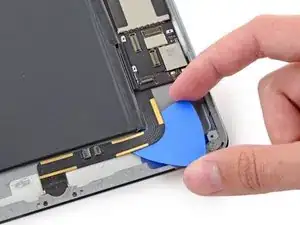
Inserta una púa de apertura en el hueco entre el digitalizador y el marco.
-
-
-
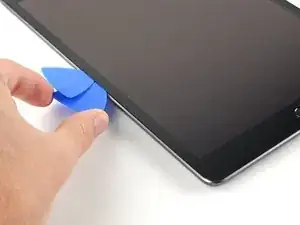
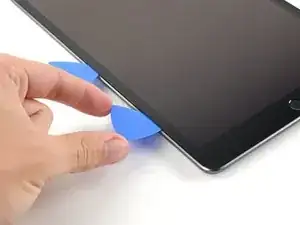
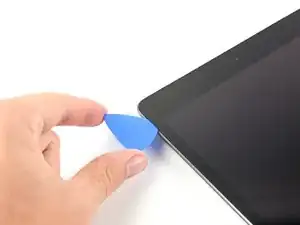
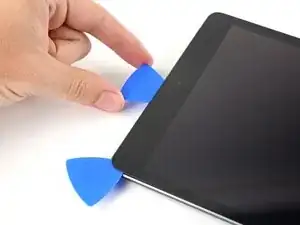
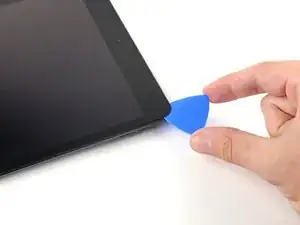
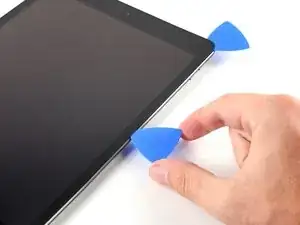
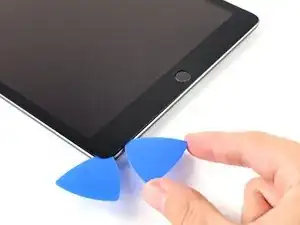
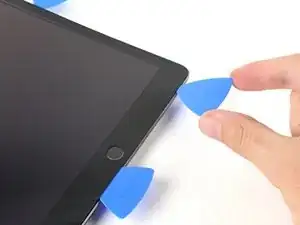
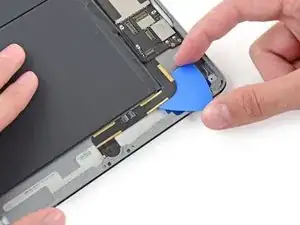
Inserta una segunda púa de apertura en el hueco que acabas de crear.
-
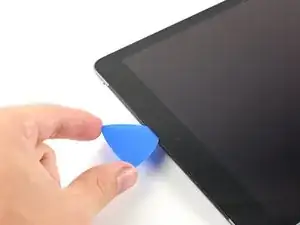
Desliza la púa hacia la esquina izquierda inferior en el dispositivo para separar el adhesivo.
-
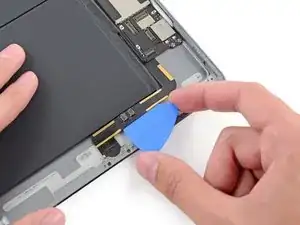
Deja la púa en la esquina inferior izquierda para prevenir que el adhesivo vuelva a sellar.
-
-
-
Si la púa de apertura se atora en el adhesivo, "gira" la púa a lo largo del lado del iPad para continuar separando el adhesivo.
-
-
-
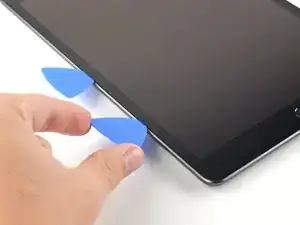
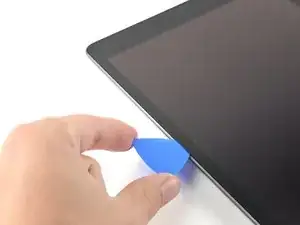
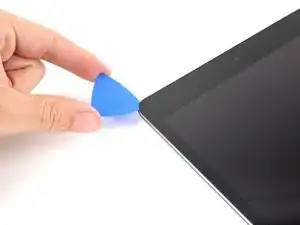
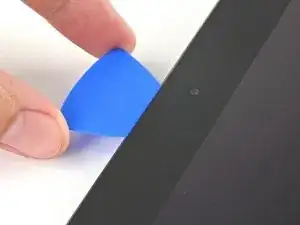
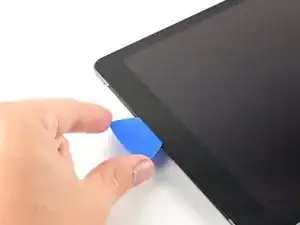
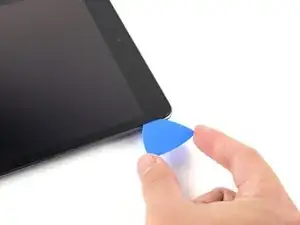
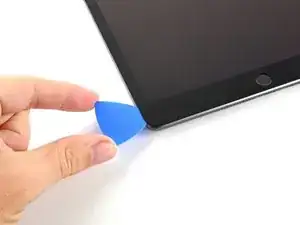
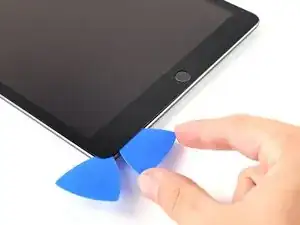
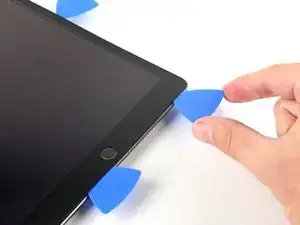
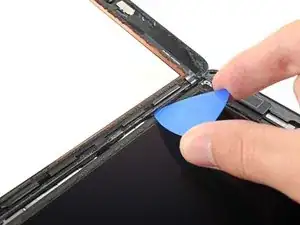
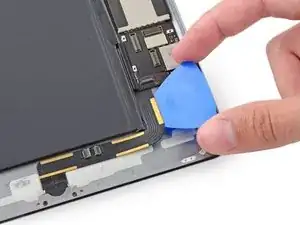
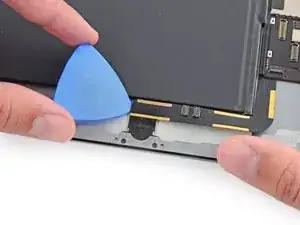
Desliza la primer púa de apertura hacia la esquina superior izquierda del dispositivo para separar el adhesivo.
-
Deja la púa en la esquina superior izquierda para prevenir que el adhesivo vuelva a sellarse.
-
-
-
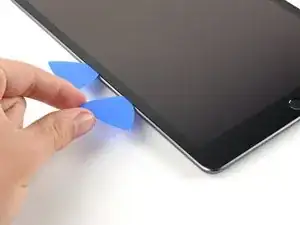
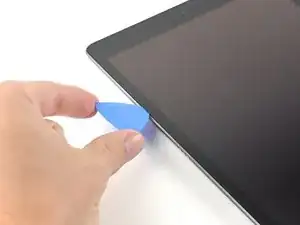
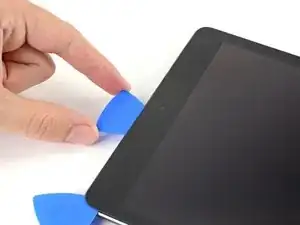
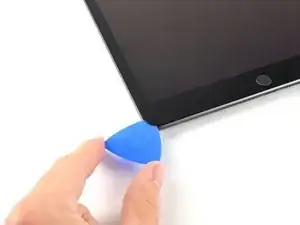
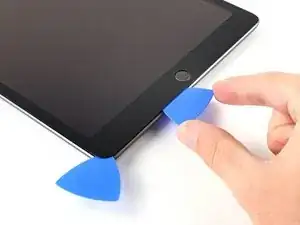
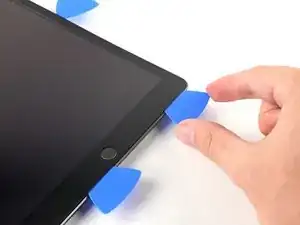
Rota la púa alrededor de la esquina superior izquierda en el dispositivo para separar el adhesivo.
-
-
-
Desliza la púa de apertura a lo largo del borde superior del dispositivo, deteniéndote justo antes de llegar la cámara frontal.
-
-
-
Jala la púa hasta que la punta este entre el digitalizador y el marco.
-
Desliza la púa sobre la cámara frontal para separar el adhesivo.
-
Deja la púa cerca del lado derecho de la cámara frontal antes de continuar.
-
-
-
Re-inserta la púa y deslízala hacia la esquina superior derecha en el dispositivo para separar completamente el adhesivo en el superior.
-
Deja la púa en la esquina superior derecha para prevenir que el adhesivo vuelva a re-sellar.
-
-
-
Rota la púa alrededor de la esquina superior derecha del dispositivo para separar el adhesivo.
-
-
-
Desliza la púa den inferior izquierdo hacia la esquina inferior izquierda para separar el adhesivo.
-
Deja la púa en la esquina inferior izquierda antes de pasar al paso siguiente.
-
-
-
Inserta una nueva púa de apertura en el hueco que acabas de crear en el borde inferior del iPad.
-
Desliza la púa sobre la antena, deteniéndose antes del botón de inicio.
-
Deja la púa en la izquierda del botón de inicio antes de continuar.
-
-
-
Inserta una púa de apertura en el hueco que acabas de crear.
-
Desliza la púa por debajo del botón de inicio y hacia la esquina inferior derecha, asegurándote que solo la punta esta entre el digitalizador y el marco.
-
-
-
Re-inserta la púa y desliza hacia el botón de inicio para separar completamente el adhesivo inferior.
-
Deja la púa a la derecha del botón de inicio antes de continuar.
-
-
-
Gira las dos púas de apertura en las esquinas izquierda del iPad para levantar el digitalizador un poco, separando la última parte del adhesivo en el proceso.
-
-
-
Levanta el borde izquierdo del digitalizador hacia arriba para separar el adhesivo que hay a lo largo del borde derecho del iPad.
-
-
-
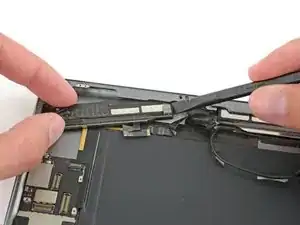
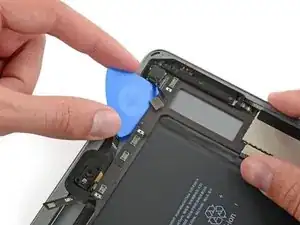
Mientras sostienes el digitalizador, desliza una púa de apertura entre los dos cables del display para separar lo que queda del adhesivo.
-
-
-
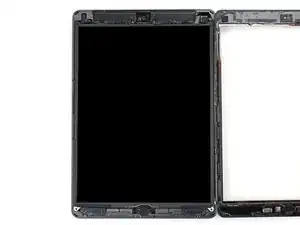
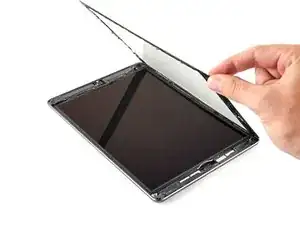
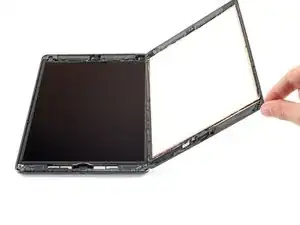
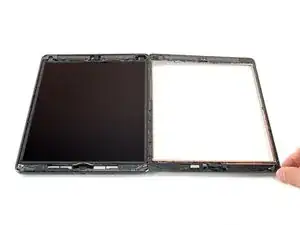
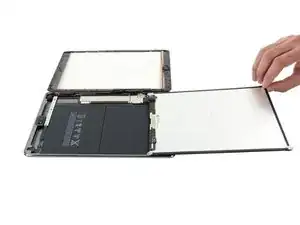
Una vez que todo el adhesivo ha sido separado, abre el digitalizador como un libro y déjalo paralelo al iPad.
-
-
-
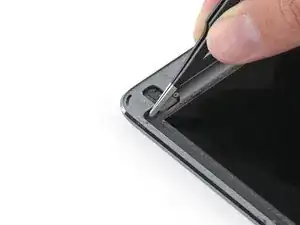
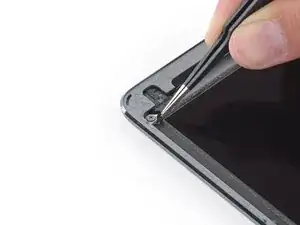
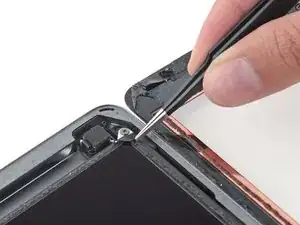
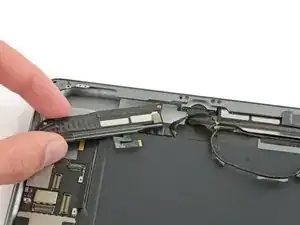
Usa la punta plana de un spudger para levantar el LCD de su lugar y poderla sostener con los dedos. Puede que haya pegamento alrededor de los agujeros de los tornillos que se tenga que cortar con un cuchillo
-
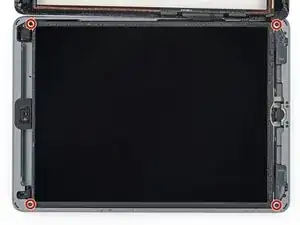
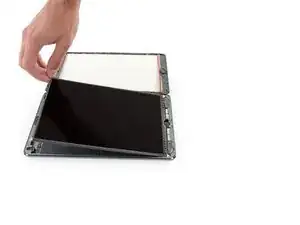
Gira el LCD levantando desde la cámara frontal hasta el botón inicio como si fuese un libro.
-
Pon la pantalla sobre su cara para permitir el acceso a los cables.
-
-
-
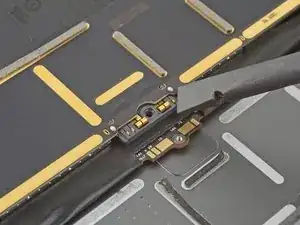
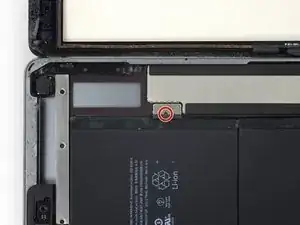
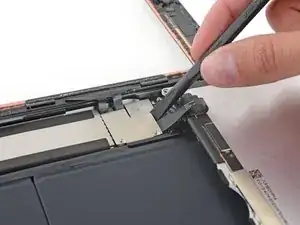
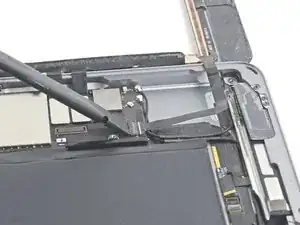
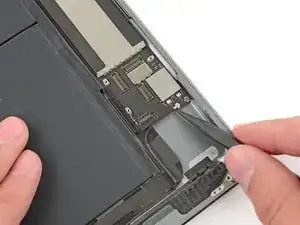
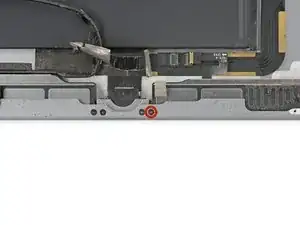
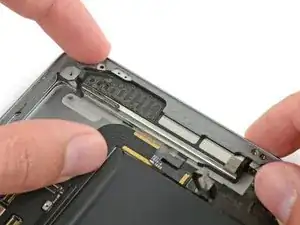
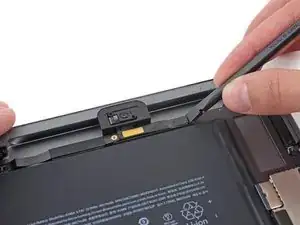
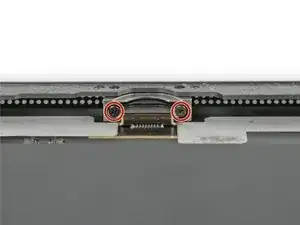
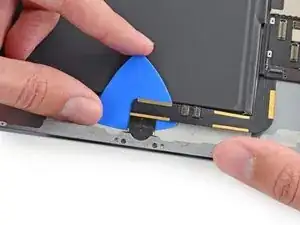
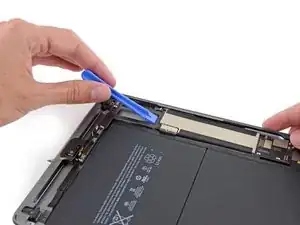
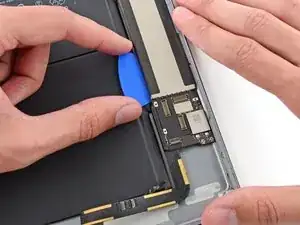
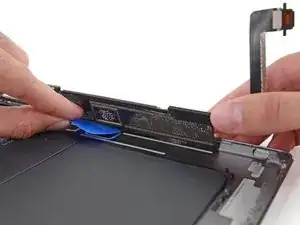
Remueve el único tornillo Phillips #000 2.3mm uniendo el conector de la batería a la tarjeta madre
-
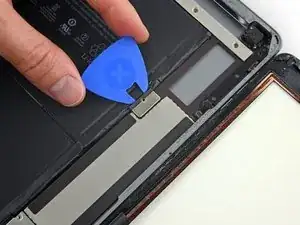
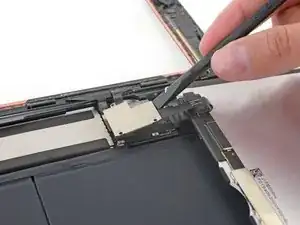
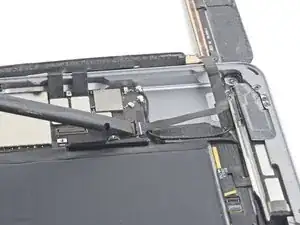
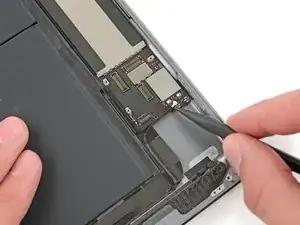
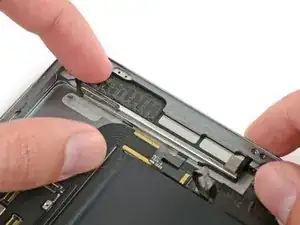
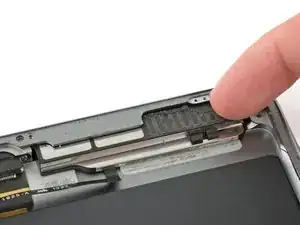
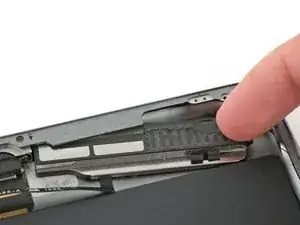
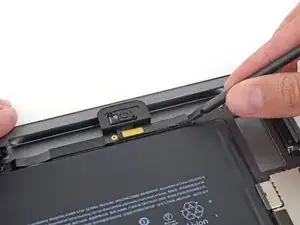
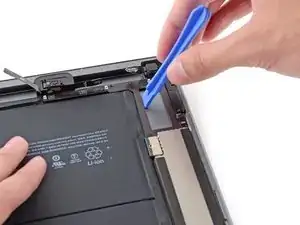
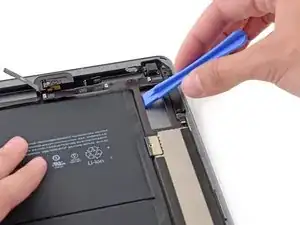
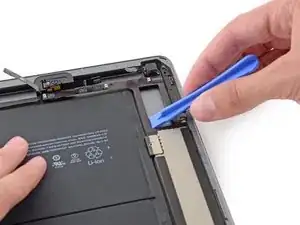
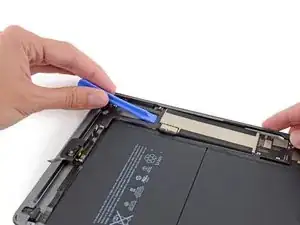
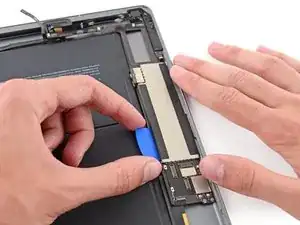
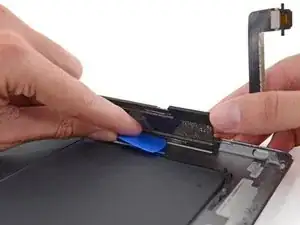
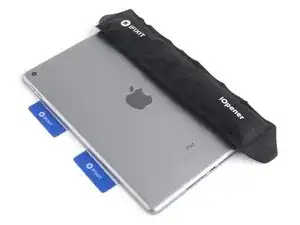
Desliza el bloqueador de batería por debajo del conector de la tarjeta lógica en un ángulo de 35 grados.
-
No empujes el bloqueador de la batería debajo del conector con demasiada fuerza. Si estas teniendo problemas colocando el bloqueador de batería debajo de la tarjeta lógica, puedes intentar usar un naipe en vez para desconectar la batería.
-
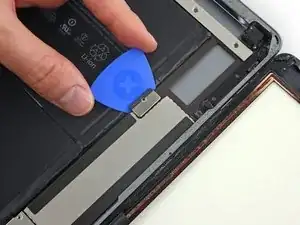
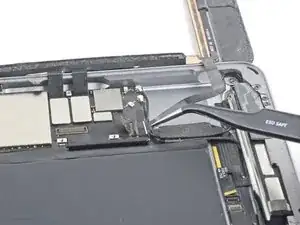
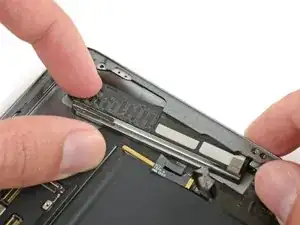
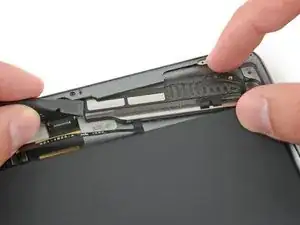
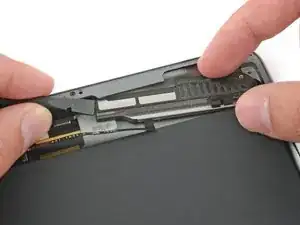
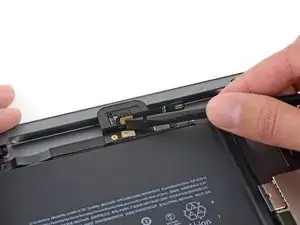
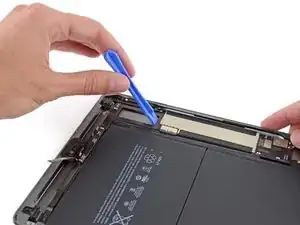
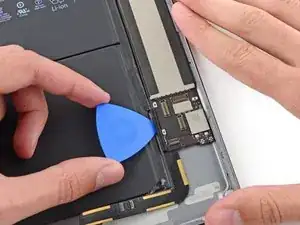
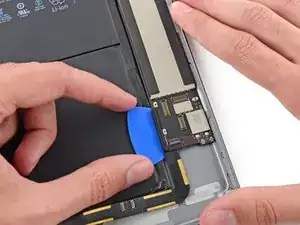
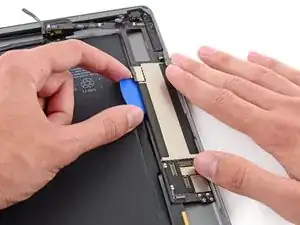
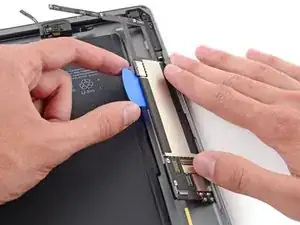
El bloqueador de batería o naipe idealmente debería deslizarse debajo de la tarjeta lógica sin encontrar algún bloqueo. Después de la inserción, debe descansar en un ángulo de 15 grados.
-
Deja el bloqueador de batería en este lugar conforme trabajas.
-
-
-
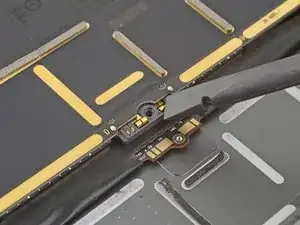
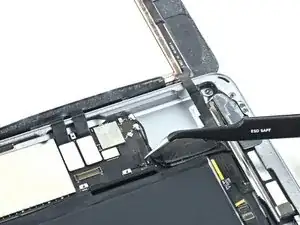
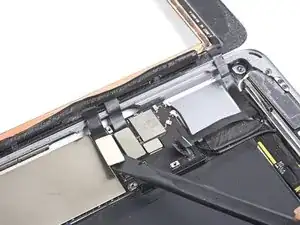
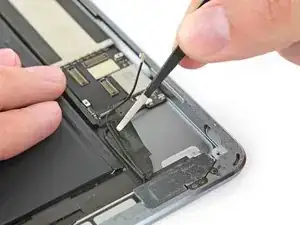
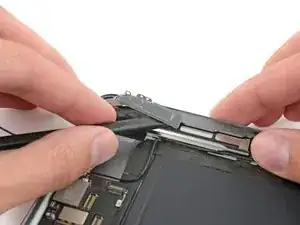
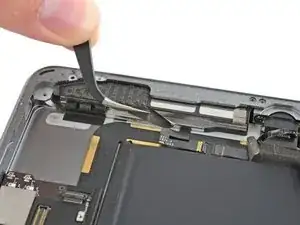
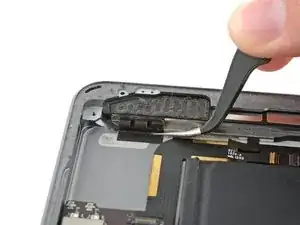
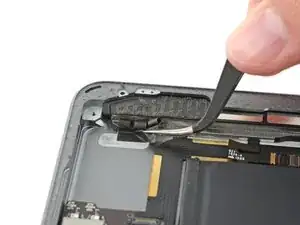
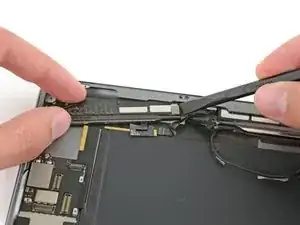
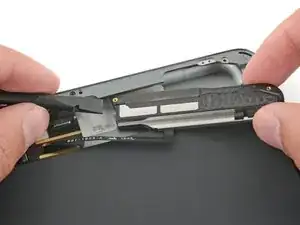
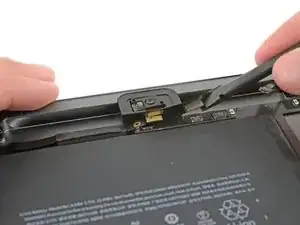
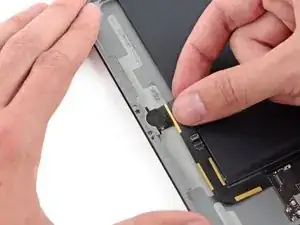
Usa la punta plana de un spudger para levantar con cuidado el cable y el soporte juntos de la tarjeta madre
-
-
-
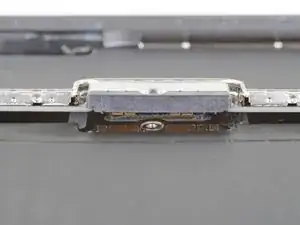
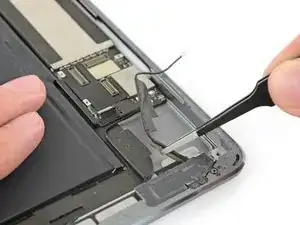
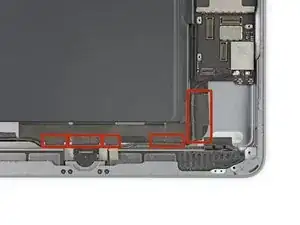
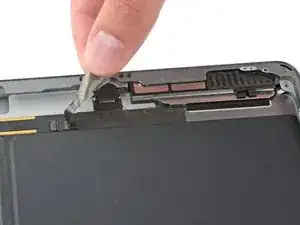
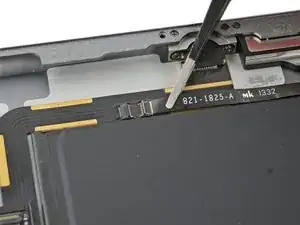
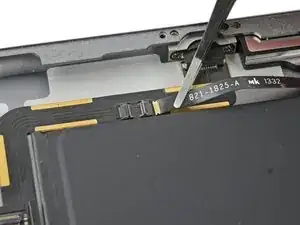
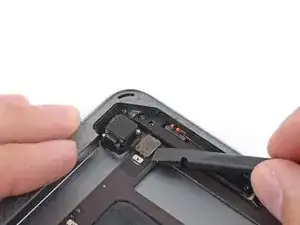
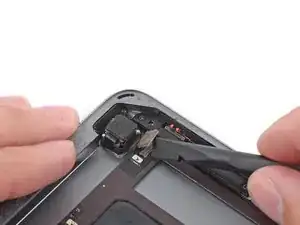
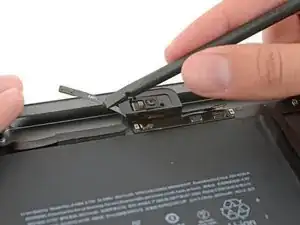
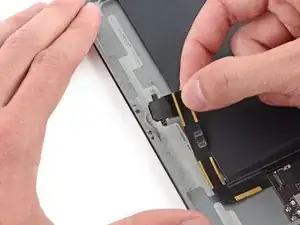
Usa el lado plano de un spudger para levantar la pestaña en el conector ZIF del cable plano del botón Home hacia arriba.
-
Cuidadosamente tira el cable plano del botón Home afuera del conector ZIF.
-
-
-
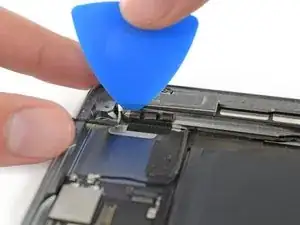
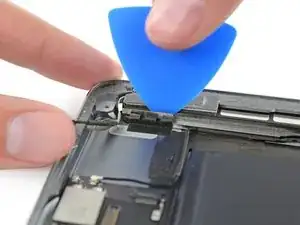
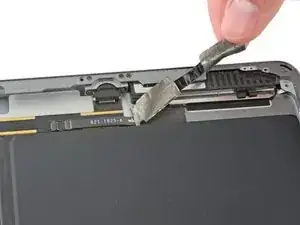
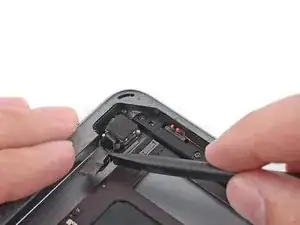
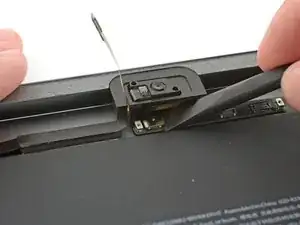
Usa el lado plano de un spudger o una uña para cuidadosamente despegar los dos cables del digitalizador de su conector.
-
-
-
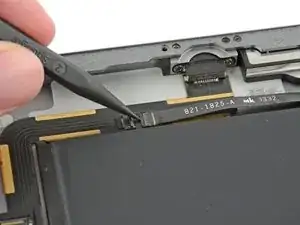
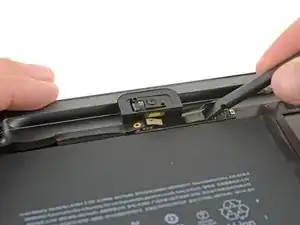
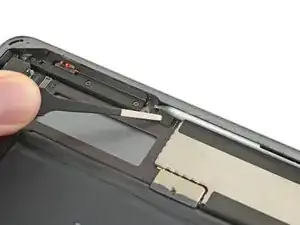
Cuidadosamente pela el cable plano del botón Home de su adhesivo manteniéndolo a la carcasa posterior.
-
-
-
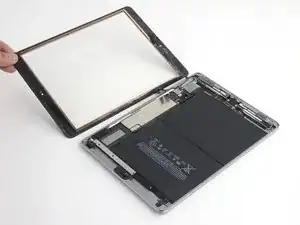
Remueve el ensamble del panel frontal.
-
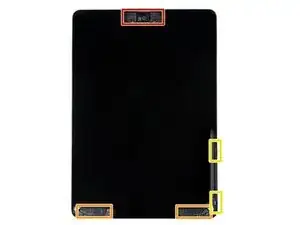
Si estas experimentando problemas "fantasma" o "espectro" con la entrada de touch en tu nueva pantalla, esto puede ser resuelto añadiendo una capa de cinta aislante muy delgada, como cinta (poliamida) Kapton, a las áreas destacadas en la parte de atrás del panel. Paneles de iFixit vienen con aislante apropiado, y no deberían requerir la adición de cualquier cinta.
-
-
-
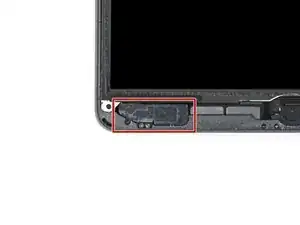
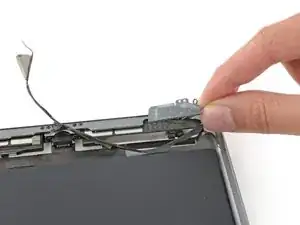
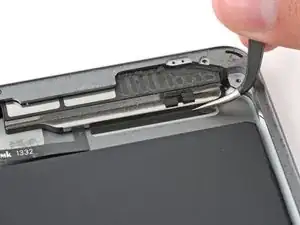
Inserta un spudger debajo del cable de antena más cercano al borde del iPad y levántalo para desconectar el conector del cable de antena.
-
-
-
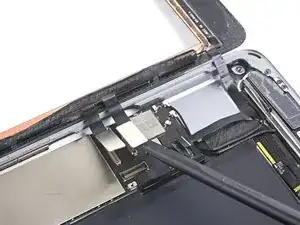
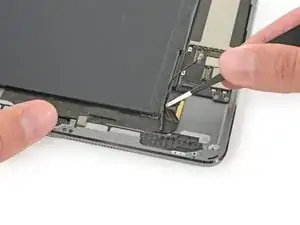
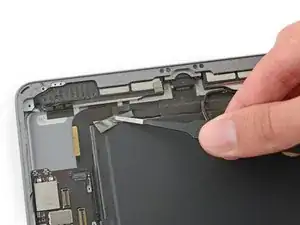
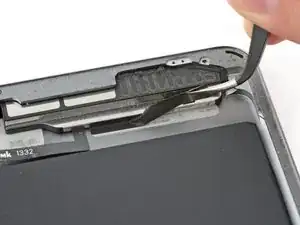
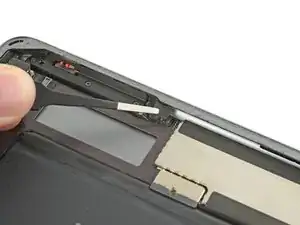
Hay dos piezas grandes de cinta envueltas alrededor del cable de antena derecho, asegurándolo a la carcasa trasera.
-
Despega la cinta de la caja trasera.
-
-
-
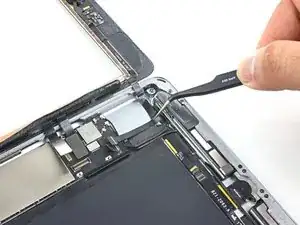
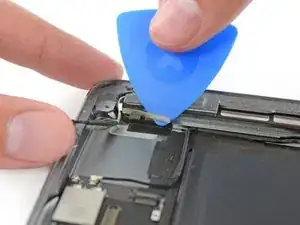
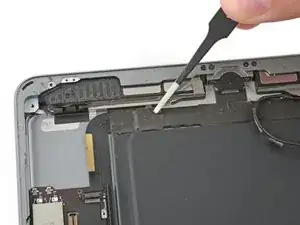
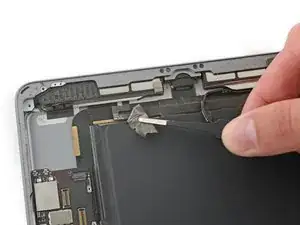
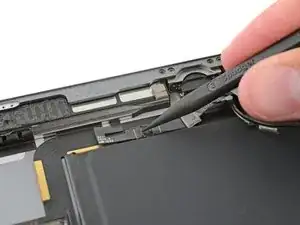
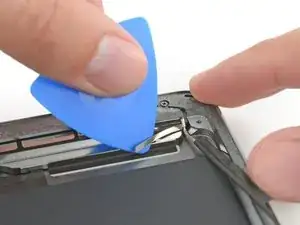
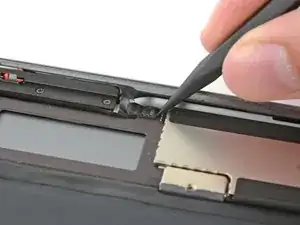
Inserte cuidadosamente una púa de apertura entre la caja del altavoz y el soporte del cable de la antena.
-
Desliza la púa hacia el botón de inicio para cortar el adhesivo.
-
Empuja el soporte lejos del altavoz hasta que despeje la cinta debajo.
-
-
-
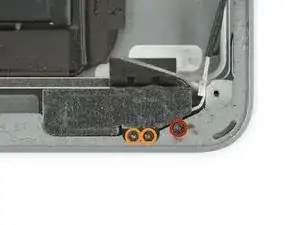
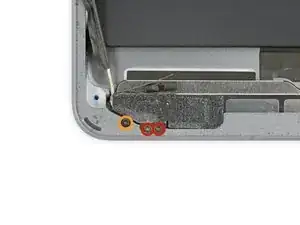
Quita los siguientes tornillos Phillips # 000 que sujetan la antena derecha:
-
Un tornillo de 2.3 mm
-
Dos tornillos de 1.4 mm
-
-
-
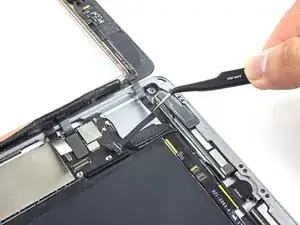
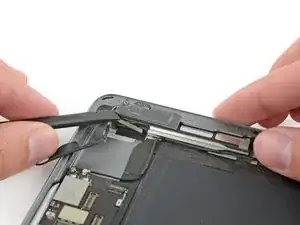
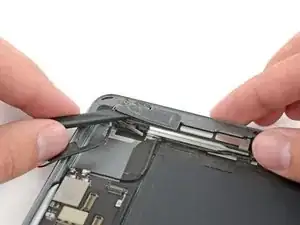
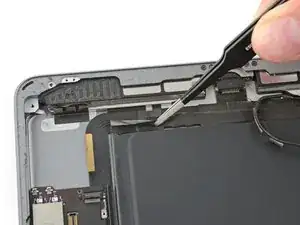
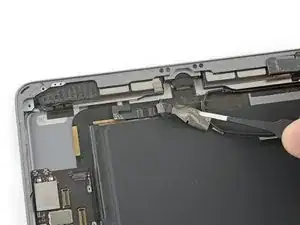
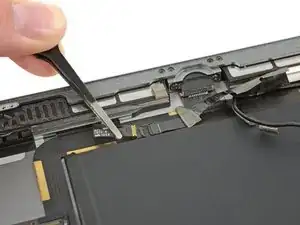
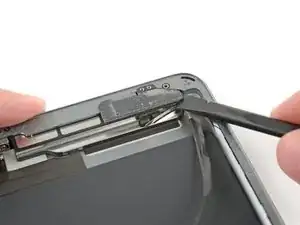
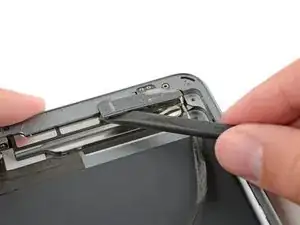
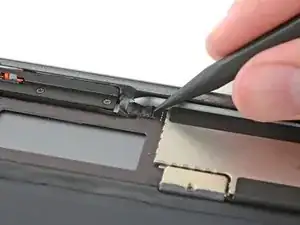
Inserta el extremo plano de un spudger entre la antena y el conjunto del altavoz.
-
Desliza el spudger hacia el botón de inicio para cortar el adhesivo de espuma que asegura la antena.
-
-
-
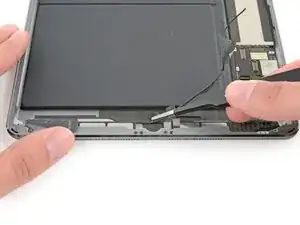
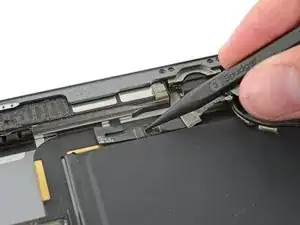
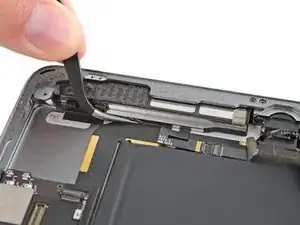
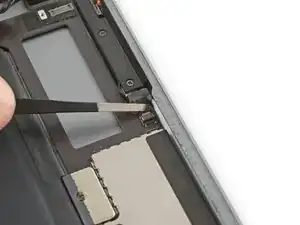
Inserta un spudger debajo del cable de antena izquierdo y levántalo para desconectar el conector del cable de antena.
-
-
-
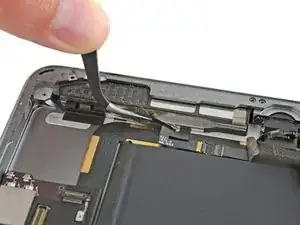
Hay cinco piezas de cinta envueltas alrededor del cable de antena izquierdo que cubre el conector del cable del altavoz derecho.
-
Despega la cinta de la carcasa trasera.
-
Dobla el cable de la antena fuera del camino.
-
-
-
En su lugar, agarra la cinta justo debajo del altavoz y pélala hacia abajo, lejos del borde de la carcasa.
-
-
-
Usa el extremo puntiagudo de un spudger para voltear la aleta de retención en el conector del cable del altavoz derecho.
-
Desliza el cable del altavoz hacia afuera de su conector ZIF.
-
-
-
Inserta una uña o el extremo plano de un spudger en la ranura de la carcasa del altavoz, cerca de la esquina de la carcasa trasera.
-
Tira del altavoz hacia abajo, lejos de la esquina de la carcasa.
-
-
-
Usa un spudger para ayudar a sacar el altavoz de debajo del borde de la carcasa trasera.
-
Quita el altavoz derecho del iPad.
-
-
-
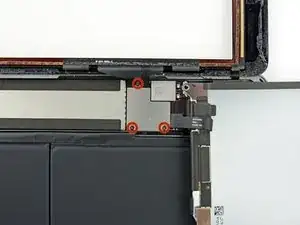
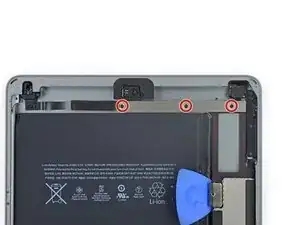
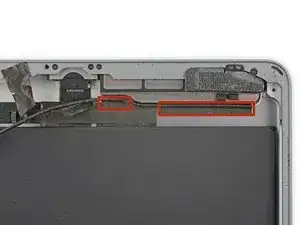
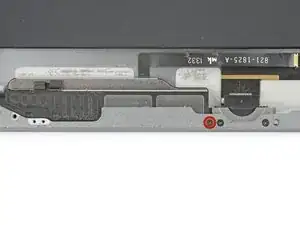
Quita los tres tornillos Phillips # 000 de 1.4 mm que sujetan el soporte del cable del componente superior.
-
-
-
Hay dos trozos de cinta restantes que aseguran el cable de antena izquierdo a la carcasa trasera.
-
Despega la cinta de la caja trasera.
-
-
-
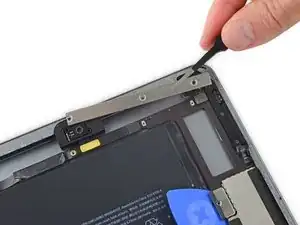
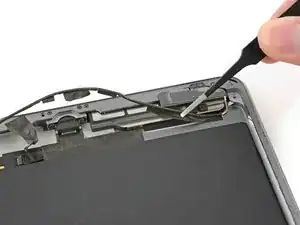
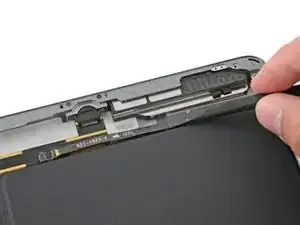
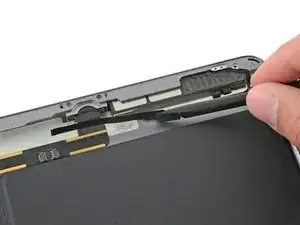
Inserta cuidadosamente una púa de apertura entre la caja del altavoz y el soporte del cable de la antena.
-
Desliza la selección hacia el botón de inicio para cortar el adhesivo.
-
Empuja el soporte lejos del altavoz hasta que quede libre de la cinta debajo.
-
-
-
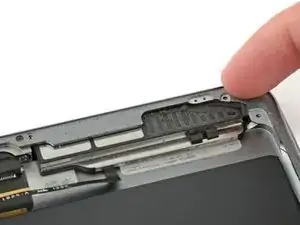
Quita los siguientes tornillos Phillips # 000:
-
Dos tornillos de 1,4 mm.
-
Un tornillo de 2.3 mm
-
-
-
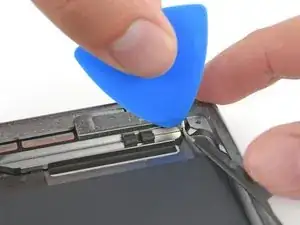
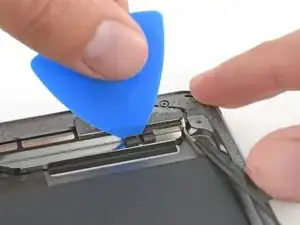
Inserta el extremo plano de un spudger entre la antena y el conjunto del altavoz.
-
Desliza el spudger hacia el botón de inicio para cortar el adhesivo de espuma que sujeta la antena.
-
-
-
Usa el extremo puntiagudo de un spudger para voltear la aleta de retención en el conector del cable del altavoz izquierdo.
-
-
-
Dobla suavemente el cable plano del altavoz izquierdo hacia arriba para que libere la batería cuando deslices la caja del altavoz.
-
-
-
Inserta una uña o el extremo plano de un spudger en la ranura de la carcasa del altavoz, cerca de la esquina de la carcasa trasera.
-
Tira del altavoz hacia abajo, lejos de la esquina de la caja.
-
-
-
Usa un spudger para ayudar a sacar el altavoz de debajo del borde de la carcasa trasera.
-
Quita el altavoz izquierdo del iPad.
-
-
-
Usa el extremo plano de un spudger para desconectar el conector frontal de la cámara de la placa lógica.
-
Dobla el cable de la cámara frontal hacia afuera.
-
-
-
Usa el extremo plano de un spudger para desconectar el conector de la cámara que mira hacia atrás de la placa lógica.
-
Dobla el cable de la cámara que mira hacia atrás fuera del camino.
-
-
-
Usa el extremo plano de un spudger para desconectar el conector jack de auriculares de la placa lógica.
-
Dobla el cable de la toma de auriculares fuera del camino.
-
-
-
Usa el extremo plano de un spudger para desconectar el conector del cable del micrófono de la placa lógica.
-
-
-
Usa el extremo puntiagudo de un spudger para levantar la aleta de retención en el conector del cable del conjunto del botón superior.
-
-
-
Quita los dos tornillos Phillips # 000 de 3.3 mm que sujetan el puerto Lightning.
-
Para encontrar estos tornillos, sostén el iPad verticalmente y mira en el puerto Lightning.
-
-
-
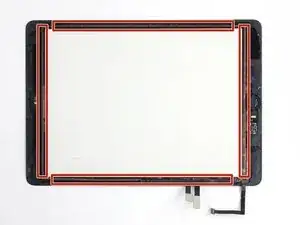
El adhesivo tiene la forma de seis piezas de cinta de espuma negra; consulta este paso mientras trabajas calentando y haciendo palanca para realizar un seguimiento de dónde se encuentra cada pieza.
-
-
-
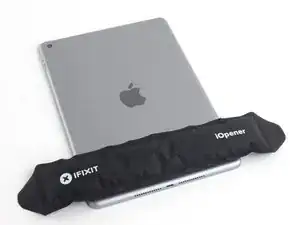
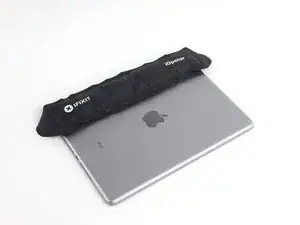
Coloca un iOpener calentado sobre el extremo de la cámara que mira hacia atrás del iPad y déjalo reposar durante al menos un minuto para suavizar el adhesivo a través de la carcasa trasera.
-
-
-
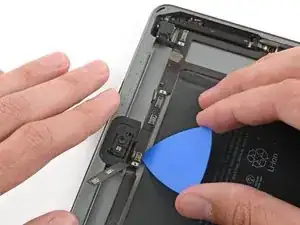
Inserta cuidadosamente una púa de apertura debajo de la placa lógica, entre la cámara frontal y la batería.
-
Desliza la púa hacia el conector frontal de la cámara y detente en la curva de la placa lógica.
-
-
-
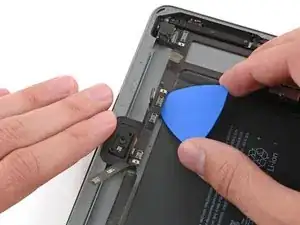
Desliza una púa de apertura debajo de la placa lógica desde la cámara frontal hacia la cámara posterior.
-
-
-
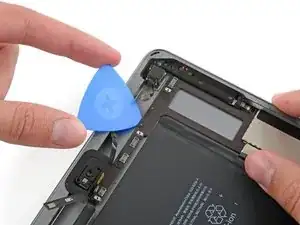
Inserta una púa de apertura debajo del cable Lightning donde se encuentra con la placa lógica.
-
Desliza la púa hacia abajo y alrededor de la curva del cable.
-
-
-
Continúa deslizando púa de apertura debajo del cable, deteniéndote antes de que el cable se doble al conector Lightning.
-
-
-
Finalmente, desliza la selección de apertura entre la batería y el conector Lightning para separar el último adhesivo debajo del cable.
-
-
-
Coloca un iOpener calentado en el lado izquierdo de la carcasa trasera, donde está adherida la placa lógica.
-
-
-
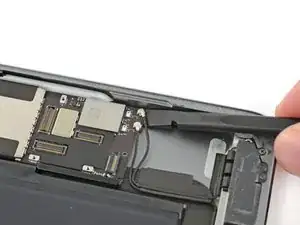
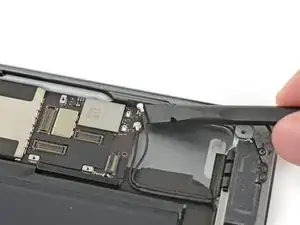
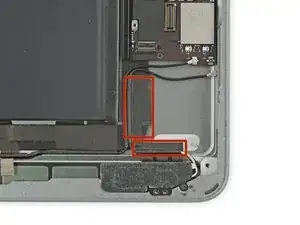
Inserta una herramienta de apertura de plástico en el espacio rectangular en el área superior de la placa lógica y levanta la placa lógica desde la carcasa trasera.
-
Mientras mantienes la herramienta de apertura debajo de la placa lógica, deslízala hacia abajo a lo largo del espacio para liberar el extremo superior de la placa lógica del adhesivo.
-
-
-
Desliza una púa de apertura debajo de la placa lógica entre ésta y la batería.
-
Desliza la púa desde la base hasta el centro de la placa lógica para cortar el adhesivo.
-
-
-
Desliza la púa a lo largo de la placa lógica.
-
Una vez que se haya cortado el adhesivo, levanta el lado de la batería de la placa lógica hacia arriba de la carcasa trasera.
-
-
-
Continúa levantando la placa lógica a lo largo del borde más cercano a la batería, hasta que pueda poner una púa de apertura contra el borde más alejado de la placa lógica.
-
Corta cualquier adhesivo que sostenga el borde exterior de la placa lógica a la carcasa trasera.
-
-
-
Recalienta el iOpener en el microondas durante 30 segundos.
-
Coloca el iOpener calentado en el centro de la parte trasera del iPad. Déjalo reposar así por 90 segundos para ablandar el adhesivo de la batería.
-
Mueve el iOpener a la derecha (lejos de la cámara trasera), y deja el iOpener reposar por otros 90 segundos.
-
Finalmente, mueve el iOpener al borde derecho del iPad for 90 segundos.
-
-
-
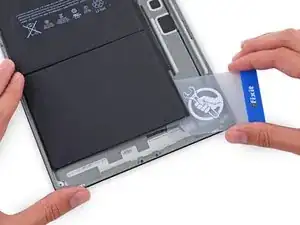
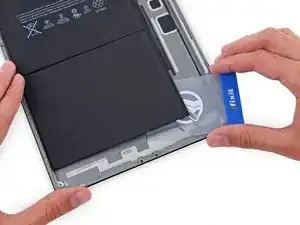
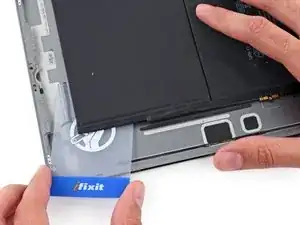
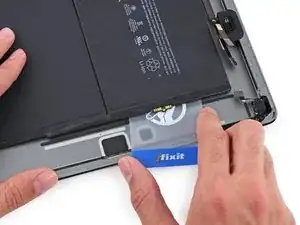
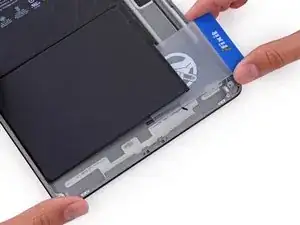
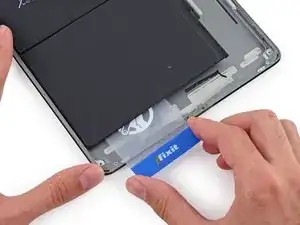
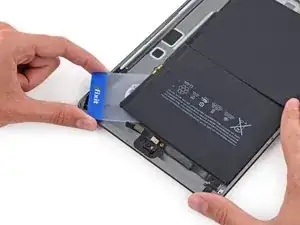
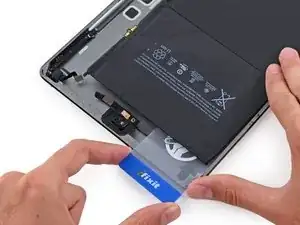
Inserta una tarjeta de plástico debajo de la celda inferior de la batería, en la esquina inferior derecha.
-
-
-
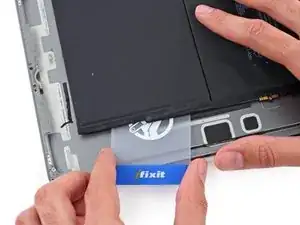
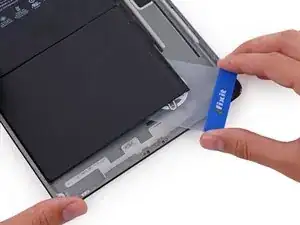
Con la tarjeta insertada aproximadamente a la mitad, deslízala hacia la parte superior del iPad, deteniéndote antes del contacto de la batería.
-
-
-
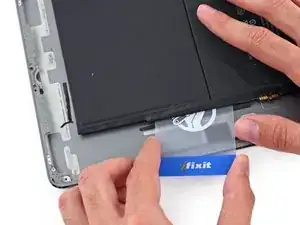
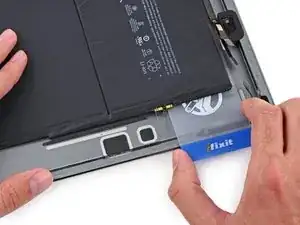
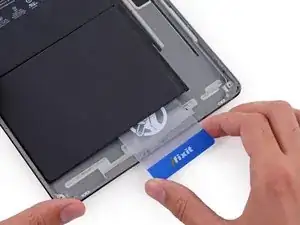
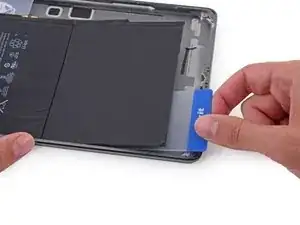
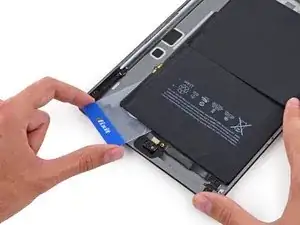
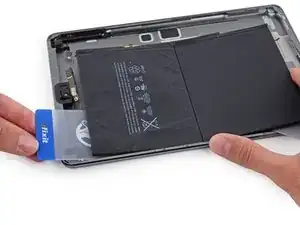
Levanta ligeramente la tarjeta de la carcasa trasera para permitir que pase sobre el poste de montaje del contacto de la batería.
-
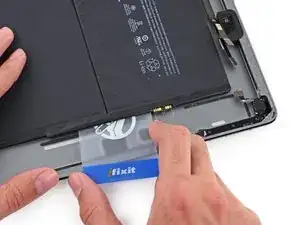
Desliza la tarjeta desde el centro de las celdas de la batería hasta la esquina superior derecha de la batería.
-
-
-
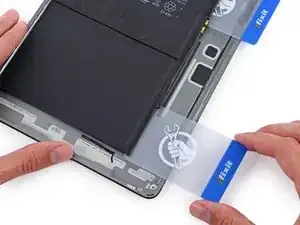
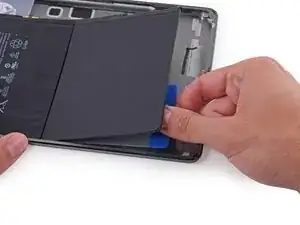
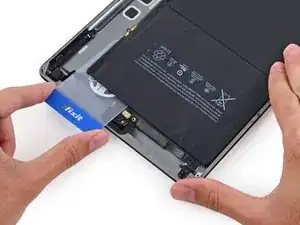
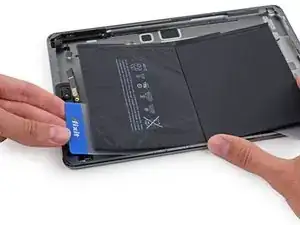
Coloca una segunda tarjeta de plástico a medio camino debajo de la celda de la batería de la izquierda para evitar que se vuelva a ajustar cuando vuelva a aplicar el iOpener.
-
-
-
Coloca un iOpener en el lado derecho de la batería, opuesto a las tarjetas, para aflojar el adhesivo.
-
-
-
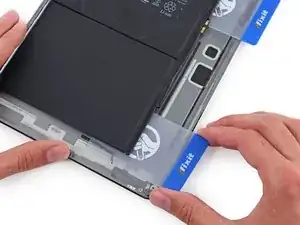
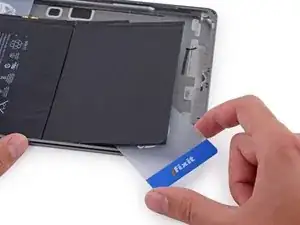
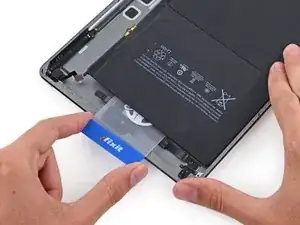
Presiona la tarjeta más adentro, rompiendo la mayor cantidad de adhesivo que puedas en la batería.
-
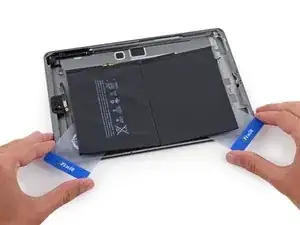
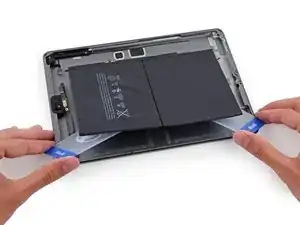
Coloca la tarjeta de plástico debajo de la esquina inferior izquierda de la batería.
-
-
-
Presiona la tarjeta más adentro, rompiendo la mayor cantidad de adhesivo que puedas en la batería.
-
Coloca la tarjeta de plástico debajo de la esquina superior izquierda de la batería.
-
-
-
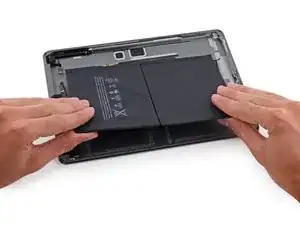
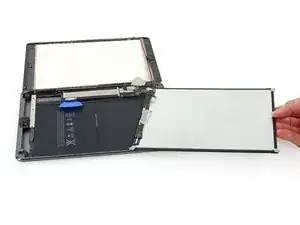
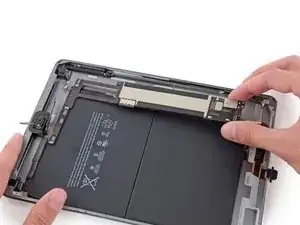
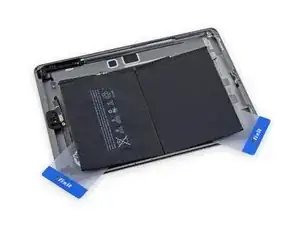
Sujeta ambas tarjetas firmemente y gíralas para levantar la batería de la carcasa trasera.
-
Quita la batería de la carcasa trasera.
-


Para reensamblar tu dispositivo, sigue estas instrucciones en orden inverso.

6 comentarios
analyzing the structure of the arrangement of the components, is it necessary to remove everything? I think you could only remove the battery without removing the logic card.
Hi Vik,
While it may not be necessary to remove the logic board to remove the battery, we found that it is the safest option. Removing the logic board first allows you to pry the battery around all the edges while keeping the bending to a minimum.
Geez, 111 steps to remove the battery and how many to reassemble? Insanity!!
rudyfs2 -
Thanks for a great guide! I left out steps 47 to 100 as some suggested and it worked fine for just replacing the battery. I was aware that the issue may be the bending of the battery and, therefore, iFixit does not recommend skipping these steps. However it worked fine for me. My tip is to allow yourself enough time to loosen the battery from the adhesive and keep the heated iOpener always underneath the section of the battery that you are working on. This way the adhesive softens and allows you to loosen the battery step by step. - It took me 3 hours of which the first hour was trying to figure out how to get Step 9 done. It took me a while to have the iOpener at the right temperature. So, be patient.