Introducción

Usa esta guía para reemplazar la batería en tu Huawei Mate 8.

  1. FPx6tr1SmACZCQLl
    FPx6tr1SmACZCQLl
    nV32foKH1fC3wQpp
    • Apaga el teléfono y remueve la bandeja de tarjeta SIM.

  2. MoPkyf5rJ1B6BDgK
    • Remueve los tornillos Torx T2 de la parte inferior del teléfono.

  3. 2AIKFEMfSFQObbBo
    2AIKFEMfSFQObbBo
    GEZbwKnoJkZJmYmu
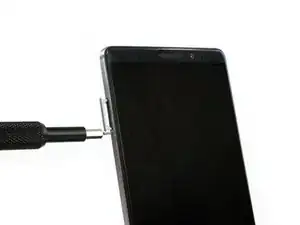
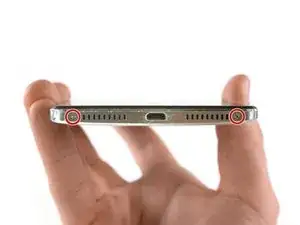
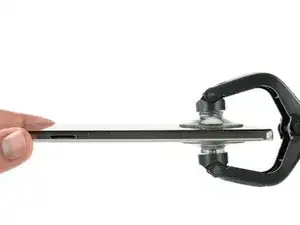
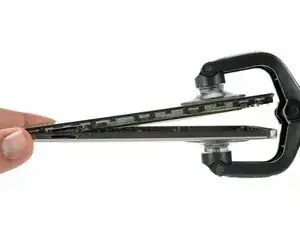
    • Usa un iSclack o una manija ventosa en el área inferior de tu teléfono para separar la unidad de pantalla del panel trasero.

  4. nUkTUM4bAdfaScSX
    nUkTUM4bAdfaScSX
    j5FJXOAmFYNNasFl
    jHXPyaXbBMkd66un
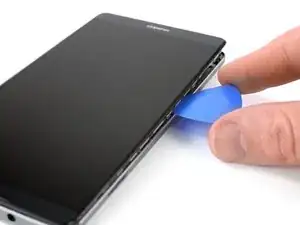
    • Usa una púa de apertura para separar completamente los clips, liberando el teléfono.

    • No remuevas la tapa trasera completamente. El cable del sensor de huella digital está todavía conectado a la tapa trasera.

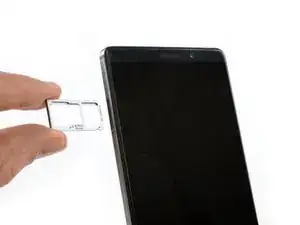
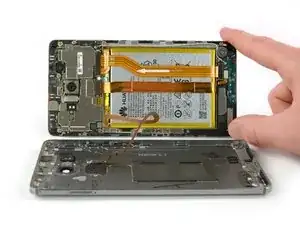
    • Abre el teléfono como un libro desde el lado de la bandeja SIM.

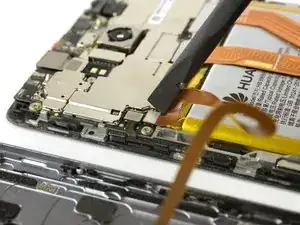
    • Usa un spudger para desconectar el cable de sensor de huella digital.

  5. IVnKFFI2pYjFIGHs
    IVnKFFI2pYjFIGHs
    VjsdpGOfXllTC4Vr
    QaXBXHUyrByqcm6a
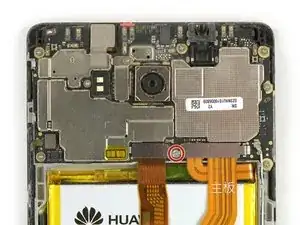
    • Remueve el autoadhesivo indicador de líquido.

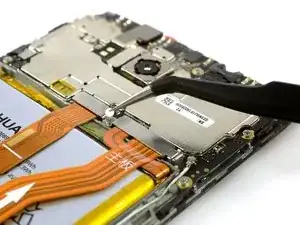
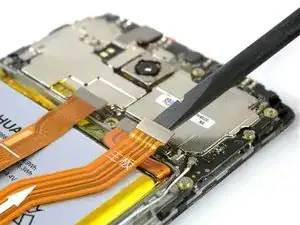
    • Remueve el tornillo Phillips #00 que sujeta el escudo de metal.

    • El escudo de metal está bien ajusto en su lugar. Si intentas removerlo sin presionarlo de un lado, se romperá fácilmente.

    • Usa un spudger para remover el escudo de metal.

  6. K6orOuC2D6Rd4wDj
    K6orOuC2D6Rd4wDj
    1UuljImJHcSoWvB5
    2fGFVt4LOXi16CVI
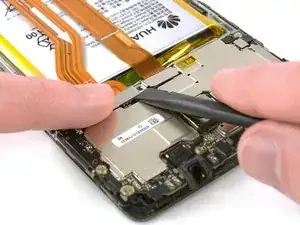
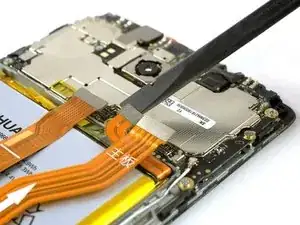
    • Usa el extremo plano de un spudger para desconectar los cables de pantalla, de interconexión de placa hija y de batería.

  7. k4FNj21sCTTJhxXb
    • Remueve el tornillo Phillips #00 que sujeta el soporte de cable de interconexión.

  8. YsSDABtcvNYWUN2G
    YsSDABtcvNYWUN2G
    VHrupamIvFWGy2EJ
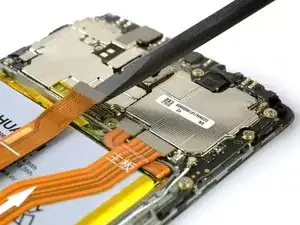
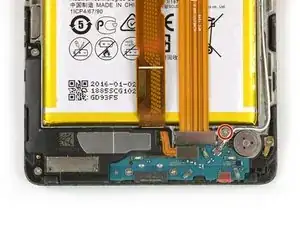
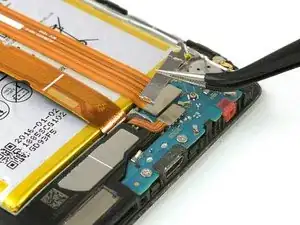
    • Levanta el conector coaxial de su zócalo para permitir el acceso al soporte de cable de interconexión de la placa hija.

    • Remueve el soporte.

  9. esX2tEyJIi5UfMTS
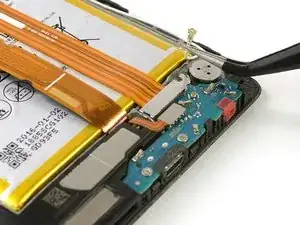
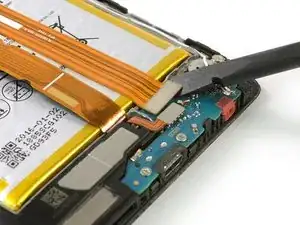
    • Usa un spudger para desconectar el cable de interconexión.

    • Remueve el cable de interconexión.

  10. VGdDI3wIg13GpYnl
    • La batería esta pegada con dos tiras adhesivas. Una con una lengüeta y otra sin.

    • Toma fuertemente la lengüeta cerca del botón de inicio y despega la tira de adhesivo tirando constantemente en ángulo llano.

    • Si la tira adhesiva se rompe, tómala y tuércela alrededor de la punta de la pinza un par de veces y continúa.

  11. KW2vFPuJwBR6Vjxj
    KW2vFPuJwBR6Vjxj
    vWPG2QbHY1SCGSvt
    FFPyAxKEAXiMnRpj
    • No dobles o perfores la batería ya que el daño puede causar que la batería se prenda fuego.

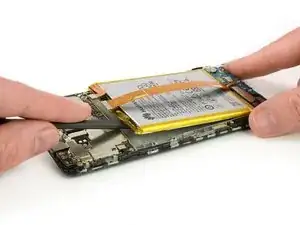
    • Calienta un iOpener y colócalo en el teléfono durante un minuto para ablandar el adhesivo restante.

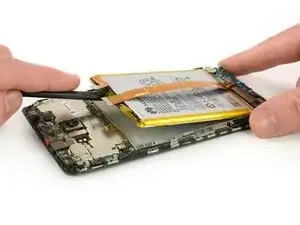
    • Con cuidado inserta el extremo plano de un spudger para separar el adhesivo restante en la parte superior de la batería.

  12. xiJFSRPgsCOSViyh
    xiJFSRPgsCOSViyh
    H5GFqYN4TNvvFXFL
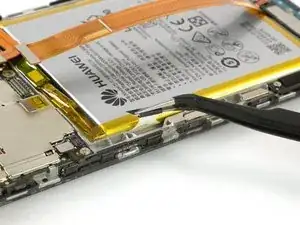
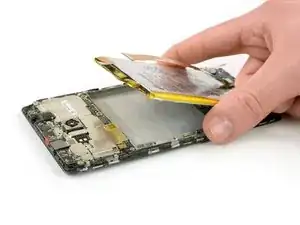
    • Levante el extremo superior de la batería para despegar la batería de la tira de adhesivo restante.

    • Al volver a ensamblar tu teléfono aplica cinta adhesiva de doble cara o adhesivo precortado para sujetar la batería.

    • Nunca vuelvas a instalar una batería que se doble o se dañe al removerla.

Conclusión

Para volver a ensamblar tu dispositivo, sigue estas instrucciones en orden inverso. Al reensamblar tu teléfono, aplica adhesivo nuevamente donde sea necesario.

Dominik Schnabelrauch

Miembro Desde 23/11/16

169012 Reputación

7 comentarios

great guide changed my battery in under 30 min thank you @schnabel

george austin -

Hi George,

nice to hear and i hope your phone works well!

Dominik Schnabelrauch -

Thank you for an excellent guide! Clear instructions and great pictures. I followed the steps and it worked flawless. One comment regarding Step 4 - I had greater luck opening from bottom side up rather than from left to right.

Jim My -

Thanks for you guide, Easy and complete. Perfect

Jonathn -

Thanks for the great guide! It took some effort to open the phone and to remove the old glue. Also with my old eyes (60 years) I could hardly see the tiny screws an connectors, even with my reading glasses on so it took me 2 1/2 hours to finish, but succeeded after all! Never did this before, so it is doable without experience, but you do need the tools. A looking glass would be helpfull too :)

Tom Hogendoorn -

Just done my Huawei Mate 8. Getting it open was a bastard, even with the IsClack - heated a wheat bag (just too hot to hold) and put it on the back of the phone for 60 secs - then the isClack could do its work. Battery was very difficult to remove - used bute force and ignorance ! Not easy to remake connections, specially the co-ax. To my surprise, it worked - the replacement battery was at 60%. Total time (not counting the break for lunch before starting to put it back together) - 2.75 hours - but then, I am 88years old - if I can do it, anyone can.

Mike Scragg -

was able to replace the battery with the phone seeming to work fine, but i am unable to put the cover back on fully. the top part doesn’t seem to want to fit back into the cover. somewhat afraid to try and force it, but not sure what is preventing it from closing. any suggestions? the sim card slot won’t sit all the way inside; if it did i wouldn’t be concerned.

thanks for the guide !

eden rose -