Introducción

Si tu Huawei P8 Lite no mantiene la carga puedes utilizar esta guía para reemplazar la batería gastada sin remover la placa madre.

Antes de desmontar tu teléfono, descarga la batería por debajo de 25%. La batería puede prenderse fuego y/o explotar si se perfora accidentalmente, pero las chances de que esto pase son mucho menores cuando la batería está descargada.

  1. kOX24a6hdlJsKSan
    kOX24a6hdlJsKSan
    bqZrFYapKqyV4Frt
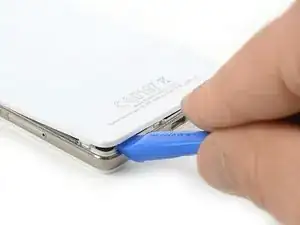
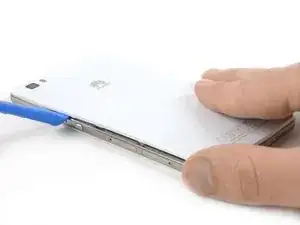
    • Usa una herramienta de apertura y comienza hacer palanca en tu tapa trasera de tu Huawei P8 Lite en la parte inferior del teléfono.

    El celular no tiene ese tipo de tapa es como sellada, que debo hacer para saber si es por la pila que no agarra carga porxa

    maguada1106 -

    Wenn man langsam langsam arbeiten und vorsichtig ist, dann kein problem gibt es.Ich hätte keine Problemen zu öffnen.Das ist sehr leicht.

    Athanasios Georgopoulos -

  2. tajQ2CStittCCurI
    tajQ2CStittCCurI
    jcDXRoDsARYrqPyn
    5UMoZynGE4QjIAQe
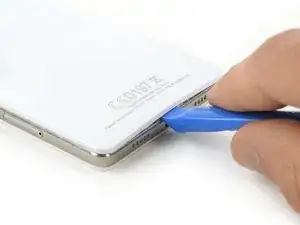
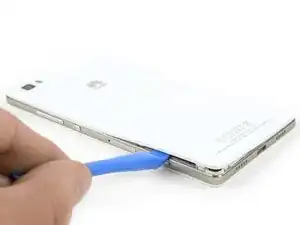
    • Hay clips alrededor del medio marco sujetando la tapa trasera. Abre todos los clips con la herramienta de apertura.

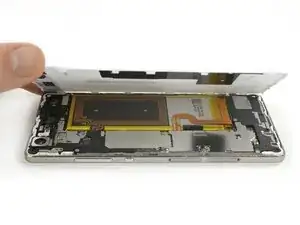
    • Cuando todos los clips estén abiertos, remueve la tapa trasera del resto del teléfono.

    • Si la tapa trasera no sale es porque hay probablemente algunos clips adicionales que deben ser desconectados.

    The back panel is really really easy to brake, be careful :)

    romaingauthier -

    In my mobile phone the back panel was kept in place also from 2 strips of bi-adhesive tape. Pull gently to detach it to remove the panel.

    beppe modolo -

    right. it has 4 strips of adhesive tape

    Miguel Cretu -

    To facilitate the detachment of these double-sided tapes, I recommend heating with a hairdryer along the edges of the back cover, especially at the four corners.

    Nicola -

  3. 1WfLIMHLvgP2Zvrh
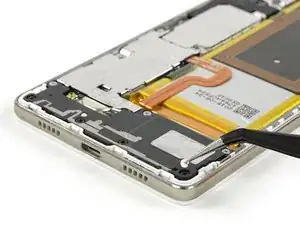
    • Usa una pinza para remover el autoadhesivo de la garantía que se encuentra en un tornillo en la parte inferior derecha de tu teléfono.

    The 4 screws wich hold down the lower part of the loudspeaker are Torx screws for me. But it's a French Huawei, doin' nothing like the others :)

    Christopher Hourlier -

    Die Wasserschadenindikatoren sitzen unter dem Mainboard. Bei den Aufklebern auf den TORX handelt es sich um Garantiesiegel.

    Andre Richter -

    Danke für den Hinweis, wurde so übernommen.

    Dominik Schnabelrauch -

    pour dévisser les vis cruciformes, quel taille de tournevis faut il? svp

    blan -

    Bonjour, il vous faut un tournevis ou un embout cruciforme #00 pour dévisser une vis cruciforme #00. Bonne réparation !

    Claire Miesch -

  4. M5TsRwCPTTsV5tAw
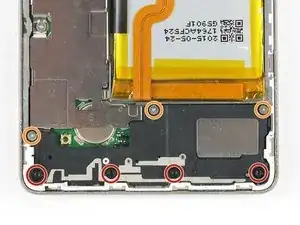
    • Remueve los 4 tornillos negros Torx T5 que sujeta la parte inferior del altavoz.

    • Remueve los tres tornillos plateados Phillips #00 que sujeta la parte superior del altavoz.

  5. WZh3tYfAKZpgBvKD
    • Remueve el altavoz con cuidado.

  6. 3cHSn4plrstfrlQ2
    3cHSn4plrstfrlQ2
    dYxAvojuhOVbuT5Z
    LlmFNp2CBokeEANW
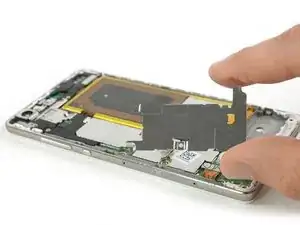
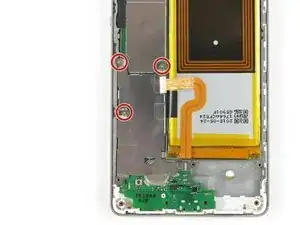
    • Remueve los tres tornillos Phillips #00 que sujetan la placa de metal en su lugar.

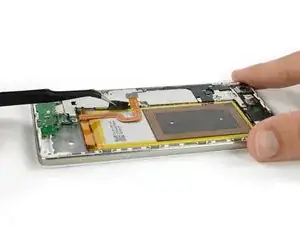
    • Remueve la placa de metal con una pinza.

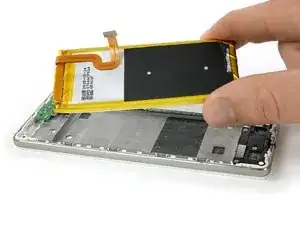
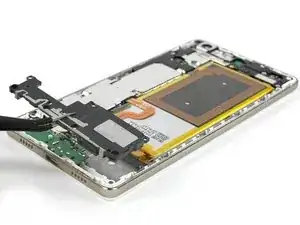
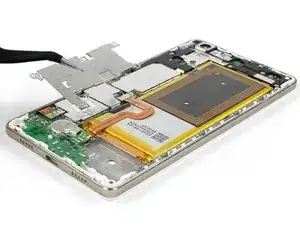
    • Desenchufa el conector flexible de batería con un spudger.

  7. ZaquZLHTi1AYoEQk
    ZaquZLHTi1AYoEQk
    eSvTQSvsgryxQiAB
    • Para proteger tu placa madre al remover la batería puedes volver a instalar la placa de escudo permitiendo un palanqueo más seguro.

    • Atornilla los tres tornillos Phillips #00 de nuevo en su escudo de placa madre.

  8. RSbZTfOYoxYyle2o
    RSbZTfOYoxYyle2o
    Z5QCgJT2BBukYISi
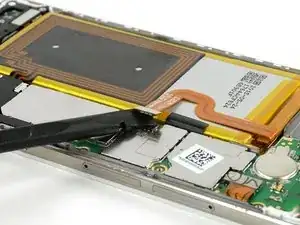
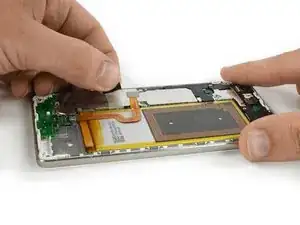
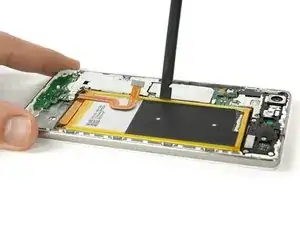
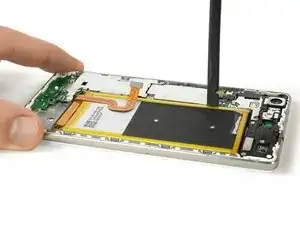
    • Usa una pinza para soltar la tira de adhesivo y levantarla para conseguir una mejor sujeción.

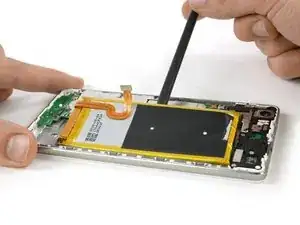
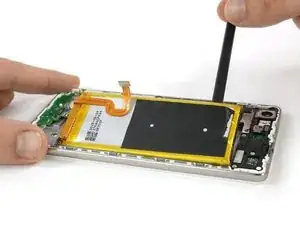
    • Poco a poco saca la tira adhesiva jalándola. Jala en ángulo llano y con precaución ya que se puede dormir en dos pedazos fácilmente.

    • Si tu teléfono está equipado con una antena NFC, continúa con el paso siguiente para removerla. Salta el próximo paso si no tiene una antena NFC .

  9. YLBJSVlGcJPAXqSp
    YLBJSVlGcJPAXqSp
    3EIMYAiXwW5mmYgc
    ReTLZQFnHvmwAkCs
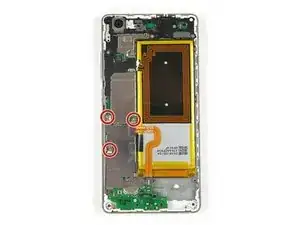
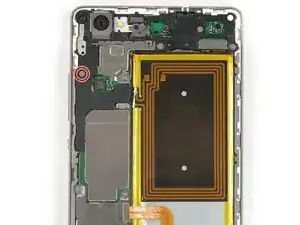
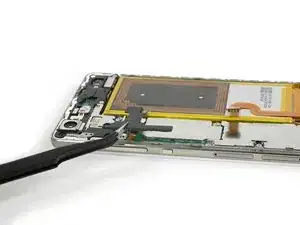
    • Remueve el tornillo Phillips #00.

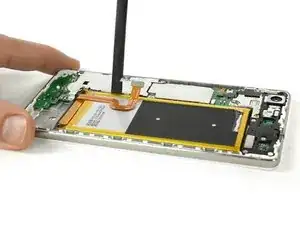
    • Usa una pinza para remover la tapa de plástico.

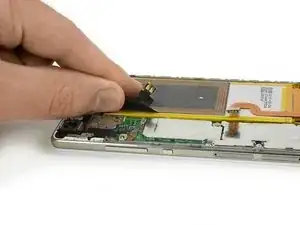
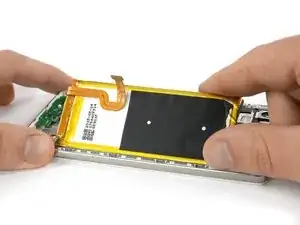
    • Con cuidado despega la etiqueta NFC y remuévela.

    • Cuando vuelvas a ensamblar tu dispositivo, asegúrate de instalar la antena NFC en la batería nueva y conectarla.

    In my case, in order to remove the NFC antenna i had to remove also the second screw on the metal pate. This allowed to lift just a little the plate and move out the NFC connector.

    Roberto -

    Auch bei mir ging es nicht wie in der Anleitung beschrieben, da die Antenne auf beiden Seiten eingefasst ist.

    Julian Riedel -

    In my case, the small black plastic cache, was glued with the nap of the buttons which is just under the cache. I totally screw the connector for the buttons, carefull removing this plastic cache !!

    Pour moi, le cache en plastique était collé avec la nappe des boutons physique qui est dessous, j’ai du coup complètement pété le connecteur de cette nappe… gaffe !

    yop -

    The small black cover of my phone was also attached with a double-sided adhesive. Therefore, be careful not to force and lift gently.

    Nicola -

    We can detach the NFC antenna from the old battery starting from one of its corners, first heating it a little with a hairdryer. Then we can apply it to the new battery.

    Nicola -

  10. HjMYAYhOQP2xFFT1
    HjMYAYhOQP2xFFT1
    MCedlBUiUojokOUU
    hX1eCltPDvD4oXlA
    • Hay tres tiras adhesivas debajo de la batería que tendrás sacar. Una debajo de la parte superior, otra debajo de la parte central y la última debajo de la parte inferior de la batería.

    • Ten mucho cuidado de no hacer palanca contra la placa madre ya que podrías dañar componentes montados en la superficie y perder funcionalidad.

    • Usa un Spudger para sacar cuidadosamente tu batería.

    Slip a stiff playing card(poker) into one corner of the battery and work your way through the bottom. I didn’t have the tools to remove the adhesive so this really helped. I’d tried brute-forcing my way through with the spudger and screwdrivers but that ended up almost causing an electrical fire

    Jithin Thomas -

    A playing card is a good idea that could work. But please, never ever use a screwdriver on a battery.

    Tobias Isakeit -

    To facilitate battery unstuck (which notice is attached tenaciously!), I advise you to proceed as follows. First of all, I found it easier to operate from the base of the battery (where the flexible cable connector starts) since there was a little more room to work than at other points. From here, patiently begin to perform these two actions alternately: heat inside with a hairdryer and gradually introduce a thin object (the one I used was plastic, longer than the battery and about 2 cm wide), also making movements side. If you have a contact cleaner or alcohol, you can spray some inside. You will see that little by little, with patience, you will come up above and the battery will come off!

    Nicola -

  11. UkOPSRQqBLqUb5Vw
    UkOPSRQqBLqUb5Vw
    y2cKwDEkJGuscUnJ
    WaJTtbsHpNvQ5hCX
    • Saca el adhesivo debajo de la batería con un Spudger.

    • La forma más fácil de hacerlo es moviendo el Spudger con movimiento pequeños como una palanca.

  12. kRHNklcWClB3Q4IN
    • Remueve la batería.

    • Si usaste el protector de metal de la placa madre para proteger la placa mientras haces palanca, deberás retirarla para conectar tu nueva batería.

    • Cuando vuelvas a montar el teléfono, reemplaza el adhesivo viejo con cinta adhesiva de doble cara o con tiras adhesivas precortadas.

    Bei Schritt 9.2 (Kunststoffkappe vor NFC-Antenne hilft es, die Kreuzschraube links neben dem NFC-Anschluss zu lösen, dann lässt sich die Abdeckung einfacher entfernen. Ansonsten funktioniert die Anleitung sehr gut.

    Groej Htro -

Conclusión

Para volver a ensamblar tu dispositivo, sigue estas instrucciones en orden inverso y aplica tiras nuevas de adhesivo donde sea necesario.

Dominik Schnabelrauch

Miembro Desde 23/11/16

168985 Reputación

10 comentarios

Thanks for your sweet effort

Hussien -

Très bon tuto ! Merci beaucoup :-)

ps : j’ai galéré a décollé la batterie

Jérôme Blanchart -

Hat wunderbar funktioniert! Nun läuft mein P8 Lite wieder!

2711chrissi -

One thing to be careful of that I just did, and screwed up my nieces phone.

You see that black square hole in the aluminium chassis under the battery? Yeah be very very careful when sticking your prying tool under the battery. The LCD us right behind it. Try and stay very far away from those holes in the chassis when you do your prying.

Her screen now has Horizontal and vertical lines right across the centre of the screen.

Sigh.

Terrence Wilson -

Super Anleitung, Danke kann ich weiter empfehlen!

del Grosso -

Great tutorial. I applied it on my P8 lite 2017 PRA LX1 and it worked greatly. I adapted some step.

Main differences are:

Step 1&2: it’s very hard because P8 lite 2017 hasn’t clips, but only glue on the edge under the cover. It’s very difficult to insert the lever under the inner part of the cover.

Steps 3 to 5: it’s not necessary to release amplifier because it’s separated from the battery.

Steps 7 to 9: they doesn’t apply

Step 10: to release the battery you must be careful of 2 stripes of contacts under the battery. Scotch tape is all along the right side of the battery and on the left side in the upper left side and in the lower right side.

Battery inclines to bend and to warp while removing it.

THANK YOU VERY MUCH!

Pragmata Insightful Consulting -

salve,ho seguito alla lettera tutta la procedura ma il telefono non si accende più ne con la bat nuova e nemmeno con la sua originale,dove ho sbagliato,grazie x l’attenzione,saluti

andrea68 -

Ciao @andrea68 ,

Ci dispiace che il telefono non funzioni come prima. Magari puoi provare di spegnere e riaccendere il telefono e/o di fare un reset.

Se hai comprato la batteria su iFixit, rivolgiti al nostro dipartimento di supporto: eustore@ifixit.com (in caso di un acquisto sul sito europeo) o support@ifixit.com (in caso di un acquisto sul sito americano). Sarà un piacere aiutarti!

Cordiali saluti,

Claire

Claire Miesch -

Alright, so I just performed the “surgery” on mine. There’s a couple of things I would like to share: a) Be REALLY careful when taking the back cover as the plastic part around the camera breaks unbelievably easy. Just pry very slowly and patiently, don’t rush it. b) When prying the old battery, it’s necessary to pry back AND forth, millimeter by millimeter. It seems the tool doesn’t go the whole way in, thus why it’s needed to (very) slightly deform the battery’s edges. BE CAREFUL HERE. c) When assembling the phone again, during the re-installation of the NFC antenna, the black cover of the PCB where the antenna connector attaches, has two little flaps, it might need a very slight trimming with scissors if it doesn’t get back into the sockets where it latches. DO NOT FORCE IT IN, as this might damage your PCB and it’s better to damage one of the little flaps to damaging the PCB. All of that being said: Thanks so much for the guide!. Battery replaced, waiting for a full charge to start using!.

An G -

Très bien fait, Pédagogique, Bravo Dominik (de la part de Dominique)

Et très bon site IFIXIT, dans la démarche de faire par soi-même, en étant éco-responsable

Drouinot -