Introducción

Sigue esta guía para reemplazar la batería recargable del Moto G4. Si tu batería está hinchada, toma precauciones apropiadas.

Para tu seguridad, descarga la batería existente por debajo del 25% antes de desmontar tu teléfono. Esto reduce el riesgo de un evento térmico peligroso si la batería se daña accidentalmente durante la reparación.

  1. lxT1UwKFgURyGcaK
    lxT1UwKFgURyGcaK
    1jye2DaRjg6xaoVK
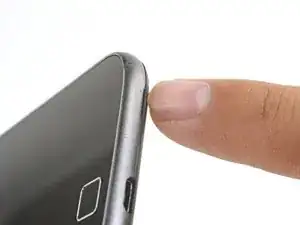
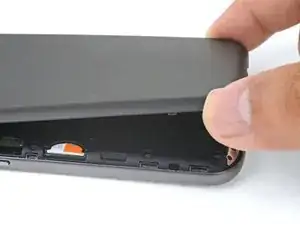
    • Inserta una uña o un spudger en el borde inferior del teléfono cerca del puerto de carga.

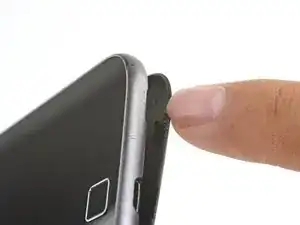
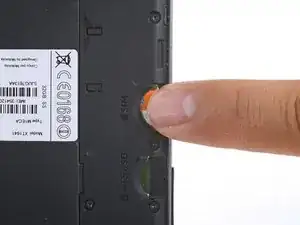
    • Separa la tapa posterior del cuerpo del teléfono.

  2. bYe3O62W1Wt2gtmv
    bYe3O62W1Wt2gtmv
    ZRw4LGhEDAptG1C1
    GYFrkRTtyKQlEd4B
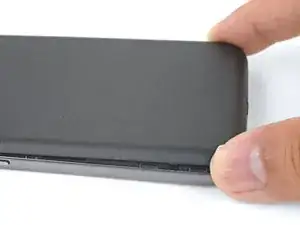
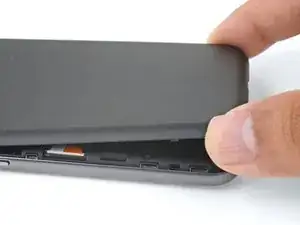
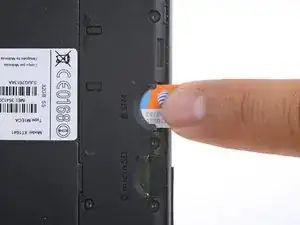
    • Continúa levantando con cuidado la tapa posterior hasta que todos los clips de plásticos se hayan liberado.

    • Remueve la tapa posterior.

    • Para volver a instalar la tapa posterior, alinea la tapa sobre el cuerpo y con cuidado presiona alrededor de los bordes hasta que sientas que los clips se hayan encajado en su lugar.

  3. MaIl6GDNwMyW3grX
    MaIl6GDNwMyW3grX
    GW6DOBihck1UBAjI
    • Desliza y remueve la tarjeta SIM.

    Tenho un Motorola g4 plus 64 G

    El celular se volvía loco abriendo y cerrando aplicaciones

    Ahora no reconoce la tarjeta SIM

    Internet y Wasapp funciona

    Alguien sabe donde lo reparan soy de Argentina Buenos Aires CABA

    Florencia Garrido -

  4. Y2bjMadRQCjPq6bx
    • Remueve los 19 tornillos T3 de 3.1 mm que sujetan el marco medio.

    A pair of binocular magnifiers is helpful here. Also, a magnetic pickup will help pull the tiny screws out of their counterbores.

    John Fossey -

    Well I'm stuck. 3 screw heads are stripped on mine, not lucky as they are two on USB port end and screw in-between two SIM slots. Phone bought new and this is 1st time screws have been touched, could see they were already stripped before getting screwdriver near them. Any tips on removing stripped screws?

    Mark Wintle -

    Hi Mark,

    I’m sorry to hear that! You can try some techniques from the stripped screw guide.

    Arthur Shi -

  5. GWhTNtKHDQJSDPMj
    GWhTNtKHDQJSDPMj
    NHQGAZWDKlNcbEPB
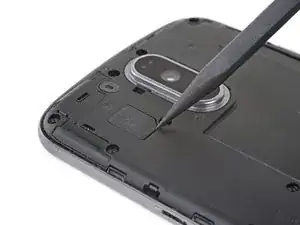
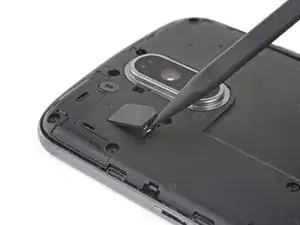
    • Usa la punta de un spudger para hacer palanca en la tapa de goma sobre el conector flash de la cámara.

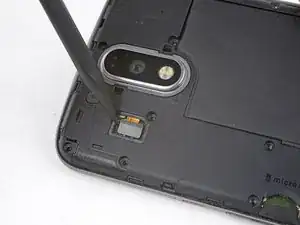
    • Remueve la tapa de goma.

  6. OJ5Fd4d5Z2XoxdSJ
    OJ5Fd4d5Z2XoxdSJ
    jgbdAx6g5ACgeNYZ
    • Usa la punta de un spudger para hacer palanca y desconectar el conector flash de cámara.

  7. W32KIcqo5YIFpbJE
    W32KIcqo5YIFpbJE
    BvV2RE33Xg4YIrS2
    XyJnRSGqnQMNF6GM
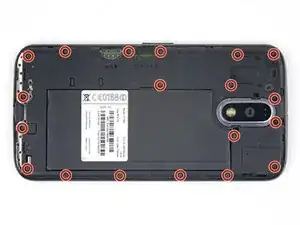
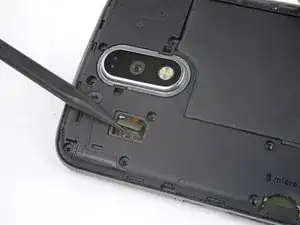
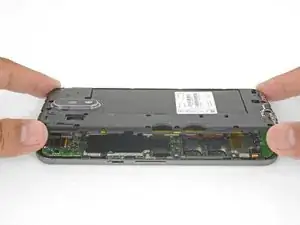
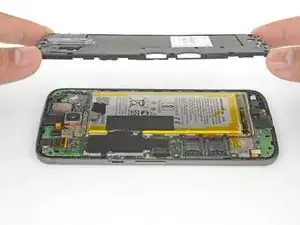
    • Suelta el marco medio a lo largo de los bordes y levántalo del cuerpo del teléfono.

    • Remueve el marco medio.

  8. cKHNL1FamCU5dnJR
    cKHNL1FamCU5dnJR
    gtZvU3O3HOCkIVVa
    • Ten cuidado de no perforar la batería con alguna herramienta afilada. Una batería de ión de litio puede prenderse fuego y/o explotar.

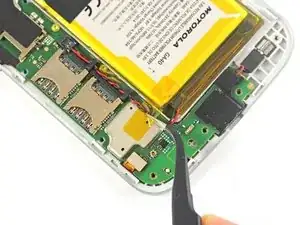
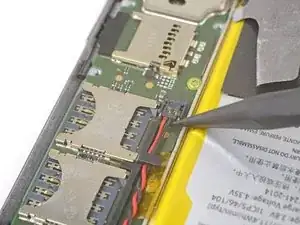
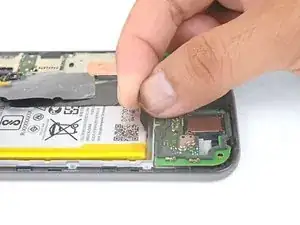
    • Despega y remueve la cinta que sujeta los cables de la bater[ia.

    • Despega y remueve la cinta negra que hace de puente entre la batería y el teléfono.

    • Si bien ninguna de estas cintas son necesarias para el funcionamiento del teléfono, guárdalas si están en buenas condiciones para el proceso de reinstalación.

  9. Bfp1NnsXcvWBibdD
    Bfp1NnsXcvWBibdD
    4dnSoBQCeltW12NK
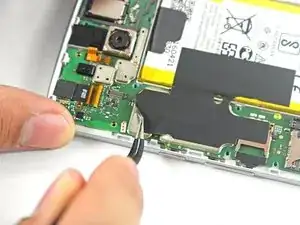
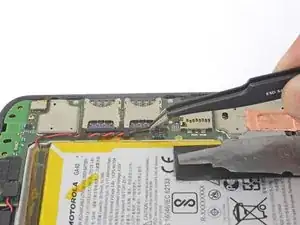
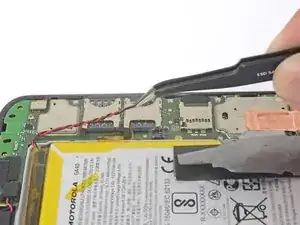
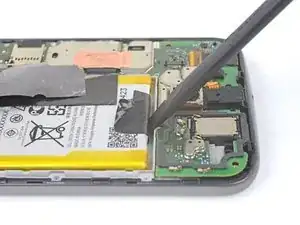
    • Desliza la punta de un spudger por debajo de los cables de batería rojo y negro y con cuidado haz palanca hacia arriba.

    • No jales el enchufe o arrancarás el zócalo de la placa. Ten cuidado dónde haz palanca. No hagas palanca contra el zócalo de la placa.

    • Durante el reensamblaje, alinea el conector en su zócalo, luego presiona directamente hacia abajo para reconectarlo.

  10. nt22DOKrSYEXRwXJ
    nt22DOKrSYEXRwXJ
    jKLniTeXpWZsqVEH
    • Usa una pinza o tus dedos para desviar los cables de batería de los soportes de plástico.

  11. ZKWAJrj2tjMODGja
    ZKWAJrj2tjMODGja
    jGKF3XeKMqHHDGOB
    y1OsQoSImBTLGvGG
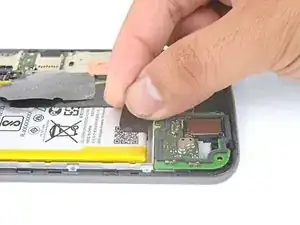
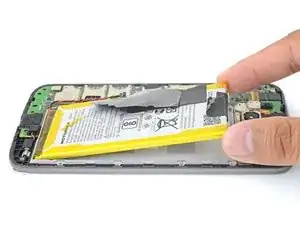
    • Despega la lengüeta negra de la batería y jala despacio pero firmemente para separar la batería del marco.

    • Unas pocas gotas de alcohol isopropílico de concentración alta (90% o más) a lo largo de cada lado podría ayudar a ablandar el adhesivo.

    • Si la lengüeta se rompe, usa un spudger para hacer palanca con cuidado alrededor de los bordes de la batería hasta que se suelte.

    • No deformes o perfores la batería, puede prenderse fuego y/o explotar si es dañada.

    • Nunca vuelvas a instalar una batería deformada o dañada. Reemplaza la batería.

    Does anybody know, what the black tape covering the metal cans an the battey is made of? It seems to have a heat insulating effect.

    David Kilias -

    No, but the tape completely separated from itself when I removed it. Glue separated from the backing. I figure the glue in the frame is holding it well enough.

    Alan Kristensen -

    I found prying the battery out was the trickiest part of this job. Take your time and pry with the plastic tool, working from the end away from the wires, but try not to deform the battery in the process. It does finally come out.

    John Fossey -

    Hi, I cannot remove the Battery, it has too strong glue. Any Ideas?

    Regards

    Moritz Strack -

    You can try to drip some high concentration isopropyl alcohol along the battery edge to help loosen the adhesive.

    Arthur Shi -

  12. ehBg24hidmq3SD3u
    • Remueve la batería.

    • Para instalar una batería, orienta la batería nueva de forma tal que los cables salgan cerca de la parte inferior del teléfono y el conector de batería esté del lado de la placa madre.

    • Limpia cualquier residuo de adhesivo que podría prevenir que la batería esté bien encajada contra el marco. Usa algunas tiras de adhesivo incluidas en el kit de batería o cinta de doble cara para sujetar la batería al marco.

Conclusión

Para volver a ensamblar tu dispositivo, sigue estas instrucciones en orden inverso.

Luego de completar esta guía, calibra tu batería recién instalada.

Lleva tus residuos electrónicos a un centro de reciclaje certificado.

¿La reparación no salió como lo habías planificado? Fíjate en nuestra comunidad de respuestas de Motorola Moto G4 Plus para ayuda con resolución de problemas.

Arthur Shi

Miembro Desde 03/01/18

219075 Reputación

10 comentarios

in step 9, when i took the connector away the hole plug came out :( need micro soldering to paste the conector to the board

Jorge Martinez -

I’m really sorry to hear that! I’ll add some extra warning on that step.

Arthur Shi -

One of the last screws stripped and I wasn't applying a lot of force. Being a jeweler, I tried every trick I knew of but that sucker would not budge. Since it was a corner screw, I rotated the entire cover (while pulling up on it to miss the components directly beneath) to expose all of the battery area. Hope I explained that part well enough. The battery was also tough to remove. I think they used way too much glue the first time around. Anyway, I was thrilled it powered right up with the new battery and I saved over $50 bucks doing it myself (and with the help of ifixit.com). Thanks!

Anna White -

Thank you for the guide! My wife and I did it together and the steps were very clear.

Abhay Ramakrishnan -

Mega mega mega, kinderleicht, Spitzenbeschreibung…

Alexander Albrecht -

Très bien expliqué étape par étape. ATTENTION : le connecteur de flash et de batterie ne sont pas évident à enlevé. S’assurer de bien clipser le connecteur de la nouvelle batterie, sinon il ne tiens pas.

vgm.380v -

Hi, thanks a lot! Successfully changed the battery today (45 minutes). But… with a T4 Torx screwdriver (?) I almost damaged the first two screws with a T3 one. Then, no problem with a T4. Thanks again.

Patrick PELLEN -

Parfait! Merci beaucoup ! 15 minutes suffisent

bertin -

Tolle Anleitung. Habe den Akku vor drei Monaten erfolgreich getauscht. Das Glück war aber nur von kurzer Dauer. Die letzten 2,5 Monate lief alles gut, aber eines schönen Tages war schluss mit Lustig. Der neue Akku entlädt sich leider sehr schnell und springt plötzlich von 55 % auf Ausschalten. Ich mag das Phone eigentlich sehr gerne und es macht sonst alles was es soll - doch nun muss ich es fast ständig am Netz halten. Was würdet ihr machen? Habe ich einfach Pech gehabt und würdet es nocheinmal mit einem neuen Akku versuchen?

Great instructions. Successfully replaced the battery three months ago. But the happiness was short-lived. The last 2.5 months everything went well, but one fine day was schluss mit Lustig. The new battery unfortunately discharges very quickly and suddenly jumps from 55% to switch off. I really like the phone and it does everything it's supposed to do - but now I have to keep it plugged in almost all the time. What would you do? Have I just had bad luck and would you try it again with a new battery?

Guybrush Threepwood -

Wo hast du denn den Akku gekauft? Ich würde mich da mal melden. Scheint eher ein Problem des Akkus zu sein. PS: Guter Username. ;)

Fabian Neidhardt -