Introducción

Si tu Galaxy A5 no mantiene la carga, puedes utilizar esta guía para reemplazar la batería gastada.

Si tu batería está hinchada, toma precauciones adecuadas.

Esta guía involucra remover la pantalla y el medio marco. Podrías necesitar adhesivo nuevo para conectar la batería y la pantalla al teléfono.

'''Antes de desmontar tu teléfono, descarga la batería por debajo de 25%. La batería puede prenderse fuego y/o explotar si se la perfora accidentalmente, pero las chances de que pase esto son más bajo si se la descarga

  1. 2mUZCcmpttVH4vcd
    2mUZCcmpttVH4vcd
    cyJDngvUfDle2knY
    spvK1AIEVBHtqOWM
    • Comienza apagando tu teléfono.

    • Toma un iOpener para calentar y suavizar el pegamento detrás de la tapa posterior.

    • Con una palanca de succión levanta la tapa posterior para insertar una púa de apertura.

  2. miE2qaQ2gYvUejv5
    miE2qaQ2gYvUejv5
    ILp6M3brtZ66LM2A
    KDDXKXEcGdAahZHR
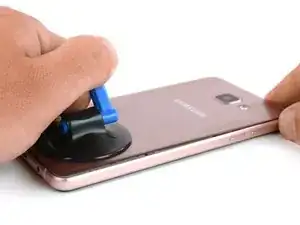
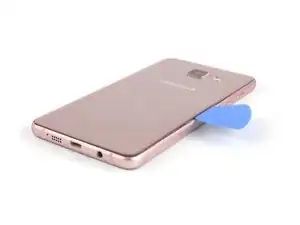
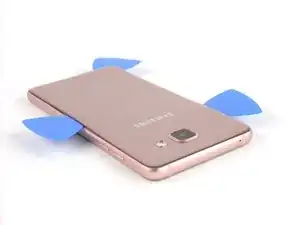
    • Desliza la herramienta de apertura por el centro para separar la tapa posterior del marco.

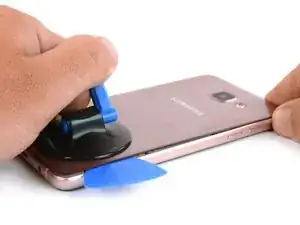
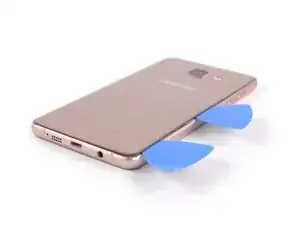
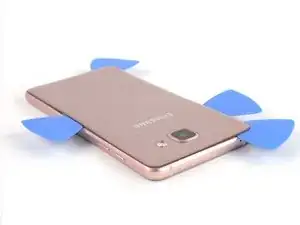
    • Inserta una segunda púa de apertura y muévela alrededor de la esquina derecha, a lo largo de la parte inferior y alrededor de la esquina izquierda.

  3. XprCrLvTLxmfK1ZO
    XprCrLvTLxmfK1ZO
    LARNvICYTUDMkbG2
    4TPN1VQRS2RRONiO
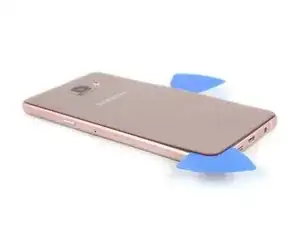
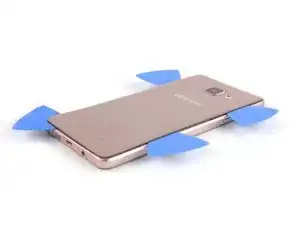
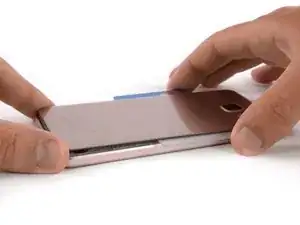
    • Toma otra púa de apertura y continúa hacia la esquina superior.

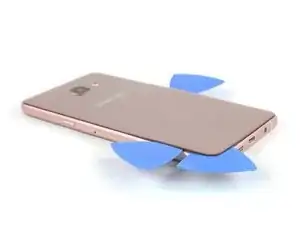
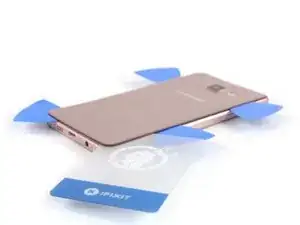
    • Aquí debes usar otra púa de apertura para la última parte de arriba.

  4. TUEwkvlgrr2PLPvH
    TUEwkvlgrr2PLPvH
    X1arsiJbHSWVqNCb
    PiWYUf6GRQsbL6HM
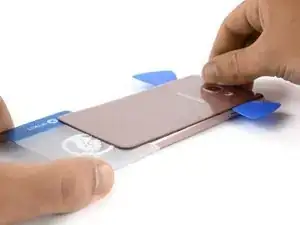
    • Inserta una tarjeta de plástico en la parte inferior y deslízala por debajo de la cubierta posterior.

  5. CCwYLvYPbTiUR2aJ
    CCwYLvYPbTiUR2aJ
    2UNDKrxsGL3pqpaN
    GV3PoRipY12FMPUi
    • Calienta la tapa trasera de nuevo para que puedas deslizar la tarjeta de plástico hacia la parte superior.

    • Siempre echa un vistazo debajo de la tapa trasera para no dañar alguna pieza como la antena NFC.

    • Mueve la tarjeta de plástico hasta que alcance el tope de la cámara. Ahora levante lentamente la cubierta posterior y finalmente extráela.

    • Asegúrate de quitar cualquier residuo del pegamento y aplica nuevo adhesivo al volver a montar el dispositivo.

  6. KSWbG16QAZfjDAgB
    KSWbG16QAZfjDAgB
    hoMJS3m2gjE5rObW
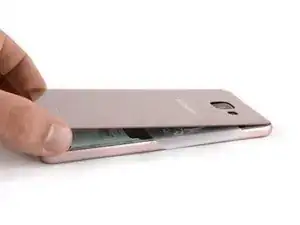
    • Remueve la bandeja de la tarjeta SIM.

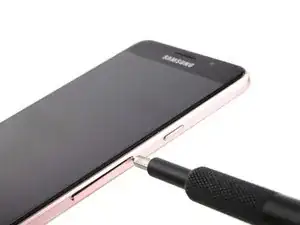
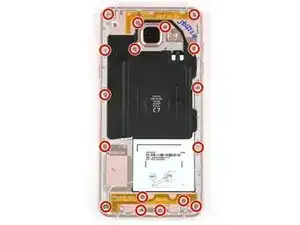
    • Remueve los 17 tornillos Phillips #00 (3,4 mm) en el marco medio.

  7. 3E1PlDr1pFfOtl6e
    3E1PlDr1pFfOtl6e
    eCjgl2WxQJ4LlAee
    OjUxuipuwukNMBoI
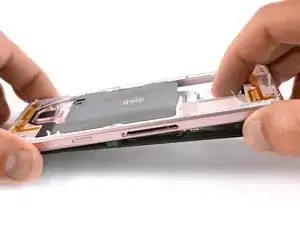
    • Empuja la parte expuesta de la batería y aléjala del marco medio para separar los componentes.

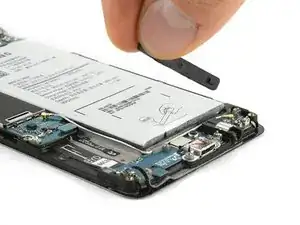
    • Podrías necesitar el sticker IMEI de tu batería vieja para identificar tu teléfono en el futuro, asegúrate de transferirlo a tu batería de reemplazo.

  8. L5kZoYFxsIDA23O2
    L5kZoYFxsIDA23O2
    SAB5EALLNyNIQwP2
    TN4AKp3ixB1jOL4I
    • Hay un espaciador plástico entre la batería y el marco medio que se debe remover con una herramienta de palanqueo de metal antes de poder reemplazar la batería. Ten extremo cuidado de no perforar la batería.

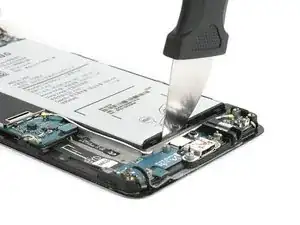
    • Usa la herramienta Jimmy para palanquear con cuidado el espaciador plástico de la batería desde la cavidad de la batería que se encuentra en el extremo de la placa hija.

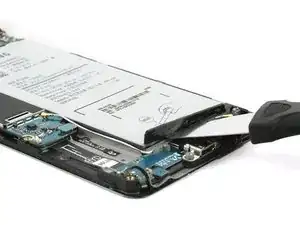
    • Remueve el espaciador plástico del teléfono.

    Bei mir war der Plastikabstandhalter fest am Akku. Am Ersatzakku allerdings auch.

    Miautier -

  9. nDhS5Ve2rd4EQqRR
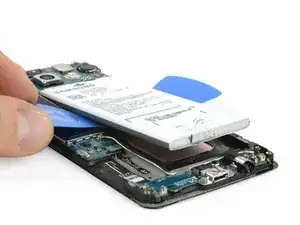
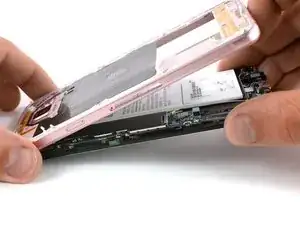
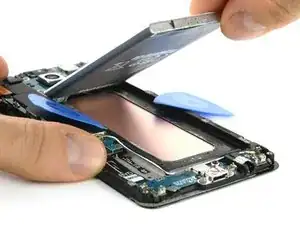
    • Nuevamente, con cuidado levanta la batería e introduce la punta en el lado izquierdo.

    • Ahora puedes usar una segunda púa de apertura y deslizarla por el lado derecho. Además, no introduzcas la púa muy adentro para evitar dañar la pantalla LCD.

    Very hard to do from this side. I recommend removing the mainboard and trying this from the top where the battery connector is. There is an area flush with the base surface.

    Felix -

  10. HEwyTedvtWnMjfoX
    HEwyTedvtWnMjfoX
    pJFiOgjO2kRfO1Hw
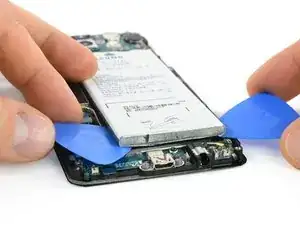
    • Desliza las púas de apertura hacia la parte superior de la batería para liberar la batería del adhesivo.

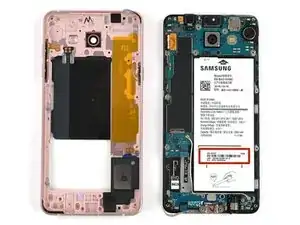
    • Ahora puedes remover la batería.

    Take care not to dent or break the copper plate under the battery. That is your screen and any deformation will damage the display causing bleeding and/or pixel loss.

    taz -

Conclusión

Para volver a ensamblar tu dispositivo, sigue estas instrucciones en orden inverso. Vuelve a aplicar donde sea necesario.

Tobias Isakeit

Miembro Desde 31/03/14

108306 Reputación

19 comentarios

Guten Tag,

Ich habe meinem Battery ausgetauscht, nach dem Austausch das Volume Taste und sim slat 2 funktioniert nicht mehr.

wie kann ich die reparieren?

vielen dank

peyman -

Prüfe, ob die Kontakte der Lautstärkeknöpfe und das Flachbandkabel noch in Ordnung sind (nicht verschmutzt oder verbogen). Das mit dem Sim Slot klingt schon etwas seltsam. Das Modell in dieser Anleitung hat nur einen Sim Slot und einen micro-SD Slot.

Tobias Isakeit -

Hi in step 7 you can see a black thin plastic over the battery. Is it the NFC antenna?

carolinaaires -

Yes, this is the NFC antenna.

Tobias Isakeit -

Just saved 2k INR by following this guide !!! Thanks Man

priyadarshi -

Can i get some screws of this mobile i mean like this mobile ,actually i have also a a5 but i have no mobile screws then i want

Hayat hesham -

Then how can you put everything back together as strong as before? any glue needed? thanks

Hayden -

بدلت البطارية متمل اشتغل واستقبل رسائل الحل

Abd Aln -

بدلت بطارية جلاكسي a5

Abd Aln -

The glue is too strong, it's exaggerated! You will easily kill the display.

Easy Repair -

The glue is too strong, it's exaggerated! You will easily kill the display!

Easy Repair -

Super Anleitung, es hat geklappt! Danke :)

pld1 -

عندي ضعف في شبكة الاتصال ايش السبب

محمد المخلافي -

اذا تركت بعض الغراء علي الهوائي هل يسبب له

محمد المخلافي -

Whats the screw size

Hayat hesham -

The screws are 3.4 mm long (information added in the step). Unfortunately not sure where to get them.

Tobias Isakeit -

Danke für die Anleitung, hat super funktioniert. Ich habe meine Bemühungen auf Video festgehalten: https://youtu.be/yfY4Jk4IhO0

Miautier -

Gratulation zur gelungenen Reparatur und Danke für den Link zum Video.

Tobias Isakeit -

The battery is very hard to remove because it has adhesive under it.

I recommend you to disassemble the mainboard and lever up the battery from the top as there you will have the only accessible flush area to really slide something under.

Felix -