Introducción

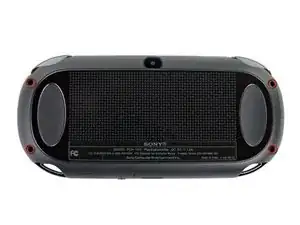
Esta guía lo lleva a través de la instalación de una cámara en la PlayStation Vita.

  1. bXHPdJvmOqwnRZ5W
    bXHPdJvmOqwnRZ5W
    Kxh4sK2xMaaiHQtJ
    • Apague y retire la tarjeta de memoria.

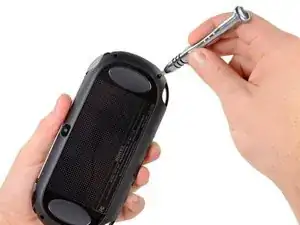
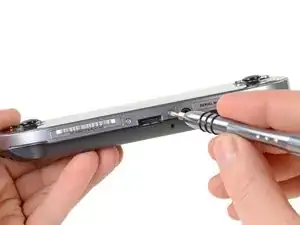
    • Usando un destornillador Phillips # 00, retire los cuatro tornillos de 6,4 mm en la carcasa trasera

  2. WwpKNcKBHnx3iwJP
    WwpKNcKBHnx3iwJP
    36FYDevnAqBvbNY3
    mjh2iFATaa2BKMEs
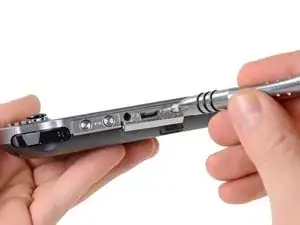
    • Usando la uña o un spudger, abra la cubierta del puerto de accesorios en la parte superior del dispositivo.

    • Usando un destornillador Phillips # 00, retire los dos tornillos de 5.4mm ocultos debajo de la cubierta del puerto de accesorios.

  3. AH6yWSkBJ4VWv3RB
    AH6yWSkBJ4VWv3RB
    aXih4BBWrQN2fmOK
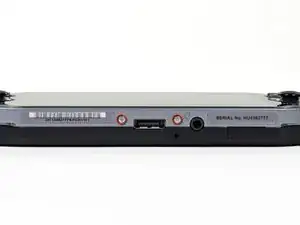
    • Retire los dos tornillos Phillips # 00 de 5.4mm en la parte inferior del dispositivo cerca del puerto de carga.

  4. bEJVmiEky4mHiDcb
    bEJVmiEky4mHiDcb
    aQOOn4pkOrVFR3hw
    vEQhcA4OEHFKVYLS
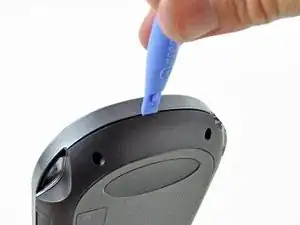
    • Comenzando a los lados del dispositivo, utilice una herramienta de apertura de plástico para separar la carcasa delantera y trasera.

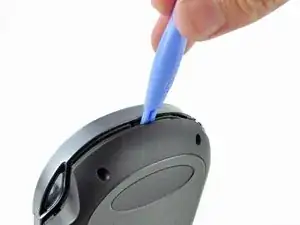
    • Continue deslizando la herramienta de apertura al rededor del borde.

    • Todavía hay alambres que mantiene juntas las carcasas delantera y trasera. Usted puede dañar las conexiones si separa las carcasas de forma brusca.

  5. 3BBZJmwmjKVUDiJa
    3BBZJmwmjKVUDiJa
    EpjUlyY4L4GWcaLS
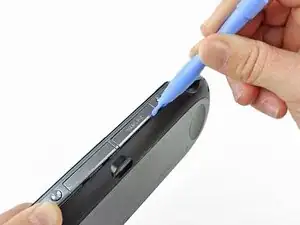
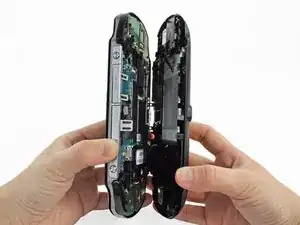
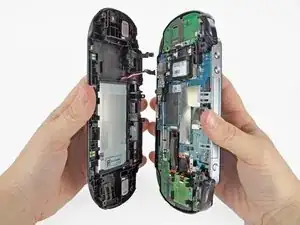
    • Suavemente separar las dos carcasas, teniendo en cuenta la batería y los conectores del controlador de pantalla táctil que mantienen las carcasas juntas..

    One of the shoulder buttons fell out when I was doing this step, along with the piece holding it in place. They go back in just fine when reassembling but make sure that they are oriented properly, of course.

    klung -

  6. NeowybD4slFqYmiM
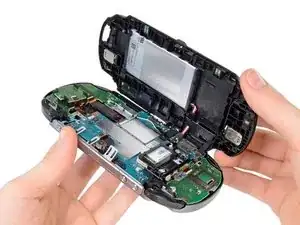
    • Utilizando un spudger, libere el cable flexible del controlador de la pantalla táctil suavemente levantando la conexión.

  7. DtebpV1FIAkm4AUj
    • Libere el cable de la batería levantando suavemente la conexión con un spudger.

    Any idea what type of pcb header is on the board for the battery? I have a motherboard with a broken header but I cant source a replacement

    Jimbo Jones -

    This is where I screwed up so I recommend extra caution for other newbies. Only the black part is supposed to come off. Don't be an idiot like me and pry off too much...

    ylimakiminna -

    Yea I messed up there too. Is there a way to fix it?

    Alethia Henry -

    This component was far more stubborn than the screen connector when it came to removal. I opted for a smaller tool than the spudger (small flat-head) and managed to disconnect it after determining the best bit size for the job. Screwdriver is metal, obviously, so being gentle helps to avoid damaging anything.

    klung -

  8. fkyIaVUrPDRIlhZV
    • Separar las carcasas delantera y trasera.

  9. axeTPLdIDKt2GrCJ
    axeTPLdIDKt2GrCJ
    EBbGkAPGxTpErWGo
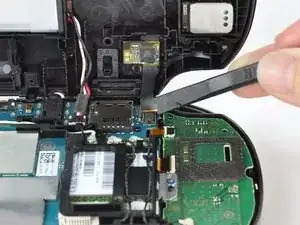
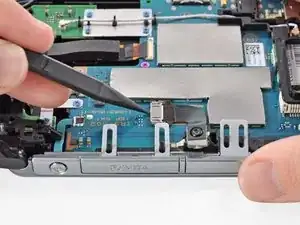
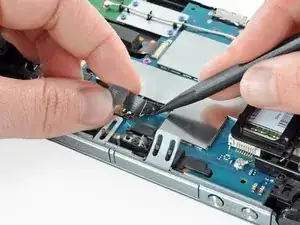
    • Suelte el zócalo del cable flexible de la cámara levantando la pestaña con un spudger. Deje el enchufe abierto.

  10. HC3hFKt1ntn6Ivp3
    HC3hFKt1ntn6Ivp3
    nvp5VtijfUCgnlle
    JlbvMSdYDPeBJ5GV
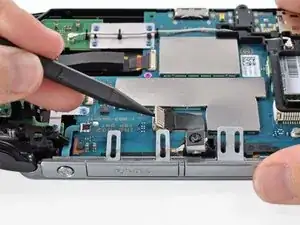
    • Usando un spudger, levante suavemente la cámara.

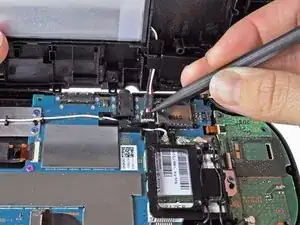
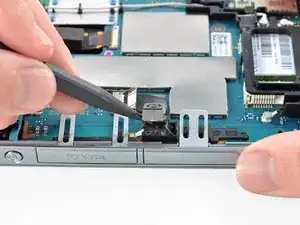
    • Trabaje a su manera debajo de la cámara y a lo largo del cable flexible de la cámara, usando la punta puntiaguda del spudger para despegar el pegamento, liberando la cámara.

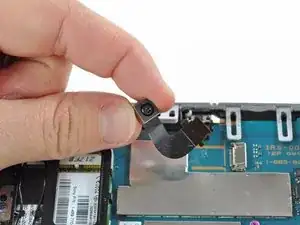
    • Levante y retire cuidadosamente la cámara.

Conclusión

Para volver a armar el dispositivo, siga estas instrucciones en orden inverso.

Brittany McCrigler

Miembro Desde 05/03/12

88184 Reputación

0 comentarios