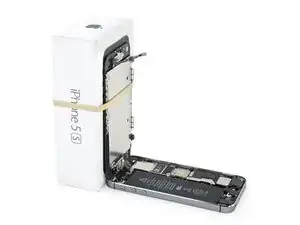
Introducción
Utiliza esta guía para quitar las cubiertas de botones para el interruptor de timbre y los botones de volumen de tu iPhone SE. Esta guía no reemplaza los interruptores físicos, solo las cubiertas del botón.
Esta guía requiere quitar la batería. Las tiras adhesivas que sujetan la batería no son reutilizables, por lo que debes tener a mano un suministro de tiras adhesivas de reemplazo antes de comenzar. Alternativamente, puedes asegurar la batería utilizando un trozo de cinta de doble cara. La batería está bastante bien asegurada en el dispositivo, pero la cinta evitará que repiquetee.
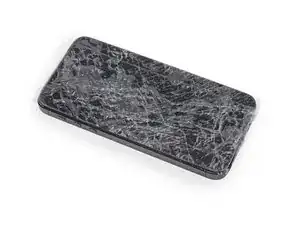
Las tapas de botones son compatibles con las partes del iPhone 5s.
-
-
Apaga siempre tu iPhone antes de comenzar el desmontaje.
-
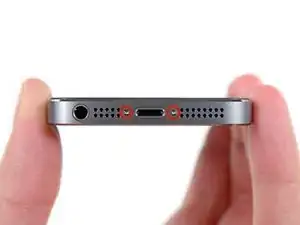
Retira los dos tornillos Pentalobe de 3.9 mm de cada lado del conector Lightning.
-
-
-
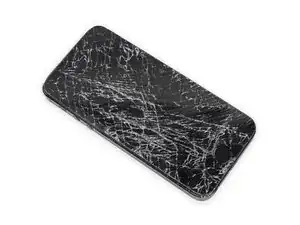
Si la pantalla de tu dispositivo está rota, evita sufrir daños físicos utilizando cinta adhesiva.
-
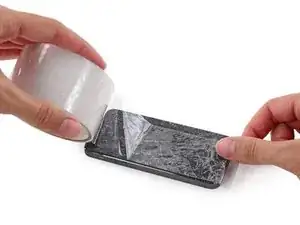
Pon tiras de cinta adhesiva transparente sobre la pantalla rota hasta que la totalidad de la pantalla esté cubierta.
-
-
-
Da igual que herramienta utilices, pero debes estar seguro de que sacas toda la pantalla.
-
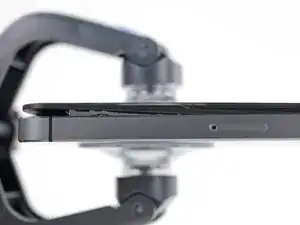
Si el cristal empieza a separarse del plástico, como se muestra en la primera imagen, desliza una herramienta de apertura entre el bisel de plástico y el cuerpo metálico del teléfono para que los clips metálicos de los laterales salgan del chasis.
-
-
-
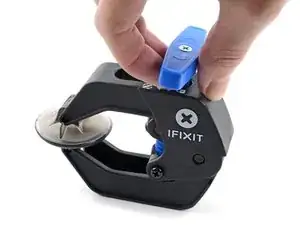
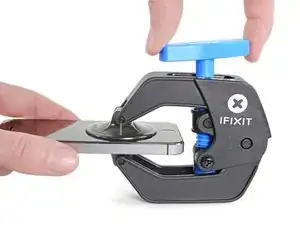
Para obtener instrucciones completas sobre cómo usar Anti-Clamp, consulta esta guía.
-
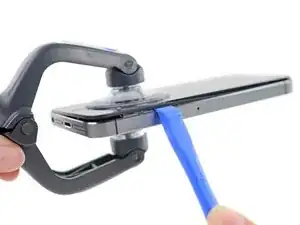
Tira de la manija azul hacia la bisagra para desactivar el modo de apertura.
-
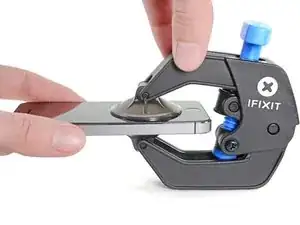
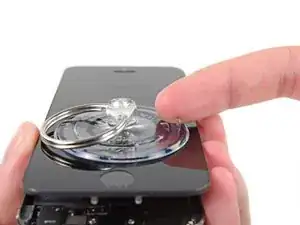
Coloca las ventosas justo encima del botón de inicio en la pantalla, una en el frente y otra en la parte posterior.
-
Coloca las ventosas justo encima del botón de inicio en la pantalla, una en el frente y otra en la parte posterior.
-
-
-
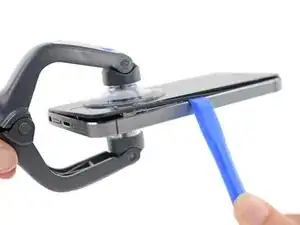
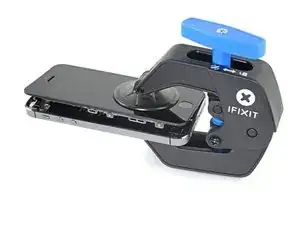
Empuja la manija azul lejos de la bisagra para activar el modo de apertura.
-
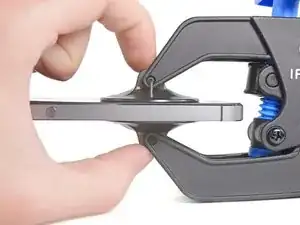
Gira el mango en el sentido de las agujas del reloj hasta que veas que las copas comienzan a estirarse.
-
Espera un minuto para que el adhesivo se suelte y se abra la parte inferior de la pantalla.
-
Omite los siguientes dos pasos.
-
-
-
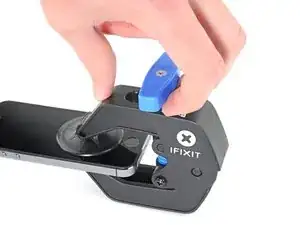
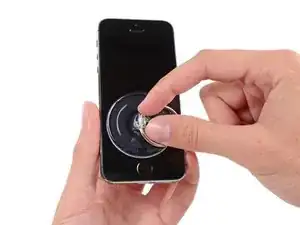
Si no tienes iSlack, utiliza una ventosa para levantar el panel frontal de tu iPhone.
-
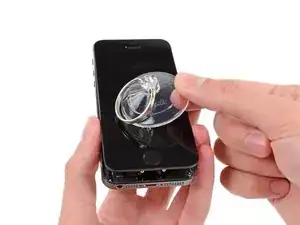
Presiona la ventosa contra la pantalla, justo por encima del botón de home.
-
-
-
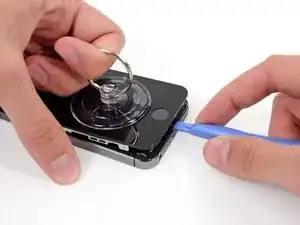
Mientras sujetas el iPhone con una mano, tira de la ventosa para arriba para separar la pantalla del chasis a la altura del botón de inicio
-
Con una herramienta de apertura, deslízala por los bordes del chasis del teléfono, no por los de la pantalla, mientras tiras hacia de la ventosa.
-
-
-
Jala de la protuberancia de plástico para liberar el sello de vacío de la ventosa.
-
Remueve la ventosa de la pantalla.
-
-
-
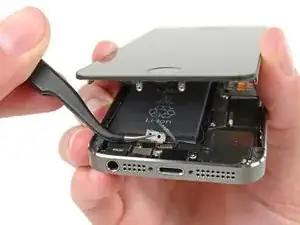
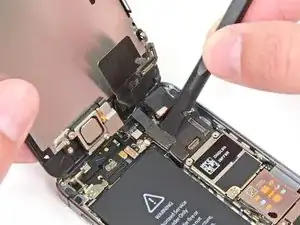
Abre el telefono lo suficiente para revelar el soporte de metal cubriendo el cable de boton de inicio.
-
Solo el ensamblaje original de boton de inicio del telefono sera capaz de utilizar la funcionalidad de Touch ID. Si rompes el cable, instalando un nuevo boton de inicio solo restaurara la funciones ordinarias de boton de inicio, no las funciones de Touch ID.
-
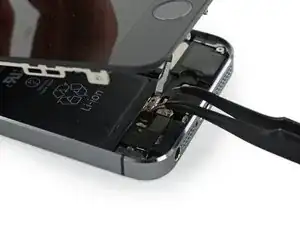
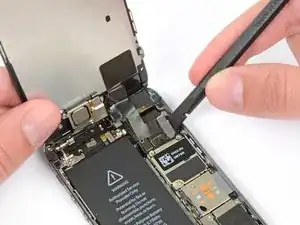
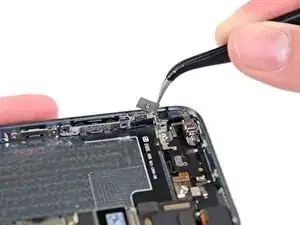
Utiliza la punta de un spudger para empujar y liberar el soporte y quita lo con un par de pinzas.
-
-
-
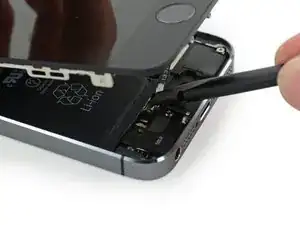
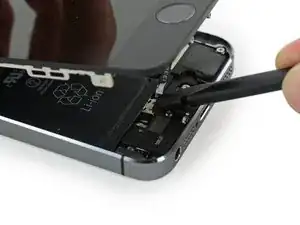
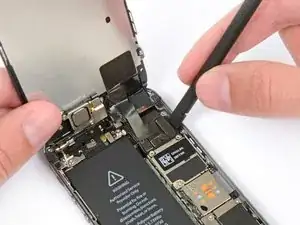
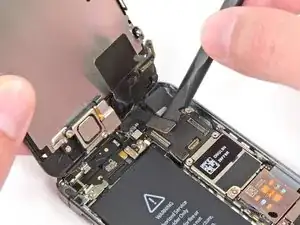
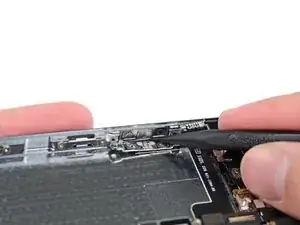
Utiliza la punta de un spudger para hacer palanca y desconectar el conector de cable del boton de inicio.
-
-
-
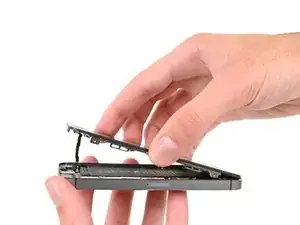
Una vez que el conector del botón home ha sido desconectado, tira de la pantalla con el cable del botón home fuera del chasis utilizando la parte superior del telefono como una bisagra.
-
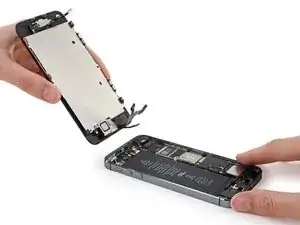
Abre la pantalla en un angulo de 90º y asegúrala contra algo para mantenerla apoyada mientras trabajas en el telefono.
-
Agrega una bandita elastica para mantener la pantalla asegurada en su lugar mientras trabajas. Esto previene tension excesiva en los cables de pantalla.
-
-
-
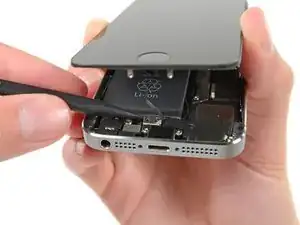
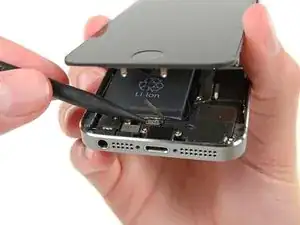
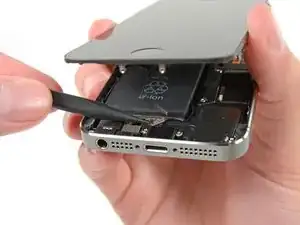
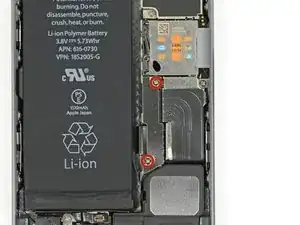
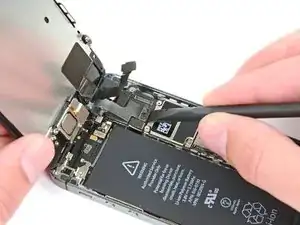
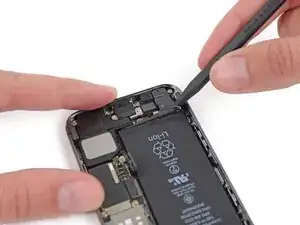
Quita los tornillos Phillips #000 de 1.6 mm del conector metalico de la bateria a la placa logica.
-
-
-
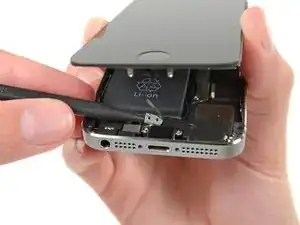
Utiliza la parte plana de un spudger para cuidadosamente hacer palanca a el conector de batería hacia fuera de su enchufe en la placa lógica.
-
-
-
Quita los siguientes tornillos que aseguran el soporte de los conectores del panel frontal a la placa lógica:
-
Un tornillo Phillips #000 de 1.7 mm
-
Un tornillo Phillips #000 de 1.2 mm
-
Un tornillo Phillips #000 de 1.3 mm
-
Un tornillo Phillips #000 mas de 1.7 mm
-
-
-
Corre la punta de un spudger entre la bateria y la entrada de auriculares para desplegar la etiqueta de adhesivo de bateria.
-
-
-
Jala la etiqueta de adhesivo de la batería hacia fuera del teléfono.
-
Corta la etiqueta negra de adhesivo de la batería entre las dos tiras blancas de adhesivo, separándolas.
-
-
-
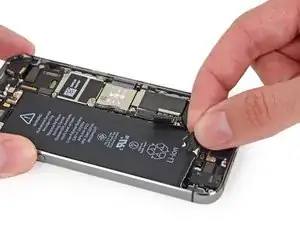
Lentamente jala una de las tiras de adhesivo de batería hacia el inferior del iPhone.
-
Jala constantemente, manteniendo una tension constante en la tira mientras se desliza entre la batería y la caja trasera. Para mejores resultados, jala la tira a un ángulo de 60º o menos.
-
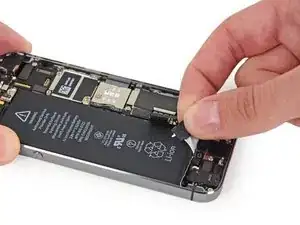
Guía la tira cuidadosamente alrededor de la esquina y hacia el lado superior de la batería. Ten cuidado de no enganchar la tira en otros componentes de iPhone internos.
-
-
-
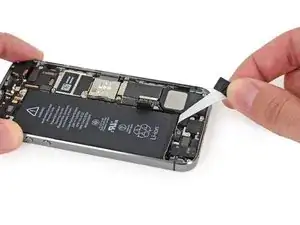
Repite el procedimiento para la segunda tira.
-
Si quitaste las dos tiras exitosamente, salta los dos próximos pasos.
-
Espera por alrededor de un minuto para que el alcohol disuelva el adhesivo. Usa el lado plano de un spudger para levantar gentilmente la batería.
-
-
-
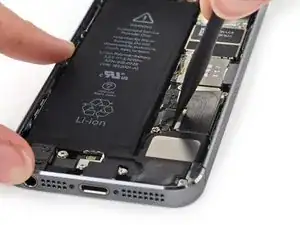
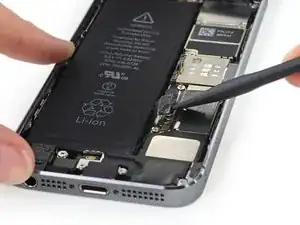
Enhebra el hilo o cuerda detrás de las esquinas superiores de la batería, junta los fines, envuélvelos alrededor de un trapo doblado, y jala uniformemente.
-
-
-
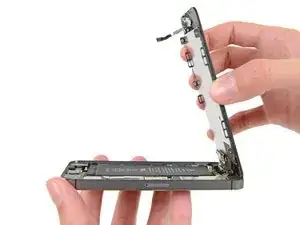
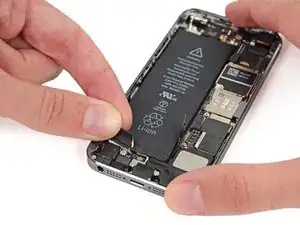
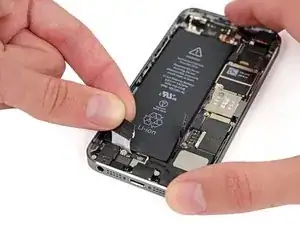
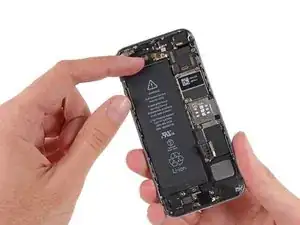
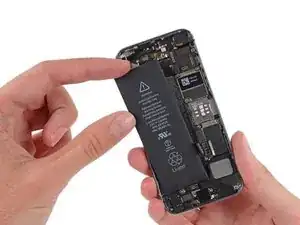
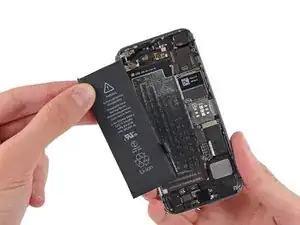
Jala la batería fuera de la carcasa posterior
-
Adhiere la batería, desconéctala y continúa montando tu dispositivo.
-
-
-
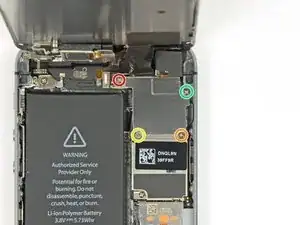
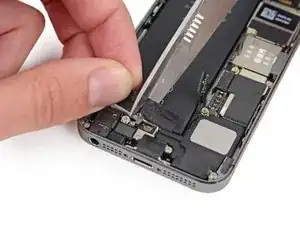
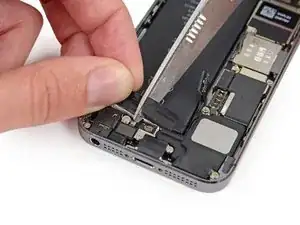
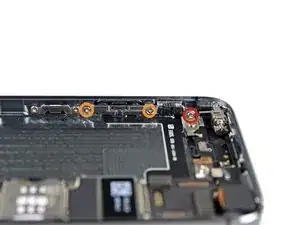
Remueve los siguientes tornillos que sujetan los soportes del botón de volumen e interruptor de timbre del lado de la caja trasera:
-
Un tornillo Phillips 1.9 mm
-
Dos tornillos Phillips de 1.6 mm
-
-
-
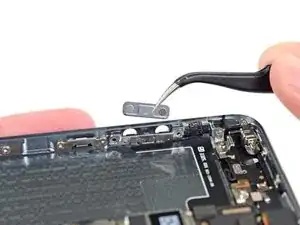
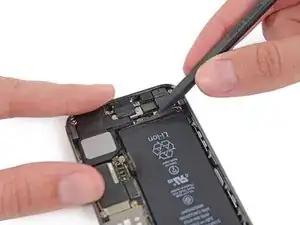
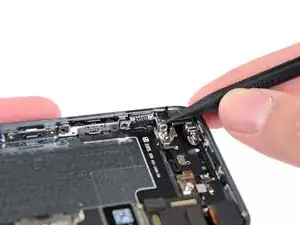
Usa la punta de un spudger para levantar el soporte del interruptor de timbre del lado de la caja.
-
Remueve el interruptor de timbre de su zócalo entre el soporte del interruptor de timbre y la caja.
-
-
-
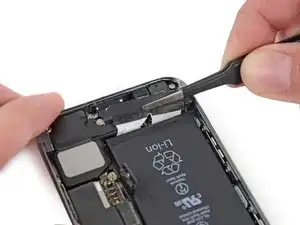
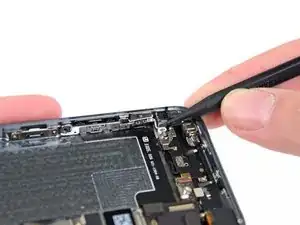
Usa un spudger para levantar el soporte de botón de volumen desde la parte lateral de la caja trasera.
-
Remueve los botones de volumen.
-


Para volver a ensamblar tu dispositivo, sigue estas instrucciones en orden inverso.

I used a white terrycloth hand towel as my work surface and to position and retain all the screws and part in their relative positions, so I didn't mix things up. I also magnetized the screwdriver tips and that made it very easy to deal with these tiny, tiny screws.
Magnus Dalen -
For a secure working, put a small pot with lid on your workplace. When the battery starts burning, throw it in the pot, close it with the lid and get the pot safely out of the building, e.g. on the balcony or throw it out of the window. Do not try to extinct the battery with water, just let it burn out outside. This might take some hours.
Raymond Willems -
This is a really helpful one! My battery caught fire but luckily it was only one cell and not the entire battery. So it was done after a few seconds and I could go on with the replacement.
Matthias Blab -
Directions should say “use the P2 screwdriver head.”
William Kolb -
This step should have included that information. It was very helpful and important. Thank you very much.
Jeffery -
ifixit supplied a set of replacement philips screws (marked “Liberate!”). Thanks but I’m sticking with the pentalobe since they fit more securely than philips which have a chance of stripping if not held with the right amount of pressure.
Don Libes -
What are you supposed to do if the screws are stripped or won’t come out. No luck with the tweezers either.
ibrokeit -
Yep i‘ve had the same problem. One screw out, one that won‘t budge!!!
Stennett -
“cheater” reading glasses are a big help. Carolyn
Carolyn Green -
In this step, it is the P02 screwdriver from the kit (see that the nib has five sides , exactly for ‘pentalobe’ screws). All the other steps involving screws it was the Philips 000 (there was a third screwdriver Y 000 in the kit which I did not use). Did not have any problems at all removing and readding screws back through the process.
Andre Silva -
I'm trying to fix my 5s’s but one has some water damage, and impeccable screen but won't turn on,then I have another one that has no water damage, screens a bit busted but won't turn because of the screen. If I use the good screen from the water damaged phone would it work?
samuel.m.fudge -
After removing the phone from a very good plastic case and before I started the repair I cleaned the entire phone with a soft cloth misted with rubbing alcohol. That removes all the grunge which builds up in the seams of the phone and the small spaces inside the case. Having a clean phone to work on makes the job a lot easier and prevents grunge from falling into the phone.
David Park -
General comment about the screwdriver tips and reassembly: If you get a screw nicely set in place using tweezers and then use the screwdriver, the magnet will probably pull the screw out before you can tighten it. If this is a problem use just the tip (without the handle) to start the screw, then tighten using the handle.
Kevin Patfield -
DO NOT disconnect the screen.
Benjamin Piscopo -
Having two SE’s needing batteries, I ordered an extra battery. The extra battery did not come with the Phillips replacement screws. It would be helpful if every battery came with a set of case replacement screws.
Dorothy Campbell -
Upon reassembly I found it useful to squeeze the phone right above the screws so everything lines up nice. I noticed that when I didn’t do this the new Phillips screws were trying to go in crooked. So just holding the phone together helps.
Samara Sullivan -
hello i am replacing my iphone 5s battery but i am stucked because the adhesive broke whiles pulling it out
before i started i made sure my battery was 0% but i am afraid that when i mistakenly puncture it with the spudger it might catch fire
please is the battery capable of catching fire when it has no power (0%)?
please can someone give me the honest answers before i continue
thank you
George Rockson -
The screws in my iPhoneSE were not P2 (1,2mm) but P1 (0,8mm). I had to order an extra screwdriver which is not available at iFixit.
Tadeus Nawka -
Instructions were fine until removing the battery , No adhesive strip at the bottom of the battery . Unable to remove battery as the battery was stuck sold with adhesive but could not get at the adhesive strip to remove battery . seems whoever put the battery together did not put a strip across the bottom . Had the phone from new and this was the first time I tried to replace the battery . Now I need a new phone
J Caley -
Instructions fine until removing the battery . No strip at bottom of the battery hence impossible to get at the adhesive strips around the battery . This must have been done in the factory as I have had the phone from new and this was the first time the battery was being replaced . Cheesed off as I now need a new phone
J Caley -
30 minutes - to an hour? I gave up after removing the screws and spending an hour trying to lift the display with a suction pad.
harwood -
iPhone 5s maderbored
Rahan Ali -