Introducción

En esta guía te mostramos cómo remover y reemplazar el ensamblaje de pantalla con marco en tu Huawei P10.

Para proteger tus ojos de trozos de vidrio y poder sujetar mejor el teléfono para abrirlo tendrás que aplicar más cinta en la pantalla.

Cuando vuelvas a ensamblar tu teléfono, aplica adhesivo nuevo donde sea necesario. Antes de volver a ensamblar, verifica si en tu parte nueva hay algún componente que necesites transferir de la parte antigua.

  1. 5kZSF1VgiLHUdyyv
    5kZSF1VgiLHUdyyv
    mQihCqm5GGlSDcKL
    jVG1EPmTTIdtTHi5
    • Apaga el teléfono.

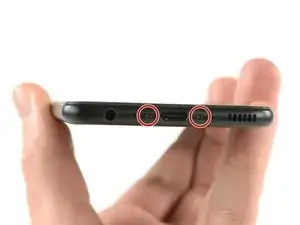
    • Quita los dos tornillos Pentalobe P2 en la parte inferior.

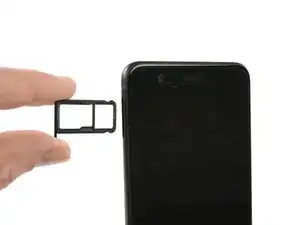
    • Quita la bandeja de tarjeta SIM.

    Das Honor 9 hat an der Unterkante keine Schrauben.

    Wie ist das Honor 9 zu öffnen?

    Michael Tuschek -

    Vielleicht beantwortet diese Anleitung deine Frage ;)

    Tobias Isakeit -

    Hi, my P10 does not have screws, just two tiny holes. Do I push in here to unfasten? Einar, Norway

    Einar Ryvarden -

    Hi Einar Ryvarden,

    in case you bought a used or refurbished phone, someone might have forgotten to put them back in. Since you have holes at the bottom edge next to the charging port this is likely. You can try to start with step 2 and see if you can lift the phone assembly (don’t forget to remove the SIM tray first). As far as I know there is no version of the regular Huawei P10 with no screws. However you there are none in the P10 lite and in the P10 plus, maybe one of the opening procedures for those phones might help you.

    Dominik Schnabelrauch -

  2. dafShavrRqe1bsKB
    dafShavrRqe1bsKB
    K4uhwPOLpW1gekMx
    oLwmeu5Ptyq4gnEs
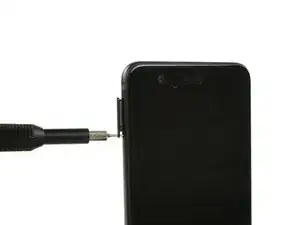
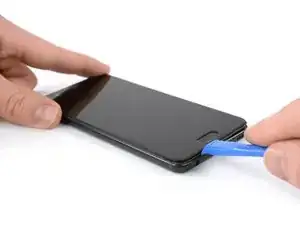
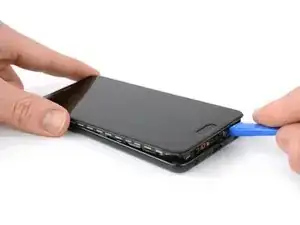
    • Introduce una herramienta de apertura de plástico entre la pantalla y la carcasa comenzando en la parte inferior de tu teléfono.

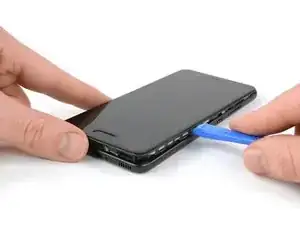
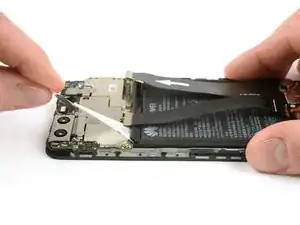
    • Levanta con cuidado la pantalla con sus partes fuera de la carcasa.

    • Introducir la herramienta de palanca requerirá un poco de esfuerzo, ten cuidado de no deslizar la herramienta demasiado o podría dañar ligeramente la carcasa.

    • Después de hacer palanca en el extremo inferior, usa la herramienta de apertura para abrir las abrazaderas en ambos lados.

    Hi! I cannot find a way to insert the plastic opening tool. Any suggestions on how I can create a gap to start. Everything seems quit rigid.

    Also, where will I find your reply.

    vbr/lars.skoldebring@gmail.com

    lars.skoldebring -

    Hi Lars, you might want to use a suction handle to lift the display and create a small gap to insert the plastic tool. If you don’t have a suction handle you can “build” a handle with tape that you stick onto the display in a shape similar to this —> __∏__ (also you may want to edit your post and remove your email address ;) )

    Tobias Isakeit -

    Hi,

    I’m stuck at this step for about two hours… There’s nothing I can do to open the case. Tried all kinds of opening tools and a suction handle. There is no gap at all between the display and the body. How can anything be inserted into a gap that practically does not exist? Please help.

    Mark Movshovich -

    Sorry to hear that. You could try and lift the display by using a suction cup and pull to create a small gap for a tool to get in.

    Tobias Isakeit -

  3. OHcFOOMU1RUU6Qbl
    OHcFOOMU1RUU6Qbl
    HVkOQd4iCx212VAM
    • No abras todavía el teléfono completamente. El cable para los botones de volumen y de modo espera está todavía conectado a la tapa trasera.

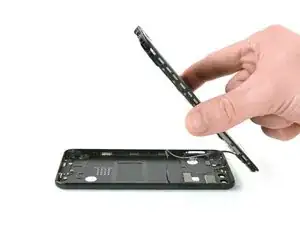
    • Abre el teléfono hacia atrás.

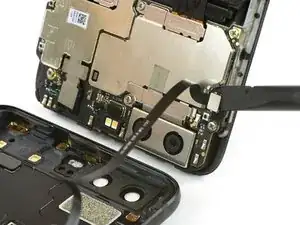
    • Usa un spudger para desconectar el cable flexible del botón de volumen y encendido.

    The cable is for the standby and volume buttons, not for the fingerprint sensor!

    JaL -

    Thanks JaL, of course it is.

    Tobias Isakeit -

  4. agMDmUNI6VNpJHCB
    • Remover los dos tornillos Phillips #00.

    a me risultano PH000

    Il Lando -

  5. ftScvkZffbLXJhob
    ftScvkZffbLXJhob
    LL246gDgJX2xhIda
    • Usa las pinzas para remover los dos soportes de cable.

  6. uUKagXgMqxZHcMHd
    uUKagXgMqxZHcMHd
    TMq12fS5BJoI3Ih4
    RUTrqCreWjbGYuBL
    • Usa un spudger para desconectar el cable flexible de batería, de pantalla e interconexión.

  7. 2KxuxooIn62pFWlU
    2KxuxooIn62pFWlU
    bnqdXxvtJNFS22e2
    • La batería está pegada con dos tiras adhesivas. Una con una lengüeta y otra con ninguna.

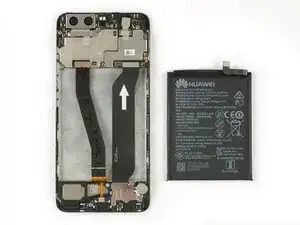
    • Despega la tira adhesiva que está por debajo de la batería tirando de manera uniforme la lengüeta en un ángulo plano.

    • Es posible que la tira adhesiva se rompa. En ese caso, puedes tomarla y retorcerla alrededor de la punta de la pinza un par de veces y luego continúa.

    • Usa un iOpener para ablandar el adhesivo restante

    It wasn’t easy to find the piece to pull. It was a black label, folded and stuck to the battery

    Donato Grieco -

  8. opJKA5bvNTIlxenD
    opJKA5bvNTIlxenD
    2mIiIFd4O2ZfJgSY
    • Ten cuidado de no doblar o perforar la batería.

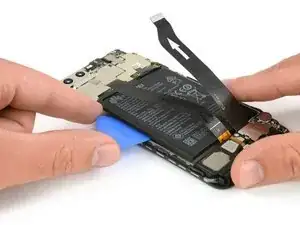
    • Introduce una púa de apertura o spudger por debajo de la batería y con cuidado levántala.

    • Remueve la batería.

    • Cuando vuelvas a ensamblar tu teléfono, reemplaza el adhesivo viejo con cinta de doble cara o tiras adhesivas pre-cortadas.

    • Nunca vuelvas a instalar una batería que ha sido doblada o dañada al removerla.

  9. HcS2sY5iNP1wSHgK
    HcS2sY5iNP1wSHgK
    3KIKU2tOx6P1TMXv
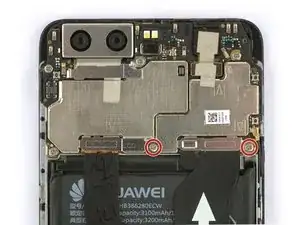
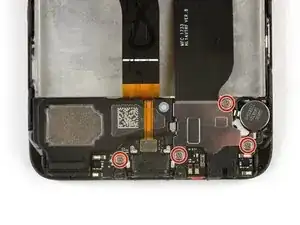
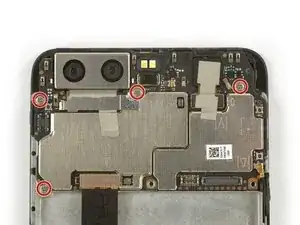
    • Remueve los cuatro tornillos Phillips #00 .

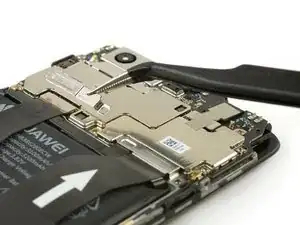
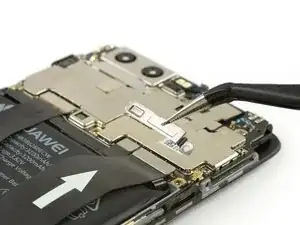
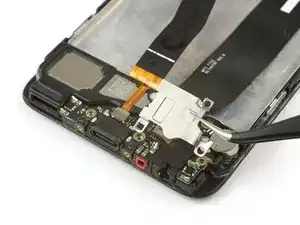
    • Usa las pinzas para remover la lámina de metal que cubre la placa de carga y el cable flexible principal.

  10. ygUCLqXWn5TfPX1C
    ygUCLqXWn5TfPX1C
    5RRSIkPHNvtrfgIt
    C3cl3slfHAHaHBxI
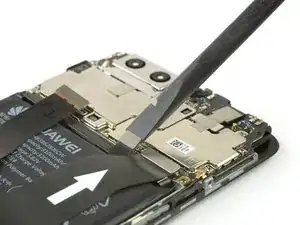
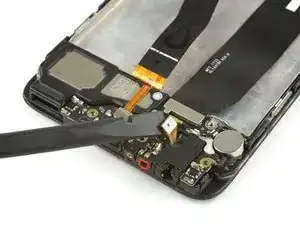
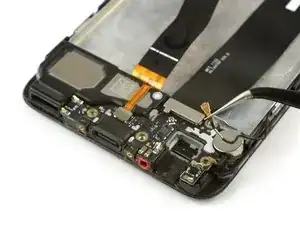
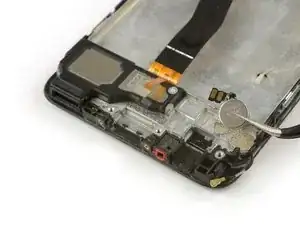
    • Usa el extremo plano de un spudger para desconectar el cable flexible de la toma de auricular.

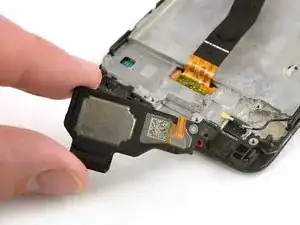
    • Remueve la toma de auriculares con pinzas. Hay un poco de adhesivo por debajo así que puede ser un poco pegajoso.

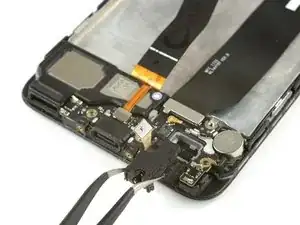
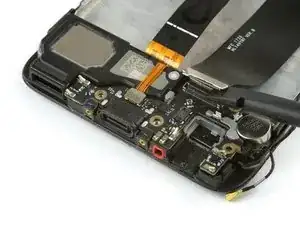
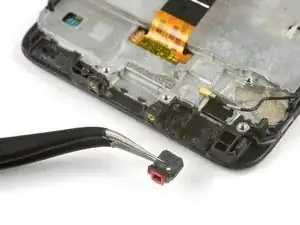
    • Desenchufa el cable de antena con pinzas.

  11. rslBHjQUABAuHaUF
    rslBHjQUABAuHaUF
    NKlYFIMqicHF3INc
    whjeMYhSCNdJipSN
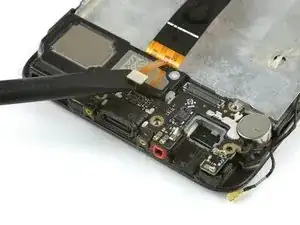
    • Desconecta el cable flexible principal con un spudger y remuévelo.

    • Desconecta el cable flexible del altavoz.

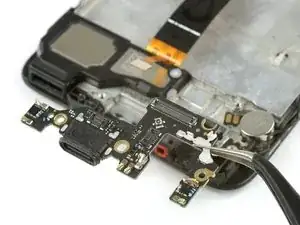
    • Con cuidado remueve la placa de carga.

  12. HkV1kYyVBV5PERWQ
    HkV1kYyVBV5PERWQ
    PtsOddFolKQda5nU
    niVLE4r1xs5XrxJB
    • Remueve el motor de vibración. Si el adhesivo es muy fuerte, calienta un iOpener para suavizarlo y removerlo fácilmente.

    • Usa el extremo plano de un spudger para hacer palanca por debajo del altavoz.

    • Remueve el altavoz.

  13. pnTXRhSVCN3qRTxJ
    • Remueve el tapón de goma con pinzas.

    • Si el tapón está incluido en la parte nueva, no hay necesidad de removerlo de la parte vieja.

  14. rOXbOoJ6OHVHDHFi
    • Remueve los cuatros tornillos Phillips #00 de la placa madre.

  15. ekesad3kU1UYGhQw
    • Desconecta el cable de antes y remuévelo.

  16. 1u1asBoCNUkLAQIj
    1u1asBoCNUkLAQIj
    YaNCPJKV5RV4peIG
    iYwuV2bCteLpWBQs
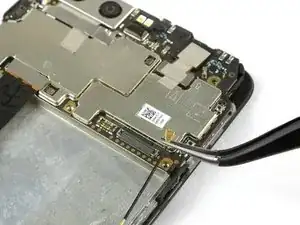
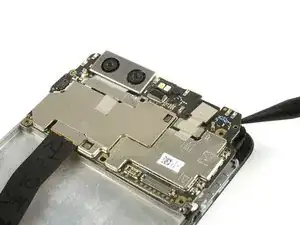
    • Usa el extremo puntiagudo de un spudger en la esquina de derecha superior de la placa madre y haz palanca haste que puedas sujetar bien.

    • La cámaras trasera y la frontal están todavía conectadas a la placa madre. No las dañes mientras remueves la placa madre.

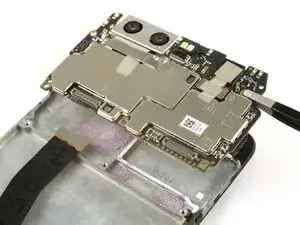
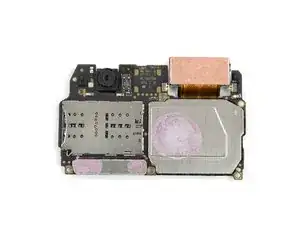
    • Remueve la placa madre.

    • En la parte posterior de la placa base hay almohadillas térmicas (gotas de color rosa con forma de goma) para la disipación del calor. Si estas almohadillas térmicas se rompieron o están demasiado secas, es posible que deba aplicar nuevas almohadillas térmicas en el nuevo ensamblaje de la pantalla o en la placa base.

    Can I replace the pink thermal pad with thermal paste? Because I can't any online store sell pink thermal paste for phone.

    muhd syafiq -

  17. VSxZGUBxVUKmwvgb
    VSxZGUBxVUKmwvgb
    GfPS4MuqKGZdOdds
    REhFIlRxTGFKBvMk
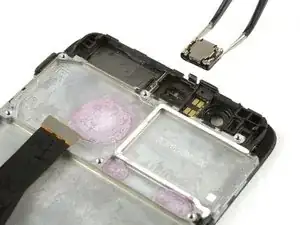
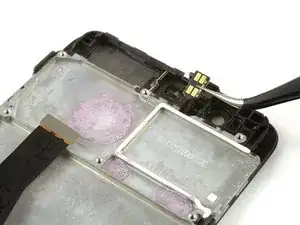
    • Remueve el altavoz auricular con una pinza.

    • Ten cuidado de que los conectores de metal no se doblen.

    • Con cuidado remueve el sensor de proximidad de su recoveco.

    • Antes de volver a ensamblar, fíjate si tu parte nueva tiene componentes que necesiten ser transferidos de la parte vieja

Conclusión

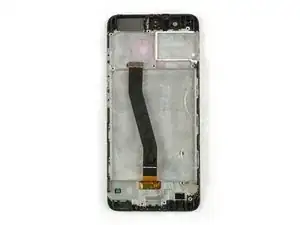
Para volver a ensamblar tu dispositivo, sigue estas instrucciones en orden inverso. Cuando vuelvas a ensamblar, aplica adhesivo nuevo donde sea necesario.

Dominik Schnabelrauch

Miembro Desde 23/11/16

169012 Reputación

4 comentarios

Are the pink/purple blobs unter the motherboard thermal paste? If so, should I re-apply any when reassembling?

Martin Düren -

Gonna upload an easy and faster way to do it whitout removibg the battery or upper boards and cameras, wait for it, my 1st guide.

mauro-diaz1 -

I Need screen for p smart huawei2018

mbc judo -

I didn’t add the tape. I don’t know why the battery comes with it, plus, it is ultra strong, I was all the time afraid to ruin the battery, but fortunatly, everything went well

Ciro Monteiro -