Introducción

Usa esta guía para cambiar la cámara frontal de tu Huawei P10 Lite. Cuando vuelvas a montar tu teléfono aplica nuevo adhesivo donde sea necesario.

  1. YqiUymRKMTYinZcE
    YqiUymRKMTYinZcE
    1x5qv4HPtVGSmvpD
    byJlAME6WaXCgGa2
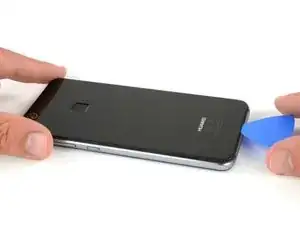
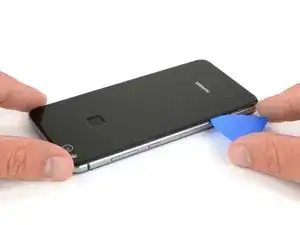
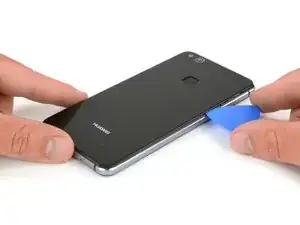
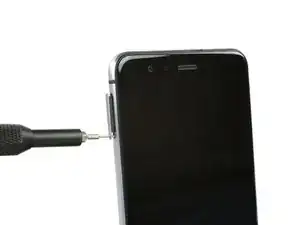
    • Introduce la punta de una púa de apertura entre la tapa trasera y el marco medio y deslízala alrededor del teléfono para cortar el adhesivo.

    • Usar un mango de succión para levantar la carcasa trasera podría ayudarte a generar un poco de espacio donde insertar la púa de apertura.

    • Si el adhesivo es difícil de cortar, usa un iOpener para ablandarlo.

    Mit dem Saugnapf die Rückseite anheben hilft ungemein…

    Matthias Eberle -

    Had to use blue wedge tool to wedge open bottom plate from the rim part in order to then use the tip of the blue opening pick under the back plate to then cut the glue. It’s like placing a pie server or knife under the plate once there’s a gap between the rim and the back plate.

    Jane -

    Be careful, there’s a cable to fingerprint sensor, very close to the edge (see pictures below)… It’s very easy to cut it through with the pick, as I just learned :)

    dambig -

  2. F5lCy2LZ2xfWDDqg
    F5lCy2LZ2xfWDDqg
    Na6gp15IRbPSW3Ll
    2xyqfXZApukGpaZe
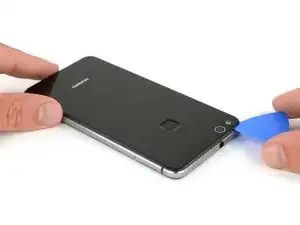
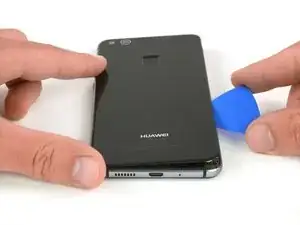
    • Luego de cortar el adhesivo en cada borde, tuerce tu púa de apertura para separar la tapa trasera del teléfono.

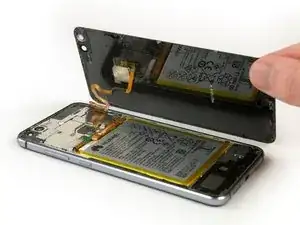
    • Voltea la tapa trasera hacia el lado derecho del teléfono.

  3. oPLqQqGCxyiCQ6oZ
    oPLqQqGCxyiCQ6oZ
    gZgRjiB2CuBip3Xu
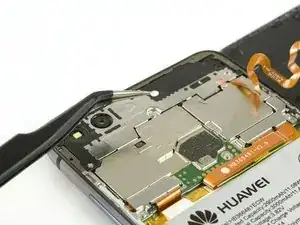
    • Usa un par de pinzas para remover el sticker.

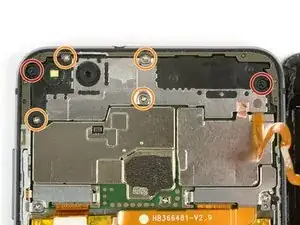
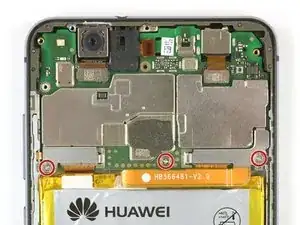
    • Remueve los dos tornillos Phillips #00

    • Remueve los cuatro tornillos Phillips de 2.5 mm.

    Schritt 3 und 4 kann man sich komplett sparen. Wozu auch. Kann gleich mit Schritt 5 weitergemacht werden, zuvor einfach das Flachbandkabel vom Fingerabdrucksensor an der Rückabdeckung abklemmen und fertig.

    Bobby mcgee -

    There are four silver screws and two black to be removed.

    Jane -

    Translate what Bobby mcgee said:

    Step 3 and 4 can be completely ignored. What for? You can continue with step 5, just disconnect the ribbon cable from the fingerprint sensor on the back cover and you're done.

    Antonio Sun -

    However, the reason step 3 and 4 should not be skipped is Step 6 — Use an iOpener to loosen the adhesive beneath the battery. I.e., the adhesive cannot be easily removed without heat, however, that heat might damage the electric chips. Thus they’d better be removed first.

    Antonio Sun -

  4. jMQb6f2oPStGtZUm
    jMQb6f2oPStGtZUm
    QdMRkHKjOFsRwEGW
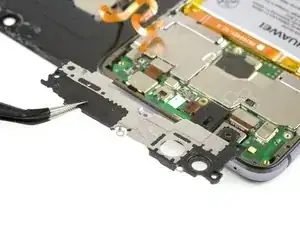
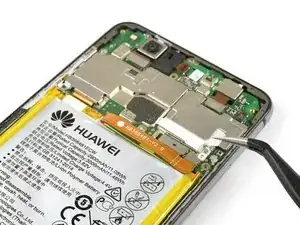
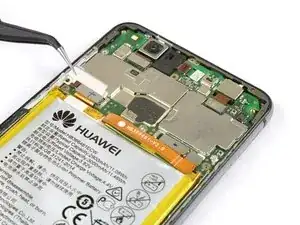
    • Usa una pinza para remover el escudo de la placa madre.

    • Usa un extremo plano de un spudger para desconectar el cable flexible de sensor de huella digital.

    • Cuando vuelvas a ensamblar, aplica un adhesivo nuevo donde sea necesario.

    Welchen Klebstoff soll man verwenden?

    josef navratil -

    Hallo Josef,

    sollte bei deinem Ersatzteil kein Klebstoff oder Klebeband dabei gewesen sein, kannst du dünne Streifen Doppelseitiges Klebeband verwenden. Es gibt für das Huawei P10 Lite auch schon zugeschnittene Klebestreifen zu erwerben, hierbei gilt aber je nach Händler Rezessionen zu lesen, ob die Klebestreifen auch wirklich halten.

    Dominik Schnabelrauch -

    Note that there is a copper-colored sticker to lift up near the flat cable connected from the phone the finger pad. Lift the main board plate (shield) up SLOWLY from the camera side to the other end as the plate is wedged in place.

    Jane -

    what adhesive is recommended? thanks

    darren -

    Hi darren,
    pre-cut adhesive would be the best solution if you can source it. Otherwise a two-sided adhesive tape or carefully used E6000 adhesive glue will be your friend.

    Tobias Isakeit -

  5. OhrsLhJdFEEJZoyT
    OhrsLhJdFEEJZoyT
    XUmIYRSe4fT2lvmX
    • Remueve la bandeja de tarjeta SIM antes de seguir.

  6. pYM1NvRB4CGOZrV1
    pYM1NvRB4CGOZrV1
    gnFqS3uDt3jc5gBk
    K5uFSjMakqKGHXSL
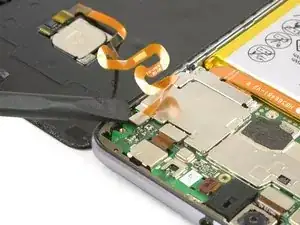
    • Remueve los tres tornillos Phillips #000.

    • Usa pinzas para remover los dos escudos de metal que cubren los cables flexibles en la placa madre.

  7. cSvoCEQMrsM5ZgQr
    cSvoCEQMrsM5ZgQr
    ZpdvSmWtRYOpW3Bi
    BNsH4NRw2kfZlnxB
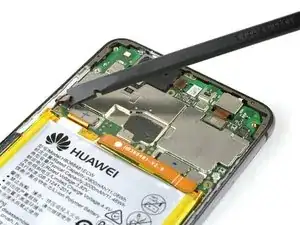
    • Usa el extremo plano de un spudger para desconectar el volumen y botón de encendido, el cable flexible principal y de pantalla.

  8. IZyLDwNOJxxIERev
    IZyLDwNOJxxIERev
    vqSGyfCQeAhB5J4j
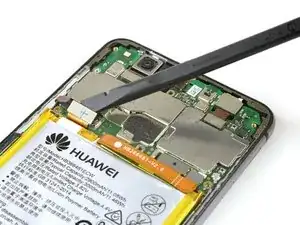
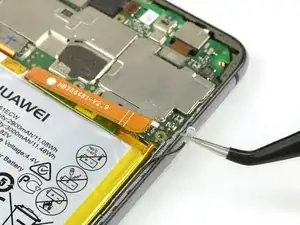
    • Desconecta el cable flexible de la batería con un spudger.

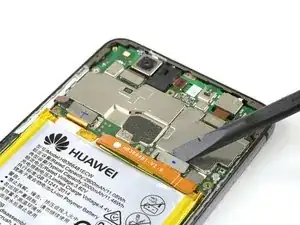
    • Desenchufa el cable de antena con pinzas.

  9. w5XIVlq6IdNwTiQl
    w5XIVlq6IdNwTiQl
    MFre2nnBiAYMj3hw
    agoTVnLmReATrWTg
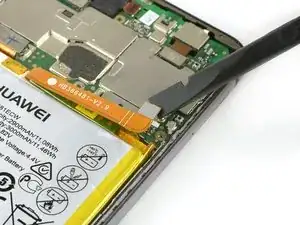
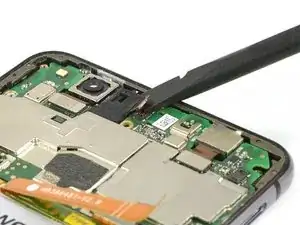
    • Desconecta el cable flexible de toma de auriculares con el extremo plano de un spudger.

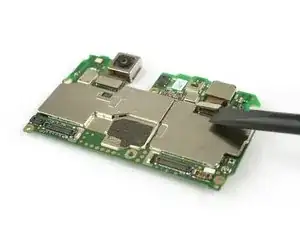
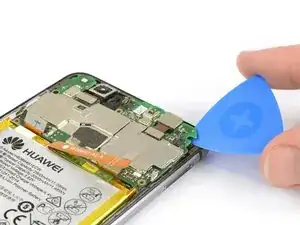
    • Usa una púa de apertura para levantar la placa madre haste que la puedas tomar firmemente.

    • Ambas cámaras están aun sujetas a la placa madre. No las dañes al removerla.

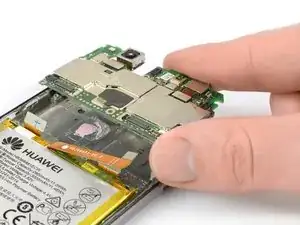
    • Remueve la placa madre.

    • Si deseas reemplazar su placa madre, debes desconectar ambas cámaras y transferirlas a tu pieza de repuesto.

    • En la parte posterior de la placa base hay almohadillas térmicas (gotas de color rosa con forma de goma) para la disipación del calor. Si estas almohadillas térmicas se rompieron o están demasiado secas, es posible que debas aplicar nuevas almohadillas térmicas en el nuevo ensamblaje de la pantalla o en la placa madre.

    Clear and to the point. Many thanks…

    Richard Marere -

    Where to buy new motherboard original huawei.

    Neil -

  10. ua3TdiqDMCkFvdyt
    ua3TdiqDMCkFvdyt
    PEAHvfM6Et2sQD2y
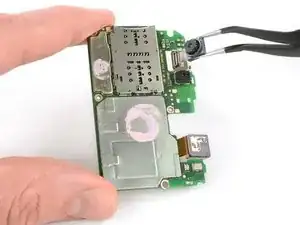
    • Desconecta el cable flex de la cámara frontal con un spudger.

    • Da la vuelta a la placa base y agarra la cámara frontal con unas pinzas. Pasa el cable flex a través del espacio en la placa base.

    • Retira la cámara frontal

Conclusión

Para volver a ensamblar tu dispositivo, sigue estas instrucciones en orden inverso. Cuando vuelvas a montar tu teléfono aplica nuevo adhesivo donde sea necesario.

Dominik Schnabelrauch

Miembro Desde 23/11/16

169012 Reputación

0 comentarios