Introducción

Si tienes problemas al expulsar tu cartucho de juego, tendrás que abrir tu NES y quitar la bandeja de los cartuchos de juego. Sigue nuestra guía para más información.

  1. aWptGiRVTeq1GLPj
    aWptGiRVTeq1GLPj
    X2DlKA2PHkWZSJno
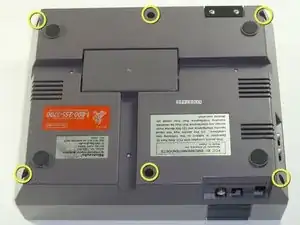
    • Desatornilla los 6 tornillos Phillips de 13.25mm en la base de la consola con un destornillador plano #2.5.

    • Los tornillos están hundidos 40mm aproximadamente.

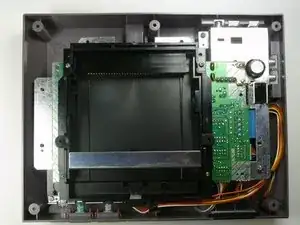
    • Dale la vuelta a la consola y quita la parte superior de la carcasa tirando hacia arriba y separándola del resto del dispositivo usando tus manos.

    the outside screws are a little deep, plan ahead :)

    Joseph McCord -

    Why use a slotted driver? The screws are phillips. Both #1 and #2 work for me.

    kmcrawford111 -

  2. WlRGREqDfRX5XcTU
    WlRGREqDfRX5XcTU
    IwactFKPXGkwbdmR
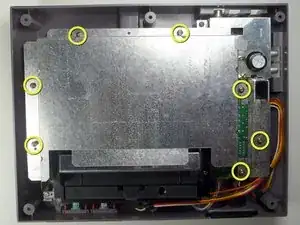
    • Desatornilla los siete tornillos Phillips de 13.25mm de la tapa metálica con un desatornillador Phillips #2.

    • Levanta la tapa metálica tirando hacía arriba usando tus manos.

  3. U3hHS514sOOJGH4O
    U3hHS514sOOJGH4O
    LMEuSKjdCqqnWLcu
    1EOlwLWfUKBQLetP
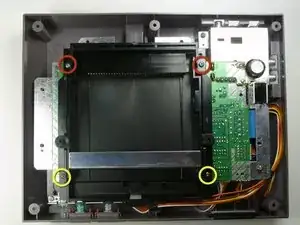
    • Quita los dos tornillos plateados Phillips de 17.45 mm de la bandeja de los cartuchos usando un destornillador Phillips de cabeza #2.

    • Quita los dos tornillos de bronce Phillips de 13.25 mm de la bandeja de los cartuchos usando un destornillador Phillips de cabeza #2.

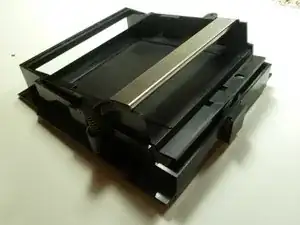
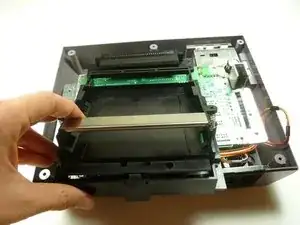
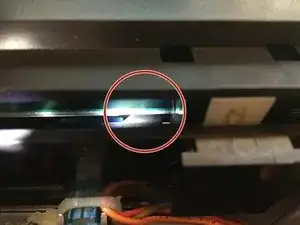
    • Desliza la bandeja de cartuchos hacia ti, hacia afuera del conector de 72 pines, y fuera del conjuntos de la placa base.

    There may also be two short/yellow screws at the upper (back) right and left of the cartridge tray.

    Jay -

  4. bR5tFq2ubQKbsQdy
    • Debajo de la bandeja del cartucho, hay una pestaña/labio (ver marcador).

    • Asegúrate de que orientas esta pestaña por debajo de la placa base, aparte de orientar la bandeja encima. De no hacer esto, la bandeja del cartucho se doblará y forzará el componente.

    This is so unclear! I have no idea what tab this step is referring to.

    trevorsklar -

    So, it’s a year later, and I have a lot more experience with this system now. The front of the cartridge tray needs to hook under the edge of the board.

    It’s much easier to get the tray on and off if you just make sure the board is unscrewed from the case. Then pick the board up a little and the tray should be much easier to slide on and off.

    trevorsklar -

    Me too... No idea whatsoever

    zac -

    its when your replacing the cartridge tray, if u do it wrong the tray will feel like it's bowing up in the middle, like when u put in the screws u have to press the tray down to get the screw holes to line up / be flush, if u get the lip underneath to catch correctly there will be no issue/bow u wan't have to press down on it, or make the screws pull the tray to the motherboard, instead the tray will be flush with no pressure applied, i had no idea what he meant either until i was reversing the steps.

    Joseph McCord -

    also not all NES are the same underneath, my tab was much less noticeable and i had one less screw to get the shield off then he showed. and 2 less screws to remove the cartridge tray.

    Joseph McCord -

    This seemed very unclear to me at first, until I tried to replace the cart tray. I apparently didn’t get the little lip under the mobo on my first attempt, and I noticed there was a pretty decent chunk of space between the front brass screw holes and their corresponding holes on the mobo. I reseated it, and the second time I heard a little click (apparently the lip going under the mobo). This time the bottom/brass screw holes were virtually FLUSH with the mobo holes. If you see a chunk of space between the cart tray and the mobo near the brass screw holes you didn’t get the lip under the mobo.

    Gary -

    I’ve added a new, better picture with additional clarification. Hope this helps.

    Steve -

Conclusión

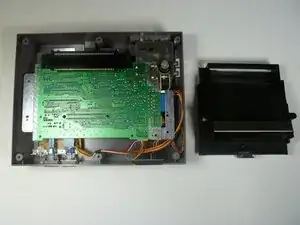
Para volver a montar tu dispositivo, sigue estas instrucciones en sentido contrario.

nicholasweiser

Miembro Desde 23/09/10

2625 Reputación

0 comentarios