
Introducción
Esta página te guiará a los siguientes pasos:
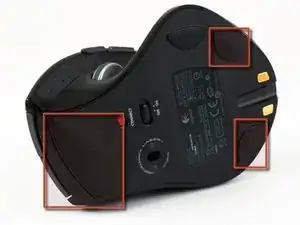
- Quitar los 4 tornillos que sujetan el protector del mouse
- Sustitución de la batería de iones de litio
También puede ver un video de Logitech MX Revolution siendo desarmado.
Crédito: BlaisePhoto.fr y Logi Nu
-
-
Retira las patas del mouse con cuidado con un destornillador de cabeza plana.
-
También puedes comprar patas de ratón nuevas en eBay si las rompes.
-
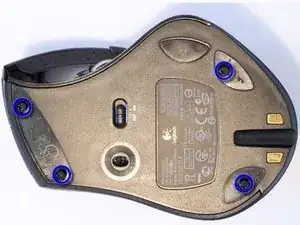
Desatornilla cada tornillo poco a poco alternando entre los 4 para que la base salga de una sola vez.
-
-
-
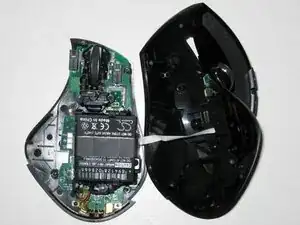
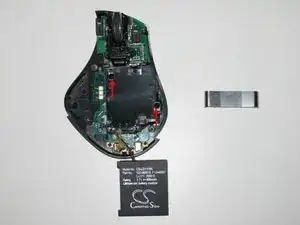
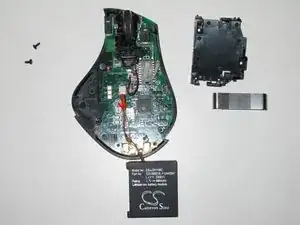
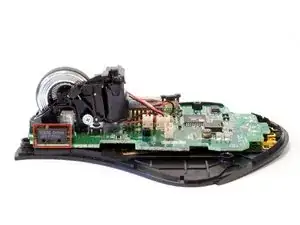
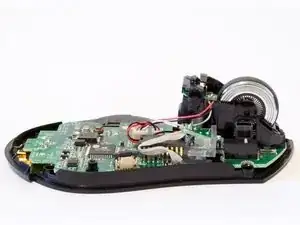
Levanta suavemente la parte superior del mouse ya que la parte inferior y la parte superior están conectadas con un cable plano.
-
-
-
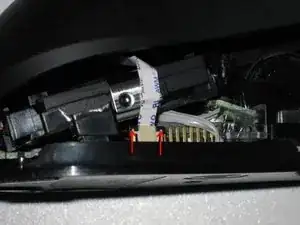
Retira el cable de cinta SUAVEMENTE use su destornillador de cabeza plana para levantar cada lado del clip negro de manera uniforme hasta que se suelte la cinta.
-
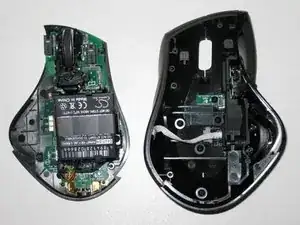
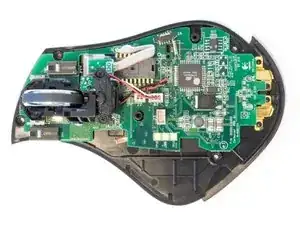
En este punto, el escudo del mouse debe estar libre de la placa del mouse.
-
Si tienes un modelo de mouse más antiguo, sigue los pasos 4 a 7.
-
Si tienes un modelo de mouse más nuevo, vaya al paso 8.
-
-
-
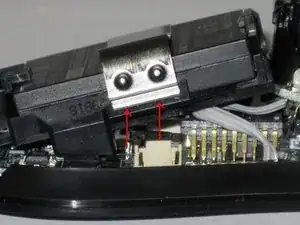
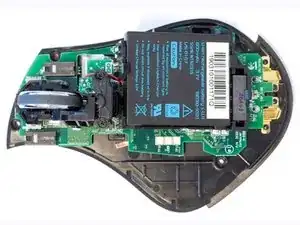
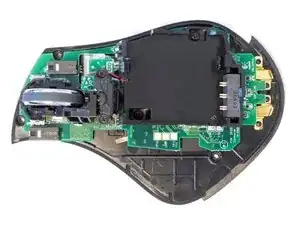
Retira el retenedor de la batería. Use su destornillador de cabeza plana para levantar la pestaña de metal, ya que es bastante flexible.
-
-
-
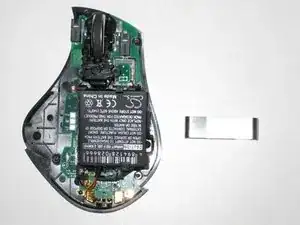
Retira la batería empujando la pestaña hacia adelante y levantando la batería al mismo tiempo.
-
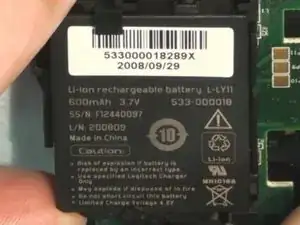
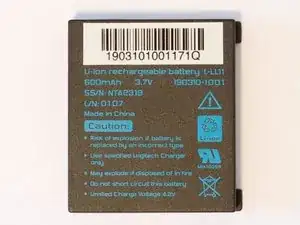
Puedes ver el número de pieza de la batería.
-
-
-
Usando tu destornillador de cabeza plana, mueve el conector hasta que salga.
-
Inserta la nueva batería de iones de litio L-LY11 y listo.
-
-
-
Este paso es para el modelo de mouse más nuevo.
-
Retira la batería empujando la pestaña hacia adelante y levantando la batería al mismo tiempo.
-
Inserta la nueva batería de iones de litio L-LL11 y listo.
-
-
-
Imágenes adicionales de Logitech Revolution MX.
-
El ratón utiliza el microinterruptor Omron D2FC-F-7N.
-
Para volver a armar tu dispositivo, sigue estas instrucciones en orden inverso.
3 comentarios
Only one correction.
Either way you can order the new LY battery, since it's manufacturing date is newer and there's been some fix in it.
You just use a toothpick to take down both old and new switches, and mount the old switch on new battery. Takes 10 min and steady hands.
I just did it, and the things working....
Thanks for the guide.
I would not just order the LY battery. This depends on your manufacturing year. The LY battery has wires soldered onto it, but the old model does not have wires soldered onto it because there are contact points on the battery holder (like an old cell phone battery). Just open your mouse to be sure. Old model uses the L-L11 battery.
One tip: for the old model you don’t need to unscrew/remove the battery holder. Just take the battery out.
agrior -
Pro Tip on reassembly: attach the ribbon cable from the upper shell before reinstalling the battery cage. The battery cage makes it extremely difficult to slide the ribbon back into the slot.
If you work carefully, it may be possible to skip disconnecting the ribbon and battery cage altogether.
The mouse feet are stuck to the mouse via double sided sticky tape, try to make sure that when you peel the feet off, the double sided sticky tape stays on the feet, not on the mouse.
Gerry Hedderwick -