Introducción

Usa esta guía para reemplazar una batería gastada o muerta en tu reloj Samsung Galaxy3.

Si tu batería está hinchada, toma las precauciones adecuadas. Por tu seguridad, descarga tu batería por debajo del 25% antes de desmontar su reloj inteligente. Esto reduce el riesgo de un peligroso evento térmico si la batería se daña accidentalmente durante la reparación.

Necesitarás adhesivo de repuesto para volver a colocar una batería nueva cuando vuelvas a montar el dispositivo.

  1. a63LjGHbMHP6JGH2
    • Antes de comenzar la reparación, saca el reloj del cargador y apágalo.

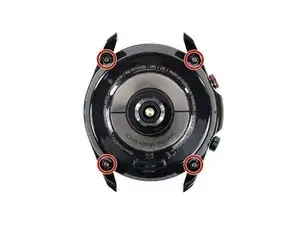
    • Usa un destornillador Tri-point Y00 para soltar los cuatro tornillos en la parte trasera del teléfono.

    • No te preocupes por remover los tornillos. No se moverán de su lugar en la tapa trasera.

  2. AYFpCm45IBcsXE1V
    AYFpCm45IBcsXE1V
    iwckjD1whPf3Q5wO
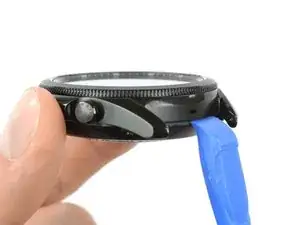
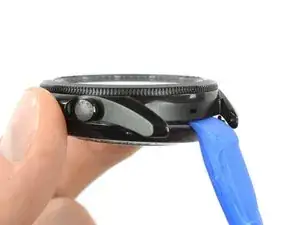
    • Inserta la herramienta de apertura entre la tapa trasera y la carcasa de metal.

    • Gira la herramienta de apertura para crear una brecha más amplia.

    • No quites completamente la tapa trasera todavía. El cable flexible del sensor aún está conectado a la placa madre.

  3. dHpTdiX6DQSZMSxm
    dHpTdiX6DQSZMSxm
    hYr6SZILNpmEg5Tp
    kouxAHaTH1IZYyUV
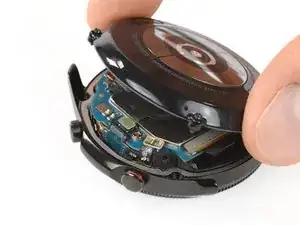
    • Pon el reloj boca abajo.

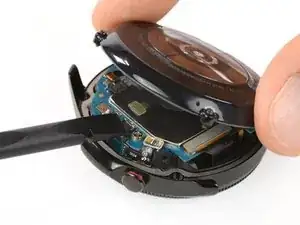
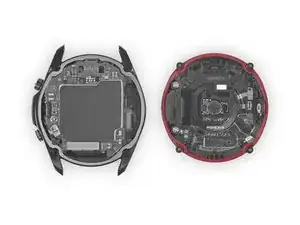
    • Levanta con cuidado la tapa trasera del borde con los botones para acceder al conector del sensor.

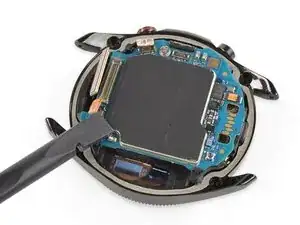
    • Utiliza el extremo plano de un spudger para levantar y desconectar el cable flexible del sensor de la placa madre.

  4. E2pyOpJJBim22SJB
    E2pyOpJJBim22SJB
    pREbiCwhYedi16f1
    • Remueve la tapa trasera.

    • Asegúrate de que la junta de goma (marcada en rojo) no esté dañada. Si está dañada, reemplázala por una nueva durante el reensamblaje para mantener una adecuada resistencia al agua.

  5. yxOtK4R5urwlhnHB
    yxOtK4R5urwlhnHB
    R3xPGMkppJhplQhI
    VlVXtBKoHARZHANJ
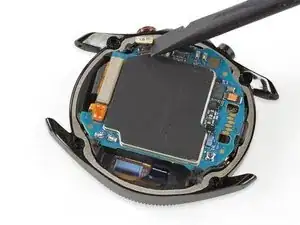
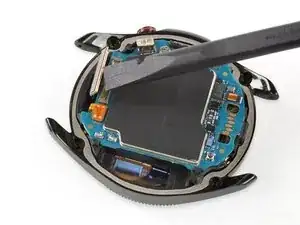
    • Usa el extremo plano de un spudger para desconectar los cables flexibles de los botones laterales, la pantalla y el sensor Hall.

  6. eEPDoZnCliCpfm22
    • Remueve el tornillo Phillips #00.

  7. WOryYayvEVkZPoof
    WOryYayvEVkZPoof
    coPhyfyjHEenLOES
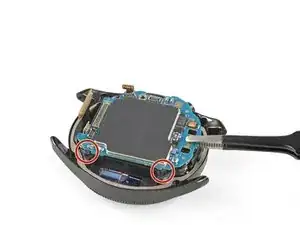
    • La placa madre está sujeta por dos pequeños clips de plástico.

    • Usa un par de pinzas sin filo para levantar la placa madre desde debajo de los clips de plástico hacia los botones.

    • Remueve la placa madre.

    Question, I had a demo Watch3. I tried to swap out the software and ended up putting it into Odem Mode. It’s bricked right now, any idea or help to fix it?

    Lucas Economy -

  8. TaarIShZHFuntIqH
    TaarIShZHFuntIqH
    NutM1JCmWUr1HgNl
    DH324ucJ3HIEANUc
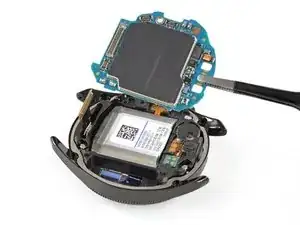
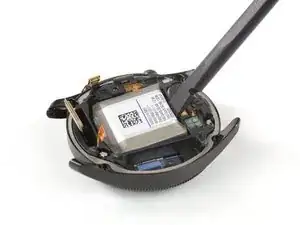
    • Coloca el extremo plano de un supdger en el pequeño hueco entre el marco de plástico y la batería, opuesto al cable de la pantalla.

    • Con cuidado levanta la batería y sácala de su hueco.

    • La batería está adherida al núcleo con un adhesivo ligero, así que tómate tu tiempo.

    • No intentes quitar la batería por completo todavía, ya que su conector sigue adherido al núcleo.

  9. qmXVGZLPidPo1CBh
    qmXVGZLPidPo1CBh
    Q5FyK4oTbgCDLOX5
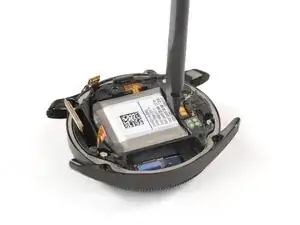
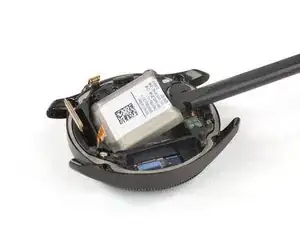
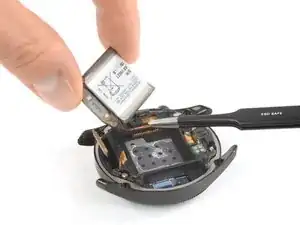
    • Levanta un poco la batería para acceder a su cable conector pegado.

    • Use un par de pinzas sin filo para levantar el conector de la batería que está asegurado con un adhesivo ligero.
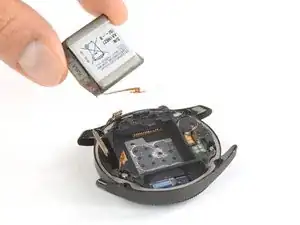
    • Lo más probable es que pueda reutilizar el adhesivo para fijar la nueva batería en su lugar. Si no, reemplácela con cinta adhesiva de doble cara o precortada.

    • Remueve la batería.

Conclusión

Si es posible enciende tu dispositivo y prueba tu reparación antes de instalar un nuevo adhesivo y volver a sellar.

Asegura la nueva batería con adhesivo precortado o cinta adhesiva de doble cara. Para posicionarla correctamente, aplica el nuevo adhesivo en el dispositivo en los lugares donde se encontraba el adhesivo antiguo, no directamente sobre la batería.

Para volver a montar el dispositivo, sigue estas instrucciones en orden inverso.

Para un rendimiento óptimo, calibra tu batería recién instalada: Cárgala al 100% y sigue cargándola durante al menos 2 horas más. Luego usa tu dispositivo hasta que se apague debido a que la batería está baja. Finalmente, cárgala ininterrumpidamente al 100%.

¿La reparación no salió según lo planeado? Prueba con basic troubleshooting, o pide ayuda a nuestra comunidad de respuestas.

Lleva tus residuos electrónicos a un centro de reciclaje certificado.

Tobias Isakeit

Miembro Desde 31/03/14

108306 Reputación

14 comentarios

Once I had the correct tools and replacement battery, fixing was easy. Tyvm!

Jeremy Salazar -

One question, where can I find an authorized battery for this watch? or one that you highly recommend. Thanks.

**Edit - Your store doesn’t have a 45mm battery for my Galaxy Watch 3. Only 42 and 46.

Gilberto Garcia -

The 42 and 46 mm models are the first Galaxy Watch sizes. We ’re working on getting the Watch3 batteries and parts but it may take some time.

Tobias Isakeit -

Hi, is it possible to put the battery from samsung watch 472mAh, on samsung watch 3, instead of 340mAh?

Andrey Irnazarov -

Hi Andrey, short answer is no—although basically a good idea. But even if you cut the battery contact plate to fit (cut off the part with the alignment hole) its polarity is inverted. The Watch3 contact plate has -/+ (noted under the cable) whereas the original has +/-. Also the original Galaxy Watch battery is much bigger than the one in the Watch3. So it won’t fit inside the recess. Here is an image with the Watch3 battery on top of the original battery.

Tobias Isakeit -

Hi Tobias, thanks for the reply, I don't think the pins are a problem, the wire can be turned over and the tab with the hole, cut off. the pins will be pressed by the motherboard. I'm more interested in the size of the 472mAl battery and the inside of the battery compartment of the Watch 3?

Also I wonder if it would be a problem if the battery has a 472mAl, 1.27Wh and the 340mAl, 1.8Wh ?

Unfortunately, I don't have the opportunity to measure and test it myself.

Thanks.

Andrey Irnazarov -

Here’s a photo for you with some measurements. I’m afraid you won’t be able to fit the bigger Watch1 battery inside the Watch3 frame

Tobias Isakeit -

Great instructions which were easy to follow. Side note is I was doing the battery replacement on the 41mm instead of the 45mm (did not find one specifically for the 41mm version) and the battery it uses is the same one in Samsung Galaxy Watch Active2 40mm (EB-BR830ABY). Just in case anyone else was wondering.

Bradley Avery -

Do you mean that the battery EB-BR840ABY for the 45mm is compatible with the EB-BR830ABY for the 41mm. So I could put the 840 in my 41mm?

R.J.G. Beerten -

Are there batteries for the smr850 yet??

scott park -

It is nice that they give instructions on how to remove the battery with the right tools it can be accomplished. However reassembly should be addressed for people who have never done this before. I had difficulty making the last connection on to the motherboard with the connector that is attached to the back cover. I tried using my dominant hand several times to no avail. Apparently you need your dominant hand to hold the cover steady while you use your fingers from your non-dominant hand to press down to connector. My Water Seal adhered to the watch and I had to carefully reuse a spudger to remove it and then reshape it so it would fit back onto the back cover. And then during reassembly I had to carefully make sure that that part of the water seal was carefully in place before screwing the the cover down.

Coy D Davis -

Tienen la batería disponible para el modelo de Samsung watch 3 de 41mm modelo de la batería: EB-BR830ABY

rodrichucho rodrichucho -

Is the battery EB-BR840ABY for the 45mm is compatible with the EB-BR830ABY for the 41mm. So I could put the 840 in my 41mm?

R.J.G. Beerten -

I guess what Bradley was saying is, that the battery from the Active 2 (40mm) is the same battery used in the Watch 3 (41mm).
You very likely can NOT use the battery from the Galaxy Watch 3 (44mm) in the smaller Galaxy Watch 3 (41mm) model.

Tobias Isakeit -