Introducción

Usa esta guía para reemplazar una batería muerta o gastada.

Si tu batería esta hinchada. toma precauciones adecuadas.

  1. oOkDK2PfcAZZka2v
    • Apaga tu teléfono antes de comenzar.

    • Si es posible, drena la batería antes de desmontar. Cuando la batería está cargada, aumenta el riesgo de un evento térmico peligroso si la batería se sobrecalienta o se daña durante la reparación.

    • Si el cristal trasero está agrietado, cúbrelo completamente con cinta de embalaje para contener los trozos de vidrio y evitar heridas.

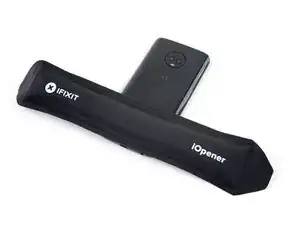
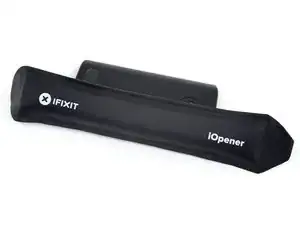
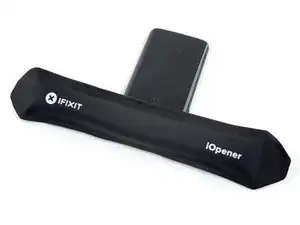
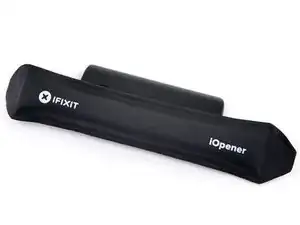
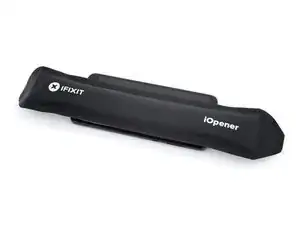
    • Prepara un iOpener y calienta la parte trasea del teléfono a lo largo del borde inferior durante dos minutos o hasta que esté ligeramente muy caliente al tacto. Esto ayudará a suavizar el adhesivo que sujeta el cristal trasero.

    • Puede que tengas que recalentar y volver a aplicar el iOpener varias veces para que el teléfono se caliente lo suficiente. Sigue las instrucciones del iOpener para evitar el sobrecalentamiento.

    • También se puede utilizar un secador de pelo, una pistola de calor o una placa calefactora, pero ten cuidado de no sobrecalentar el teléfono: tanto la pantalla como la batería interna son susceptibles de sufrir daños por el calor.

    At what temperature shold the glass be heated to? My heat gun goes from 250 up to 1350.

    Miles Raymond -

  2. fr4jVcfvhheifPgF
    fr4jVcfvhheifPgF
    x3sZ6aHMMe1NWFZr
    PWCRYqLV2SwDxanP
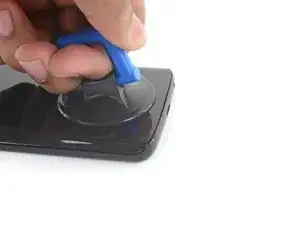
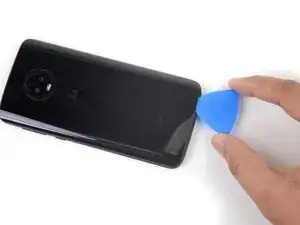
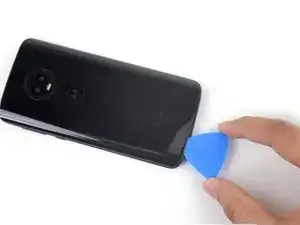
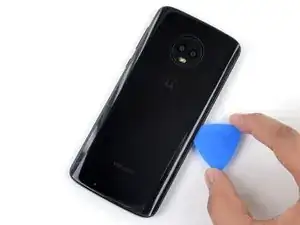
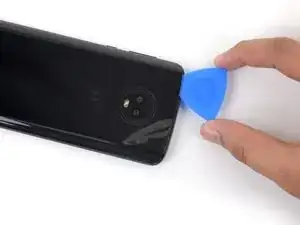
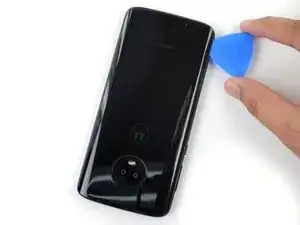
    • Aplica una ventosa en el borde inferior del cristal trasero

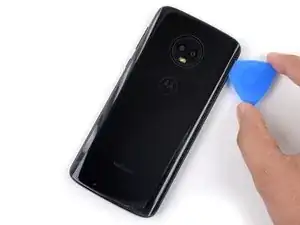
    • Tira de la ventosa con presión firme y constante para crear una grieta pequeña entre el cristal trasero y el marco.

    • Si el cristal está agrietado, la ventosa puede que no se pegue. Intenta levantarla con cinta adhesiva fuerte, o pega la ventosa en su lugar y deja que se cure para poder proceder.

    • Esto puede requerir una cantidad significativa de fuerza, pero sólo necesitas abrir un pequeño espacio con la ventosa para insertar tu herramienta.

    • Si tienes problemas, aplica más calor para ablandar aún más el adhesivo, e inténtelo de nuevo. El adhesivo se enfría rápidamente, por lo que es posible que necesites calentarlo repetidamente.

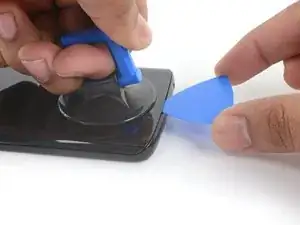
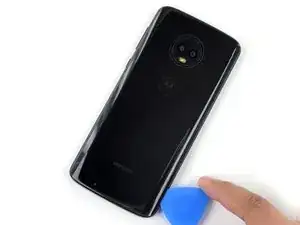
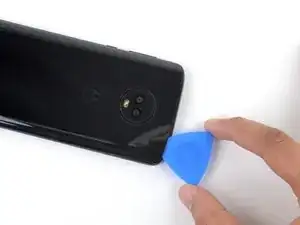
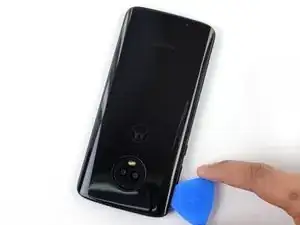
    • Inserta una púa de apertura en el espacio que creaste debajo del cristal trasero.

    I'm stuck on this step (literally and figuratively). I've heated it pretty hot and pulled pretty hard on the suction cup, but I can't see a gap…

    Andy Mach -

    I used a piece of laminating plastic instead of the pick and managed to slide it in!

    Andy Mach -

    My back delaminated at this point. That is, the clear plastic started to come away leaving the paint layer behind. Mine is (was) the indigo blue one.

    Neil Hoskins -

  3. QryndCP4giKDICLQ
    QryndCP4giKDICLQ
    tNci1QthQbiieNqu
    NrkNHuixRCJleKTw
    • Desliza la púa a lo largo del borde inferior del teléfono para cortar el adhesivo que asegura el cristal trasero.

    • Desacelera y corta con mucho cuidado al llegar a las esquinas. La parte curva del vidrio a lo largo de los bordes izquierdo y derecho puede romperse muy fácilmente si la púa empuja hacia arriba contra el vidrio curvo.

    • Después de ser cortado, el adhesivo a veces se pegará de nuevo cuando se enfríe. Para evitar esto, puedes dejar la púa en este borde después de cortar, y continuar los siguientes pasos con una nueva púa. Repite esto con cada borde, dejando una púa y continuando con una nueva.

  4. yF4HOZEhJlFreLvQ
    • Calienta el borde derecho de la parte trasera del teléfono para ablandar el adhesivo.

  5. DcL2qyeYNMRYNRCt
    DcL2qyeYNMRYNRCt
    bHmwDMS6Oci1vcPV
    MQbtRiXjDECXTTHB
    • Desliza la púa a lo largo del borde derecho del cristal trasero para separar el adhesivo.

  6. WNTdNvrSOCdorpoY
    • Calienta el borde superior de la parte trasera del teléfono para ablandar el adhesivo del cristal trasero.

  7. 4DIxSWZJB4YUgtxs
    4DIxSWZJB4YUgtxs
    1XpdlVmr1WkmThAd
    sDFJJbrtklNCYDPB
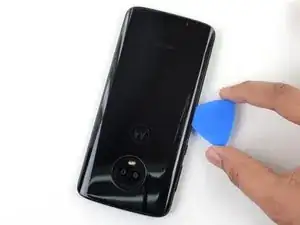
    • Desliza la púa a lo largo del borde superior del teléfono para cortar el adhesivo que sujeta el cristal trasero.

    • Desacelera y corta con mucho cuidado al llegar a las esquinas. La parte curva del vidrio a lo largo de los bordes izquierdo y derecho puede romperse muy fácilmente si la púa empuja hacia arriba contra el vidrio curvo.

  8. C25atjP52WKlBHpZ
    • Caliente el borde izquierdo de la parte trasera del teléfono para ablandar el adhesivo.

  9. 1KaQyGiUmPXSZFRF
    1KaQyGiUmPXSZFRF
    SFBK3kqEWSisiHq4
    CpeKXujnpWvnGLEa
    • Desliza la púa a lo largo del borde izquierdo del teléfono para cortar el adhesivo del cristal trasero.

  10. PpoVYbWEpEiZqGRk
    PpoVYbWEpEiZqGRk
    FfGCfPVSCMCbaZ4T
    • Si el cristal continúa atascado, vuelve a calentar y cortar el adhesivo cuantas veces sea necesario.

    • Levanta el cristal trasero con cuidado, asegurándote de que esté completamente separado del adhesivo.

    • Remueve el cristal trasero.

    • Durante el reensamblaje, haz una pausa aquí para reemplazar el adhesivo del cristal trasero con una tarjeta adhesiva precortada o una cinta adhesiva de doble cara de alta resistencia, como la Tesa 61395.

    • Después de cerrar el dispositivo durante el reensamblaje, apila algo pesado, como un libro de texto o dos, encima del dispositivo durante 30-60 minutos. Esto asegura una fuerte unión adhesiva.

    When cleaning old adhesive off the back glass, be careful not to scratch the inner coating of the glass. If you scratch this coating with tweezers, it will leave visible “nicks” on the back glass.

    Sarah Braden -

  11. b5hWUHcnKaH42vZw
    b5hWUHcnKaH42vZw
    cIJx1ucCQAJJJ6Rp
    • Usa un par de pinzas para despegar la cinta negra que cubre la batería.

    • Remueve la cinta.

    • Si es posible, mantén la cinta intacta para poder volver a utilizarla durante el reensamblaje.

    On my phone the sticker was covered by another NFC tag that was attached to the board under the cover. I yanked it out, breaking it in the process, but if you peel that sticker off the batter sticker first and leave it attached at the end, you should have more success.

    Stuart -

    Yes, there's the NFC tag that isn't mentioned, with its connection to the left. Thanks for the tip, Stuart; I gently lifted mine to the left and it seems to be intact. I guess I won't know until I try to pay for something.

    Neil Hoskins -

  12. tgOUTZfhcKg5bRiU
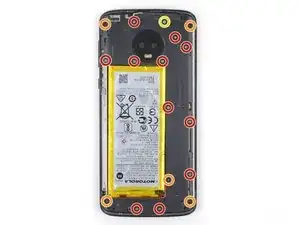
    • Usa un destornillador Phillips para remover los 17 tornillos que sujetan la tapa de plástico.

    • Once tornillos grises de 3 mm de largo

    • Cinco tornillos negros de 2.5 mm de largo

    • Un tornillo plateado de 3.5 mm de largo

    The holes for the black screws are marked with a small triangle to differentiate them from the holes for the gray ones. I found this super helpful when reassembling!

    Jamie Bell -

  13. IQxuSSpRI6mkTqI3
    IQxuSSpRI6mkTqI3
    oL36RmgHDujVEOG6
    alXtAX2rILVQG2Zc
    • Inserta el extremo puntiagudo de un spudger en la muesca en el borde superior izquierdo de la tapa de plástico.

    • Usa el spudger para levantar el borde superior de la tapa y liberar los clips que sujetan la tapa.

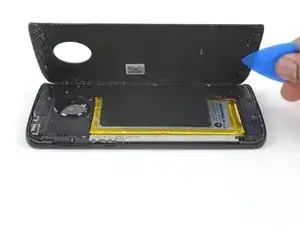
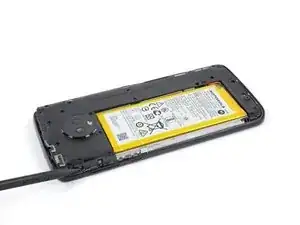
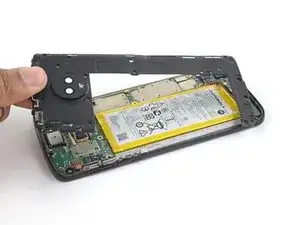
    • Remueve la tapa de plástico.

    When reinstalling plastic cover, alignment is critical for underlying contacts to line up. Test all functions before sealing up the phone. If camera or speaker don’t work, recheck plastic cover installation and correct until all phone functions operate.

    Eric Oberer -

  14. UBQUoTmwH1BQ5aWn
    UBQUoTmwH1BQ5aWn
    hj4l2xF2IKqe3hHu
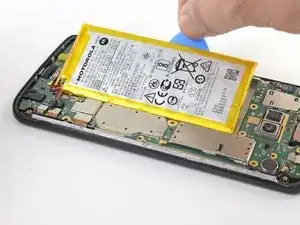
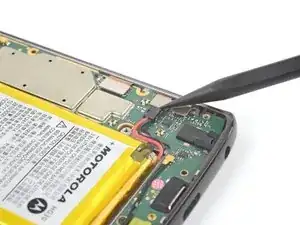
    • Usa el extremo puntiagudo de un spudger para levantar el conector de la batería y desconectarlo.

    • Durante el reensamblado, este es un buen punto para encender el teléfono y probar todas las funciones antes de sellarlo. Asegúrate de apagar el teléfono completamente antes de seguir trabajando.

    What is the black part the battery is connects to called? The black part connected to the body of the phone.

    Slippery Steve -

  15. fhTKVXJOAeOfLeYK
    • Prepara un iOpener y aplícalo a la mitad derecha de la pantalla durante al menos dos minutos, para suavizar el adhesivo de la batería que hay debajo. Recalienta y vuelve a aplicar el iOpener según sea necesario.

    • Ten cuidado de no sobrecalentar la batería o la pantalla con el iOpener. Si nota que la batería se hincha, retire inmediatamente el calor y deje que se enfríe.

    • Alternativamente, aplica un poco de alcohol isopropílico debajo de cada esquina de la batería y déjalo penetrar durante varios minutos para ayudar a debilitar el adhesivo.

  16. J253sWFeVNGSmOda
    J253sWFeVNGSmOda
    PsZwQfgCsYyTLVHm
    5heYPxrOVTIAxEkt
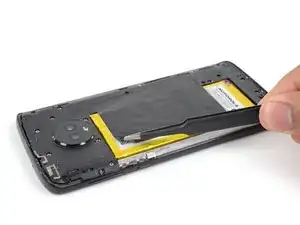
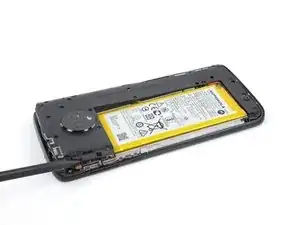
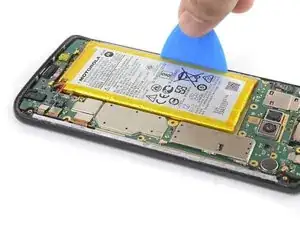
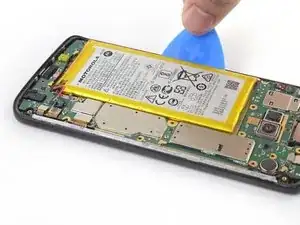
    • Usa una púa de apertura para levantar la batería comenzando desde el borde exterior de la batería.
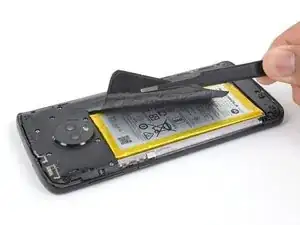
    • Es posible que tengas que recalentar y volver a aplicar el iOpener repetidamente para ablandar aún más el adhesivo. El adhesivo es resistente y puede que lleve unos cuantos intentos poner en marcha la púa bajo la batería. Si la batería empieza a doblarse, aplica más calor o alcohol isopropílico y haz palanca más lentamente.

    • Intenta no deformar la batería durante este proceso. Las baterías de iones de litio de caparazón blando pueden desprender sustancias químicas peligrosas, incendiarse o incluso explotar si se dañan. No utilices fuerza excesiva ni hagas palanca en la batería con herramientas metálicas.

    • Remueve la batería.

    • Volver a instalar una batería dañada o deformada es un riesgo para la seguridad. Sustitúyela por una batería nueva.

    • Durante el reensamblaje, retira el resto de cinta adhesiva que quede debajo de la batería y limpia cualquier resto de adhesivo con alcohol isopropílico . Si vas a reutilizar el ensamblaje de la pantalla, aplica a la batería un nuevo adhesivo precortado o una cinta de doble cara de alta resistencia antes de presionar la nueva batería en su lugar.

    I found it easier to remove the battery after I removed the mother board.

    Clinton King -

    It’s much easier to remove the battery after the motherboard is removed from the opposite side

    Marc Keirn -

    Merci. La batterie est difficile À décoller Mais tout été parfait.

    Didier Isoard -

Conclusión

Compara la nueva pieza de repuesto con la original; es posible que tengas que transferir los componentes restantes o retirar los respaldos adhesivos de la nueva pieza antes de instalarla.

Para volver a montar el dispositivo, sigue los pasos anteriores en orden inverso.

Para un rendimiento óptimo, después de completar esta guía, calibra tu batería recién instalada.

Lleva tus desechos electrónicos a un centro de reciclaje certificado.

¿La reparación no salió según lo planeado? Prueba con [solución de problemas básicos, o pide ayuda a nuestra comunidad de respuestas de Moto G6.

Tarun Thiruma

Miembro Desde 20/11/19

32585 Reputación

8 comentarios

This is a beautifully done tutorial. I have written over 100 service manuals, and have seen few procedures described better than this.

Edward Coan -

One of the best instructions that I have used and the Ifixit tool kit was perfect and the price for everything was very good.

Steve Rickman -

One of the best tutorials I have followed. Even this 73 year old was able to easily follow and finish the project without difficulty. Thank you, I now have a new battery in my cell phone. Happy customer.

Ann Stickel -

Moto G6 charging problem

Kumar. Kumar Kumar -

thank you for writing this up. I could follow your steps without any issue. The telephone is glued together really well, it took me many attempts to take off the back cover glass and also the battery. Just keep (re)heating the phone and slowly work with the picks, it will come off eventually.

doj -

Changed battery successfully and it is charging! Will also calibrate in order to set the battery to indicate charge correctly. I kept both a youtube tutorial and this tutorial up and doublechecked myself thoughout, it worked really well. Thank you so much, Ifixit, your instructions on various things have helped me through multiple projects.

Audrey L -

Thank you for such an excellent tutorial. It along with the excellent kit for the Moto G6 battery made the job easy...

Dik Harrison -

I praised too soon! Now when I try to charge the phone I get the message "charging will continue after the phone has cooled down", but the phone is not even warm.  I have tried all the suggested solutions I could find, to no avail.  I finally did a restore to factory defaults, again to no avail.  Also when the phone boots up it immediately shuts down once booting is completed.

Dik Harrison -