Introducción

Si la batería en tu teléfono parece no mantener la carga como solía, puede ser que sea hora de reemplazarla. Sigue esta guía para reemplazar tu batería. Si tu batería está hinchada, toma precauciones apropiadas.

Advertencia: Debido al adhesivo resistente que sujeta la pantalla, el espacio mínimo para insertar las herramientas y el calor requerido, hay posibilidad de dañar la pantalla accidentalmente durante este procedimiento. Si estás reemplazando la pantalla, no debes preocuparte, pero para todas las otras reparaciones, trabaja con mucho cuidado y prepárate para reemplazar la pantalla luego si es necesario.

  1. ydABkfhovuuJPnWv
    • Apaga tu teléfono antes de comenzar.

    • Si es posible, drena la batería antes del desmontaje. Cuando la batería está cargada, hay más riesgo de un evento término peligroso si la batería se sobrecalienta o se daña durante la reparación.

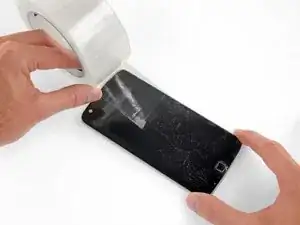
    • Si tu pantalla está rota, cúbrela completamente con cinta de embalaje para contener los fragmentos de vidrios y prevenir lesiones.

  2. bGmTDlgJgUDWSmSJ
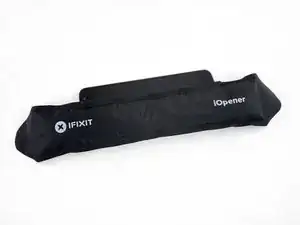
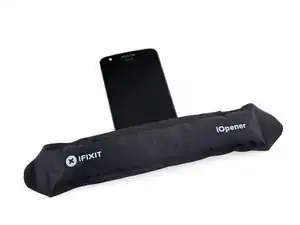
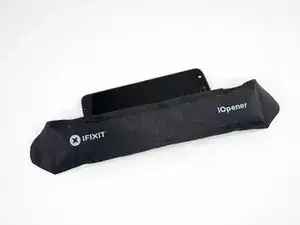
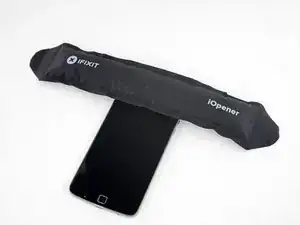
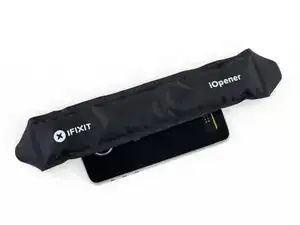
    • Prepara un iOpener y calienta la parte posterior del teléfono a lo largo del borde izquierdo durante dos minutos. Esto ayudará a ablandar el adhesivo que sujeta la pantalla.

    • Puede que tengas que volver a calentar y aplicar el iOpener varias veces para que el teléfono se caliente suficientemente. Sigue las instrucciones del iOpener para evitar el sobrecalentamiento.

    • Se puede utilizar un secador de pelo, pistola de calor u hornillo, pero debes tener cuidado de no sobrecalentar el teléfono. La pantalla y la batería interna son susceptibles al daño por calor.

  3. 6E54EjDJiPsEjyLK
    6E54EjDJiPsEjyLK
    jTXCAF4o5IZKIHyK
    EQXJDYfnpFQckAQ2
    • En los siguientes pasos, separarás el ensamblaje de la pantalla del chasis del Moto Z Play.

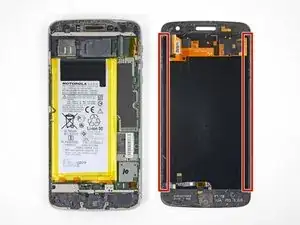
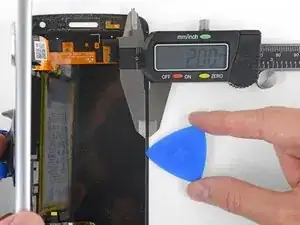
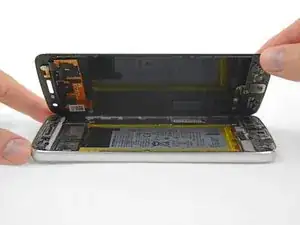
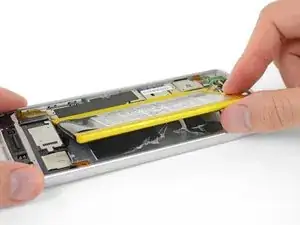
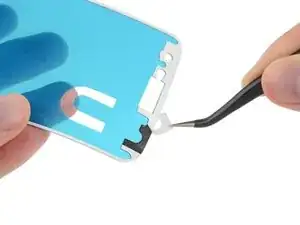
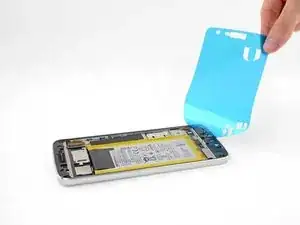
    • Para referencia, consulta la primera imagen que muestra la parte trasera del ensamblaje de pantalla (derecha) luego de haber sido removida del teléfono (izquierda).

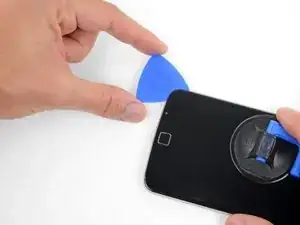
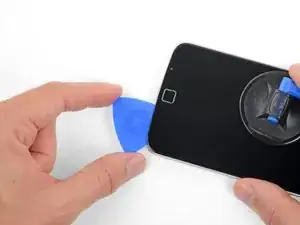
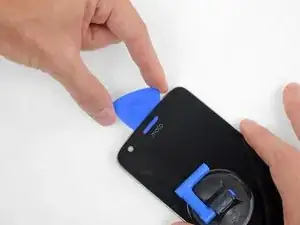
    • Si planeas volver a usar el ensamblaje de pantalla, presta atención especialmente a los bordes laterales. Al cortar el pegamento en esta área, debes tener cuidado de insertar la herramienta no más de 2 mm o tu herramienta tocará el panel de pantalla y lo dañará.

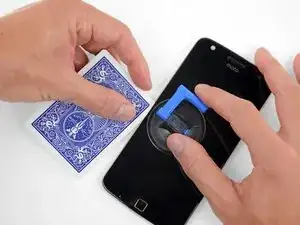
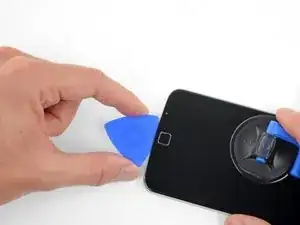
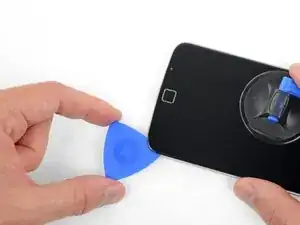
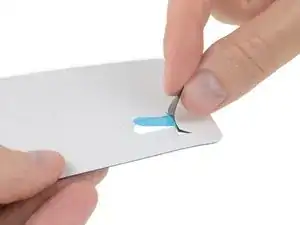
    • Los naipes o cartas para jugar son más seguras, pero mucho más lentas como herramientas. Es menos probable que las cartas de papel suave dañen el panel de pantalla Esto es una buena noticia si planeas volver a usar la pantalla.

  4. nEjKhNtyfldf3XIR
    nEjKhNtyfldf3XIR
    rLvX2byhouDmjZqN
    eDXT1YXSpFLXxVde
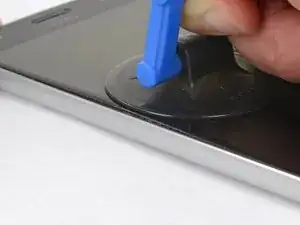
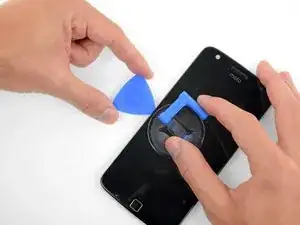
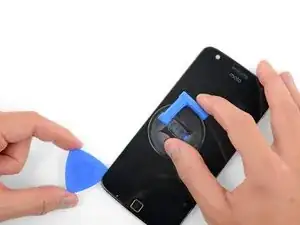
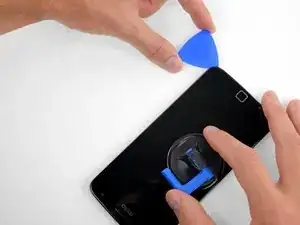
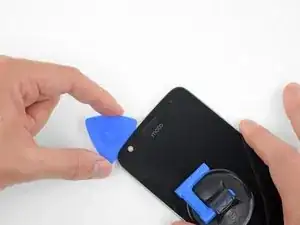
    • Aplica una ventosa en la pantalla cerca del medio del borde izquierdo.

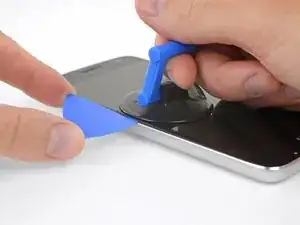
    • Levanta la ventosa con presión constante y firme para crear un pequeño espacio entre el panel frontal y la caja trasera.

    • Si la pantalla esta rota, la ventosa podría no adherirse. Intenta levantarla con una cinta resistente o pega la ventosa con pegamento permanente y permite que se adhiera antes de proceder.

    • Esto podría requerir hacer mucha fuerza, pero solo necesitas abrir un espacio muy pequeño con la ventosa para insertar la herramienta.

    • Si tienes problemas, aplica más calor para ablandar aún más el adhesivo e intenta nuevamente. El adhesivo se enfría muy rápido así que podrías tener que calentarlo varias veces.

  5. dLFYQBw6yfKIgcii
    • Inserta una púa de apertura (o carta) en el espacio que abriste detrás de la pantalla.

  6. VEvSRwhsVMInQvnc
    VEvSRwhsVMInQvnc
    gtBmvEvOcPKH4N2t
    fNyo2YQuSqrbIwO1
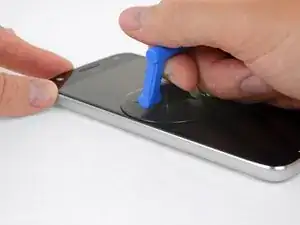
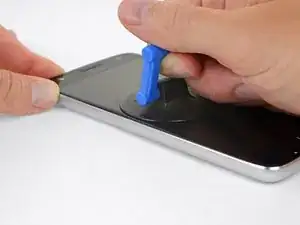
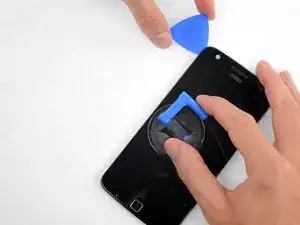
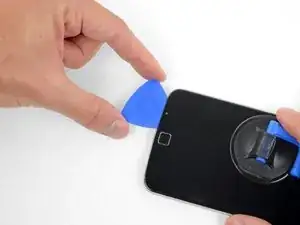
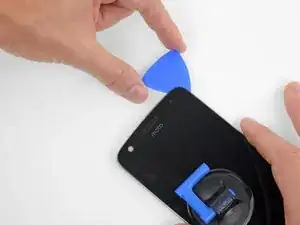
    • Desliza la herramienta a lo largo del borde izquierdo del teléfono para cortar el adhesivo que sujeta la pantalla.

  7. pHUOUroCXegrKrgL
    • Calienta la parte frontal del teléfono entre la pantalla y el borde izquierdo para ablandar el adhesivo debajo.

  8. FQ6mTwZUjEaTgsBG
    FQ6mTwZUjEaTgsBG
    l62vQGPMnMaGUURn
    SPKVhuiLdkSD2EFh
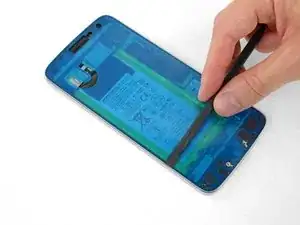
    • Corta el pegamento debajo del bisel inferior, teniendo cuidado de no dañar el sensor de huella digital.

    • Desliza o roda tu herramienta pasando el borde inferior del sensor de huella digital y continúa al otro lado. No hagas palanca directamente por debajo del sensor.

    • Si planificas volver a usar la pantalla, ten cuidado de no cortar o hacer palanca en el panel de pantalla. Consulta esta imagen para ayudarte a identificar las áreas pegadas y evitar el panel de pantalla (resaltado en rojo)

  9. NYCk6gMfOdtSA6eA
    NYCk6gMfOdtSA6eA
    ZhyxJUZmhGo5qQJW
    xwJH2HRKH4A4NVqj
    • Continua separando el pegamento por debajo del resto del bisel inferior.

  10. BfMU5NE1AwN6KRTj
    • Calienta el borde derecho del teléfono para ablandar el adhesivo que sujeta el borde derecho de la pantalla.

  11. NfntAnBUKWeHSj2q
    NfntAnBUKWeHSj2q
    ULfZLWPalsTGMtXg
    • Desliza tu herramienta a lo largo del borde derecho del teléfono para separar el pegamento que sujeta la pantalla.

  12. vP5QF6CQehUAMcuj
    • Calienta la parte frontal del teléfono entre la pantalla y el borde superior.

  13. GxSlwfpI5iQhHp3A
    GxSlwfpI5iQhHp3A
    kg1iSYEKxrtpDCGl
    CiFMePvKpwYXNl2r
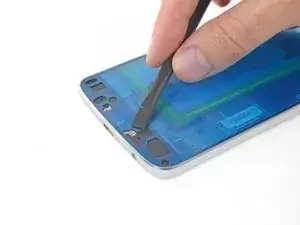
    • Inserta tu herramienta en la esquina derecha superior del teléfono y comienza a deslizarla por debajo del bisel superior para separar el pegamento.

    • Como antes, si quieres volver a utilizar la pantalla, no insertes la herramienta hasta que toque el panel de pantalla.

    • Deténte cuando tu herramienta pase el borde izquierdo del altavoz auricular.

    • Desliza o rueda tu herramienta sobre la parte superior del módulo flash para la cámara selfie para evitar dañarla.

  14. Chx4qbup6QMxcMJJ
    Chx4qbup6QMxcMJJ
    Cb5hC35RfvDWx6ww
    • Si la pantalla sigue atascada, vuelve a calentar y corta el adhesivo repetidamente según sea necesario.

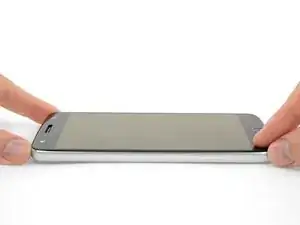
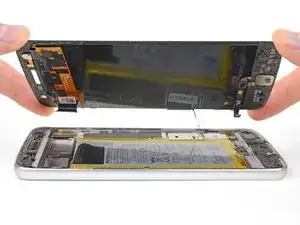
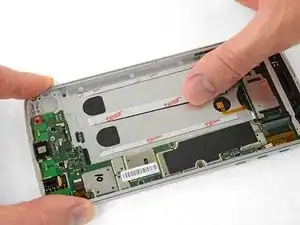
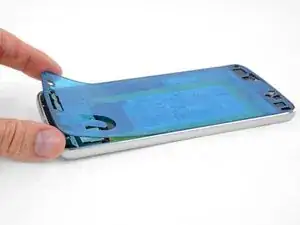
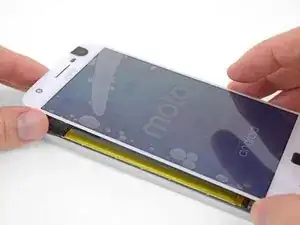
    • Levanta la pantalla del borde izquierdo y ábrela apartándola del teléfono.

  15. DDQbiYscMxtvZYOC
    DDQbiYscMxtvZYOC
    3rqUB1X4LvUSo1du
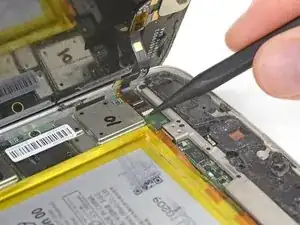
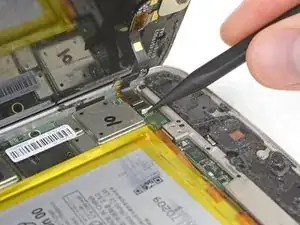
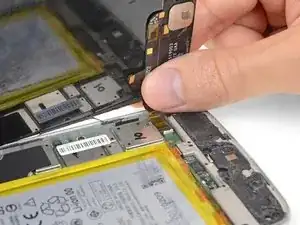
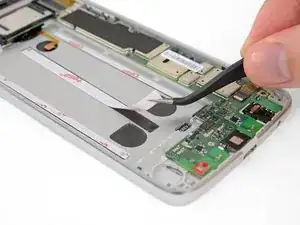
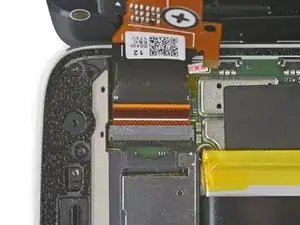
    • Mientras mantienes la pantalla abierta, usa la punta de un spudger para hacer palanca en la lengüeta de cierre en el conector ZIF del cable del sensor de huella digital.

  16. LrEqWK2mDwLbxVZV
    LrEqWK2mDwLbxVZV
    1FysILV6FnvbLFth
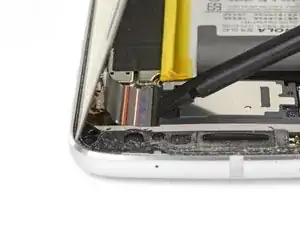
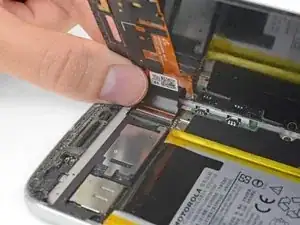
    • En el extremo opuesto del teléfono, usa tu spudger para abrir la lengüeta del cierre en el conector del cable de la pantalla.

    The locking tab on the is dark colored and runs almost the entire width of the ZIF connector. It is located on the opposite side from where the cable connects into. Pry upward from the bottom- it works like a hinge.

    Dewayne James -

  17. AFPTO3TvpVUkv5mK
    AFPTO3TvpVUkv5mK
    jHiSHvQUDuumKDwI
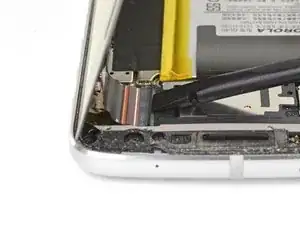
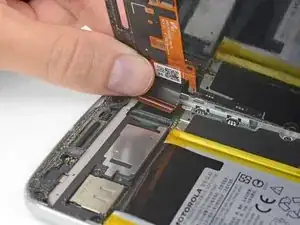
    • Con cuidado jala el cable del sensor para deslizarlo hacia afuera de su zócalo, desconectándolo de la placa madre.

  18. dLEP6WbnSNUElsLS
    dLEP6WbnSNUElsLS
    BHbrlFImWW434IK4
    • Con cuidado jala el cable de la pantalla para deslizarlo de su zócalo en la placa madre.

  19. EDf4lQUQLUCjqlMM
    • Remueve el ensamblaje de pantalla.

  20. Bv2Y5uwB1TH6u4Hb
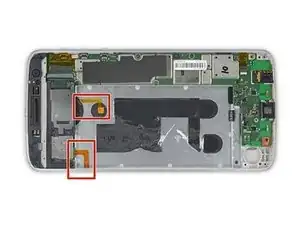
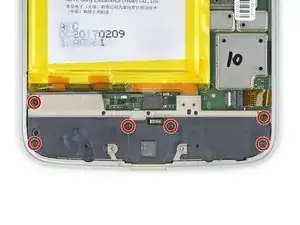
    • Usa un destornillador T3 Torx para remover los seis tornillos de 3.2 mm que sujeta la tapa inferior.

    The repair kit that was bought for this phone came with the wrong size torx bit. Mine came with a T5 Torx which was bigger and I almost ruined the screw. I noticed it was not working and looked at the bit and in fact it was not the T3. Luckily I have the full kit and had a T3 Torx handy. Make sure to look at the Bits before using them. The screws are so fragile that they can get stripped easily.

    israel329 -

    The kit comes with both a T3 and a T5—the T5 isn’t needed if all you’re doing is replacing the battery.

    Jeff Suovanen -

  21. SNJfArWvAUyTJdMg
    SNJfArWvAUyTJdMg
    pvdwKFhNZTEgXbZX
    • Haz palanca y remueve la tapa inferior.

    • Si usas una herramienta, no hagas palanca en la batería o la placa madre.

  22. ZdITkDdTyV14rYGB
    ZdITkDdTyV14rYGB
    LnQxmbFGUoZlfrei
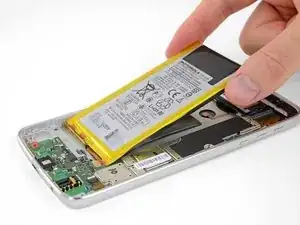
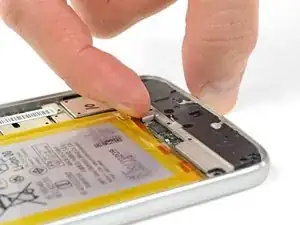
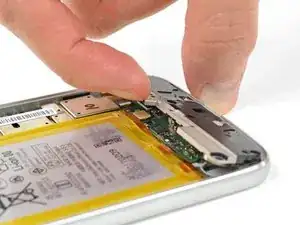
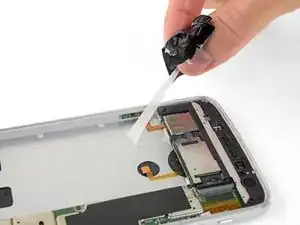
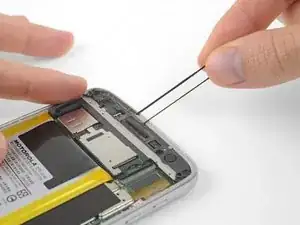
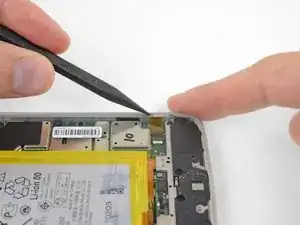
    • Usa un spudger para desconectar la batería haciendo palanca en su conector y levantándolo de la placa madre.

  23. BFAaChqBydUWFfyF
    BFAaChqBydUWFfyF
    eyQmPtTLCf3poMSp
    • La batería está pegada fuertemente en su lugar.

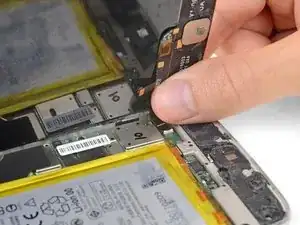
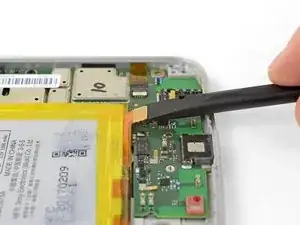
    • Despega la lengüeta negra en el borde superior de la batería y lentamente sácala de la batería en un ángulo de 45 grados para liberar las tiras de comando (también conocidas como adhesivo de tiro y liberación) por debajo.

    • Si las tiras se rompen o la lengüeta negra se pierde, todavía puedes remover la batería utilizando calor y/o alcohol isopropílico para ablandar el adhesivo.

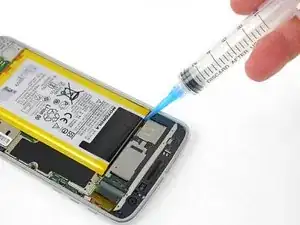
    • Aplica algo de alcohol isopropílico de concentración alta (>90%) debajo de cada esquina de la batería y permite que se penetre durante varios minutos para ayudar a ablandar el adhesivo.

    • Alternativamente, aplica un iOpener caliente a la parte trasera del teléfono directamente detrás de la batería durante dos minutos para ayudar a ablandar el adhesivo. Volver a calentar y aplicar el iOpener según sea necesario.

  24. tOGwfoPScYCWsCmk
    tOGwfoPScYCWsCmk
    5kSQl43MSseKQLdG
    IjA4Hjcopqhli5mk
    • Al utilizar herramientas para sacar la batería haciendo palanca, ten cuidado de no dañar los dos cables flexibles naranjas escondidos por debajo del borde superior de la batería.

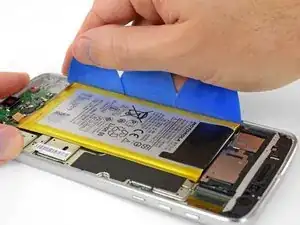
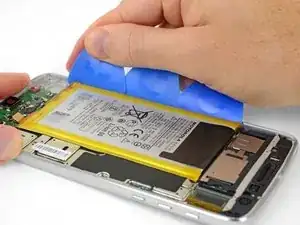
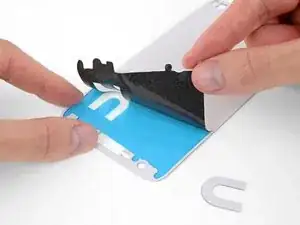
    • Inserta varias púas de apertura o una tarjeta de plástica a lo largo del borde exterior de la batería.

    • Aplica presión constante y pareja para levantar despacio y sacar la batería del teléfono haciendo palanca.

    • Si es necesario, usa varias rondas de calor y presión para ablandar despacio el adhesivo y la batería comenzará a separarse.

    • Intenta no deformar la batería durante este proceso. Las baterías de ion de litio pueden perder sustancias químicas peligrosas y prenderse fuego o también explotar si están dañadas. No uses fuerza excesiva o hagas palanca con herramientas de metal.

    I did sever the orange flex cable as i was lifting the battery free. Is there anyway to repair this fragile cable?

    ty varszegi -

  25. BegUVXoMZOHGkfhn
    • Continúa levantando la batería hasta que el adhesivo se libere de la caja trasera.

  26. 1clv6jUqLbkyVLbt
    • Remueve la batería.

    • No vuelves a usar la batería luego de que haya sido removida, ya que al removerla se puede dañar la celda de la batería, creando un posible peligro de seguridad. Reemplaza con una batería nueva.

  27. M4HpUcQjocwpjVU5
    M4HpUcQjocwpjVU5
    mygTEQrpJEiPXDJf
    • Antes de instalar la batería nueva, despega el adhesivo viejo y remuévelo del teléfono.

    • Para mejores resultados, limpia el área debajo de la batería con alcohol isopropílico y un paño anti-pelusa o filtro de cafe. Esto ayuda a preparar la superficie para que la batería nueva se adhiera más fuerte.

  28. mLeXvocFixTgcvNy
    mLeXvocFixTgcvNy
    q6BOVUvvNeXythWk
    FVXfhKHwvxV6ZhT6
  29. gvODceex1XfMjQu4
    gvODceex1XfMjQu4
    PQCafQdVtWnQlWYo
    CLrIniayXWFwJyig
    • Despega los revestimientos de film para exponer el adhesivo antes de presionar la nueva batería para colocarla en su lugar.

    • Con cuidado posiciona la batería y presiónala de forma pareja en el teléfono.

    • Conecta la batería a la placa madre e instala la tapa inferior, incluyendo su seis tornillos T3 Torx.

  30. 4UkeHa4pxU6tGr3q
    4UkeHa4pxU6tGr3q
    xqYOPPrbvsTd6TIj
    nDE4tvK4PTCZ1QRc
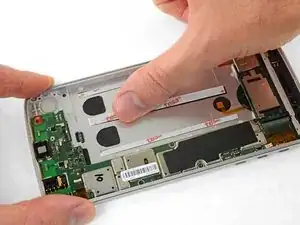
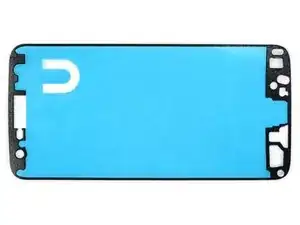
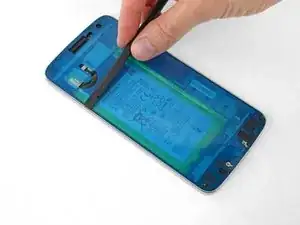
    • Despega y remueve todo el adhesivo de pantalla viejo del cuerpo de tu teléfono.

    • Si estás instalando tu pantalla existente, remueve todo el adhesivo viejo de allí también.

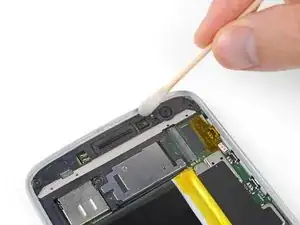
    • Usa la punta de tu spudger para remover pequeños trozos de adhesivo que quedaron pegados.

    • Ten mucho cuidado de no perforar accidentalmente la batería con tu spudger.

    • Para mejores resultados, limpia el área por debajo del adhesivo removido con alcohol isopropílico para ayudar a prepara la superficie para que el adhesivo nuevo se pegue más fuerte.

  31. JDETM2xBqY1DHXGx
    JDETM2xBqY1DHXGx
    YZneQLUmLUasiMYu
    • Unas hojas de adhesivo precortada para la pantalla contienen hasta tres capas: una revestimiento de plástico (usualmente azul), una capa de adhesivo en la mitad (negro) y un forro de papel encerado (blanco).

    • Si las tuyas vinieron con el forro de papel, despégalo y remuévelo.

    where i buy this plastic

    ynwiam1990 -

  32. 3YnceihtryxeBwFX
    3YnceihtryxeBwFX
    3vOhWywnaDWOvSkZ
    DXuQKCyvpRDBTbDV
    • Despega y descarta cualquier resto de forro de papel, exponiendo el adhesivo de un lado.

    • Antes de continuar, la hoja de adhesivo debe verse como en la tercera imagen.

  33. Zp4ZYk3R5Shusdp1
    Zp4ZYk3R5Shusdp1
    UYaSLUbmQiYIUwfT
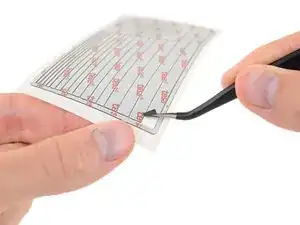
    • Mantén la hoja de adhesivo con el adhesivo expuesto hacia abajo y con cuidado alinea la hoja en el borde inferior del teléfono.

    • Asegúrate de que la hoja adhesiva está orientada correctamente: el borde con múltiples agujeros se alinea con el borde inferior, y el recorte rectangular para el altavoz del auricular se alinea en la parte superior.

    • Cuando este alineada correctamente, baja el resto de la hoja de adhesivo en el teléfono.

  34. JmsLiRkeNbLZnshi
    JmsLiRkeNbLZnshi
    ZJCgiuO1QFeZhPp3
    JRcLmOTXPjBrBcJm
    • Firmemente presiona el adhesivo para colocarlo en su lugar.

    • Usa el borde plano de tu spudger para presionar a lo largo de los bordes de las áreas difíciles de acceder.

    • Ten mucho cuidado de no perforar accidentalmente la batería con tu spudger.

  35. VOrriUIFvpXNyxZM
    VOrriUIFvpXNyxZM
    gpMbZLJEb2rdhmBU
    • Despega y descarta el revestimiento de plástico que expone el adhesivo de la pantalla.

    Should the removal of the blue plastic backing wait until after verifying the screen works in the next step?

    amaismeierj -

    Well, you can’t connect the screen with the plastic in the way. But in principle, you’re right—it wouldn’t be a bad idea to pause before installing the display adhesive, plug everything in, and verify that it works. Unfortunately, you then have to unplug it again to install the adhesive, so you’ll want to test it again once it’s plugged back in, but before sealing up your phone—just to make sure the cables are seated properly. So, the verification step is probably best left where it’s at.

    Jeff Suovanen -

    Well, I connected the screen to the motherboard without peeling off the plastic.

    It is possible!

    And after testing the phone I took off the plastic foil from the adhesive without unpluging the two connectors. The plasic foil herefor has two cuts in the area of the connectors .

    So I think it’s a good idea to swap step 35 to step 36.

    Thorsten Nüse -

  36. MxR5E6GLIVDk2uEX
    MxR5E6GLIVDk2uEX
    WkIK3vacBnhYjSGV
    • Antes de sellar la pantalla en su lugar, conecta los cables flexibles para la pantalla y el sensor de huellas digitales y luego enciende el teléfono.

    • Prueba todas las funciones para asegurarte de que la reparación fue exitosa, antes de sellar la pantalla.

    • Cuando esté completamente insertada, la línea blanca a través de cada cable flexible debe estar nivelada con las marcas en la placa madre a cada lado del cable.

    • Los cables pueden ser difíciles de alinear e instalar. Asegúrate de no tocar los contactos dorados de la parte posterior, ya que los aceites para los dedos pueden causar un mal funcionamiento. Si los toca accidentalmente, límpielos con alcohol isopropílico.

    What if at this point my phone isnt turning on?

    bambibabygirl20 -

  37. 3TeF53TnPC3HfItc
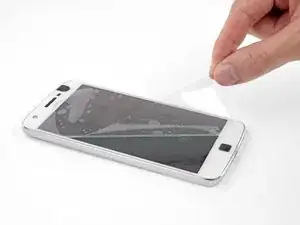
    • Cuando se haya probado y completado tu reparación, presiona la pantalla firmemente en su lugar y retira los revestimientos de plástico de la pantalla.

    • Para ayudar a que el adhesivo de la pantalla se adhiera de manera más segura, calienta el perímetro de la pantalla y coloca el teléfono boca arriba debajo de una gran pila de libros durante 30 minutos.

    • No apoyes el teléfono sobre tu cámara mientras haces esto, ya que la presión desigual puede impedir que la pantalla se adhiera correctamente. Coloca un par de libros finos debajo del teléfono a cada lado del tope de la cámara para elevarlo y mantener la presión en el lugar correcto.

Conclusión

Compara tu nueva pieza de repuesto con la pieza original. Es posible que tengas que transferir los componentes restantes o retirar los adhesivos de la nueva pieza antes de instalarla.

Lleva tus desechos electrónicos a un centro de reciclaje certificado (R2 o e-Stewards).

Tras completar esta guía, calibra tu batería recién instalada.

¿La reparación no salió como planificaste? Consulta nuestra comunidad de respuestas para obtener ayuda en la resolución de tus problemas.

Jeff Suovanen

Miembro Desde 06/08/13

407899 Reputación

13 comentarios

Good instructions. 2 things to add. Be careful how much heat you apply, I damaged my screen. A real heat gun needed about 30 seconds. Second is you can get custom cut stickers for the Z play to reinstall the battery and screen they are from that big online company, you know the one.

Kris McLinden -

One of the best guides ever: clear and precise, with a REAL step by step process. Thank you very much.

I only want to add something: on my model (EU) the battery is attached to the body by two striped along the short sides of the battery. It can be hard to work on those stripes so pur extra attention on that.

just.mro -

Excellent guide. The biggest pain by far was removing the old battery. I didn’t have a heat gun so just used a hair dryer for the multiple rounds of heating and prying. I did end up deforming the old one quite a bit getting it out, but luckily nothing happened. Also, on my adhesive, the U-shaped cutout was *not* at the top left. Just make sure the speaker holes line up.

Simon Lai -

Excellent instructions! I read it several times while waiting for my new battery to come from ifixit. I was pretty confident in my abilities and knew the risks of damaging the screen in the process. Sure enough, after going through the whole procedure and plugging my old screen back in, half of it was blank… Pretty sure I flexed the screen too much while lifting on it with the suction cup and cracked it. The screen is a lot thinner and flexible than I was expecting. I would have preferred to give more business to ifixit but I didn’t want to be down for another whole week so I had to order a new screen from online company with free 2 day shipping… No complaints towards the author or ifixit at all. I would attempt this repair again.

I just want to mention that even the packaging for the repair parts and tools was impressive. Lots of attention to detail. Only complaint about the tools is that I would have paid a few extra bucks to include some kind of case for the tools. Thanks!

Doug Hein -

One simple method I use to remove the battery. After heating up the back of the phone, I use an old gift card and insert it through the side of the battery and since its larger and flexible your able to reach the strips of glue underneath the battery and loosen it from the battery. A lot safer than pulling and togging at the battery from the top and the potential risk of puncturing it . Just make sure to look for locations that have any circuits underneath the battery and avoid those spots. Works well for any other phones or tablets. I used it on this phone and only needed to heat it up once. Hope this helps someone.

israel329 -

Great instructions. I’m almost done. My problem is that the phone is working but nothing is on the screen. I’ve tried resetting the phone and reseating the connector. Still nothing. Any advice before I go to Verizon?

Teri Judge -

Same for me! I replaced the battery and plugged both connectors in. The fingerprint reader is working. I can feel it vibrating when I touch it, but the screen shows nothing even though I know the phone is powered on. I tried reconnecting the screen plug and nothing.

Shannon Valdez -

Ok, so I don't know if I did something wrong. But the screen I got did not come with the finger print reader or the front flash. I moved the finger print reader over from the old screen, but I did not see these steps in the guide. And I forgot the front flash and did not notice until I had closed the phone up. Kinda frustrating, but I guess that is in me. If I have fixed the worn down battery I will be happy. Guess I will plug the hole with some tooth paste or something. Lol! Other then that, very helpful guide, I will be using Ifixit next time too. I second the earlier commented that I would have been happy to pay a bit more for a nice case for my new tools.

Twitchy11B -

Sorry to hear of those frustrations! I will amend the guide with a reminder.

Arthur Shi -

After replacing the battery and, yes, new screen, I thought all was good and reassembled the phone. I subsequently found that the speaker isn't working when I am watching a video. I have checked all the settings but can't find the problem. If anyone knows what the most likely problem is, I would appreciate your help. Email me at colormegone123@gmail.com

Bruce Pauley -

Mon téléphone, ne fait pas les transferts des données avec l'ordinateur par câble ! Que dois-je faire ??

JACQUES MWILA SOMPWE -

Who is the manufacturer for OE AMOLED displays for Moto Z play ? How can i get original display ?

Prabhakar Baskar -

I am from INDIA and i need a original AMOLED display for my Moto Z play

Prabhakar Baskar -