Introducción

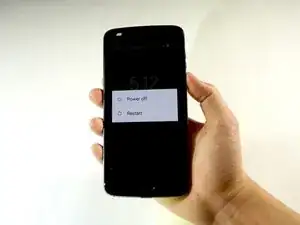
Usa esta guía para quitar y reemplazar una batería agotada o baja en un Motorola Moto Z2 Play. Si su batería está hinchada, tome las precauciones adecuadas.

Advertencia: debido al fuerte adhesivo que sujeta la pantalla, el espacio libre mínimo para insertar las herramientas y el alto nivel de calor requerido, existe una gran posibilidad de dañar accidentalmente la pantalla al retirarla. Si tienes la intención de reutilizar la pantalla, ten mucho cuidado al calentar e insertar herramientas para separar la pantalla del resto del dispositivo.

  1. beOomxPATPpVuVLt
    • Apaga tu teléfono antes de completar cualquier paso de reemplazo.

  2. CXryqN4aCZdZrKd1
    CXryqN4aCZdZrKd1
    TwrLlRHPPq4JtmYE
    VdDfcodGkPOqI5iQ
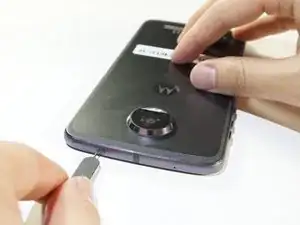
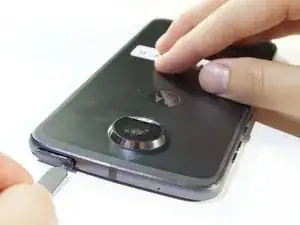
    • Retira la carcasa de la tarjeta sim presionando firmemente en el orificio de la parte superior izquierda del teléfono con el removedor de tarjetas sim.

    • La carcasa de la tarjeta sim saldrá.

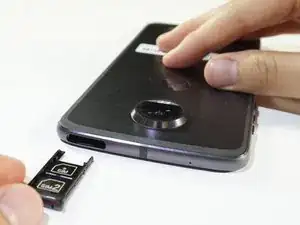
    • Remueve el alojamiento de la tarjeta sim que sobresale tirando de él hacia afuera.

  3. UAUuWV2TwUlUOp2m
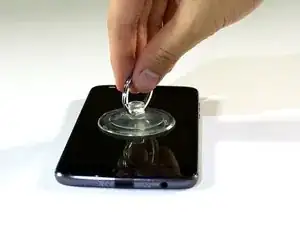
    • Calienta los bordes de tu pantalla durante dos o tres minutos con una pistola de calor. Ajusta la pistola térmica a 85 grados centígrados, y ten cuidado de no mantenerla en una posición durante mucho tiempo; para evitar dañar la LCD. La pantalla debe estar muy caliente, pero no debe ser dolorosa al tacto. Vuelve a calentarla si es necesario.

    • Si la pantalla está agrietada, coloca una cinta adhesiva fuerte a todo lo largo de la pantalla para evitar que se rompa más y que se produzcan cortes.

    • Si la pantalla está agrietada, coloca cinta adhesiva fuerte en la pantalla para evitar

  4. HNMUs5BCYLnCCbqN
    • Coloca una ventosa en el medio de la pantalla y presiona.

  5. 2EqDBCsecoDdbK1Q
    2EqDBCsecoDdbK1Q
    SgrrAe1TLbUdBZ3d
    fIayJYOdq3ODDyQ1
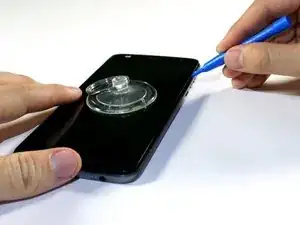
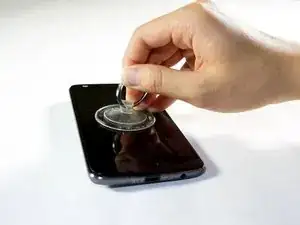
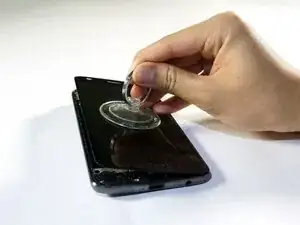
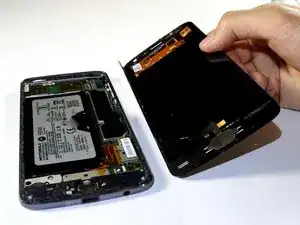
    • Haz palanca en la pantalla, calzando la herramienta de apertura de plástico debajo de la pantalla en el puerto de carga.

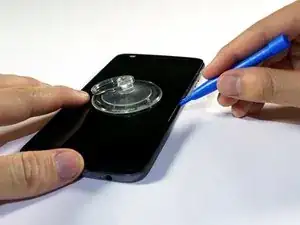
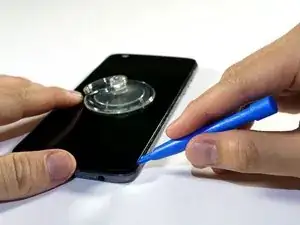
    • Trabaja alrededor de la pantalla con la herramienta de apertura de plástico.

    • Cuando te entrometas cerca de las esquinas superior derecha e inferior derecha, ten cuidado de no entrometerte demasiado, o te arriesgarás a dañar el cable de la pantalla.

    • Completa estos pasos con cuidado porque la pantalla es delicada y se puede agrietar fácilmente. Si la pantalla comienza a resistirse a ser fisurada, recalienta el adhesivo con su pistola de calor.

  6. POa4QcN31v1Aso2H
    POa4QcN31v1Aso2H
    RwxfWkahnxALhIbA
    l2ZnPplDtwRXIaPP
    • Usa una ventosa para levantar la pantalla de izquierda a derecha.

    • Si no tienes una ventosa, calza un spudger o una pequeña tarjeta plástica debajo de la pantalla y levántala lentamente.

    • Si no se levanta la pantalla de izquierda a derecha, se pueden dañar los cables interiores del teléfono.

  7. xnKqmGRugyS3sRIF
    xnKqmGRugyS3sRIF
    cLaPwqgWtYhEbRQQ
    HcFUWQuRpxCYbHAb
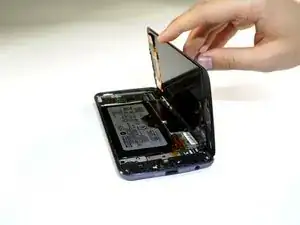
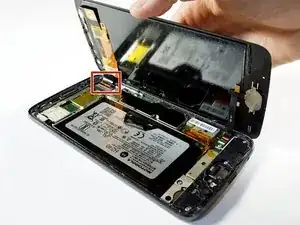
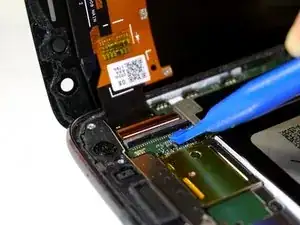
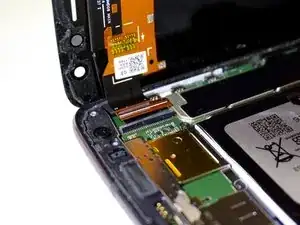
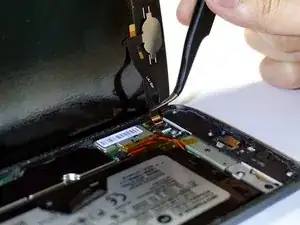
    • Identifica el conector del cable plano en la parte superior derecha del teléfono.

    • Levanta la barra negra de cierre suavemente con una herramienta de apertura de plástico.

    • Retira los cables de plano tirando del conector con una pinza.

    • La barra de bloqueo es la pequeña barra negra que se encuentra en el conector ZIF del digitalizador.

    • Asegúrate de empujar la barra de bloqueo hacia abajo usando un spudger después de volver a colocar el cable plano, ya que la cerradura no se bloquea automáticamente.

  8. VWtwWUHVTpyR3nIu
    VWtwWUHVTpyR3nIu
    PDGDDElLcGmvnKZW
    mp4AZ2mmN3v4KxnX
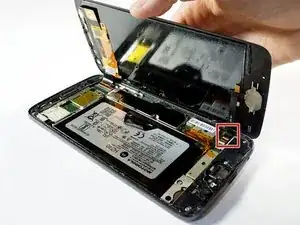
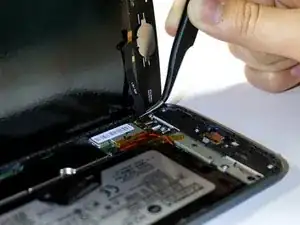
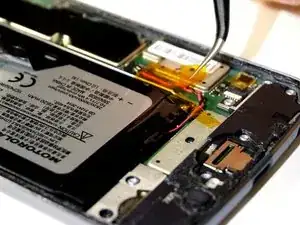
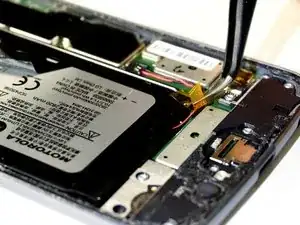
    • Identifica el cable plano, situado en la parte inferior derecha del teléfono.

    • Desconecta el cable de cinta, situado en la parte inferior derecha del teléfono, tirando hacia fuera y hacia atrás con unas pinzas.

    • No es necesario aplicar una fuerza excesiva.

  9. 6WB5PrNGSq6PBDjE
    • Levanta la pantalla del teléfono para desprenderla completamente.

    • Si la pantalla no se desprende, vuelve a los pasos 7 y 8 para asegurarte de que la barra esté desbloqueada y el conector del cable plano esté completamente desprendido.

    • Durante el reensamblado, es posible que tengas que aplicar o reemplazar el adhesivo de la pantalla en el ensamblaje de la misma. Utiliza nuestra guía de aplicación del adhesivo de pantalla para aplicar el adhesivo y volver a sellar el dispositivo.

  10. DguOWUDRdkPEUhed
    DguOWUDRdkPEUhed
    OvYDTTrfVhGEGqj3
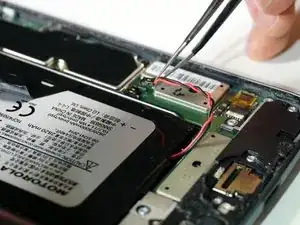
    • Remueve la cinta naranja ubicada en la parte inferior derecha del teléfono utilizando pinzas.

    • No deseches la cinta.

    If you discard the gold tape it can cause the phone to reset after repair

    JT Harper -

  11. vOQhxvU5ccLSCL1r
    vOQhxvU5ccLSCL1r
    pvdAP1Has4sjiac3
    • Separa el cable negro y rojo de la batería levantando con pinzas.

    What if the whole black box came off. I think i broke it! :( is this fixable?

    Rachael Vigar -

  12. FWJFddjwrAposI2k
    FWJFddjwrAposI2k
    MPbnSVgcyrS2cYDX
    • Despega la cinta negra que se ubica sobre la batería

    • Asegúrate de despegar la cinta con cuidado así la puedes reutilizar durante el reensamblaje.

  13. bCcL33IbOubIxbbv
    bCcL33IbOubIxbbv
    VhqDEZYgTHxYmZy6
    rMEOggEsbB5wHbNM
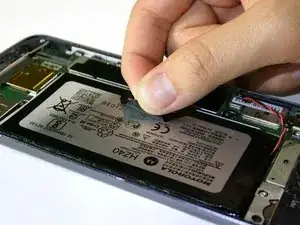
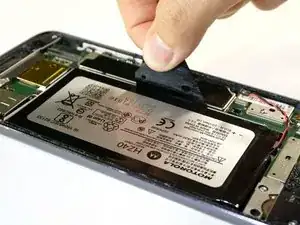
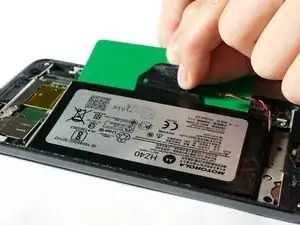
    • Levanta la cinta negra y desliza una tarjeta debajo de la batería.

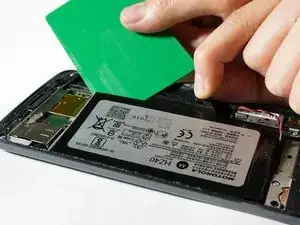
    • Alinea la tarjeta en paralelo y debajo de la batería.

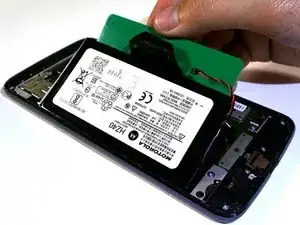
    • Empuja la tarjeta más hacia abajo debajo de la batería.

    • Levanta la tarjeta para ayudar a retirar la batería del adhesivo.

  14. ffahI6QAj3VlYCSb
    • Levanta para remover la batería completamente del dispositivo.

    Why can't they just go back to the phones where you can snap off the back and simply replace the battery? I'm afraid to do it myself and Verizon won't do it for me. Now I have to find someone whom I will have to pay to replace a battery. This is ridiculous. It should not be so difficult to replace a battery and I should not have to jeopardize my phone to replace a battery. Why? Sorry, I just needed to vent. I miss simplicity.

    spallatto -

    I agree with both of you guys, but it’s the breaking point between performance, convenience, and safety. Older phones had batteries with hard protective casings that wouldn’t leave them vulnerable to pocket-fire if your keys jammed the battery.

    Unfortunately, with phones getting more powerful(requiring a higher-capacity battery), AND slimmer, the protective casing for the battery is literally the casing on the phone. Look at the battery above; it could easily be pierced and dangerously vent.

    I’m with you in wishing I could just pop a spare in, but those days have passed. =/

    Mike Ponce -

    I suggest NOT to do this. Followed the directions exactly, with the slight deviation of my cable into the battery crumbling so I carefully pulled out the lose pieces with the tweezers and had NO problem putting it back together. My phone was WORKING with the exploded, puffy battery with NO deficits. Now? No charging (but checked it with the multi-meter so I know it is not the fault of the new battery). Only reaction I get is the phone making a vibrating sound when I plug it in to charge. Will NOT turn on. Will NOT react. F*CKED.

    Jeanne M Taylor -

    Without knowing what I was getting into I ordered a replacement battery, toolkit, and screen adhesive. Thanks to this guide I was actually able to remove the screen, replace the battery, and get it sealed back up relatively easily. Definitely nerve-wracking as I haven’t attempted anything like this before, but my phone was at the end of the battery life so I figured why not give it a shot.

    Thank you for the easy instructions!

    Alex Anderson -

    i followed the guide step by step, but unfortunately i touched the lcd in one place ... with the result that the screen went KO can i fix it somehow?

    erryedelia -

Conclusión

Para volver a ensamblar tu dispositivo, sigue estas instrucciones en orden inverso.

Luego de completar esta guía, calibre su batería recién instalada.

mitch miller

Miembro Desde 24/01/18

2040 Reputación

11 comentarios

Awesome guide! where can someone get a replacement battery in Canada?

xbddd777 -

Great instructions, clear and concise.

thank you

David Wyatt -

so now that I've heated the adhesive to get the screen off do I need to apply new adhesive? or simply reheat it?

eli Factotum -

Hi Eli,

The most ideal option would be to replace the adhesive. This ensures the best chance for your phone to stay sealed. You can re-use the existing adhesive and it may work well enough for awhile.

Arthur Shi -

What type/brand adhesive do you recommend for this screen instead of trying to reuse the old adhesive. Typical 3M strips?

Jason -

Pretty good guide altogether. The only thing I’d add is some more detail on the heating phase, as far as temperature, adhesive depth, strength etc. Don’t want someone putting a heatgun on max temp and using it on their screen for 3 mins, ya know?

Thanks for making it really straightforward though.

James Heinrich -

Total fail. Used an iOpener but could not judge how hot it needed to be to soften the adhesive nor how firmly it can be pried/pulled without damage. Ended up with multiple internal cracks in the screen. Tried finishing the repair anyway, couldn’t tell how far the flat-flex cables needed to be inserted into their sockets to make a good connection. Pix in the guide are not clear enough to tell, and I neglected to take my own photos.

Oh well, so much for repair. Kid got a new phone out of the deal, the Z2P is headed for the landfill.

kenshop -

Finished the guide , battery works well, only problem I encoutered was my own hastines with prying the screen out. On the right side near the fingerprint sensor i went too deep with the pryer and tore the flex cable. Now I am waiting for the new one. So I’ll update when it comes and I change it.

Ondřej Gregor -

Can the battery be replaced with a larger one or is it too tight.

Philip Pike -

Great guide! Worked perfectly for my Z2 Play, thanks!

Anthony -

Great guide - thank you 😊

Andrew Lea -