Introducción

Si tu OnePlus 6T está experimentando problemas de drenaje de la batería o no mantiene la carga/no se carga, entonces puede ser el momento de reemplazar la batería del teléfono.

Por tu seguridad, descarga la batería por debajo del 25% antes de desmontar el dispositivo. Esto reduce el riesgo de un evento térmico peligroso si la batería se daña accidentalmente durante la reparación. Si su batería está hinchada, [[Si tu OnePlus 6T está experimentando problemas de drenaje de la batería o no mantiene la carga/no se carga, entonces puede ser el momento de reemplazar la batería del teléfono.

Por tu seguridad, descarga la batería por debajo del 25% antes de desmontar el dispositivo. Esto reduce el riesgo de un evento térmico peligroso si la batería se daña accidentalmente durante la reparación. Si su batería está hinchada, take appropriate precautions.

Necesitarás un adhesivo de repuesto para poder completar esta reparación.

  1. QnG4LXYaqLslvlYd
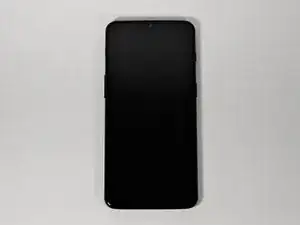
    • Asegúrate de que el teléfono está apagado y colocado con la tapa trasera hacia ti en una superficie estable.

  2. GlmtQ2lbErO6W4Wy
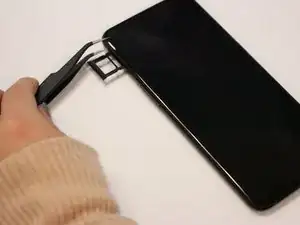
    • Abra la bandeja de la tarjeta SIM introduciendo una herramienta de extracción de tarjetas SIM en un pequeño orificio situado en la parte superior izquierda del teléfono.

    • Con cuidado remueve la tarjeta SIM de su bandeja.

    Remove the SIM card tray from the phone. Don't need to remove the actual card from the tray, just be careful you don't lose it…

    SayIDidIt™ -

  3. SEOAbe1VJT4htmt4
    • Afloja el pegamento de unión dentro del teléfono utilizando un secador de pelo o un iOpener.

    • Si decides utilizar un secador de pelo, mantén el secador a una distancia mínima de 20 centímetros del teléfono y aplica calor durante dos minutos con un movimiento circular alrededor de los bordes del teléfono.

  4. ZFfAKQo3yDUUuVSa
    ZFfAKQo3yDUUuVSa
    rNJyYyGSscfBUtvq
    D6Nmxbmo3tiaMNsO
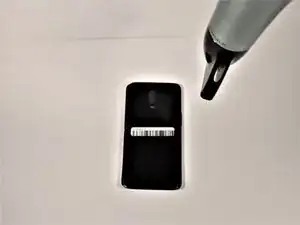
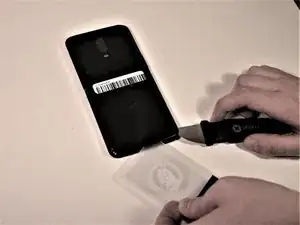
    • Inserta un Jimmy bajo una de las esquinas calentadas del teléfono para levantarlo ligeramente.

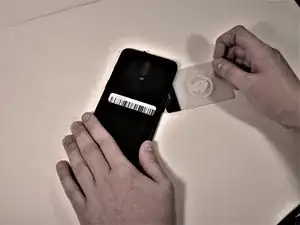
    • Inserta una tarjeta de plástico bajo el labio ligeramente levantado de la cubierta trasera y desliza suavemente la tarjeta bajo la carcasa levantada del teléfono.

    • Habrá una pequeña tensión, pero esto es normal ya que la tarjeta está eliminando el adhesivo dentro del teléfono.

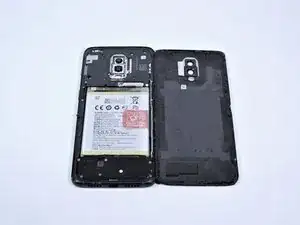
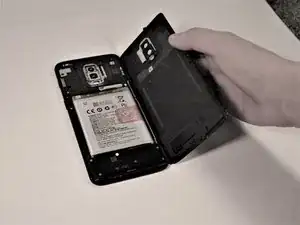
    • Retira la tapa trasera del teléfono.

    • Utiliza alcohol isopropílico de alta concentración (>90%) y un paño sin pelusas para eliminar todos los residuos de adhesivo de la tapa trasera y del marco.

    Do you need to replace the glue when reassembling?

    S Marlin -

    It was sufficient for me to re-heat the adhesive from the phone.

    Also, I used a pair of tweezers to lift the initial corner, which was a breeze compared to the Jimmy’s as suggested by the guide.

    Michel Rummens -

    The gaps were very tight. After warming the adhesive, it was helpful to have a helper use a suction cup to tug on the back to enlarge the gap for the jimmy.

    tbrannam -

  5. oObUqGCSMwuZm1Dr
    • Remueve el único tornillo Phillips #00 de 3 mm de la batería.

  6. hKHQKsAN4YUiK4Sm
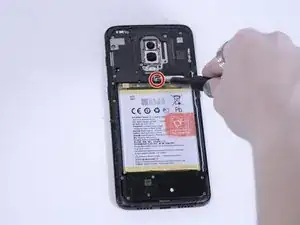
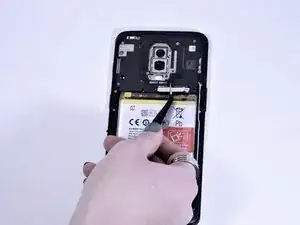
    • Con unas pinzas, retira con cuidado el pequeño soporte metálico que cubre el conector de la batería.

  7. BRHRLwXLaP6e2uQC
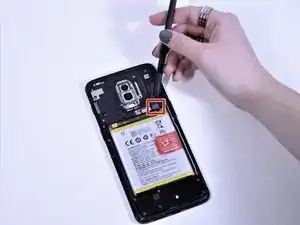
    • Con un halberd spudger, levanta suavemente y desconecta el conector de la batería del teléfono.

    • No utilices una herramienta metálica para este paso, ya que podría perforar la batería y provocar una fuga de líquido tóxico.

    The given picture is of a one plus 6T. The steps for a one plus 7 are slightly different . Need to get a lot more screws out to access that connector!!

    Naveen Kusumanchi -

  8. VXAjhNaMiJTgfJSH
    VXAjhNaMiJTgfJSH
    26TL5a1P5KMXMZrA
    • Agarra la lengüeta roja del lado derecho y tira hasta que la batería se desprenda.

    • Tendrá algo de tensión ya que hay cinta adhesiva que sujeta la batería en su sitio. Retira sólo la batería. Asegúrate de dejar la cinta adhesiva ya que asegurará que la siguiente batería se mantenga en su sitio.

    • No reutilices la batería después de haberla retirado, ya que ello supone un riesgo potencial para la seguridad. Reemplázala por una batería nueva.

    the battery requires the strength of a god to pull out. any tips for getting it out for normal people?

    pancakehiatt -

    This is very true! that red ribbon was a joke! i cant even get a grip...

    Naveen Kusumanchi -

Conclusión

Para volver a montar tu dispositivo, sigue estas instrucciones en orden inverso.

Lleva tus residuos electrónicos a un centro de reciclaje certificados.

¿La reparación no ha ido como estaba previsto? Prueba con algunas soluciones de problemas básicos, o pide ayuda a nuestra comunidad de respuestas.

Kira D'Agostino

Miembro Desde 15/10/19

1363 Reputación

10 comentarios

Does the adhesive for the back cover need to be replaced? Should I heat the phone and back glass for re-assembly?

Mark Bugajski -

Good questions. I think “reassembly is the reverse of these instructions" is a bit simplified. I think the heat is only for removal, but perhaps it would cause the adhesive to rebond after reassembly? Can an ifixit tech comment?

Justin Allen -

Just wondering if anyone can clarify the reattachment of the rear panel, as far as whether it is recommended, or necessary, to heat it again, or get a new adhesive gasket. Thanks.

Scott Sparling -

Good question! You should replace the back cover adhesive with either a custom-cut adhesive or double-sided tape such as Tesa tape. You can choose to reheat and reuse the existing adhesive, but there may be a chance that the back cover will fall off. If you’re reusing adhesive, be sure to remove any uneven adhesive chunks.

Arthur Shi -

What width Tesa tape would work for the replacement of the back cover?

Jamie Wright -

Just look for phone repair adhesive tape - I believe it is 2mm

Farheen Ali -

Personnally, I did warm it again and it looks to fit. I did use the heating bed (90°) of my 3D printer to heat it before and after mounting. But without puting the camera on the bed.

Pascal Lhoas -

The first step should be expanded upon. Using just a jimmy tool dings up the casing. Heat up the bottom with a hairdryer or a heat gun and use a suction cup tool and pull on the backing enough to create a gap big enough to slip a pick into (having a second person slip the pick in makes this easy) and get the process started. Using the iOpener the rest of the way to heat up each edge and pull it away with the suction cup a bit in combination with a picker tool leaves the adhesive intact enough to re-heat and create a decent and even seal when putting the rear plate back on. This battery change out is about as easy as it gets aside from getting started.

Josh Landis -

Excellent guide, battery replaced in my OnePlus 6T.

lightbulbhead1 -

What is the thickness of the tesa tape which is required for the battery and back cover?

davidvelladingli -