
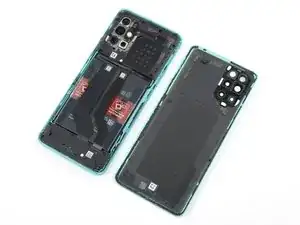
Introducción
Utiliza esta guía para reemplazar una batería gastada o agotada en tu OnePlus 8T.
Si tu batería está hinchada, toma las precauciones adecuadas. Para tu seguridad, descarga tu batería por debajo del 25% antes de desarmar tu teléfono. Esto reduce el riesgo de un evento térmico peligroso si la batería se daña accidentalmente durante la reparación.
Necesitarás adhesivo de repuesto para volver a colocar los componentes cuando vuelvas a ensamblar el dispositivo.
Partes
-
-
Apaga el teléfono.
-
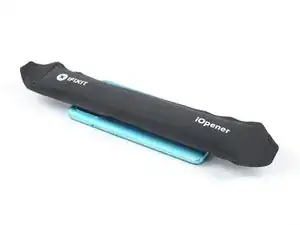
Calienta un iOpener para aflojar el adhesivo bajo el cristal trasero. Aplica el iOpener durante al menos dos minutos. Puedes repetir este paso varias veces durante la retirada del cristal trasero.
-
-
-
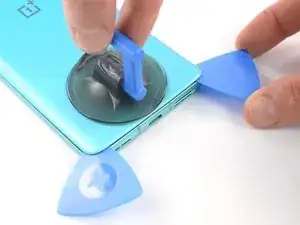
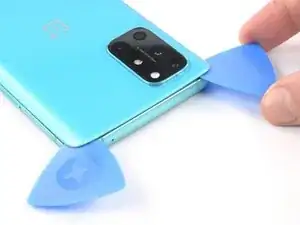
Aplica una ventosa en la parte trasera del teléfono, lo más cerca posible del centro del borde inferior.
-
Tira de la ventosa para crear un hueco entre el cristal trasero y el marco.
-
Introduce la punta de una púa de apertura en el hueco y deslízala hasta la esquina inferior izquierda.
-
Deja la púa de apertura en su sitio para evitar que el adhesivo se vuelva a sellar.
-
-
-
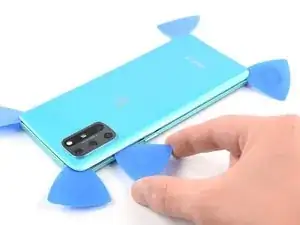
Inserta una segunda apertura debajo de la esquina inferior izquierda.
-
Desliza la púa de apertura a lo largo del borde inferior hasta la esquina inferior derecha.
-
Deja la púa en su sitio para evitar que el adhesivo se vuelva a sellar.
-
-
-
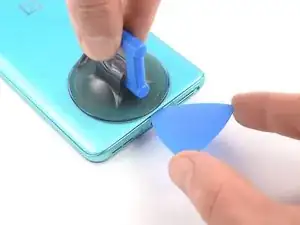
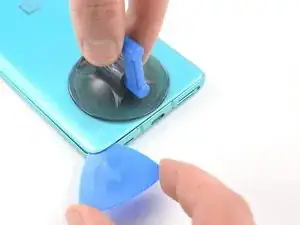
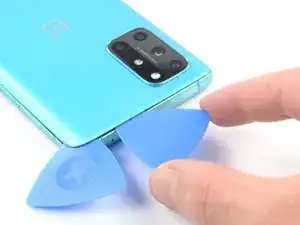
Inserta una tercera púa de apertura bajo la esquina inferior derecha.
-
Inserta una tercera púa de apertura bajo la esquina inferior derecha.
-
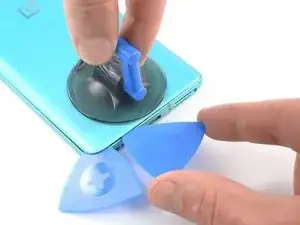
Deja las púas de apertura en su sitio para evitar que el adhesivo se vuelva a sellar.
-
-
-
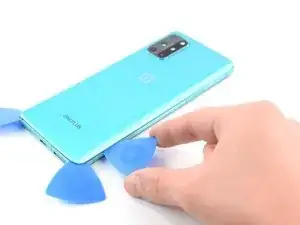
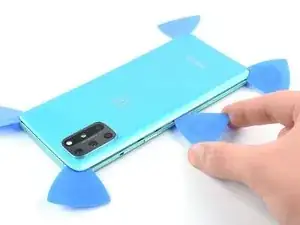
Introduce una cuarta púa de apertura bajo la esquina superior derecha.
-
Deslízala por el borde superior hasta la esquina superior izquierda para cortar el adhesivo.
-
Deja la púa de apertura en su sitio para evitar que el adhesivo se vuelva a sellar.
-
-
-
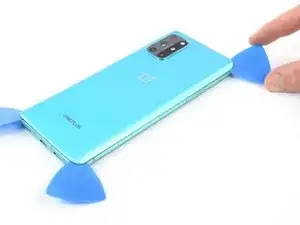
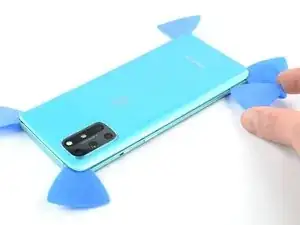
Introduce una quinta púa de apertura bajo la esquina superior izquierda.
-
Desliza la púa de apertura a lo largo del borde izquierdo hasta la esquina inferior izquierda para cortar el adhesivo restante.
-
-
-
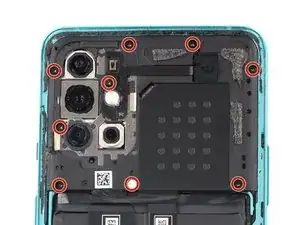
Utiliza un destornillador Phillips para retirar los nueve tornillos de 3.8 mm de longitud que sujetan la tapa de la placa madre.
-
-
-
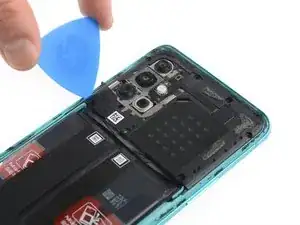
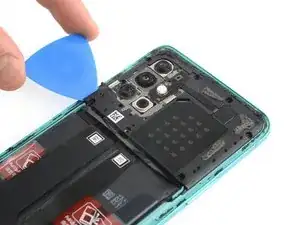
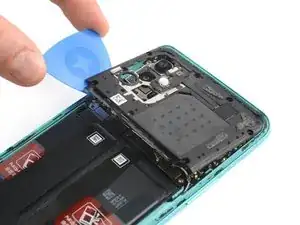
Introduce la punta de una púa de apertura bajo la esquina inferior izquierda de la tapa de la placa madre.
-
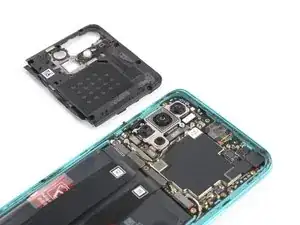
Utiliza la púa de apertura para levantar la tapa de la placa madre y liberar los clips de plástico que la sujetan.
-
-
-
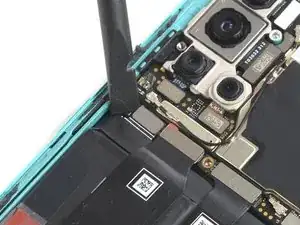
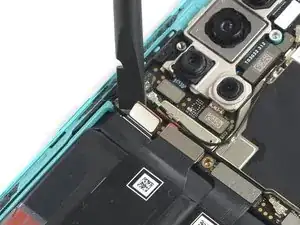
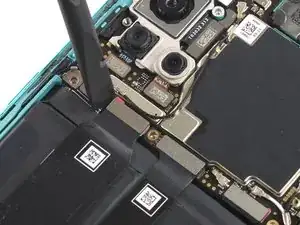
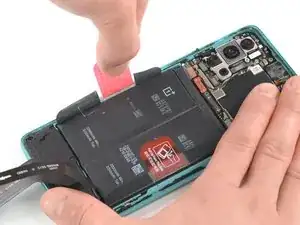
Utiliza un spudger para desconectar la batería haciendo palanca en el conector para sacarlo de su zócalo.
-
-
-
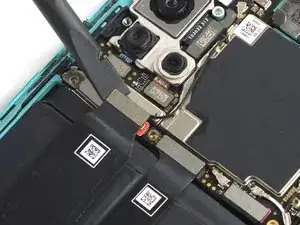
Utiliza el extremo plano de un spudger para desconectar los dos cables flexibles que cubren la batería.
-
-
-
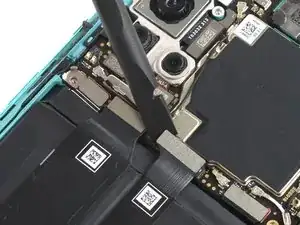
Dobla los dos cables flexibles hacia la parte inferior del teléfono y fuera del camino de la batería.
-
-
-
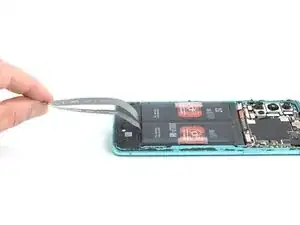
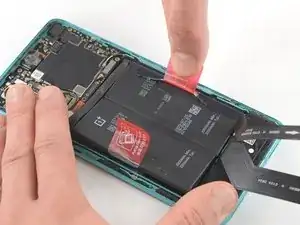
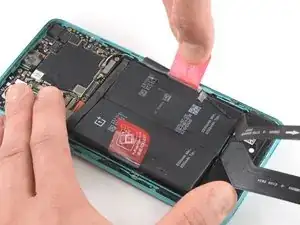
Retira la lengüeta roja y el adhesivo negro del borde izquierdo de la batería.
-
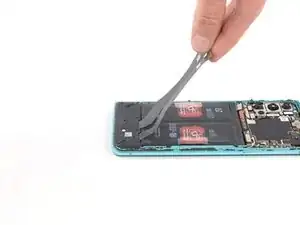
Tira de la lengüeta hacia arriba con una fuerza lenta y constante para separar la batería del adhesivo que la sujeta.
-
-
-
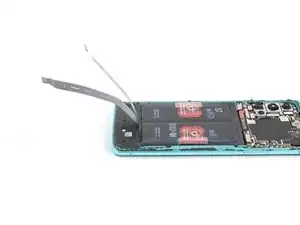
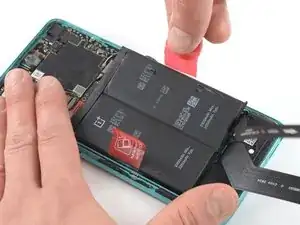
Retira la lengüeta roja y el adhesivo negro del borde derecho de la batería.
-
Tira de la lengüeta hacia arriba con una fuerza lenta y constante para separar la batería del adhesivo que la sujeta.
-


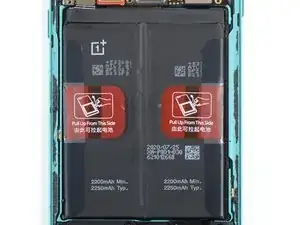

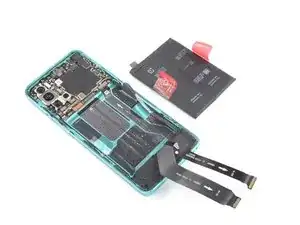
Si es posible, enciende el dispositivo y prueba la reparación antes de instalar el nuevo adhesivo y volver a sellar.
Fija la nueva batería con el adhesivo precortado o con cinta adhesiva de doble cara. Para colocarla correctamente, aplica el nuevo adhesivo en el dispositivo en los lugares donde se encontraba el adhesivo antiguo, no directamente sobre la batería. Presiona la nueva batería firmemente en su lugar.
Para volver a montar el dispositivo, sigue estas instrucciones en orden inverso. Aplica el nuevo adhesivo donde sea necesario después de limpiar las zonas pertinentes con alcohol isopropílico (>90%).
Para un rendimiento óptimo, calibra tu batería recién instalada: Cárgala al 100% y sigue cargándola durante al menos 2 horas más. A continuación, utiliza tu dispositivo hasta que se apague por falta de batería. Por último, cárgalo ininterrumpidamente al 100%.
Lleva tus residuos electrónicos a un R2 o reciclador certificado por e-Stewards.
¿La reparación no ha ido según lo previsto? Intenta con algunas soluciones básicas de problemas, o pide ayuda a nuestra comunidad de respuestas.

4 comentarios
This doesn't look too bad. Heat the back cover enough to cut through the adhesive, then lift off the back cover. Unscrew 9 tiny #00 phillips screws and pop off the mobo cover. Lift 3 ribbon cable connectors. Pull the battery off the adhesive. Clean off all the old adhesive from under the battery and around the edge of the back cover. Then reverse the process to reassemble. You would need a new battery, and a new back cover if you broke the original one trying to remove it. You can get a new back cover from Amazon for $20, but the reviews all said it's not Gorilla Glass, and it's far less durable and crack-resistant than the OEM cover. Finding a good quality replacement battery seems to be more difficult, I don't see even one battery for sale on Amazon that says specifically that it fits this phone.
My refurbished OP8T's battery gave up randomly one day. Plugging in any charger/any attempt to boot would just briefly showed a lightning bolt icon and would fade to black.
With that said, I completed my fix yesterday evening without any issues. I used a blow-dryer to loosen the back cover rather than the iFixit heating tool, and it worked fantastically. I removed the dead stock battery and replaced it with a 4600mAh from eBay, taking care to move the sticky pull tabs from the old battery to the new for future repairs. The battery and two removed cables snapped in with an audible click.
When reseating the motherboard cover, be aware there's a little connector that needs to line up with the board, and that will click into place.
I resealed my device with gorilla glue (but there are better, more tailored glues on Amazon). I am a little worried about water and dust getting in now that I've broken the seal, so I would be very wary of that.
In total, repairs cost about $40 and 40 minutes of my time. Great guide!
A question, the 8T has a battery rated at 4400mAh, while the battery in the store is 2200mAh. is this a mistake or does the replacement battery have half the battery life of the original?
I would assume that the replacement battery in the store is actually two 2250mAh cells packaged together in a series just like the stock battery that comes in the OnePlus 8T (it physically looks like it, even though its not labeled as such).
OPPO's SuperVOOC which is rebranded as Warp Charge in the OnePlus phones depends on multiple cells in a series to charge as fast as it does without introducing extra wear. So I highly doubt that iFixit would sell a replacement that doesn't meet these specs. It's probably just not labeled correctly and should be identical to the stock in capacity, both typical and rated.
Matt B. -