Introducción
¿La batería no dura mucho? Cámbiala.
-
-
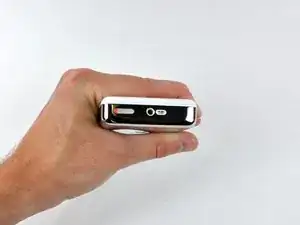
Antes de abrir su iPod, asegúrate de que el interruptor de retención esté en la posición de bloqueo. La barra naranja debe estar visible, lo que indica que la retención está activa.
-
-
-
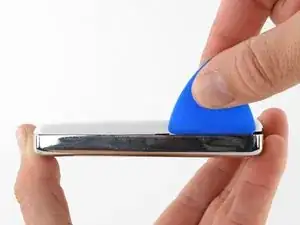
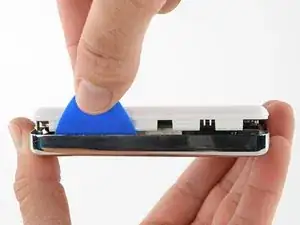
Inserta una púa de apertura lo más lejos posible en la costura entre el frente de plástico y el panel trasero de metal, en el borde derecho del iPod.
-
Usa la púa de apertura para hacer palanca contra el panel frontal de plástico y suelta las cinco pestañas de retención (que se ven en la tercera foto).
-
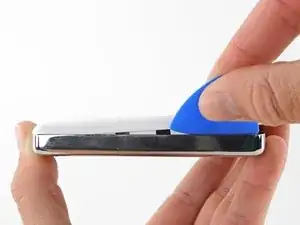
Desliza la púa a lo largo del borde del iPod y continúa haciendo palanca para liberar el resto de las pestañas de retención.
-
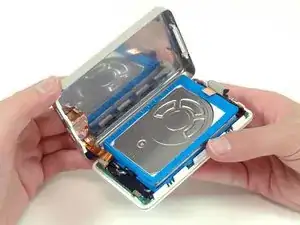
Una vez que las cinco pestañas del lado derecho estén libres, la carcasa debería abrirse con facilidad.
-
-
-
Abre la carcasa como un libro con el conector de la base en la parte superior y coloca el panel posterior junto a la mitad frontal del iPod.
-
-
-
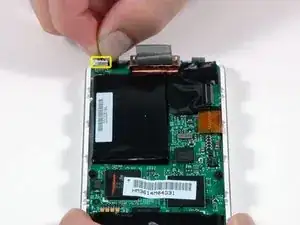
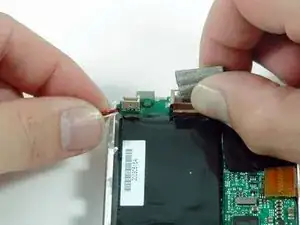
Utiliza una herramienta de plástico o las uñas para desconectar con cuidado el cable naranja del conector de auriculares. Asegúrate de tirar hacia arriba del conector, no del cable en sí.
-
-
-
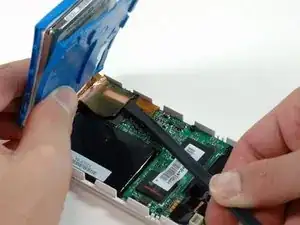
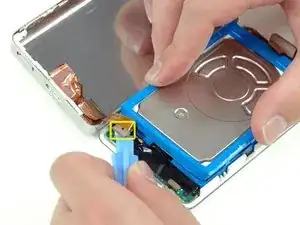
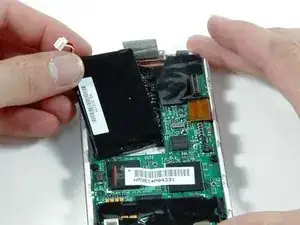
Levanta el disco duro con una mano y desconecta con cuidado la cinta del disco duro de la placa lógica.
-
Saca el disco duro del iPod.
-
-
-
Desconecta con cuidado el conector blanco de la batería de la placa lógica. Asegúrate de tirar solo del conector y no de los cables.
-
-
-
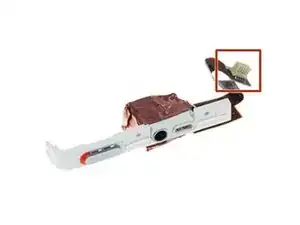
Retira el tornillo Torx T6 negro que se encuentra cerca del conector de la batería en la placa lógica.
-
-
-
Pasa con cuidado el cable de la batería alrededor del extremo de la placa lógica. Ten cuidado de no tirar demasiado de la placa lógica mientras liberas el cable de la batería.
-

Para volver a armar tu dispositivo, sigue estas instrucciones en orden inverso.

18 comentarios
If you are real careful you don't have to remove the Torx screw to get the battery out.
I found this quite easy. The tools worked great. I agree with Andy, if you push the tool into the groove, then lift or pry it up so the tip of the tool is down inside the back cover, you should be able to slide it across to pop the clips quite easily. Once you get the first two sides open, it goes quick.
I also did this without having to remove the Torx screw. It helped to lift the battery up a bit to give the wires a little slack, and then just feed them around the corner of the motherboard. Putting the new battery in, I just fed the wires around the corner, and used the opening tool to push them the final bit of the way around the corner.
My old iPod is like new now! Hours and hours of battery life, when it would previously die after 5 minutes.
Changing the battery was simular to when I changed the HD in the same iPod. Quite easy. No need to remove the torx screw, Just be sure where the (lock) button (on the top) is when you close it, this time I didnt forget, as I did replacing the HD :)
Olafur -
Note that the lock will move out of position again easily once you have the case open (when disengaged from the internal switch). That being said, you will want to keep this little switch in mind even beyond making sure the lock is in the right place, as the little plastic tab that is the switch is extremely small and fragile. I ended up breaking mine off somehow while trying to get the case closed. It is small enough that I never felt it break; I finally got the iPod back together and found that the lock switch didn’t work. I was able to re-open it and use a pick tool to unlock what was left of the switch, so my iPod works, but no longer locks. I’m happy to have a working battery anyhow, but I’d have been happier yet to have completed the repair without breaking anything - be careful with this little switch.
Joe Sutton -