Introducción
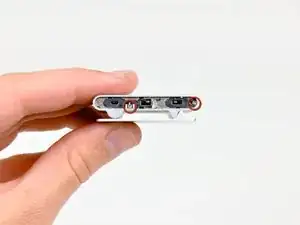
Usa esta guía para reemplazar la batería de tu Shuffle. Reemplazar la batería requiere un soldador de punta fina y conocimientos de soldadura de montaje en superficie.
Partes
-
-
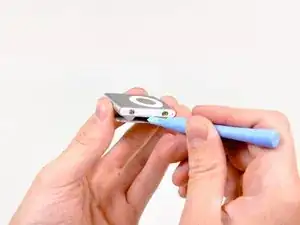
Usa el borde de una herramienta de apertura de iPod para hacer palanca en la cubierta de plástico del lado del conector para auriculares del Shuffle.
-
Retira la cubierta de plástico y déjala a un lado.
-
-
-
Usa el borde de una herramienta de apertura de iPod para quitar la cubierta de acero del lado del conector para auriculares del Shuffle.
-
-
-
Usa el borde de una herramienta de apertura de iPod para hacer palanca en la cubierta de plástico del lado de los controles del Shuffle.
-
Retira la cubierta de plástico y déjala a un lado.
-
-
-
Usa un par de pinzas para quitar los controles deslizantes de retención y reproducción aleatoria de la reproducción aleatoria.
-
-
-
Usa el borde de una herramienta de apertura de iPod para quitar la placa de acero del lado de los controles del Shuffle.
-
-
-
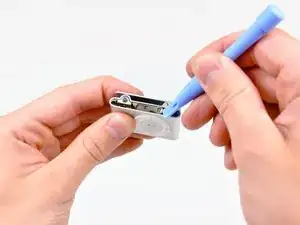
Usa el borde de una herramienta de apertura de iPod para hacer palanca ligeramente en la placa de acero en el lado del conector para auriculares del Shuffle lejos del borde cortado en la carcasa exterior.
-
-
-
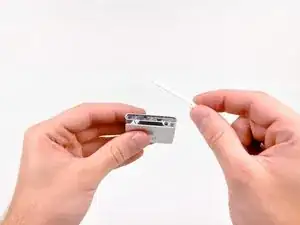
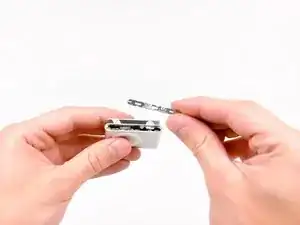
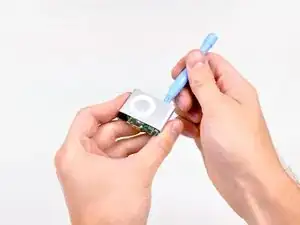
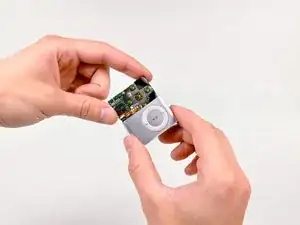
Usa la herramienta de apertura de tu iPod para empujar el ensamblaje de la placa lógica fuera de la carcasa exterior lo suficiente como para agarrar la placa lógica por los bordes.
-
Extrae el conjunto de la placa lógica de la carcasa exterior.
-
-
-
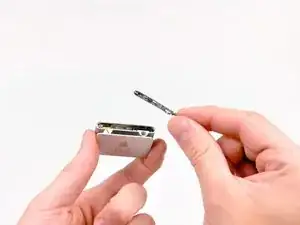
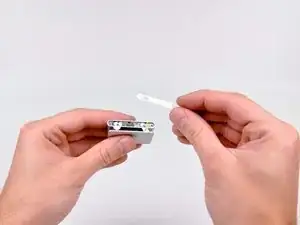
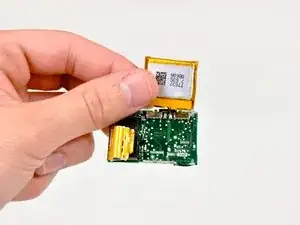
Usa el borde de una herramienta de apertura de iPod para despegar el adhesivo debajo de la batería que lo sujeta a la placa lógica.
-
Voltea la batería hacia arriba para revelar las almohadillas de soldadura soldadas a la placa lógica.
-
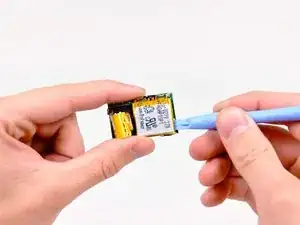
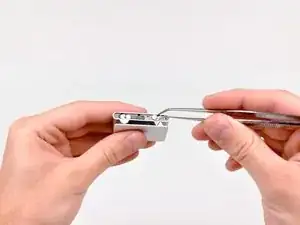
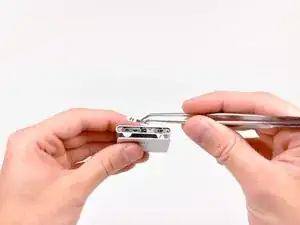
Desuelda la batería de la placa lógica calentando la junta de soldadura con un soldador y, al mismo tiempo, usa un par de pinzas para sacar el cable de la batería de la placa lógica.
-
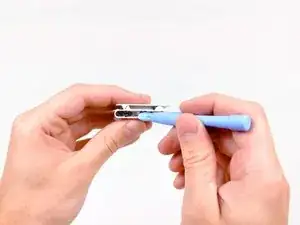
Si nunca antes has soldado, tenemos una guía que lo hace fácil.
-


Para volver a armar tu dispositivo, sigue estas instrucciones en orden inverso.

19 comentarios
Followed your clear instructions and made a successful battery change. It would be helpful to explain that both cover plates are held ond by double sided sticky tape and to give caution on the location of the miniclips on the control cover - I cut through 2 of them by mistake. Thanks for the help.
Regards, Frank, North yorkshire, UK
FrankF -
I rarely find instructions so detailed and foolproof. I ended up with a "new" iPod saving a bunch of money.
Read on about the incidents I encountered.
The working end of the plastic pry tool snapped off rendering it useless, but not before it irreparably bent the pink housing. The suggested screwdriver for which I paid extra did not undo the tiny screws, and I eventually tapped them out with a miniscule eyeglass-repair screwdriver. (Is it a coincidence I did not see a screwdriver in any of the photos?)
Ditto on the suggestion that the super-sticky adhesive presents itself as an obstacle. A suggestion to apply pressure slowly as the adhesive releases would have been helpful.
I loved that the instructions were really easy to follow. It would be helpful to mention that the logic board ought to be really carefully pushed out. It was difficult in my case and I had to apply a considerable amount of force to slowly push it out.
Despite taking care to control my strength and push it out, part of the protective yellow tape got torn and one of the components was dislodged and broken. It must've been pretty important cuz unfortunately my iPod didn't work after I put it together in one piece. I'm sure the fault lies in my carelessness, the instructions were great. I hope you guys have better luck with yours (:
Jane -