Introducción

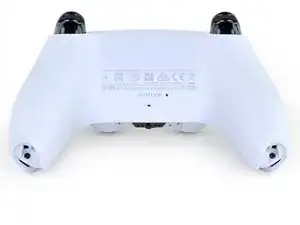
Sigue esta guía para sustituir la carcasa trasera de un mando DualSense de Sony PlayStation 5.

  1. GTfsKVIR12U1WTFu
    GTfsKVIR12U1WTFu
    ePrmMhAFKkXiSkSe
    • Desconecta y apaga tu mando antes de empezar.

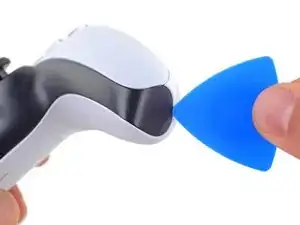
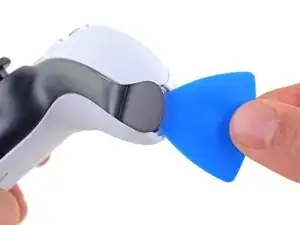
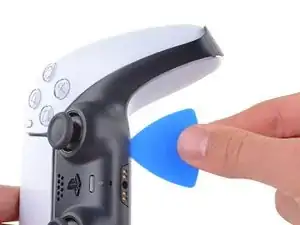
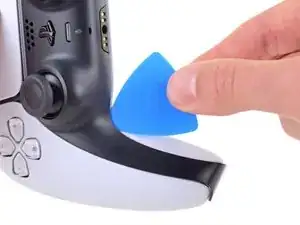
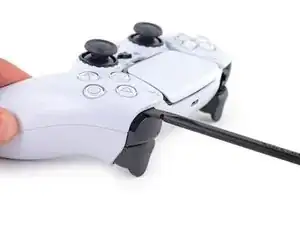
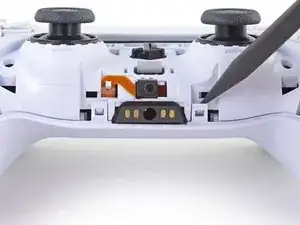
    • Inserta una púa de apertura por debajo del reborde central de la esquina inferior derecha del mando para liberar los clips que lo sujetan a la carcasa.

  2. Rjcu3KDZixCT6wVc
    Rjcu3KDZixCT6wVc
    PTiPbZOkfusF5DVG
    TciAM3EXVAG6wM3E
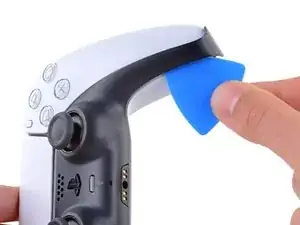
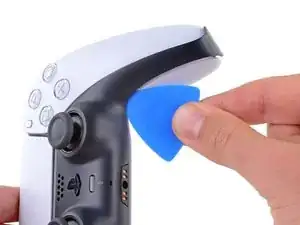
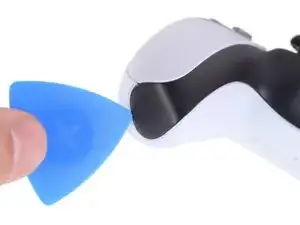
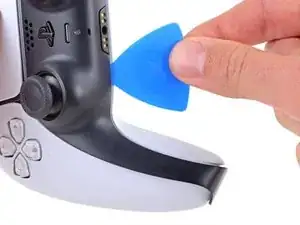
    • Desliza la púa de apertura a lo largo del borde inferior derecho del embellecedor central para liberar los clips que lo fijan a la carcasa.

  3. d5bIXVWhYD6NuHtO
    d5bIXVWhYD6NuHtO
    VnUyqAC2gatYKPwY
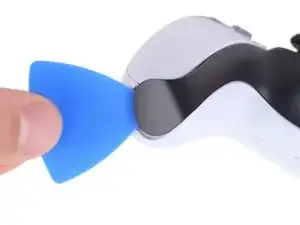
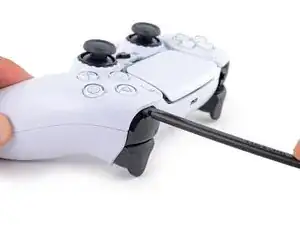
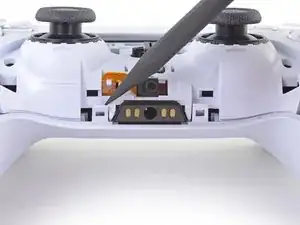
    • Inserta una púa de apertura por debajo del reborde central de la esquina inferior izquierda del mando para liberar los clips que lo sujetan a la carcasa.

  4. e5VLpDCSJZrCTHZr
    e5VLpDCSJZrCTHZr
    Vmn4XCtKxVVpYw1i
    uGRXgEGmKq2IKNvT
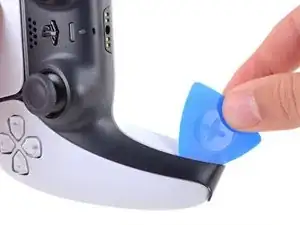
    • Desliza la púa de apertura a lo largo del borde inferior izquierdo del embellecedor central para liberar los clips que lo fijan a la carcasa.

  5. bQYOnlI5CkoEepwG
    bQYOnlI5CkoEepwG
    FnfBCacKEAvKripH
    MIN3JWiK5kicsBCd
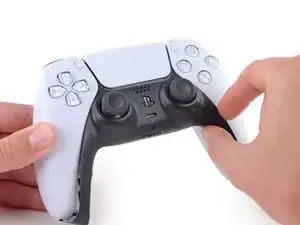
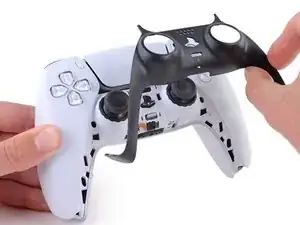
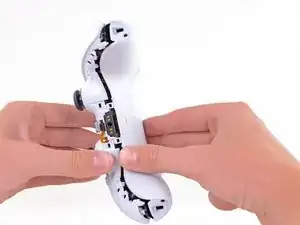
    • Levanta con los dedos el borde inferior del reborde central para liberar el clip restante.

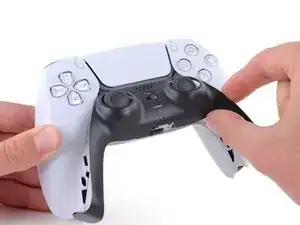
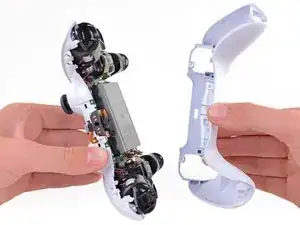
    • Levanta el reborde central sobre los joysticks para retirarlo.

  6. 5ReUfeCrCvT1oJRI
    5ReUfeCrCvT1oJRI
    3WpjIcSsYp21SxKj
    gHDW61gAMVPVZgHk
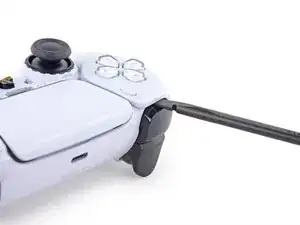
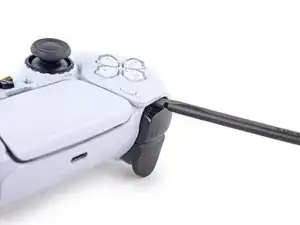
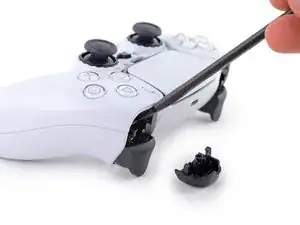
    • Introduce el extremo plano de un spudger en el hueco que hay sobre el botón L1.

    • Cubra el botón con el pulgar para evitar que salga despedido por la habitación.

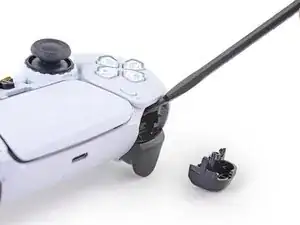
    • Haz palanca hacia arriba para retirar el botón L1.

  7. HCYXqmKm54w4y6aL
    HCYXqmKm54w4y6aL
    pXUHXLrS3R1rQahC
    NOocJ2nMtBXZlsgH
    • Introduce el extremo plano de un spudger en el hueco que hay sobre el botón R1.

    • Cubre el botón con el pulgar para evitar que salga despedido por la habitación.

    • Haz palanca hacia arriba para retirar el botón R1.

    to save a few bucks, the L1 and R1 buttons can be removed without the use of the spudger tool by using any thin prying tool and just pry the buttons from the bottom instead of the top

    Alan Peng -

    What I didn't see addressed anywhere (here or in other similar articles) is that replacement R1 / L1 buttons can be differ enough to be un-usable depending on which model your ps5 controller is. The ones I ordered don't fit and now I can't find a way to be sure I get the right ones because few know there's even a difference.

    Walt Mather -

  8. RTMdTIsvXlDMMLCE
    RTMdTIsvXlDMMLCE
    3xBGQ3AXp52YbXKM
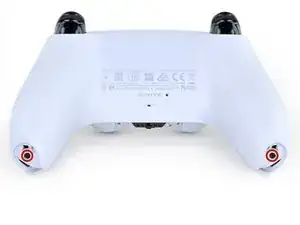
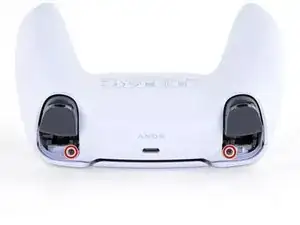
    • Utiliza un destornillador Phillips para retirar los dos tornillos de 6.4 mm que sujetan las esquinas inferiores de la carcasa inferior.

  9. rkti2BnvDAh1TREh
    rkti2BnvDAh1TREh
    YyonYJBpMSo32LBL
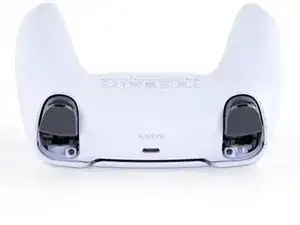
    • Utiliza un destornillador Phillips para retirar los dos tornillos de 6.4 mm situados detrás de los botones L1 y R1.

  10. Xc1l4aJ6u6BGp5RP
    Xc1l4aJ6u6BGp5RP
    LjguKaIMMeWPUAgo
    dItxRHYBJkALcAlp
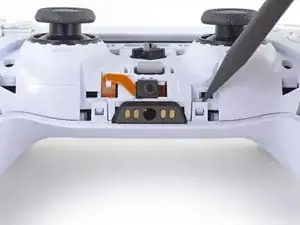
    • Usa el borde puntiagudo de un spudger para desenganchar los dos clips situados a ambos lados de la toma de auriculares.

    If these are similar in nature to the DS4’s clips, don’t use too much force so you don’t end up breaking them

    Strings Cat -

    there is a clip that holds the rear cover in place located in R1 and L1

    Zargruzski nakamura -

  11. VZLGleYqNCLAPnRD
    VZLGleYqNCLAPnRD
    OVo1ia2tIbXUTgfA
    • Retira la caja trasera.

    There are four more clips/hooks hidden in the seams along the outer sides of the handles. If you pull open the controller as shown in this step, then you will shear off the two tiny clips which are right next to the R1 and L1 buttons.

    Therefore, you should first release those clips by prying the seams open sideways.

    I noticed this with the updated design of the controller, not sure whether the hooks are present on the first version.

    The hooks are not critical for the integrity of the controller as the two halves are held together by the screws hidden under the buttons. The damage does show that the controller has been taken apart.

    Nick -

    Thought I'd clarify: The clips next to the L1 and R1 are on the outer side from the L1 and R1 buttons, I'd suggest zooming in on the picture to see them. They're quite easy to break, but also easy to remove using the plastic spudger along the seam, bending the bottom cover outwards

    Franz Rolfsvaag -

    I am still strugling to find the clips. Could someone point them out in the image with a screen shot or something like that.

    aGingerThing -

    I keep getting stuck at this step too with the new DualSense CFI-ZCT1WA revision. The top and bottom shells seem like they are fused together next to L1/R1 but I can't seem to be able to find where these hidden clips are located. My controller is still in warranty so I don't want to break them in case I can't fix my issue.

    but also easy to remove using the plastic spudger along the seam, bending the bottom cover outwards

    I tried this but it seems that the you need a lot of force and I ended up bending the tip of my spudger. Are you sure it's not the top cover that you need to pry away? The bottom cover has a ridge to make sure it's under the top cover so it's not easy to bend outwards.

    @samomio I think there needs to be a step added for these new clips.

    robplease -

Conclusión

Para volver a montar tu dispositivo, sigue los pasos anteriores en orden inverso.

Lleva tus residuos electrónicos a un centro de reciclaje certificado.

¿La reparación no ha ido como estaba previsto? Intenta con algunas soluciones básicas de problemas, o pide ayuda a nuestra Comunidad de respuestas.

Sam Omiotek

Miembro Desde 25/02/19

59803 Reputación

0 comentarios